Art of Murder: Cards of Destiny
By
City Interactive
Walkthrough by
MaGtRo March 2010
Gameplay:
This is a third person point and click game. The disk is needed to be in the
drive to play.
The main menu has Start,
Load, Save, Options, Movies, Credits and Quit Game. The Options has sound and
graphic settings. The sound settings are volume control
for music, fx, dialogues and master. The graphic settings are shadows-fx,
background animations, subtitles, save the screen ratio, gamma correction and
details.
ESC key skips intro,
cutscenes and also accesses the main menu.
The main game screen has
the PDA, Hints (question mark) and Menu (briefcase icon). Labels of items
are seen on top of the game screen.
The phone has contacts, dialogs, documents and diary.
The Hints feature - a ? shows the active spots and exits or change screen area
in the game screen.
Double clicking makes Nicole run.
Left click of mouse is to do action; right click of
mouse is to examine in scene and look close in inventory
Left click skips the dialogues.
A walkthrough and a .pdf manual are installed in the
game folder.
A woman emerges from her car.
The trash collector moves the trash bin and a bloody
card falls out. Unbeknownst to the collectors, the tied and screaming woman is
inside the trash bin and is collected and compressed.
October 19, 2009: Nicole's apartment, Jersey City
Nicole Bonnet receives a package. Ruth calls. Learn
that Nicole is on vacation for another week.
Open the package:
Look close at desk and examine phone, diary, mp3
player, documents and take the parcel.
Exit to the Hall through green door at right.
Take the paperknife from table and cat food
from drill at right.
Look close (right click) at parcel in inventory. Use
the paperknife on parcel and get metal box, newspaper and
wrapping.
Read the newspaper. It has Nicole's picture. Her name
and serial killer is circled in red.
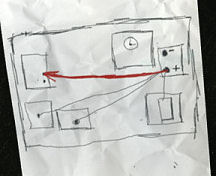
Look close at the wrapping. It has a symbol of 2
rectangles with an exclamation mark.
Open metal box:
Go back to room. Climb up to mezzanine.
Fill the cat's bowl right of bed with cat food.
Take the magnifying lens from
dresser at right.
Look close in bed. Take nail file and
packaging (alkazeltzer).
Look close at metal box and then use the nail file on
lock.
Turn the box to the short side to see contents.
Take bulb. Look close at bulb in inventory. Use the magnifying
lens on base of bulb and see inscription.
Take rusty bolt from metal box. Use the magnifying
lens on rim of the top-head of rusty bolt and see inscription.
Clean rusty bolt: Go down to
room.
Take the glass of water from the counter of the
kitchen sink.
In inventory, click on packaging (alkazeltzer) to get
alkazeltzer tablets.
Combine the glass of water with alkazeltzer tablets
and
then place the rusty bolt in the glass to get clean bolt in the glass.
Take it out of the glass and use magnifying lens to
read the inscription.
Get info about the bulb and bolt:
Go to the desk. Use the cell phone. Automatically call
Wang, the lab technician. He will check the inscriptions.
Look close at desk. Take green notes.
Check the chair and take the New York city map
from the drawer under the seat.
Go to table right of green door. Take felt pen.
Lay the New York city map on the table. Wait for Wang to call back by looking around the
place.
Get a call from Wang and get info about locations of
where the bolts and bulbs are found.
Get the locations written in green notes.
Go back to the city map spread out on the table.
Read the green notes and place them in the appropriate
locations in the map. Yeah, that's the right place!
Nicole notes that the bolt and bulb info are side by
side in Queens. She'll go there.
Exit room to hall and then exit through main door.
October 19, 2009: Blake Avenue, New York
Gentle Bob Bar:
Look around.
Theatre entrance: Check the
door and window above. See that there's light inside.
Take the batteries on the sidewalk at left
side.
Gentle Bob: Go left to the
bar. Check the motorcycles parked in front. Enter the bar.
Talk to bartender and then go through dialogues with
the reporter-Jack and the woman. Left click hastens the dialogue.
The woman goes to the rest room. Go to the ladies room. Talk to the woman.
Open the grating of the window:
After the woman leaves, open the window by using the
handle. See the backyard of the theatre.
Check the padlock at right edge of the window frame.
See that it is rusty.
Take the spray bottle from floor and the
paper towels from the sink.
Exit the ladies room. The motorcyclist and reporter
are gone.
Key to padlock: Talk to the woman.
Nicole gives the batteries. Patti tells that she is a hairdresser and social
worker.
She relates the stories of the old man she visits over
here. Learn about the key to the grating window hidden at the pipe used as foot
rest.
Look close at foot rest and see a knob at end. Click
on it and knob is off. Check the hole; there's something in there.
Pull back and look close at counter corner and take
the fork. Try to use the fork on the hole of the pipe. No good.
Look close under the counter and see a chewing gum
stuck to wall. Use fork on chewing gum.
Use fork with chewing gum on the hole of the
foot rest. Look close at the fork and take the key off the chewing gum.
Exit the bar and pick up the screwdriver from
the road.
Go to the ladies bathroom and use the key on padlock.
Look close at the key and see that it is rusty.
Go back to bar. Take the bottle of oil from the table
at left. It is empty. Talk to bartender and get oil.
In inventory use oil on rusty key to get oiled key.
Go to the bathroom and use the oiled key on padlock.
The padlock is opened.
Theatre:
Enter theatre: If you haven't
taken the screwdriver from the road outside the bar, do so now.
Push the grating and exit to backyard of theatre.
Go to the left and look around. Take the rod,
bricks and bucket from the items at the corner and under the men's
bathroom window.
Go back-down to the backyard of the theatre. Climb
the stairs.
See that the door is locked and the handle is missing.
Check the slightly opened window above the door.
Use the screwdriver on the door lock. Use the rod
on the window above the door.
Click on opened window. Nicole climbs up and through
the window.
Control room:
Take the reel and small screwdriver from
bottom left of screen.
Take the key right of door. Enter the control-projection room.
Reel: Look close at work
bench. Take the empty reel.
See a reel container with Nicole's name on it. Look
close and open the container to get reel with film.
Look close at the film rewinding machine above the
work bench.
Place the empty big reel at right reel space.
Place the reel with film on the left reel space.
Look close at crank and see a hole. Use the small
screwdriver on the hole.
Use the crank and automatically transfer the film to
the big reel at right. Take the film on reel.
Play the film: Look close at
projector at right.
Bulb: Open the projector lamp
door and see that there's no bulb. Place the bulb from the parcel in the bulb
space.
Film: Look close at bottom
reel space at right. Use handle to open door. Place empty reel inside and close
the door.
Look close at top reel space at right. Use handle to
open door. Place film on reel inside and close the door.
Window: Check the window in
front of the right projector. Slide the cover off using the handle and see that
window is dirty.
In inventory, use the spray bottle on paper towel to get
soaked towel. Use soaked towel on dirty window.
Power: Go to amplifier on
wall left of the left projector. Flip the switch and see that it works.
Go back to projector and flip the switch at bottom
left of the machine.
New bulb: The bulb burned
out. Go to the other projector and take the bulb inside. Use that other bulb as
replacement for the burned bulb on the right projector.
Now, flip the switch. Nicole says to raise the
curtain.
Raise the curtain: Exit the
room and go downstairs to the auditorium.
It's dark down here. Enter the lit back room ahead.
Take the flashlight on top of the reels at
right. Take the cast iron wheel propped on the posts.
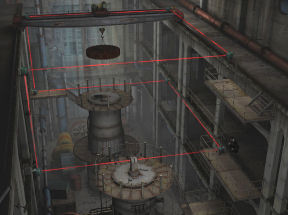
Look close at curtain mechanism on left wall.
Place the cast iron wheel on the revolving mechanism
(gear) at right.
Turn (click-hold-turn) the handle until it holds.
After a while the wheel releases.
In inventory place the bricks in the bucket to get
bucket with bricks.
Turn the wheel again until it holds. Then hang the
bucket with bricks on the wheel handle. The curtain is drawn.
Watch the show: Go back to
the Hall at bottom of screen and then control room.
Look at the projector and flip the switch at bottom
left of the bottom box. Watch Nicole in her previous cases and a symbol of 2
squares with letters Vd inside.
Seat plan: Exit the room.
Try to go back to the door that was used to enter in
and floor breaks. If you need to exit here - You can use the door leaning to the
left by the movie posters to lay across the hole created in the floor. Then use
the key on the door. Thanks, Bob!
Go back to the auditorium. Go to the theatre exit
right of the back room.
Check the board right of the blocked theatre exit. See
the Seat plan. Move the light at bottom right and see the square within a square
clue symbol similar to the one in the parcel wrapping. Another clue?
Go back to the auditorium and click on the seats. The
letters inside the square within a square clue are Vd. Click on the chair at row
5, 4th chair.
Nicole finds a piece of metal. In inventory, look close at piece
of metal and take a
train ticket for 7 PM.
Go back to theatre exit and use the piece of metal on
the door. Nicole exits the theatre.
Train platform:
See a car stalled at the train track. The oncoming
train hits the car with the locked-in driver still inside.
Look around. Talk to Wang, the lab technician.
Pick up the block of concrete at left close to
the yellow police tape.
Go right to the platform. Pick up the copper tube on
top of the trash bin at right end of platform.
Go right to the alley and then to grade crossing.
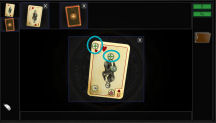
Evidence: Look close at
barrier top. See and click on the Jack of hearts card.
Go back to Wang at far section of platform. Talk to
Wang about traces and evidence.
Open the technician's box on the ground. Take evidence
bags and the camera. Close the box and go back to far right until the barrier
top.
Take a picture of the Jack of hearts card
and then use an evidence bag to collect it.
Look close at box left of the signal lights. See the
square within a square clue drawn at top of box. Take a picture of the squares.
Try to open the box. Look close at manhole cover. Use
copper tube on the hole at center. Use the block of concrete on copper
tube to get deformed tube. Use the deformed tube on the lock of the box
and then click to pull open.
Take picture of the newspaper with murder on
headlines. Use evidence bag to collect the newspaper.
Go back to street and then cross the street. Enter
through door by police car.
Look close at board. Take picture of the seating
plan.
Go back to the projection room. Take the film
at bottom reel space. Take the projector bulb inside the main box.
Exit the theatre and go to Wang. Talk to Wang about
the evidence.
Return the camera and the bags in the metal box. Talk
to Wang again to give him the evidence.
Talk to Patti.
October 20, 2009: Local FBI Office Bronx, New York
See that the cell phone is now at bottom right. The
phone has phone book, dialogues, documents and journal.
Lab: Talk to Wang Taylor.
Wang verifies that the car was sabotaged and verified by an expert. He gives a
bloody paper with Holland St. 7 PM.
Expert: Exit the lab and talk
to the expert. Jason Emmerick. He wants a calling card.
Desk: Automatically be in
your office. Look close at Nicole's desk. Check the computer and see that it was
taken apart.
Take Nicole's magnetic card and box with
calling card. Look close at the calling cards and find out that these are
Nick's.
Talk to Nick and find out that he was made a
scapegoat for what happened in Marseilles. He is going to start his own
detective agency and would welcome Nicole.
Go down the stairs and talk to the expert by the
reception desk.
Secretary's office: Go back
upstairs and enter the Secretary's office. Talk to Ruth.
Laboratory: Go back to the lab.
Look close at the worktable left of Wang.
Take the Jack of hearts in evidence bag,
gloves and packet of evidence bags.
Go to scanner left of the big machine.
Look close at the Jack of hearts in evidence bag. Use
the gloves on it to take it out of the bag.
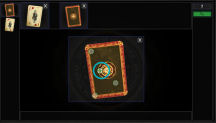
Scanner: Open the scanner.
Place the card inside. Close the lid and press the blue scanning button.
Open the lid. Right click to turn the card over. Close
the lid and press the blue scanning button.
Open the lid and take the card out. Close the scanner.
Look close at empty evidence bag. Use the card on the
evidence bag to place it inside.
Return the card in the evidence bag on the worktable
left of Wang.
Try to use the database screen and then ask Wang for
permission to use.
He wants a favor. He gives his magnetic card to pass
the shooting test.
Shooting test: Exit the lab
and go downstairs. Go to rooms in corner.
Enter the shooting range by using Wang's magnetic card
on the card reader.
Go to the #2 firing cubicle. Take the gun and shoot at
the target. You have 10 tries at the most.
Flip the switch at left to see how you fared. Exit the
room and go back to the lab.
Talk to Wang to return his card.
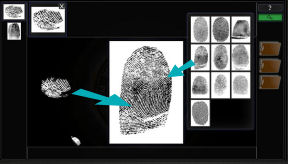
Database: Look close at
database user screen. Click the screen for it to check your fingerprint.
Press your own computer's enter key.
Click-hold drop the 2 scanned card sides on the top
area. Click on one of the cards to get a bigger picture.
Click on the green analyze question mark at top right.
This automatically analyzes both sides.
See green circles on the card. Click on a total of 3
circles-selectable areas from both sides and then click the green search button
at top right. These areas will be compared to known information in the database.
Select the top left corner and the face on the obverse
side and the one on the circle of the reverse side.
Click the search button.
See 5 matches. Click on each match to learn the cases
that have information with these kinds of cards. This information is also seen
in the brown book icon at right and in the cell phone's journal. Read the
complete reports.
Talk to Wang about the card analysis.
Boss: Enter the Secretary's
office. Talk to Ruth.
Enter the Boss' office. Talk to Jeff Kurtz, the boss
about the new serial case, the FBI PR, Nick and her new partner - Dick
Parry.
Go downstairs and go to the rooms in corner and see
that the IT left a note on door of the IT room.
Another parcel: Exit the building
through the left side of the screen. See the Bomb squad-Sappers at work on a
parcel sent to Nicole.
At the Sappers room, talk to one of the sappers. The
wrapping was sent to the lab.
Wrapping: Go to the lab. Ask
Wang for the box wrapping.
Go to Ruth at secretary's office. Talk to her to get
permission to use the photocopier.
Look close at the box wrapping in evidence bag. Use
gloves on the wrapping.
Use box wrapping on photocopier to get a copy.
Look close at empty evidence bag. Use the box wrapping
on the evidence bag to place it inside.
Examine wrapping: Look close
at wrapping copy. Nicole says to fold the paper to make sense of the red
colored marks.
The X at bottom right is a pull back. There is a reset
button.
Turn the paper to see the other side by placing the
cursor on top edge and then click.
The paper should now show the side with 53G.
Fold the right and left edges. Nicole sees a Q and a
red heart. It's the next victim's symbol.
Open the left side by clicking left arrow placed at
left edge.
Fold up the bottom part by clicking the lower arrow
up.
Fold the left side again. Nicole now sees 6 8 Q heart.
Open the parcel: Go back down to the Sappers' room.
Talk to the Sapper. He explains the combination 6 8 Q heart. The decoded combination is 6 8 12.
He gives permission to unlock the metal box. Look
close at the monitor.
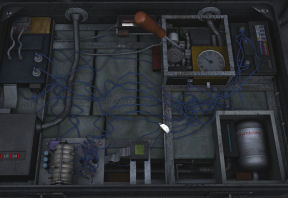
Manipulate the robot arm. The joystick moves the robot
arm. The left button opens and closes the hand. The right button moves the arm
at original place at left.
Enter 6 8 1 2 on the dial.
Move the open clamp to the gear wheel of each number.
Close the clamp on the gear. Move the joystick up or
down to change the number.
I would recommend doing the far right number first.
Then open the clamp, move the joystick to the left,
close the clamp and adjust the number until the 4 digits are entered.
The box is opened. See a coin and paper.
Talk to the Sapper and get his permission to enter the
room with detonation chamber.
Enter the detonation chamber. Use the gloves to take
the token from the metal box.
Look close at an evidence bag and use the token on
bag.
Use glove to take the piece of highway ticket.
Close the chamber.
Go back to the lab and take an evidence bag.
Look close at an evidence bag and use the ticket on bag.
Analyze the new evidence:
Scanner:
Go to scanner left of the big machine.
Look close at the token in evidence bag. Use
the gloves on it to take it out of the bag.
Open the scanner.
Place the token inside. Close the lid and press the blue scanning button.
Open the lid. Right click the token to turn it over. Close
the lid and press the blue scanning button.
Open the lid and take the token out. Close the scanner.
Look close at empty evidence bag. Use the card on the
evidence bag to place it inside.
Do the same for the ticket.
Database: Look close at
database user screen. Click the screen to check your fingerprint.
Press your own computer's enter key.
Click-hold drop the 2 scanned ticket sides on the top
area. Do the same for the 2 sides of the token.
Click on the green analyze question mark at top right.
This automatically analyzes both sides of the token and ticket.
See green circles on the ticket's obverse side. Check
the blank back of the ticket and see nothing. Click the X on top right of the
blank page at top of the screen to remove it from analysis.
The ticket's obverse information is now to be compared
and searched for any correlating data.
Select one of the circles on the ticket and then click
the search button.
A match is found when the #15 (second from bottom) with 0.70 is selected and matched with the token.
A map is seen with the Amusement Park by Exit 15 highlighted.
Talk to Wang about the evidence analysis.
Dick Parry: Meet Nicole's new
partner. Talk to Dick Parry. Dick Parry wants to wait while Nicole wants action.
October 20, 2009: Amusement Park, New Jersey
See Dick Parry talk to SWAT commander. Talk to SWAT commander.
Go through the Alley - mouth of big face. Talk to the SWAT officer.
Check the closed shack at left. Take the crank.
Binoculars: Look close at the binoculars at right side of
the alley.
Look through the eyepiece of the left one and see it focused on the shooting
gallery.
Look close at the binocular at right and see it facing the other side with
machineries and barrels. This binocular is blocked.
Go to that side alley and see Dick and the barrels. Pick up the can of engine
oil behind Dick.
Talk to Dick. Check the barrels.
Guardhouse: Go to Guardhouse beside the binoculars.
Take the wooden block blocking the door. Enter the guardhouse. Look
around.
See a key cabinet with a padlock. Check the fridge and see that it has a
combination lock.
Look close at desk and open the top drawer. Take the tokens, box with
shots, key and light bulb.
Exit the guardhouse.
Shooting gallery: Go to shooting gallery across the
street.
Take the metal railing left of the trash bin.
Look close at the shooting gallery's roller shutter. It's too heavy.
Raise the roller shutter: Look close at the roller
shutter crank box at right.
Use the key taken from the guardhouse desk on the keyhole.
Place the crank taken from the closed shack on the crank arbor above.
Turn the key and then turn the crank. Something is jammed.
Look at the shutter mechanism under the metal awning above. It's too high.
Place the metal railing on the right side of the box. Click on metal railing
again to place it vertically.
Now look close at the roller shutter mechanism. It may be seized up.
Go back to main path and go to Chamber of Horrors front.
Chamber of Horrors: Talk to police officer. Pick up the
shovel at right side of screen.
Ghost train control room: Enter the right door.
Take keys hanging on left window frame and the
prop at bottom window frame.
See the control panel. Exit the room.
Storeroom: Enter the storeroom at left of the Chamber
of Horrors.
Use the keys taken from the control room to unlock the door.
It's dark. Look close at lamp hanging inside. Use the light bulb from the
guardhouse on the lamp. Pull the string and get light.
Pick up the hammer from the floor.
Look close at workbench. Take the oil can and wheel from the table
and string hanging on wall.
Go back to shooting gallery.
Look close at the oil can in inventory. Use the can of engine oil on the oil
can.
Look close at the shutter mechanism. Use the filled oil can on the
shutter mechanism.
Go down to control-crank box. The key should be turned. Then click on the
handle. The roller shutter is raised.
Shoot: Look close at the shooting gallery.
Use a token on the token slot. Press the button and pick up the air gun.
Shoot at all the duckies. Then shoot at all the bunnies. A witch doll drops
down.
Take the witch doll and the yellow plastic on the counter.
Look close at the witch doll. Turn it around and take the key tag with 9
omega and arrow.
Nicole states that the key tag is part of the key cabinet.
Guardhouse key cabinet: Go back to guardhouse. Look
close at key cabinet on right wall.
Open key cabinet: The cabinet is padlocked.
Look close at hinge at right edge of cabinet. Pull the nail off.
Click on the wood frame to open the cabinet.
Arrange the Keys: Take a key and examine it. Turn the key
around to see a number in the attached tag.
Take all the keys and place them back in the cabinet arranged in
numerical order. All the keys are where they belong.
Note where the arrows on key tags 2 and 9 are pointing - #14. Ah - 2 9 1 4.
Open the fridge: Now that we have a numerical clue, look
close at the padlock of the fridge.
Enter 2 9 1 4. That's it! Take the padlock off.
Open the fridge. See beers. Take the keys at top shelf. Close the fridge
and Nicole places the padlock back.
Chamber of Horrors: Go back to Chamber of Horrors.
Dick Parry is waiting for Nicole. Talk to Dick. He wants to leave. Eventually,
he leaves and takes the SWAT and police off the Amusement Park.
Cars: Enter the main attraction of the Chambers of
Horrors and see the cars.
Take the railing bar propped on the gate.
Wheel: Look at the cars. Look close at the car axle of
the first car. It's missing a wheel.
Place the wheel taken from storeroom on the axle. Use the nail on the axle and
see that it is too short.
Go to the control room-cubbyhole. Use the railing bar to take the nail
from left window frame. The nail is bent.
Go to the storeroom workbench. Insert the prop from the cubbyhole window sill on
the hole of the vise screw. Turn-click the prop once.
Insert the bent nail in the vise clamp. Turn-click the prop again. This
straightened the bent nail.
Turn-click the prop again. Take the nail.
Go back to the wheel of the car. Look close at axle. Insert the nail on the axle
hole.
Use the hammer on the nail to bend it.
Start the car: Go to the cubbyhole and study the control
panel of the ghost train.
Use the key taken from the fridge in the power on/off key slot. Turn the key.
Study the plan that shows the route of the ghost train. The green
circles-exhibits inside the route correspond to the buttons at right.
Press the buttons to get all the lights to be lit. Press button S2 and S3. Uh
oh! the ghost train moved but without Nicole.
Block the train: Go back to the first car of the train.
Look close at car underbody. See the drive wheel over the rail. Right click to
learn that these wheels transfer the energy from the rail to the engine.
Go to storeroom's workbench. Insert the plastic tile taken from the shooting
gallery in the vise clamp. Turn the prop to hold the plastic tile steady.
Use the nail on the plastic tile to make a hole. Turn the prop to open the vise.
Take and look close at plastic tile with hole. Use the string on
plastic tile with hole to get a plastic tile with string.
Go back to train and look close at the underbody of the first car. Use the
plastic with string on drive wheels.
Have a wild ride: Go back to control room and turn the
key to start the train. The power is on.
Go back to the first car and click on string.
Watch Nicole take the ride through the Evil House. Nicole grabs the Queen of
Hearts.
Nicole calls Dick to keep him updated. He doesn't believe that the crime is in
the Amusement Park and does not want to return.
Security guard: Go back to the alley and see man in a
motorcycle arrive. It is the security guard.
Talk to Archie Benson, the security guard of the demolition company. He's on
parole.
He exchanged tokens for the combination of the fridge.
Blocked binocular: Look close at right binoculars. Insert tokens in the slot. Pull handle and then look through the eyepieces.
See the Queen of hearts symbol on one of the barrels blocking the view.
Go to the side alley. Look close at barrels.
Place the wooden block on the ground in front of the barrels. Use the spade on
the barrel in front of the wooden block. Nicole topples the barrels to create a
space.
Look through binoculars again and see an old building-factory.
Enter the guard house and talk to Archie Benson. Find out that the building is
an old power plant.
Nicole leaves and drives to the power plant.
October 20, 2009: Power Plant
Check the colorful minibus. Take the pipe sticking out of the broken
windshield.
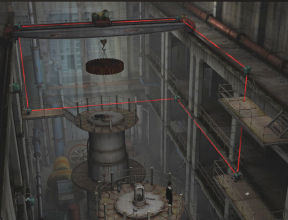
Go to building front and then enter the building.
See a giant gear move in position on top of one of the generators. It is
surrounded by laser beams.
Level 0: Pick up the fire extinguisher at
side of the first generator.
Go to back-center of the room at this level. Check the second generator.
Workbench: Look close at the workshop at right wall.
Open the left drawer and take screwdriver, wrench and flat file.
Open the right drawer. Take round file, triangle file and key.
Close drawers and go back to the first generator at other end of level 0.
Level 1: Climb the stairs at bottom left to be at level
1.
Check the door to level 2. It is blocked on the other side.
Continue to the right of level 1. Climb the stairs to the turbine of second
generator.
Queen of hearts: See the weight-giant gear tied to
gantry lower down on unconscious woman at top of first generator.
Nicole calls Dick about the situation. Dick will get the SWAT, Sappers and
doctors back here.
Look at turbine cover at center of the second generator. Take wire cutter
from floor.
See that the laser control box is on a platform at level 2. The laser from the
control box goes to top level through the ladder preventing access to the top
level.
Get to level 2: Go down the stairs and forward to other end
of level 1.
Go through the window since the door to level 2 is blocked. The window closed
leaving Nicole stranded on the ledge.
Click on ledge to get Nicole to walk the ledge going left. Click on the pipe
above the ledge.
Click on platform at left to get Nicole there. Climb the ladder to get to top
ledge.
Click on window at right to get Nicole to go there and be at level 2.
Turn off the lasers: Go right to platform with laser
control.
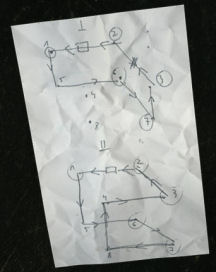
Laser diagram: See a sheet of paper on the
floor.
Study both sides of the paper. One side the diagram of the laser arrangement
and the other is the diagram of the bomb.
The laser diagram 1 - top drawing is what the laser is set up right now. The
laser from control box to top floor (#7 to #3) prevents access to top floor via
the stairs at right and covers the woman (#5 to #6).
The laser diagram at bottom shows #7 laser point going to #8 at other side
of the building.
Look close at laser control box (autosave) and see the drawings. The knob is
pointing presently to laser going up while the top knob goes out to other side.
But remember the turbine cover will block the laser path. Hmm...
Clear laser path: Go back to door at end of
hallway.
Go down to level 1. Go to right end of level 1 and climb up the stairs to
turbine platform.
Use wrench on the bolts holding the turbine cover.
Insert the pipe on the hole on top of the turbine cover. Turn the bar once to
get the pipe turn 90 degrees.
Laser control: Go back to laser control at level 2.
Go down stairs, enter the door to level 2 and go to laser control.
Turn the knob once to point to top diagram. That changes the path of the lasers.
Crane-Bomb and power box: Climb the ladder right of the
laser control box and be at top level 3.
Run to the left at gantry. Nicole walks the gantry to the crane.
Look close at crane-bomb and power box (autosave).
Remove the cover: Examine the cover and see that there
are 4 screws at each corner.
Use the fire extinguisher on the blinking white mercury sensor at top of the
cover. This stops the ticking for a bit. Apply the fire extinguisher whenever
the light comes on on that hole.
Use the screwdriver on one of the screws. It is a special kind of head.
In inventory, look close at screwdriver. Use all 3 files (only 2 are actually
used) on screwdriver to change the point. Use the
screwdriver with round tip on each of the 4 screws.
Remember to use the fire extinguisher whenever the white foam disappears or
when Nicole says not to touch anything now.
When the 4 screws are removed, use the screwdriver on the right edge of the
cover to pry the cover off.
Disable the laser: See a column of wires at center of
the box and above the green square light.
Review the bomb diagram and note where the red line is
located.
Use the wire cutters on the bottom blue wire of that
column of wires. That is the wire that goes from right to the box at top left.
That turns off the lasers.
Neutralize the timer: There is another cover on the set
up. Use the key on all 4 corner screws spacing sleeves. Click to remove the
cover.
Then use the screwdriver on the clock workings left of the clock face at top
right.
Watch Nicole check the victim. She sees a man and gives chase.
October 21, 2009: Local FBI Office, Bronx, New York
Interrogation room:
Archie Benson is being questioned by Dick. The boss gives Nicole permission to
interrogate Archie.
Outside the room, talk
to Dick.
Go upstairs and enter your room. Check the folder on
the left and get 5 victims' pictures.
Go back to interrogation room and questioned Archie.
He knows Jane Harrington, the victim at the power plant. Learn that all the
victims are jurors in his trial.
Nicole exits the room. Talk to Dick.
Go upstairs. Meet Ruth and get Archie Benson's case
files. Ruth says the boss wants to talk to Nicole.
You can do your shooting test at the shooting range at
this time if you want to.
Boss' office: Go to Boss at his
office. Talk to him and explain Archie's case. Archie's father is a big shot
politician. Archie was accused of but acquitted in the murder of Carol Austen.
She dabbles in fortune telling. Her fortune telling cards disappeared from
evidence. All the victims are jurors in Archie's trial.
Murderer: Go to the lab and talk
to Wang. He found a partial fingerprint from the car at the train murder.
Dick comes in the lab and says that the murderer
called and wants to talk to Nicole. He will call again. Nicole will take the
call at the Monitoring room with Wang and Dick.
Nicole answers phone call from the murderer. He wants
to be called Paul. He baited the victims Carter and Jane with illegal
activities.
Wang says that the murderer called from out of state.
Boss told Nicole that there's a parcel for her and the
Sappers got it. The Sappers detonated the parcel. The Sapper gave the secured
box wrapping.
The box wrapping: Go to the lab
and talk to Wang about the wrapping.
Wang checks the wrapping and have extracted the phone
call. There are seeds in the wrapping.
Go to worktable and take the tweezers and
gloves.
Scan the wrapping: Open the
scanner at left.
Look close at wrapping in bag and note that there are
watermarks of a riverboat-steamer on the paper.
Use gloves on wrapping. Place the wrapping in scanner.
Scan the paper.
Then turn over the paper and scan the other side.
Take the paper. Look close at evidence bag and place
the paper inside.
Close scanner.
Prepare the seeds: Look close
at microscope.
Look close at bag of seed fragments. Use tweezers on
the bag of seeds to get the seeds.
Take a microscope slide. Look close at
microscope slide and use the tweezers with seed on slide.
Open the small rectangular stage of the microscope.
Use the seed fragments on slide on the opened stage.
Close the stage. Flip the switch at base of
microscope.
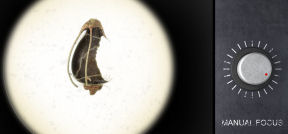
Put together the seeds: Look
through the eyepiece.
Manually focus the seeds by turning the knob at right.
See seed fragments. The fragments can be moved by
click-hold-drop. Right click turns the fragments sideways and double click turns
them to the other side.
Put together the fragments to see a complete seed.
Correctly attached fragments cannot be separated anymore.
Nicole needs to use the database.
Take a picture of the completed seed by pressing the
red button at top of microscope.
Turn off the microscope light.
Identify the seed and search:
Seed: Use the database user screen. Press enter key of your
computer after fingerprint scan.
Place the seed picture and wrapping scans to top area.
Press the analyze button.
Click-hold to pick up the seed picture and drop it
over the samples of complete seeds at right.
Place the seed over the top right sample and see
that they match. It is Elecocharis rufilata.
Wrapping: Check the wrapping and a watermark is selected.
Press the search button and the watermark and seed
info are searched.
See a map of Louisiana where the seeds are found.
Press the print button at right.
Press the green arrow at bottom right to see another
map - areas where the Louisiana Navigation Co has offices. Press the print
button at right.
Check the printer at extreme left of the room. Take
the map copies of company office locations and plant occurrence areas.
Recording of the murderer's phone call:
Go down to the Monitoring room.
Look close at one-way mirror and the main panel of the
machine at left.
See sound graph of the recording. Filter will remove
the interference.
Play the recording and hear a radio. Then push the
analyze button.
Mark a range so that it can be filtered out of the
recording.
Mark-click #1 at left; then filter button. It removed
that area.
Analyze again. Mark-click #2; then filter button. It
removed that area.
Analyze again. Mark-click #3; then filter button. It
removed that area. It couldn't be better...
Play the recording and hear the Louisiana radio
station. It's a radio station from Lafayette.

Find the area of the call: Go
back to Nicole's office at top of stairs.
Talk to Dick and update him on the evidence. The radio
range is 60 miles.
Take the marker from Nicole's desk. Go to the
map board on right wall.
Flip the switch at bottom left frame of the map. The
map is lit up.
Look close at the map. Click the printout of company
locations and the plant occurrence area over Louisiana.
Now that the 2 papers are superimposed on the map, use
the marker on the map. Nicole draws the 60 mile radius of the Lafayette radio
station. Detalion is the site that match. We got you, card man.
Talk to Dick. He agreed to accompany Nicole.
October 22, 2009: Detalion, Louisiana
Town:
Sheriff and stranger: Talk to
Sheriff of Detalion. Outside, talk to Dick. Look around (car, store, house).
Go down the lane to the wharf. Look at the house at
right.
Check the bar (sign, door) and talk to the tramp,
Aaron. He talks about a huntin' lodge and steamer. No dandies and their lawyers.
The sheriff took his bag and inside is his mojo.
Check the pier and talk to Momma Morton. Learn about
the stranger she brought to hunting cabin not far from steamer. Check the
airboat.
Talk to Aaron the tramp at the bar about the steamer
and stranger.
Go back to Sheriff's office and ask him about the
steamer. He is hesitant to take you to the steamer.
When he leaves, look at his desk. Take the postcard,
scissors and adhesive tape.
Take the map of Louisiana left of window.
Examine the postcard and map in inventory. The map is
marked showing the path from the town to the lodge.
Find a ride to hunting lodge:
Go back to the pier and talk to Momma Morton about the boat. The rudder of the airboat is reactin' slow.
Go to Aaron at the bar. Get a call from Dick. He
leaves to pick up a misplaced document.
Talk to Aaron about boat. Momma is his sister. He
talks about the spirits at the lodge. He will cut ice with Momma if Nicole gets
his mojo.
Get the mojo: Go back to
Sheriff's office.
Look close at the cabinet and see the leather Indian
bag of Aaron's.
Take-click on nail on right frame. Use scissors on
glass pane to take it off.
Click on bag and get spiral copper tube and mojo bag.
Pull back and take the glass pane on the left of the
cabinet. Nicole places it back on cabinet.
Go back and talk to Aaron. Too much fruit is
wasted! Hahaha.
He gives wrapped chicken to be given to the
spirits. He doesn't want lawyers and he wouldn't give the steamer away. Aaron
gets upset and Momma Morton comes to calm him down.
Airboat: Talk to Momma
Morton. She wants Nicole to bring the stranger back. She gives clear and concise
directions to the lodge. <wink>
Go to the airboat.
Rudder: Get in the boat and
Nicole wants to check the rudder. Use the rudder level. See that it doesn't move.
Click at bottom left of the base of the seat to get to
toolbox. Take funnel and brake fluid.
Open the base of the chair. Check the red rudder tube.
See that there's a hole.
Click on rudder tube to free it.
In inventory combine the scissors to tape to get piece
of adhesive tape. Use adhesive tape on hole of rudder tube.
Use the funnel on the opening of the tube - it's too
big. Click on postcard in inventory to make a funnel. Place
the postcard funnel on end of tube.
Pour brake fluid in postcard funnel. Take funnel and
click rudder tube to place it back on the engine.
Now try the rudder level.
Hunting lodge:
See Nicole arrive at the hunting shack. The airboat is
almost out of gas. Look around.
Check the boat to get a close up. Go left to pier (left). See the wire on the post and
swamp with petroleum.
Go to pier at right. See a raised drawbridge.
Arthur Blake: Enter the cabin.
Nicole handcuffs the stranger to the post of the porch.
Talk to man and learn that Arthur Blake is a writer
that wants to buy the cabin, swamp and steamer from Turner of a group from New
Orleans.
Go down to the pier and boat. Get a call from Dick.
Nicole calls Ruth about Prescott, Crosby and Moreau from New Orleans and Turner.
Go back to boat and get a text reply from Ruth - no
such office. Dick also calls and verifies the author.
Talk to Arthur again and Nicole takes the handcuffs
off. Talk more about Turner and the swamp.
Get light: Enter the cabin
and see that it is pitch black.
Go left side of porch. Take deck chair and
boat hook.
Look close at battery. Click and note that there's no
connection on left electrode. Check bottle of water beside the battery.
Now go back to the pier; look close at boat and look
close at pier (left). Now you can take the wire from post.
Go back to battery. Click on the wire to straighten it
and then use the wire on left electrode.
In inventory combine the scissors to tape to get piece
of adhesive tape.
Use piece of adhesive tape on cut-off wires above the
battery. Light comes on in the cabin.
Talk to Arthur. He is cold and wants tea.
Enter the cabin and look around at everything.
Make tea: Take the teapot
from stove. Open the stove and see no fuel.
Take the old wall calendar from side of fridge.
Go to cupboard in kitchen. Cake! Take the 2 mugs.
Open the top left cupboard door and take the Breakfast
tea can.
Exit the cabin. Dick and the sheriff are stuck in the
mud. Learn that Aaron owns everything here.
Go to the water bottle beside the battery at left of
porch. Use teapot on water bottle.
Go to right side of porch. Take ax and use axe on
crate to get wood chunks.
Go back inside and to the stove. Place the wood chunks
and then old wall calendar inside the stove.
Ask Arthur about a lighter. Use lighter on the fuel
inside the stove to get fire.
Place the kettle with water on the stove's top
plate.
Place the 2 mugs on the stove's top plate. Use the tea
can on the 2 mugs. Tea bags are placed on mugs.
Talk to Arthur again until a phone call rings. Exit
the cabin to take the call. It was a text message but not her cell. Go back
inside the cabin.
The tea is ready. Go to stove and take the mug.
Uh oh. Nicole is drugged. When Nicole wakes up, Blake
is gone.
Go outside and Nicole calls for Arthur. Go down to
pier and see that the drawbridge is half raised and the steamer at far right is
lit up.
Nicole picks up Blake's cell phone and reads the text
message. It is from Turner to Blake. They are going to meet at the steamer.
Prepare the lantern: Enter
the cabin and take the lantern from the desk. Check the kerosene lantern
and see that there is no fuel.
Exit and go to right porch. Take the basin,
bucket and can.
Go down to the boat and then pier (left). Use bucket
on swamp with petroleum to get bucket with petroleum.
Go inside cabin to the stove.
Take the mug and then place it back. It is placed closer
to the kettle.
Use the copper tube on kettle and see it hang from
spout to mug.
In inventory click on deck chair to get deckchair
canvas. Use deckchair canvas on funnel.
Use funnel with canvas on kettle. Nicole says the
canvas is too low. Look close at funnel with canvas; then use scissors on funnel
with canvas.
Use funnel with shortened canvas on kettle. Use bucket
with petroleum on kettle. Close the lid.
The steam is leaking on the copper tube.
In inventory combine the scissors to tape to get piece
of adhesive tape. Use adhesive tape on copper tube and see purified
petroleum in the mug.
Take mug with petroleum and use it on the lamp. Use lighter on lamp with purified petroleum to get lit
lamp.
Drawbridge: Exit the cabin and if
you have not gotten the boat hook yet from left side of porch, do so now.
Go to drawbridge. Use the boat hook on top of the
drawbridge.
Go forward and meet one of Aaron's spirits. Offer or
throw Aaron's chicken (you can omit the 3 chants) on the humongous gator.
Swamp:
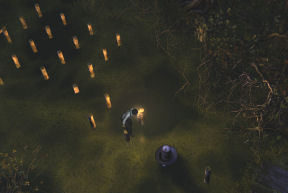
Cross the broken bridges:
Nicole wants light.
Light: Place the basin on water just
off the pier. Place the can on the basin in water.
Place the lit lamp in basin with can. See it float to
the other side and see the posts in the water.
Broken bridge 1: SAVE GAME
HERE for when the spirits get you.
Jump on the first 3 posts on the left. Immediately click on the rising post at right.
Go forward to rising post at right. Continue now on
right posts and left later until the platform.
Pick up the stick. Use the stick on the lamp on
basin to get it.

Broken bridge 2: Continue ahead
and see another set of posts.
Place the lamp on basin on water. Note that there are
submerged posts when the light floated by.
SAVE GAME HERE. You can save the game within the
puzzle. Note that there is a board on third post.
Jump on first post. Trust me, the second post is
rotten. Take the stick and click it on the board ahead. This moves the board on
1st, 2nd and 3rd posts. Jump until the third post.
Jump to adjacent post. Jump to rising post ahead. Jump
to rising adjacent post (not the one ahead - it's rotten).
Go forward with care on the next posts. The next
rotten one is the middle one at third row (of the 5 posts per row).
I don't want to be alligator food (in reference
to short post ahead). Once you reach the lamp, click-get the lamp and then hang
it on the short adjacent post.
Click to get the basin with can. Use the basin and
then the can on the small post ahead. Step on it until the platform.
Steamer:
Go forward and see the lit steamer. The paddlewheel is
turning.
Go to paddlewheel. Climb to middle deck, then upper
deck and to top deck.
Go to the right at paddlewheel and see Blake tied to
the paddlewheel.
Stop the paddlewheel: Pick up
the clapper on the floor.
Go back and try to enter the lit bridge. Use clapper to
break the glass pane of the bridge.
Reach for the handle and enter the bridge.
Take the captain's hat and get the King of hearts
card. Pull the lever that the hat was hanged on.
Check on Blake at paddlewheel.
Jack the reporter from the bar was caught.
October 23, 2009 Local FBI Office, Bronx, New York
Interrogation room: Talk to
the reporter.
Dick brings in a newspaper with the picture of Nicole
at the power plant murder scene.
He was the one running away when Nicole was trying to
check on Jane Carrington.
Get a fingerprint: Jack
didn't want to give his prints. He wants a cola.
Nicole gets a call from Wang. He got a partial print
from the car at the train murder.
Talk to Dick. They will lift Jack's prints from the
cola.
Get cola from drinks machine. Talk to reporter
to give the cola.
Nicole gets the empty cola can with prints.
Exit the room.
Check the prints: Go to the lab.
Talk to Wang about the prints on the can.
Get a call from Ruth. Dad called. Exit the lab and
Nicole calls Dad. Mom is in a coma due to diabetic stroke.
Go back and talk to Wang. The prints are now in
the database.
Comparison of reporter's and car print:
Use the database.
Place both prints on the top area of screen. See both
prints on main screen.
Click the main screen to start the comparison. Not a
match!
Search car print: Remove the
reporter's print from top area of screen.
Click on the partial print to place on main screen.
Click the search button. UAFD07 database denied.
Try also: Click the partial print on reporter's print.
Thanks, ChuckM!
Talk to Wang about the print results. He says to talk
to the boss about access to the military database.
Go to Ruth next door and ask to see the Boss. Talk to
the boss about military access. Access granted.
Go back to the lab and log in the Database-Big
Brother.
Place the fingerprint from car wreck on top. Press the
search button. Find 10 matches.
See the 10 prints at right. Select one of those 10 and
check for matching features.
Click-hold and move the partial car prints on the
enlarge print. Do this until a match is seen.
Drop the partial print on the matching lines of the
big print until the machine confirms it. The matching area is at bottom left od
the big print.
The matching print is the leftmost at second row from
top. The name is Paul Reed. Paul was working on a project called Queen of
hearts.
Talk to Wang. Exit the room and talk to boss. Learn
about the release of the reporter and the death of the writer. He was one of the jurors
under his real name.
Ask Ruth about the jurors and Judge Wolsey in Maine.
He disappeared.
October 24, 2009 Norwich, Maine
Paul Reed's farm:
Talk to Dick in your office. After some hesitancy,
Dick agrees to go to Maine. The agents each in their own car drive to Maine.
Dick is really hesitant to check the barn. Dick gets a
call about lens. Dick leaves to go to town.
Look around. Look and take inflatable mattress
on fence beside the mailbox.
Barn: Look close at barn door
and then the stove.
Take the pump on top of stove. Open the door
and take the soap and bag of salt.
Go behind the barn. There's a window ajar at top part
of barn.
Take wheel out of hole: Look
at conveyor belt. See that the wheel is stuck in iced hole.
Use bag of salt on ice where the wheel is stuck. The
ice is melted.
Place mattress on hard ground between the bars.
In close up, take the board at left and place it on hard
ground left of the inflatable mattress.
Use soap on surface of board.
Use pump on mattress valve at right side of the
inflatable mattress.
Push the conveyor using the bottom structure. The
conveyor is now under the window.
Inside the barn: Climb up and
look through window.
Check on everything on the desk and the machines
scattered around the room. They are the lasers from power plant, projector, parcel box
and several devices.
Go inside and look close at work table.
Elevator: Look close at the
lock right of the elevator doors.
It is a puzzle lock. This is a random puzzle.
Study the first 2 boxes' pattern from left and then
check the third box.
Use the wheel to change the 4th rightmost box to get
the 3rd and 4th boxes to match the pattern shown by the first 2 boxes or select
a logical sequence from first to 4th box. Press the button at bottom left to
enter the selected 4th box. It will reset on a wrong entry.
Enter the opened elevator.
Secret workroom: Look around
and see the diagrams of the devices used to murder or trap the victims.
Go back down.
Paul Reed and sister: Talk to Paul
Reed about murder case. Learn that he gets a diagram from an unknown person and
he makes the devices. Peter his coworker talked Paul to work on an experiment
that caused him to be in a wheelchair. Peter was placed in prison because of
project Queen of hearts. His name is Peter Douglas.
They passed Dick on the way and thinks he looks like a
policeman during Finney's murder. Finney was murdered by use of a clockwork
mechanism at church tower.
Church:
Go to the car. Nicole calls Dick. She will go to the
church.
Enter the church grounds. Talk to the pastor about
Derek Finney's murder. Finney was chosen as a member of the jury in Benson's
trial. Derek was holding a nail in his hand when he died.
Graveyard - Go left and look for Finney's
grave. Check the active tombstone close to the path. Look close and see that 2
of hearts is etched on his tombstone.
Talk to the pastor about the grave. The card appeared
in his tombstone a year after the murder.
Inside the church: Enter the
church. Get a call from Paul, the Card Man.
Take the brush on the prie-dieu at right. Check the door on the left and see that it is locked.
Exit and talk to the pastor. He gives the key.
Use the key on door and then enter.
Tower: It is dark up there.
Exit and talk to the pastor again. He lends his flashlight.
Go back up to the tower. Look at dark corner at top
left. See a plug. Click on plug to get light.
Take the lever hanging on beam support at right
post.
Open and check the clockwork mechanism in the
cabinet.
Look close at floor. See a board with 2 nails. Use the
lever on the nails and then on the board.
Use the brush to clear the dust. See D P and etched on
old floor. Hmmm...
Exit the tower. Dick Parry...
Talk to the pastor and learn about how Finney was
murdered. The police officer was rumored to have found him alive but let him
die. Dick Parry is the police officer.
Then leave the church area. Get a call from Ruth and
learn about the new parcel. Wang learned that the parcel had a Frasnel lens used in lighthouses. Dick was informed
and a fax was sent to the courthouse.
Courthouse:
Check the front door and see that it is locked. See
that there's a light in the backroom.
Check the SUV parked right of courthouse. It is
Dick's.
Take the broken spade sticking out of the trash bin at
foreground.
Go to courthouse rear.
Enter the courthouse: See that
there's a light in one of the rooms.
Check the window left of the lit one. It is slightly
opened.
Take the advertising board by the lamp post. It is
chained.
Look close at chain. Use the spade on the chain. Take
the ad board again.
Prop the ad board on wall below the middle window.
Climb up and through the window.
Dick Parry: Enter through door.
Go to the rear of the archives.
Learn about Peter Douglas, a cell mate of Benson. Dick
hit Nicole when she wanted to arrest and cuff him.
Watch the chase. Dick's SUV falls off the cliff. Dick's dying words
were he was being blackmailed by Douglas and light on the shore.
Lighthouse:
Look around. Check the lighthouse atop the 19th
century fort.
See a cableway from the hut to the fort.
Hut:
Go to the hut at the cliff. Enter the hut. Look around.
Take the flywheel behind the engine; reel from
top right corner and the board from the broken bench.
Look close at floor crack and see an unreachable
wrench inside the crack.
Take the metal cover at left corner.
Take the work jacket hanging on the wall. Look
close at jacket. Take the packet of cigarettes from left pocket and the
matches from right pocket.
Take the belt that was behind the hanging work
jacket. Take the hook that is used to hang the belt.
Engine: Check the engine.
Fix the starter: Look close
at engine. Take the
nut at left.
Place the flywheel on the axle. Secure it with the
nut.
Place the belt on the axle.
Open fuel tank cap: Check the
fuel tank's filler neck. Try to open the fuel cap. It's tight.
Look close at board in inventory. Use hook on board to
screw it at the base of the board.
Use board with hook on the floor crack and get
wrench.
Look close at fuel cap and then use the wrench, Open
the cap and get fuel filler cap.
Get fuel: Go behind the hut
and check the cableway. Look close at container left of the hut.
In inventory look close at metal cover. Turn the cover
to see the back and the hole.
Use the fuel filler cap on the hole. Place the cover with the cap on the ground under the
valve-tap.
Open the valve-tap but nothing is dripping. Take the
lever propped at front right leg. Take the rock that supports the front
right leg. That tilts the container.
Open the valve and get enough petroleum. Take the
metal cover with fuel.
Get fuel in engine: Go back
to hut and look close at the engine's fuel tank.
Use the cover with fuel on the open fuel tank's neck.
Look close at metal cover and take the fuel filler
cap. Use the cap on the fuel tank neck.
Heat the cylinder head: Look close
at the cylinder head.
Take the shank and examine it. Nicole mentions
that the shank is used for heating up the cylinder head.
In inventory, look close on pack of cigarettes. Click
on the pack to get one cigarette. Use the matches on cigarette's close-up.
Look close at the shank again. Use the lit
cigarette on the threaded end.
Place the lit cigarette shoved into shank back on the
cylinder head opening.
Clutch control: Look close at
clutch at right and see the hole.
Place the lever from outside on the clutch hole.
In inventory click the reel to get fishing line piece.
Use the fishing line piece on the lever. This will start the movement of the
cable car from afar.
Now the engine setup is complete. Pull the belt on the
axle to start the engine.
Go outside to the cable car. Enter the car and see
Nicole get close to the fort. The cable broke and she is dumped in the water.
Fort:
Climb up to the platform and look around.
Get up to roof of the fort:
The lighthouse is on top of the fort and the metal ladder to get there is now on
the floor.
Check the mine at right; the pulley above and the
steel rope at left.
See and look close at the fallen metal ladder on the
platform. The steel rope beside it has a hook. Use the hook on metal ladder.
Go to the left by jumping on the platform remains.
Climb up until the boat above. Take the oar.
Use oar on the steel cable to drop the other end close
to the mine.
Go down to the mine. Look close at mine. Use the other
end of the steel rope on the mine.
Take the beam that fell off the pulley. Use
beam on the mine and then push it.
The metal ladder is propped on the side of the fort.
Go to metal ladder and climb to the roof of the fort.
Go to the door of the lighthouse. The door is bolted
and the ladder at right is rusty.
Open the storeroom hatch: Go
back to the right part of roof. Climb up the metal ladder and check the
storeroom hatch.
Go back down and to far side of the crane. Look close
at the crane's control box.
Take and look at the joker card stuck on the
crane control box.
The horizontal levers move the crane left-right and
the vertical levers move the crane up down.
The levers that can be used are those with green lights
on.
Press the green button to start the machine.
Move the left vertical lever up to raise the crane.
Move the top horizontal lever to the right twice to
move it over the storeroom hatch.
Move the bottom horizontal lever to the left once to
get it over the hatch cover handle.
Move the right vertical lever down twice to
lower the hook.
Go to the storeroom hatch. Place the hook to the
handle of the storeroom hatch.
Go back to control panel. Press the green button to
start the crane again.
Move the right vertical lever up once. See that the
hatch is pulled up.
Inside the fort:
Go to the hatch. Nicole jumps down.
Talk to Archie Benson. Learn that he did kill the
fortune teller. Watch what happens after Archie pulled the trigger and heard a
click.
Find a way out: Look around.
Take the big wrench and the broom behind
Archie.
Take the bucket in the structure at right and
the small wrench that was under the bucket.
Check the grilled duct on the left. Use a wrench to
pry the grill up. It is filled with water. Nicole thinks the pump can empty the
water. Peter talks to Nicole.
Check the door. It's locked. Peter talks to Nicole.
Check the toolbox right of door. Take the medium
wrench and broken blade inside the toolbox.
Fix the junction box' wiring:
Flip the switch right of door. The wires are disconnected.
Look at the junction box above the switch. Use the
broken blade on the 2 screws holding the cover of the junction box.
The cover is in inventory. Look close at the cover and
turn it around. See the correct wiring set up.
Click the wire and then click the junction you want to
attach the wire on.
Arrange the wires on top from left to right: blue, red
and black.
Arrange the wires on bottom from left to right: red,
blue and black. The wires are already set in place.
Flip the switch. The water is drained from the duct.
Go down the culvert.
Clear way through impeller blades:
The puzzle is random. The aim is to clear a space (no
blades) at bottom of duct.
See that there are 3 impellers. Use a wrench on the
bolt and see that it affects certain impellers.
Usage of the same wrench turned in the same direction
does not work.
The small wrench when turned clockwise affects the
front and middle impellers.
The small wrench when turned counterclockwise affects
the front and back impellers.
The medium wrench when turned clockwise affects the
middle and back impellers.
The medium wrench when turned counterclockwise affects
the front and back impellers.
The big wrench when turned clockwise affects the back
impeller.
The big wrench when turned counterclockwise affects
the middle and back impellers.
Open the door above: When
completed, go through the space below the blades of the impellers.
Nicole says this place is below the room inside the
locked door.
Look at the grill above - too high.
In inventory, click on broom to get the broomstick.
Click the bucket to get bucket and handle.
Look close at broomstick and see a hole at end of
stick. Click on handle and Nicole makes a wire loop.
Use the wire loop on the hole of the broomstick. Use bucket with no handle on the platform.
Now look-click at room upstairs. Use the stick with wire on the door handle of the door
at the room upstairs. Pull the handle down and then pull again to remove the
stick.
Go through the culvert and be back at the room outside
the door and dead Archie.
Open the door. Climb to top of lighthouse. Talk to
Peter.
Watch and listen.
Farewell, Joker!
Nick, you still got that job for me?
This document may not be
distributed without express written permission of the author and the content
may not be altered in any way.
For Questions or Comments
on this Walkthrough,
Please write to:
MaGtRo
Copyright © 3/2010
MaGtRo
 GameBoomers
Walkthroughs and Solutions
GameBoomers
Walkthroughs and Solutions