
Walkthrough © by Bert Jamin
Walkthrough © by Bert Jamin
© January 2008
This walkthrough may not be sold and
may not be used for any commercial purposes. Neither is it permitted to publish
this walkthrough in any way without the written permission of the author
Prologue: "Whispers from the Past"
When
your phone call is over, it's time to do some exploration about the game play.
Move your cursor to the left side of your screen. A pop-up screen will appear.
In that pop-up screen you see two books. When you click on the upper book you
can save your game. You also can save your game by pressing the s on your
keyboard. If you want to load a saved game press the Esc button on your
keyboard. Click on Yes to confirm and click on Load Game.
When you click on the lower book with the feather you can read about the things
you have done and about the things you have to do.
When you move your cursor to the right side of the screen your notebook will
pop-up. Now remember that where I say to open your notebook you have to move
your cursor to the right side of your screen to do so. Now let's play...
You start as Jonathan in your apartment. Look at the helmet on the table. Look at the huge LCD TV. Look at the magazine on the floor. Look at the shoes on the floor. Look at the nibbled pizza on the table. Look at the pile of books on the table. Take your cell phone. Look at the books. Look at the nibbled pizza once more. Zoom out. Look at the fax machine on the counter at the left side of the room. Take the pocket watch. Zoom out. If you like you can enter the kitchen behind the fax machine. Examine the fridge. Look at the bottle of cleaner. Go back to the right.
Walk towards the stairs at the back wall of the room. Go up the stairs. Look at the African mask. Look at the door. Try to open the door. Look at the keyboard. Look at the Home-Gym. Walk further to the left. Look at the computer on the desk. Look at the wardrobe. Look at the katanas above the wardrobe. Look at the CD collection. Look at the bag on the bed. Go back downstairs.
Look at the bicycle. Look at the photographs at the wall. Look at the peephole in the door. Look at the house door. Look at the entry phone. Look at the white telephone in the cupboard. Look at the papers in the bookcase. Look at the little South-American Statue and last but not least look at the pile of stuff. Take your passport out of the pile of stuff.
Chapter 1: "A Knight's Training"
You'll end up in front of your uncle's apartment. Talk to the Chatty Bobby and exhaust all dialogs. Try to talk to the other Sullen Bobby. Look at the old creased poster on the left wall of the building. Look at the bin at the left side of the building. Look at the fire hydrant. Look at the doorbell and the street number. Enter the apartment.
Look at the glass panel of the door. Look at the vent. Look at the group of plants. Look at the caretaker's window. Go down one screen. Look at the back door. Look at the fuse box. Look at the bulletin board. Go up the stairs. Go one screen down. Look at the fire hydrant. Look at the snake. Talk to the orange cat. Look at the doormat. Try to pick it up.
Go back to the left. Look at the umbrella. Try to pick it up. Go up the next stairs. Go one screen to the right. Look at the floor plate. Look at the plant next to the door. Go one screen to the left. Look at the post next to the door mat. Try to pick it up. Look at the doorbell. Read the writing on the door. Open the door to enter the apartment.
Look at the private investigator license above the door. Look at your suitcase next to the door. Look at the old gramophone. Look at the Scottish tartan couch. Walk behind the desk. Look at the radio. Look through the right window. Look at the laptop on the desk. Look at the computer on the desk. Look at the typewriter beneath the window. Go one screen to the right. Look at he Grandfather Clock. Look at the piano. Look at the antique plate. Look at the small equestrian statue. on the desk next to the piano. Look at the Egyptian picture.
Look at the pile of books on the chair behind your back. Right click on the pile of books and take the map of London. Look at the unconscious Coletti. Search Coletti. Walk towards the bookcase at the left side of the door. Look the green books. Examine the messed up books. The book sequence is now added to your notebook. Notice the five roman numbers on the books VI, IX, I, X and III. Make a note of these roman numbers. Zoom out.
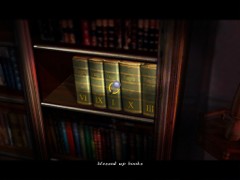
Examine the messed up books
Enter the door to the left. Look at the toilet. Look at the shower. Look at the mirror above the sink. Go through the door to the right. Look at the hot pads above the stove. Look at the fridge. Look twice at the tin on top of the fridge. Take the tin of tuna. Enter the bedroom to the right. Look at the box of cigars. Look at the wardrobe. Look at the oil painting. Look at the crucifix. Look at the antique television.
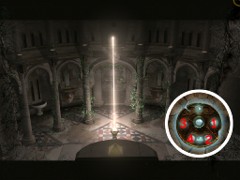
Look at the mysterious object on top of the television to take a mysterious device. Look at the mysterious device in your inventory. Right click on the mysterious device to take it from your inventory. Move it to your notebook. Move it to the Book Sequence entry. Now you get a close view on the mysterious device. Now remember the roman numbers you saw earlier on the green books. Your goal is to get the same numbers in the same order as on the green books. Move the second dial from the left 1 time. Move the center dial 5 times. Now the row of roman numbers should correspond to the ones you have seen on the green books. It should look like the next image. Press the little button at the left side of the device. After that you'll switch over to Kat.
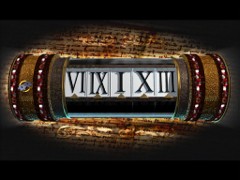
The mysterious device set correctly
Look at the graffiti on the window. Look at the cupboard. Look at the skis. Look at the fuse box. Go one screen to the right. Look at the little cupboard at the right side. Look at the old bathtub. Look at the wooden shelves. Look at the cupboard at the left side. Look at the tiny flicker at the back wall. Look at the keys. Take the keys of Frank's motorbike.
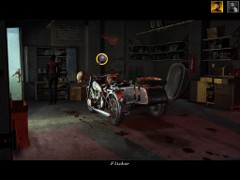
The tiny flicker at the back wall
Chapter 2: "Shining our Swords"
Look at both posters. Look at the plastic crates. Look at the lockers. Go one screen to the left. Look at the bottles of beer. Look at the locked door. Look at the trapdoor. Go down one screen. Go through the door to the right above the little stairs. Look twice at the sewer grate. Look at the glittering thing. Zoom out.
Go to the right. Walk towards the corner of the building. Look at the drinking fountain. Remember that you can find this fountain here. You have to use this drinking fountain later again! Go to the left. Go up one screen. Talk to the drunken tramp in front of the Photo Matic. Ask him if you can use his shelter place. Exhaust all dialogs.
Remember that you can find the drinking fountain here
Look at the broken glass at the right side of the photo cabin. Take the still intact bottle. Look twice at the abandoned car at the opposite site of the street until you zoom in on the front window. Look at the broken part of the window to see a magnetic religious figure. Zoom in and take the religious figure. Zoom out. Go around the corner of the street. Look at the motorbike.
Look at the old fridge. Take the melted Ice-lolly. Zoom out. Look at the gas pumps. Look at the bush. Look at the yoghurt pot. Take the yoghurt pot from the bush. Zoom out. Look at the hut. Go around the corner. Look at the fire hydrant. Look at the neon sign of the hotel. Look at the dark corner beneath the railroad. Look at the rubbish bin. Go up one screen. Look at the pile of wood. Look twice at the puddle in front of the blue containers. Look at the piece of a shoelace. Take the piece of a shoelace. Combine the shoelace with the religious magnet in your inventory. Zoom out.
Go to the left. Look at the pile of rubbish. Keep on kicking the pile of rubbish until it reveals a still closed bottle of wine. Take the bottle of wine. Look at the blue rubbish bin. Look at the rusty machinery near the stairs. Go to the left. Look at the sewer grate once more. Use your primitive fishing rod on the glittering thing to get a coin. Zoom out.
Go to the right and walk towards the drinking fountain. Take your empty bottle from your inventory and fill it with water from the drinking fountain. Put your strawberry ice-lolly into the bottle nearly filled with water. Finally put the yoghurt into the bottle filled with water and strawberry juice. And... voila... your home made bottle of wine! Go to the left to leave the drinking fountain.
Walk up the street. Give the bottle of fake wine to the drunken tramp and... off he goes. Hmmm... he seems very pleased with your home made wine! Put your chewed coin into the Photo Matic. Go down one screen. Go to the right twice. Enter the door above the little stairs. Give the ID photo to Robert. Now you switch over to Kat.
Notice that two policemen are guarding the gate of the house. So you can't just enter the house through the front door. Look at the Climbing Roses. Try to climb the Climbing Roses. Ouch... that hurts! Look at the potting shed. Look at the gloves. Pick up the gloves. Zoom out. Look at the broken gate. Look at the garden lamp. Look at the most left window on the first floor of the house. Look at the balcony. Use your gardener's gloves on the climbing roses.
Look at the mirror. Look at the bowl. Go down one screen. Go down the stairs. Go to the right into the library. Look at the bust. Go one screen to the right. Look at the piano. Try to play the piano. Look at the bookcase. Go one screen to the right. Look at the computer on the desk. Look at the documents and papers on the desk. Look at your fake passport. Take your passport. Zoom out.
Go down one screen. Leave the library through the door to the hallway. Enter the door to the left. Look at the lift. Look at the bookcase. Go one screen down. Look at the Saint Peter's model on the left table. Look at the couch. Move the pillows of the couch to take your digital camera.
Chapter 3: "Imago Sanctissimus"
You'll end up as Damien in front of Frank's apartment. Look at the poster on the left wall of the building. Enter the apartment. Look at the copses' silhouette. Go up the stairs. Look at the umbrella. Go up the other stairs. Enter Frank's apartment. Walk towards the desk with the computer. Switch on the laptop. Damn... it is password protected! Open your notebook. Click on the text "Maybe Jo knows the password for Frank's laptop." Click with this text on your communicator in your inventory. Click on the little envelope next to this text. Notice that your cursor changes into a little envelope. Click with that little envelope on Jo to send him that mail.
Click on the blinking communicator at the left top of your screen. Read the message Jo sent you that he doesn't know the password either. Turn off the communicator. Take your USB disk from your inventory and put it into the laptop. Open your notebook. Click on the text "List of books". Click with this text on your communicator in your inventory. Click on the little envelope next to the text "Kat, this is the list of books Frank wanted..." Click with the little envelope on Kat to send her this email. Now you switch over to Jonathan.
Look at the locked door of the gate. Look at the wooden boards. Move the wooden boards aside. Enter the hangar. Look at the nail gun on the floor. Try to pick it up. Go one screen to the left. Look at the airplane. Enter the office at the back wall. Talk to Alan. Exhaust all dialogs. Show your fake passport to Alan. Tell Alan that you need to fly to Charters in France. After that ask him "Sorry but can't you just order it?" "Then where can we find this piece you need?" "Do you know where I can find them?" "I'll see you later Alan".
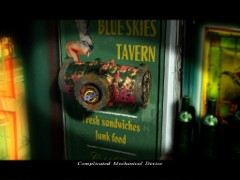
Look at the board above Alan's desk. Look at the TV at the right side of the desk. Look at the green bin. Look at the small canister inside the bin. Take the small canister. Zoom out. Open your inventory and look at the map of London. Click on Damien to go to Damien's flat. Go to the Hunter's Blue Skies Tavern. Look at the piece of paper on the pavement. Look at the sign at the right side of the door. Look at the mechanical device. Look at the front part of the complicated mechanical device. Press it to get... an old spark plug. Look at your map of London and go to Alan's hangar. Head back into Alan's office. Give him the spark plug. Now you switch over to Kat who is standing in front of the City Library.
Here you find the spark plug
Open the blinking communicator at the top left on your screen and read the incoming email. Look at your notebook to see that the List of books is added to your notebook. Look at the architecture of the left building. Walk towards the library at the right side. Look at the windows of the library. Enter the library. Talk to the librarian. Tell the librarian the titles of the books you need. Exhaust all dialogs.
Look at the fan. Go to the right. Look at the pile of books on the floor. Push the pile of books to distract the librarian. Hmmm... that didn't work! Go to the right once more. Look at the bookcase. Look at the clock. Look at the ancient book. Look at the dark brown door. Look at the intercom on the desk. Try to operate the intercom. Look at the audio & video station. Look at the fire extinguisher. Move the fire extinguisher aside to set free some mice. Quickly go to the left and take the three books you need from the shelves of the bookcase. After you have taken the three books you need you'll end up with Jonathan at Damien's.
Chapter 4: "Chartres' Reminiscense"
You go further as Jonathan now. Open the blinking communicator at the left top of your screen. Watch the movie from Damien's communicator. Turn off the communicator. Look at the newsstand. Look at the tin in front of the front door of the newsstand. Take the tin. Look at the telephone box. Look at the stuck door. Zoom out. Go to the right one screen. Look at the circular fountain. Look at the condom. Take the condom. Go down one screen.
The tiny tin in front of the newsstand
Look twice at the construction site at the very left side of the alley. Look at the metal bar sticking out of the pile of dirt. Take the metal bar. Zoom out and exit the alley to the right. Go to the phone box at the right side of the square. Look at the phone box. Use your metal bar to open the stuck door.
Go one screen to the left. Look at the right most bench in front of the cathedral. Look at the newspaper. Take the newspaper. Zoom out. Go one screen to the left. Look at the statue at the left side near the end of the street. Look at the engravings on the statue's column. Take your tin of tomato sauce from your inventory and use it on the column. Use the newspaper on the column. Use your cell phone on the newspaper with the mysterious Latin sentence on it to take a photograph. Open your notebook. Click on the text "Mysterious Latin sentence." Click with that text on your communicator in your inventory. Click on the little envelope next to that message and send it to Kat. Now you switch over to Kat.
Click on the blinking communicator at the top left of your screen. Read the message "Photo of the sentence on the column". Turn off the communicator. Talk to the playing kids across the street. Exhaust all dialogs. Open your notebook. Click on the text "One of the Cathedral's windows can be opened easily". Click with that text on your communicator in your inventory. Click on the little envelope next to that text and send it to Jo.
Go to the right. Talk to the sitting man on the bench. Exhaust all dialogs. Look at the Vespa. Look at the manhole. Look at the booklet on the table. Look at the Café de Etrangers. Look at the motorbike. Go one screen down. Look at the statue of Virgin Mary. Switch over to Jonathan by clicking on his icon at the top right on your screen.
Click on your blinking communicator. Read the message "One of the Cathedral's windows can be opened easily". Turn off the communicator. Look at the Cathedral's window at the left side of the statue. Use the ice-lolly stick on the window. Zoom out. Look at the statue once more. Take the stone next to the statue's column. Put the stone into the condom in your inventory. Zoom out.
Take the filled condom (simple knot) from your inventory and smash the street lamp with it. Look at the cathedral's window once more. Use the ice-lolly stick to open the window. You enter the cathedral. Look at the chairs. Go to the left. Look at the altar. Walk towards the back side of the altar. Look at the relic on the altar. Look at the wooden box with Mary's Robes. Exhaust all dialogs with Father Dominique.
Chapter 5: "The Mystery Revealed"
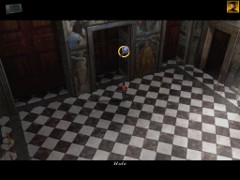
Now you switched over to Kat. Look at the Saint Peter's Cathedral. Walk towards the columns with the red posters. Talk to the funny museum caretaker. Exhaust all dialogs until he lets you enter the museum. In the first room look at the fresco "Vision of the Cross". Go down one screen. Look at the fresco "Baptism of Constantine". Go through the door beneath the fresco. Go one screen to the left.
Look at the fresco statue. Go up through the door. Go one screen to the left. Look at the fresco statue. Go one screen down. Go to the left. Look at the fresco "Fire in the Borgo". Look at the pope in the tower on top of the stairs on the fresco. Open your notebook. Click on the text "Mysterious Latin sentence translated to English". Click with that text on the pope in his tower on the fresco.
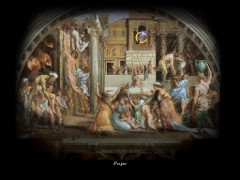
Look at the pope in the tower
Look at the capitals on the fresco. Look at the man on the fresco. Zoom out. Go to the right. Look very closely to the door in the niche to find a hole. Put your match into the hole. Take the magnetic cylinder. Zoom out.
The hole in the niche
Go down one screen. Go through the door in front of you. Go to the right. Go one screen down. Go through the door to the right. Go one screen to the right. Go through the entrance to exit the museum. Talk to the funny museum caretaker once more. Look at your map of Rome. Go to the Magical door. Look at the remains of an ancient monument. Go to the right.
Look at the statues. Look at the alchemical door. Look at the architrave above the door. Look at the center of the circle. Look at the arrow. Put your magnetic cylinder into the center of the circle. Take the magnetic cone from the opened hole. Take your map of Rome from your inventory and place it on the arrow. Take the inscribed map of Rome in your inventory and use it with your Guide to all Monuments of Rome. Look at the inscribed Map of Rome and go to the Pantheon.
Look at the Pantheon. Talk to the policeman in front of the Pantheon. Exhaust all dialogs. Look at the inscribed map of Rome. Go to the Saint Peter's Square. Walk towards the funny museum caretaker. Open your notebook. Click on the text "The policeman in front of the Pantheon won't let me in". Click with that text on the funny museum caretaker. Great... he will take care of that right away!
Look at the altar at the right side. Go to the right. Look at Raphael's Tomb. Walk towards the tomb of King Hubert I and Queen Margharita of Savoi. Look twice at the tomb. Look at the hole in the tomb. Put the magnetic cone into the hole. Take the magnetic pyramid. Go to the center of the square. Look at the spider webs. Look at the stone face above the arch. Walk to the beam of light.

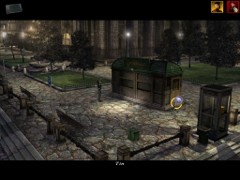
Just go down to the square
Walk towards the altar with the blue light. Look at the altar to zoom in. Look at the hole in the altar. Put the magnetic pyramid into the hole. Now you'll see a brown dish with blue lights. You have to press the blue lights in the order: three o'clock, five o'clock, nine o'clock and seven o'clock.
The correct order
Now you switch over to Jonathan. Open your blinking communicator. Look at the "Photo of the second piece of Mary's Robes". Turn off the communicator. Look at your map of London. Go to McKendal. Enter the house. Go through the door to the left. Go to the right twice. Talk to Arthur and exhaust all dialogs. Look at your map of London. Go to Damien.
Enter the door next to the tavern. Go up the stairs. Talk to the old cleaning lady. Exhaust all dialogs. Go down the stairs. Exit the apartment. Enter the tavern. Exhaust all dialogs with the bartender. He will give you a nice bottle of mustard. Go back into Damien's apartment. Go up the stairs. Go down one screen and go up the other stairs. Go down one screen. Look at the shining floor. Use the bottle of mustard on that shining floor. Go down one screen. Go down the stairs and talk to the old cleaning lady once more. When she takes off to clean up the mess upstairs enter Damien's taped apartment.
Look at the newspaper on the table. Look twice at the Ming vase. Walk behind the desk. Look at the computer and much more. Look at the photographs of Venice. Look at the desk. Look at the piece of Mary's Robes. Zoom out. Go down one screen. Go to the left. Look at the water tap in the kitchen. Look at the food. Look at the books. Go to the left. Look at the photographs. Look at the thermometer on the cupboard. Take the thermometer. Go down one screen. Look at the sofa bed. Look at the potpourri in the cupboard. Look at the biscuit box under the chair. Take the biscuit box.
Look at your map of London. Go to McKendal. Enter the house. Go through the door to the left. Go down one screen. Give the piece of parchment to Arthur. After the cut scene you'll end up in front of New Scotland Yard. Look at the map of London. Go to Frank. Go through the door to the right. Go up the stairs. Go up the next stairs. Enter Frank's apartment. Go one screen to the right. Walk towards the Grandfather clock. Look at the grandfather clock to zoom in. Look at the Broken Grandfather Clock.
Open your notebook. Page through the notebook. Click on the text "Frank's old Grandfather Clock has always been broken". Click with that text on the second pocket watch. Open your notebook once more. Click on the text "I could try setting the grandfather clock at 5.55". Click with that text on the broken grandfather clock. Look at the little sword that pops out of the clock. Take the little sword. Zoom out.
Look at the small equestrian statue behind your back. Look at the statue once more. Put the little metal sword into the small equestrian statue. Take the piece of paper. Zoom out. Look at the piano. Put the music paper into the music sheet on the piano. Take the ancient medallion. After this you receive a message from Arthur and off you go to the airport Heathrow.
Look at the trolley that is standing in front of you. Push the trolley to it's correct place to take a coin. Go one screen to the right. Look at the desk at the left. Take the pencil. Zoom out. Look at the vending machine. Put your coin into the vending machine. Look at the can. Take the can. After that you board the plane and off you go to Venice.
Look at the stone bench near the water. Go to the center of the square. Enter the entrance at the center of the arches. Go one screen to the left. Talk to the restorer. Exhaust all dialogs. Give your fresh drink to the restorer. Take the sand paper from the right side of the table. Use the sand paper with your pencil. Put the pencil's graphite dust into the tin of white plaster on the table.
Look at the well. Enter the well. Look at the space between two stones at your right side three times. Put your fingers into the hole. Ouch... that hurts! Look at the broken ladder. Go one screen to the right. Look at the stone with a little hole. Put the passepartout into the stone with a little hole.
Pick up the large green gear and drag it near the bottom of the panel to the left most pin. Pick up the left most brown gear and drag it to the second pin from the left. Pick up the front brown gear and drag it to the third pin from the left. Pick up the last brown gear and put it on the right most pin. Press the white pin on top of the panel. If you misplace one of the gears you can press the white pin to reset the gears.
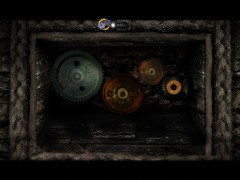
All gears set correctly
Go through the opened door. Look at the huge spider webs. Go down one screen. Step onto the platform. Look at the circular stones. Notice the five buttons beneath the circular stones. Press the right most button. Press the second from the right button. Finally press the center button. Cross the bridge. Look at the pedestal. Take the codex from the pedestal. After this you'll go back to Arthur McKendal.
Give the alchemical codex to Arthur. Look at your map of London. Go to Brixton. Go to the right. Walk towards the drinking fountain. Fill the biscuit box with water from the drinking fountain. Put the small canister into the biscuit box full of water. Add the thermometer to the biscuit box full of water and ammonia. Put the piece of parchment into the biscuit box full of water, ammonia and mercury.
Open your notebook. Click on the text "Second half of Frank's Clue found by Kat on Mary's Original Robes". Click with that text on the First half of Frank's Clue found by Kat on Mary's Original Robes in your inventory. Look at your map of London. Go to McKendal. Enter the house. Go through the door to the left. Go down one screen. Open your notebook. Click on the text "Completed Clue that Frank left hidden in Mary's Robes". Click with that text on good old Arthur.
Chapter 6: "Moonlight Shadows"
Look at the car. Look at the trunk of the car. Try to talk to the monk. Take the wooden stick from the scaffolding. Use the wooden stick on the monk. Go one screen to the right. Look at the toolbox. Take the wrench from the toolbox. Take the canister of oil from the toolbox. Zoom out.
Go down one screen. Go through the doorway to the left. Go down one screen. Look at the screw on the wall. Look at the metal cable. Go down one screen. Go through the door to the right. Go up through the door. Go up through the next door. Jonathan won't go any further because the two monks would see him. Head back through the door to the right. Go through the door to the right. Go down one screen.
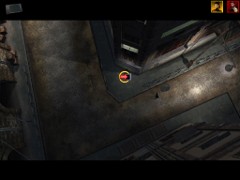
Look at the screw on the wall. Use the wrench on the screw. Pour some oil on the screw. Use the wrench on the screw... Bingo! Go down one screen. Go up through the door. Go through the door to the right. Now you enter the square with the circle at the center on the ground. Look at the hole at the right doorpost.
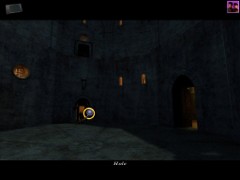
The hole at the doorpost
Put the Imago Sanctissimus into the hole. The circle opens and Jonathan and Kat descend into the pit. Go to the right two screens. Go forward. Look at the skeletons. Look at the blade. Look at the gate. Look at the strange fountain. Put the Imago Sanctissimus into the upper hole and... gamesover!
The End...