Daemonica
by
raimages and Meridian4
Walkthrough by
MaGtRo April 2006
Gameplay:
Daemonica is a third person point and click game. The main menu has Story, New
Game, Load Game, Options, Credits and Quit Game. The story is necessary to learn
the background of the main character and contains some clues. Under Options
menu, the music, sound, gamma adjustments, resolution, visual effects, shadow,
always run and simplified combat can be found. Under Controls at bottom left,
descriptions of the mouse and keyboard keys can be learned. The use of
inventory, bottom left control seen during gameplay and health condition are
also presented.
There are 10 saved game
slots that can be overwritten. Left click skips the
intro, dialogue and some cutscenes.
F1 displays help. Help
explains the game manipulations.
Use the directional
arrows to see different perspective of the area. Also, press/hold the "thumb
wheel" switch and move the mouse around; this will replace the arrow keys to
get the different perspective. Scroll the thumbwheel to zoom in on the screen
view.
Click on INV at bottom
left or I key to open the inventory screen. In inventory, there are flasks
at top left for potion making, the map at bottom left, diary at top right and
drop item at bottom right. Read the diary often to get clues. The impressions
about people that have been interviewed are stated. Potion making has the how to
in potion preparation and description of the different herbs. 'My notes' describes
the record of what has been done and to find out the different quest that is
needed to be done. The diary can be closed using the down glove icons and
selections can be done by the up glove at bottom center of the pages. Close the
inventory frame using the X at top left. The map can be accessed by clicking on
the compass direction at bottom left or the M key. The map will automatically
mark the different important places visited and can be clicked on to jump to
that place immediately.
Hints:
Herbs - To save time later, pick up any herbs seen while walking around
the area. The herbs can be found based on their description in the diary.
Combat - During the combat part, be sure to have enough health points
before fighting. Also place the sword icon on the opponent and rapidly left
click to barrage the opponent with hits. The space bar raises the sword in a
defensive position.
Read the Story to learn
the life of Nicholas Farepoynt, the Beast Hunter. He is a Haresh al-Dorem, the
one who speaks with the dead.
Act
1
Blind Justice
The items in inventory are Invitation from the Mayor of
Cavorn, dagger, bags with herbs and potion preparation set. Select the Invitation
from the Mayor of Cavorn and click it on Nicholas. Read the invitation to find
out why Nicholas is here.
Follow the path to the
Town Gate. Talk to the guard. Talk to the Mayor, Phillip SaintJohn. Follow
the Mayor to your house.
|
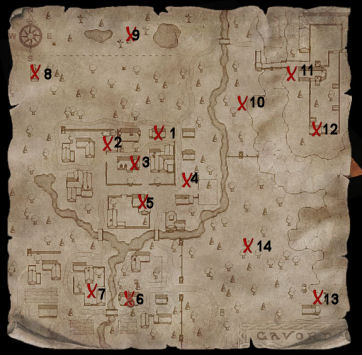 |
1. My House
2. Scaffold
3. Mayor Philip SaintJohn's
house
4. Blacksmith John Cobb
5. Broken Jug Inn
6. Doctor Clement Baker's house
7. Landlord Galfrid Limsey's
house
8. Herbalist Maud Litcott's
house
9. Swamp
10. Funeral Pyre
11. Monastery
12. Undertaker Roger Duncombe's
house
13. Mines
14. Weird Place |
Go to the different
places in town so that they can be marked in the map with a red X. Click on the red X in the
map to jump to that location. If you click on a place in the map and get a green
arrow, the game screen will show a green directional arrow until you reach that
place marked green X on the map.
Herb collection: While checking
the town, pick up as many as possible (up to 10) different herbs. Based on the
potion part of the diary: pink Bloodstone weed
- found anywhere, orange Devil's Luck - found anywhere, lavender colored
Watersleep - found close to river, white Tear of Stone - found
near rocks like the hill beside the undertaker's house and yellow Gwynlock
- found in swamp. They will be needed for potion making later.
Warm Welcome
Talk to the different people to help
in investigation: Exhaust all dialogue.
Broken Jug Inn - Talk to
Robert Mollins, innkeeper; Galfrid Limsey, old Harrel and the Mayor.
Talk to Blacksmith John
Cobb at his shop and learn about his family and the Mayor. Learn that Duncombe
died very young, would be 19 in September.
Talk to Doctor Baker at
his house. He greets Nicholas in some kind of code. Learn about Eleanor, the dead woman. There's a well at the back of
the house.
Talk to John Limsey,
stepson of the Landlord. He can be found behind the Landlord's house practicing
his swordplay.
Talk to Mary Harrel
tilling the soil across the street from the Landlord's house.
Talk to Simon Lyse
fishing at the bend in the river west of town and south of the
herbalist's house. Learn that he has feelings for Emma, the maid.
Talk to Maud Litcott,
the herbalist at her house. There's a bucket left of door.
Talk to Helen SaintJohn,
the Mayor's wife at left pond in the swamp.
Talk to Emma, the maid
inside the Mayor's house and learn that she feels the same way about Simon, the
fisherman. There's a bucket by fireplace.
Duncombe's house:
Go to Duncombe's house. Pick up tinderbox from chest by door and spade
by fireplace. There's a bucket at foot of bed. Look around outside to check on
cemetery and funeral pyre.
A little privacy
Need a lock on the
Nicholas' house door: Talk to blacksmith and he will let
you keep the lock if you find the key. Go to the right lake at the swamp and
look around. Nicholas will see the key in the water. Talk to Simon, the
fisherman and inform
him about Emma's feelings for him. He will fish the key for you. Talk to
blacksmith and he will give the lock that goes with the key. Go to
Nicholas' house and click the lock-key on door.
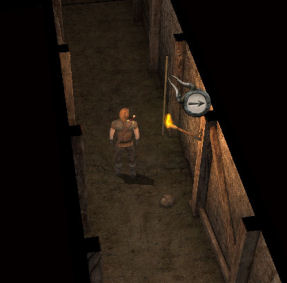
Get a drink for the
guard at the scaffold where the body of Duncombe is hanging:
Talk to Mayor at the Inn about the guard. Talk to innkeeper and get wineskin.
Go to Mayor's house. Try to take wine from table at Mayor's house. Talk to Emma
to get wineskin with wine.
Potion Preparation at the
cellar of house:
Place the potion
preparation set on table.
Click herb bag on potion
preparation set.
Select the herbs needed.
Green dot counts how many are selected. Left click to add herb and right click
of mouse to remove herb.
Check the potion making
in the diary to learn the necessary amount needed to prepare the potions.
When all the necessary
herbs are selected, click on the top left flask to make potion.
The prepared potion
will be in inventory.
Take Duncombe's body
to Nicholas' house cellar: Prepare Drowsy Eyes potion.
Check Potion Making in the diary and see that the ingredients are: 1 Gwynlock, 1 Watersleep and
one Devil's Luck. Click prepared Drowsy Eyes potion on the wineskin with
wine. Give the drugged wineskin to the guard by the scaffold. Use dagger on rope
close to wood to cut down Duncombe's body. Automatically bring the body to Nicholas' cellar.
Prepare to go to
Temple of the Sacrifices: Prepare Soulgreep potion.
Check Potion Making in the diary and see that the ingredients are: 2 Gwynlock, 2 Watersleep, 1
Devil's Luck and 2 Tears of Stone. Read the Temple of Sacrifices part in the
diary. Click the Soulgreep potion on Nicholas.
Help from beyond
Call Duncombe's soul
at the Temple of the Sacrifices: Use directional arrows to look around.
Go to door right of the mural of a hanged man and automatically voice an entry
request. Enter the right
side chamber of a strangled man. Face the different side altars and select the
appropriate answers. Left mouse click to cycle the selections and right click to
select the answer. Face the Altar of Path and chose Love as the word he will
listen to. Face the Altar of the Sign and chose Rephen as the sign the soul was
born in. The answer can be found in the diary and the blacksmith stated that
Duncombe was born in September. Face the Altar of the Demon and select
Dahn-en-nyan as the name of the devil. This is found in the diary and the story.
Go back at the center of
the Temple and see that the door beside the sun wall is now open. Enter and
Nicholas will automatically call out. If correctly done, the soul will come and talk
to Nicholas. If wrong, Nicholas will be sent back to the house. Talk to Duncombe
to learn about a brooch. Duncombe wants his body burned.
A promise is a
promise
Burn Duncombe's body:
Take Duncombe's body and automatically place it on the funeral pyre below the
Monastery. Use the tinderbox on his body.
An insignificant
trifle
Find the Brooch:
Talk to the Mayor at his house. Talk to the blacksmith to get him to convince
the Mayor. Talk to Mayor at his house again. He threw the brooch at the
cemetery. Go to cemetery behind Duncombe's house. Pick up the brooch
under the fern plant close to the backdoor of Duncombe's house.
Brooch owner:
Show the brooch to all the main characters. Finally show it to Landlord Galfrid
Limsey at the inn. Save Game here. Talk to his stepson John practicing his swordplay behind the
Landlord's house. John describes the way he lost the brooch. A sword fight
ensues. In simplified combat, just continue to hit - click on John with the sword. The
mayor is upset and he wants Nicholas to find his wife.
The safety of four
walls
Find Helen SaintJohn:
Use the map to jump to the swamp. Go to left of the left pond
and talk to Helen. She will not go home.
Talk to people:
Talk to Blacksmith. He wants you to come tomorrow and talk to him. Talk to
Doctor at his home. The chronicle will be ready tomorrow.
Time to rest:
Note that Nicholas' energy is very low. Go back to his house and sleep. Strange
voices spoke to Nicholas in his sleep.
Act
2
Voice and Darkness
Nicholas woke up with less than adequate health
condition. Once outside the house, learn about Simon the fisherman and the blood
on the wall of the house. Pick up the broken fishing rod
right of the blood stains.
Talk to people:
Talk to Mayor and then Galfrid Limsey both found at Broken Jug Inn. Go to swamp and
talk to Helen, Mayor's wife (?Clarice). Talk to Maude. Check to see young
Limsey hanging at the scaffold.
Talk to the Blacksmith
and he would train you in swordsmanship. He mentions to go to Maud the herbalist
for a potion when needed. When the health condition becomes very low - Go to
cellar of Nicholas' house and prepare Sneeya's Breath potion for minor injuries. Click the potion
on Nicholas. That makes Nicholas feel better now. Continue to train heal
Nicholas until John the blacksmith teaches you another thrust technique. Prepare Sneeya's Touch potion for a complete recovery
or major injuries. Train with John until he says
that's enough. You truly are excellent.
During the walkabout, meet and
talk to Mary Harrel. She is looking for her husband.
Talk to Emma, the maid at the Mayor's house
about everything. She will look for Simon at the marsh.
Lost Documents
Search for the lost
documents: Talk to the doctor and find out that the
chronicles and documents he prepared for Nicholas were stolen. Talk to doctor
second time and ask about 'some details' completely. Go to the cornfield across
from the Doctor's house and look close at trampled fields-cornstalks. There's
a well behind the doctor's house. Go
back and talk to the doctor about the new finding at Limsey's field.
Talk to Landlord Limsey
at the Inn. He talks about Harrel and his field. Go back to the doctor
and tell him about find something out - that Harrel is the thief.
Harrel, where are
you?
Find Harrel:
Ask John the blacksmith about Harrel. Harrel bought a rope from John. Talk to
Limsey at the Inn about Harrel.
What others do not
see
Talk to Maude, the
herbalist about Harrel. She needs a special herb, snake's tongue. It can be
found only after drinking Azraim's eye. She gives the recipe and serpentica.
When you hear the voice of the wooden watchman, who guards the
marshes day and night, go under his gaze until the land disappears into the
depths. Wait there for your winged guide. It shall show the way. When you bring
the snake's tongue, you must have all the potion out of your body.
Go to Nicholas' cellar
and prepare the Azraim's eye potion - 1 serpentica, 1 tear of stone, 2 Devil's luck and
2 Gwynlock.
 |
 |
|
Go to the right wooden
watchman close to the right pond in the swamp and behind the wooden posts. The
left wooden watchman is closer to Maude's house.
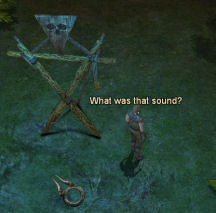
Wait until Nicholas
hears a sound. |
Turn towards and go
forward to the river's edge with the compass showing North. Face the river. |
Drink the Azraim's eye
potion.
Wait until a bird flies
overhead going east (towards right of screen).
Follow the bird or its
shadow. Go south side of the pond, across a path and just south of the bridge to
go to the monastery.
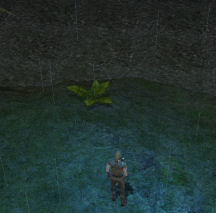
Pick up the snake's
tongue close to the river.
Go back to Maude and
talk to her. She will remove the remnants of the Azraim's eye potion from blood.
Wait a bit (go outside and pick up herbs or enhance your health) and then talk to Maude. She says that Harrel is in the mines.
Go to the main gate at
middle south of the map. Talk to Peter Walding the town guard. Go to the Inn to
talk to the Mayor. The mayor would not give permission to open the gates.
Go north of the
Blacksmith and on the path by the light post, see a hooded man. Talk to the
Benedictine monk. The Abbot wants to talk to Nicholas. The key to the
monastery gate is given.
Back to God
Visit the monastery:
Use the key given by the monk on the metal gate of the monastery. Look at the
statue on the courtyard. Talk to Abbot Michael. He wants you to talk to a
suicidal monk, Brother Thomas.
Go to the area lower right of Duncombe's house. At bottom
right corner of screen, see Brother Thomas at edge of cliff. Talk to the
Benedictine monk and he mentioned something lost. He jumped... Pan around and
see that he might have fallen outside the town wall.
Go back to the monastery
gate and use the key to open the gate. Talk to Abbot Michael about Eleanor.
Learn about the loss of the precious stone and spying in town. After telling
about Brother Thomas, the Abbott asks another favor. He wants the monk's body
taken care of and he will get the necessary permission to go out of the town walls.
A place of final
rest
Outside the town
walls: Go to Inn and talk to the Mayor. Go to town's main
gate. Talk to guard twice.
Go forward left of town
gate, by rivers edge, wall and then cliff side to look for the monk's body. See pool of blood by cliff side and meet the
robber. Save game here! A sword fight is done. The robber is dead. Check
the body and take the cassock of the monk.
Walk around and see 3 standing stones - weird place.
One and a half
dead
Mines:
Enter mine and use tinderbox on torch on wall. Take lit torch. Go
forward and light torches on the way. See a shaft with a rope on the left
corner. That must be the rope Harrel borrowed from the Blacksmith. Go down the shaft. The torches are lit down the
shaft.
Go forward as far as possible. Nicholas will see the stabbed body of Harrel and talk with Greer, the man that disappeared and the reason Nicholas was
invited here. He is now a zombie. Save game here! A swordfight ensues. Win the fight and
Greer runs away. Try to pick up Harrel's body. Use the monk's cassock (soutane)
on Harrel. Nicholas enters town and placed Harrel's body in his cellar.
Talk to Harrel:
Look for Harrel's wife, Mary close to the town fence at W or SW of map. Learn that Harrel
was born on St. Patrick's Day - March 17, Lertyan under the Altar of Sign in the Diary.
Go back to the cellar. Prepare Soulgreep potion - 2 Gwynlock, 2 Watersleep, 1 Devil's
Luck and 2 Tear of Stone. Use Soulgreep potion. At the Temple of Sacrifices, go to
the door beside the one murdered by a weapon. Enter the side room. At the Altar
of Path, select wealth. At the Altar of the Sign, select Lertyan, the shepherd
of dreams. At the Altar of Demons, select Dahn-en-nyan. Enter the side door
beside the sun symbol. Talk to Harrel.
Monastery:
Tell Abbot Michael about the watery grave of the monk.
Doctor:
Tell the Doctor about Harrel. He will tell Nicholas about everything tomorrow.
Go to Nicholas house and sleep.
Act
3
Shadow of Past
After several strange
dreams, Nicholas is awakened by banging on the door. Exit and talk to Fabius a
Roman. He must have come in response to the Doctor's letter.
Too Real
recollections
Emma:
Go to the swamp and see Emma with Bonny, Simon's dead dog. Talk to Maude about
insane Emma. She gives the recipe for Mist of recollections potion. Go to the
cellar and prepare the Mist of recollections potion - 3 waterleaf, 1 Gwynlock
and 1 tear of stone. Go back to Emma at the swamp and give her the potion.
Hide and Seek
Find the doctor:
Go to Doctor's house and talk to a rambling Mayor. Maude the herbalist
will not undergo the second potion search for Doctor Baker. The blacksmith does not
know where the doctor is. Talk to Mollins at the Inn. Talk to the guard at main
gate. He let the doctor out.
Use the map to jump to
the mines. Go down the shaft and go forward. Save game here. Fight with
Greer again. This time he's killed. Talk to Doctor Baker. He is seriously hurt
by Zombie poison.
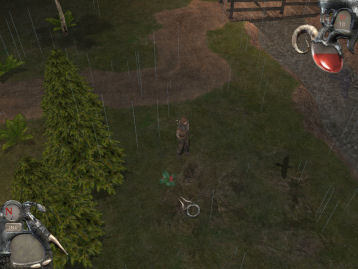
Go back to the main mine exit above. Go to top part of
the mines by clicking on the rope that Harrel used. See picture above.
Go back to the cellar
and prepare Sneeya's Touch potion. Go back to the doctor at the mine and give
him the Sneeya's Touch potion.
Automatically be at
Nicholas' bed. Quickly, ask the doctor his birthday. It is June. Take the doctor's
body. Go to the Temple of Sacrifices by preparing and drinking Soulgreep
potion. You can pick more herbs inside and outside the town walls. Enter
the side room of one mortally by poison. His sign is Talanos and his
path is knowledge. The devil is the soul bearer. Talk to the doctor at the other
room off the hall by the sun wall.
Learn about the devil
and what the Brotherhood did to silence the knowledge of the devil. The devil
was controlled by Yakos. The Doctor
sent information to Rome about what is happening in Cavorn. The passwords are
For so is the will of God, that with well doing.
The reply is ye may put to
silence the ignorance of foolish men. The riddle for the location of the stone
is: Where I stood, autumn had surrendered its reign, but spring still slept. It
slept like the dead in their dreamless sleep, lying all around. And before my
eyes, in the direction where the day falls asleep, in the ground I found what I
sought.
Mystery of the
monastery
Monastery:
Talk to the Abbott and find out that 2 of the brothers are missing.
A small service
for Fabius
Cemetery:
Find and talk to Fabius. The guard he wants is north of the herbalist hut by the
swamp. Pick up a piece of cloth in front of the SaintJohn's crypt
with a face in the front. Take note of Phillip and Helen's plaques and the dates
on the side of the crypt.
Monastery:
Show the Abbot what was found - piece of cloth at the cemetery.
Half of the path
to doom
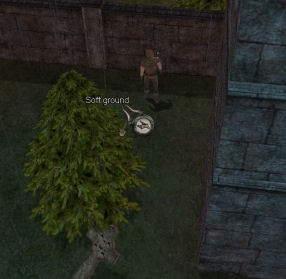
Cemetery:
Read all the epitaphs on the crosses at the cemetery - It slept like the dead in
their dreamless sleep, lying all around. Read Jonathan Winter's epitaph close
to the monastery - Winter by name, fire by heart - Where I
stood, autumn had surrendered its reign. The monastery is north of
Winter's cross. Go left of Winter's cross to go west - direction where the day falls asleep. Use the
shovel on the soft ground close to the wall. Take the stone.
Maud:
Save Game before coming to Maud's house. Maud is dead. A zombie is present
but is not responsible for Maud's demise. She was strangled. A sword fight with the
zombie is done.
Automatically take Maud's body to Nicholas' cellar.
Helen and the Mayor:
Helen comes. The next morning after the interlude, the Mayor is waiting outside Nicholas' house.
Helen goes home. Go to Mayor's house. The Mayor poisoned Nicholas and drowned
Helen.
Act
4
Onset of Darkness
Nicholas decides to go back to the Temple of
Sacrifices to bring Helen back in spite of Clarice's advice. Go to the cellar
and see that someone had removed the bodies. Prepare several Sneeya's potions. If there is a need for herbs,
prepare several Sneeya's breath potions first before going out to search for
more herbs. Drop some inventories that are not needed such as buckets, drowsy
eye potion, invitation,
fishing rod and brooch. The best place to collect herbs is by monastery and by
the funeral pyre.
Townspeople:
Go to the blacksmith and see that he has killed a zombie. He had fun. Save
game here. Go to the inn and fight another zombie to save the innkeeper.
Check Nicholas health points to see if he needs a Sneeya's breathe potion. Go to bridge
west of the Doctors house and see Landlord Limsey lying beside a tree.
Give him a Sneeya's breath potion. Go to his house to see if the road is safe. Save
game here. Fight another zombie. Go back to the Landlord and tell him the way
is now clear.
My dead love
Helen:
Go to the west side of town where the river bends. Find Helen's body. Nicholas
takes her home. Prepare the Soulgreep potion. Use the Soulgreep potion to go to the Temple of Sacrifices.
Enter the side room right of those who dies in water. Helen's path is love and her
sign is Rephen. Call the life giver devil - Marghet-en-dryat. Nicholas did the
ritual correctly but Helen is still dead.
One of the two
Monastery:
Talk to the Abbott about entering the crypt.
Crypt:
Enter and talk to Fabius who is behind a locked gate. Go forward to a large
room, turn right and face
an opening with 2 tapestries on its side. There's a locked door beyond the
tapestries. Go back to big room and enter the side hall. Face a cell,
left again and see a hallway with cells on the right side.
Save game here. Be sure
that Nicholas' health level is good. Enter the left chamber with a zombie. Kill
the zombie. Check the dead zombie to get an unknown object 1. There is a
water basin at top left.
Exit the room through
the doorway you entered on at right. Enter the next right side cell. Pick up
the Sneeya's breath potion from the floor. Use it on Nicholas. Go back out to the hallway and pick
up the extinguished torch on wall at the end of the hallway. See a blocked door
at end of the intersecting hallway. Go left and then right at the end of the hallway.
Go across the chasm.
1. The cell on the right
has a bucket. Pick it up if you do not have 2 in inventory. The chest has a nice dagger.
The room on the left has levers on the wall. One is missing a lever. Use the extinguished torch on the hole to use
as the lever. Pull all the levers down to open all the cell doors. It closes the
main exit to the chasm.
2. Go to the second cell
on the right and see a swollen part in the mattress. Use the dagger on mattress
and pick up unknown object 2.
3. The third room
on the left has a bucket if you do not have 2 in inventory.
4. The fourth cell on
the right has a zombie. Talk to zombie. He wants liberation in exchange for information. It states to not overlook the library that has important
information. The secret switch is at next room. If you do not want to fight, give it liberation. If no
liberation, he will fight with you.
Go back to the room with
levers. Pull up all the levers to open the main door to the chasm.
Cross chasm. Turn right
and forward to where the dead zombie is located. Fill the buckets with water
from the water basin.
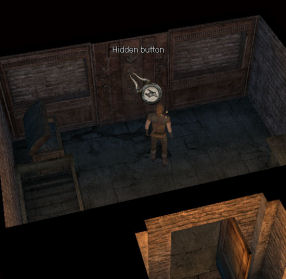
Go back to the hallway you came on and turn right to the blocked door at end of the hallway. Enter the room next to this
blocked door. Press the hidden bottom at the center of the decorated wall.
Library:
Read the scroll at bottom of the standing bookcase on the right.
There must be 3 people for journeys to open the demon's prison.
.... decide how to lay the paving stones correctly. Only one who knows all the
elements of earthy forces, the deadly sins and the number of the beast should be
allowed in. ...prove their identity in order to gain access to the demon. One of
the keys from the northern gate must be kept here in this room.
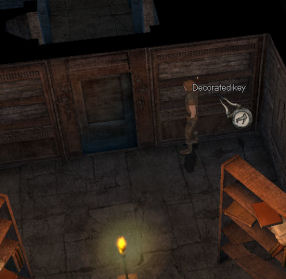
Go to the bookcase right
of the opposite door you entered through and take the decorated key.
Go back to the locked
door beyond the doorway with tapestry on both sides.
Act 5
Face to Face
Go forward across the
bridge and meet the Mayor. He jumps to his death. Go forward and turn right. At
the end see a bridge that is not connected to the other side.
Turn back and go right
to a chamber with numbered tiles on the floor. There are 4 side rooms (2 on each
side). Place the unidentified objects on walls of the first room at right and left side.
These activate the numbered tiles.
Numbered Tiles:
The scroll at the library stated -
There must be 3 people for journeys to open the demon's prison.
.... decide how to lay the paving stones correctly. Only one who knows all the
elements of earthy forces, the deadly sins and the number of the beast should be
allowed in. ...prove their identity in order to gain access to the demon. One of
the keys from the northern gate must be kept here in this room.
Stand on tile 4 and drop
a bucket filled with water -
elements of earthy forces.
Stand on tile 7 and drop
bucket filled with water -
the deadly sins.
Stand on tile 6 -
number of the beast.
Nicholas will say that
it is right. Go to the half bridge
and see that it is crossable. Save Game here.
Decisions:
Go forward and see Fabius about to take in the essence (smoke) of the
devil in the cage.
You now have a decision
to make to get one of 3 different endings.
1. Agree with Fabius.
2. Do not agree with
Fabius and fight to kill him. Helen arrives.
a. Decide to stay
with (click on) Helen.
b. Stab Helen.
Based on the decision, listen to what
happened to the world, Nicholas, Helen, Emily, Innkeeper, Abbott and his 2 monks
and the town.
This
document may not be distributed without express written permission of the author
and the content may not be altered in any way.
For
Questions or Comments on this Walkthrough,
Please write to:
MaGtRo
Copyright © 4/2006
MaGtRo
 GameBoomers
Walkthroughs and Solutions
GameBoomers
Walkthroughs and Solutions