 |
 |
 |
FACE NOIR
by Mad Orange
Walkthrough by MaGtRo July 2013
Gameplay: This is a third person point and click game.
At start of the game; see the settings frame. Here you can select display and sound settings. The display has choice for display device, colors, antialiasing and the aspect ratio. Sound device can be chosen at sound settings.
The main menu has continue, start, load, options, credits and exit. At bottom left, choice of language can be selected: English, Italiano and Russian.
Options have 3D or 2D inventory selection; subtitles and shadows for video and volumes for main, music, environment and voices for Audio. The keyboard controls are shown.
Under options, I recommend that you use Detective (3D) to get clues in the game as well as other features.
In 2D; the inventory is at top of the screen. Right click at item to see the eye icon. Click again to get a description of that item. At end of the bar see an arrow that links to in game menu. In game menu has: resume, save, load, options and exit.
In 3D, space bar opens and closes the inventory.
ESC key is for pause/menu.
F1 or the ?-question mark in 2D at end of inventory bar shows the hotspots in the screen.
Saved games can be overwritten. There are 23 saved game slots (including the auto-save).
PART 1
1934: At an airport hangar a plane takes off. Jack Del Nero and Greta Reed exit from the building. Jack runs to stop the plane. The plane takes off.
Jack is held by gunpoint and is shot by a man.
Less than 24 hours before in Jack's office; Jack was hired by Harvey Webber to find his stepdaughter Susan Webber. Jack is to get a photograph of Susan to prove that the 20 yr old aspiring actress is having an affair with an older man.
Last Heaven Hotel:
Jack traced Susan at Last Heaven Hotel. He parks the car in front of the Athena theatre.
Inventory has: investigator license, cigarette and lighter, lock-picking tool, camera, money (25 bucks) and car keys.
Look around. Check the car and the poster right of the marquee. It is a poster of Vivian Leight; an actress that Susan admires. Check Fat Tommy's laundry sign by the alley and the Last Heaven Hotel.
Find Susan: Enter the hotel and look around.
Right click to talk to the desk clerk. Learn how the hotel got its name. There is no Susan Webber here.
Give the desk clerk some money.
If you haven't yet, exit and check the poster right of the theatre marquee - Vivian Leight.
Go back inside and talk to the reception clerk again. Select I have a question for you.
Deduction: See a new deduction screen of evidence gathered.
Based on info already gathered in the game; select the information that will lead to a deduction.
Select Susan's passion (Vivian Leight) and The hotel guests (guests don't leave real names in register).
Learn that a young blonde is at room 313 at third floor.
Climb the stairs at right. Read the newspaper on the table. Look around and see panel on the floor by room 312.
Check room 313. Right click to eavesdrop and hear Susan and her teddy bear - Howard.
Find which window is Susan's room: Exit the hotel. Enter the side alley. See a gate that blocks the alley.
Go back inside the hotel. Climb back up to third floor. At hallway, check the panel by the floor left of room 312.
Game manipulation using mouse button: See an interact screen. Follow the instructions.
Left click-hold the mouse. Then while holding the left mouse button; continuously click the right mouse button until the panel gives.
Then move the left mouse button to the right to open the panel.
Turn the thermostat knob of room 313 to the max - left click-hold-up.
Go through alley gate: Go back to the alley left of hotel. Hear Susan complain about the heat. She opens the window of her room at bottom of screen.
Lock pick puzzle: Use the lock pick tool on the gate.
See the lock pick puzzle. Move a pick until a sound is heard.
There is a skip button at bottom right.
Move the pick to open the lock. Left click-hold-move right, hear a click, left click-hold-move left, hear a click, left click-hold-move right and hear a click. The lock is opened.
|
|
|
|
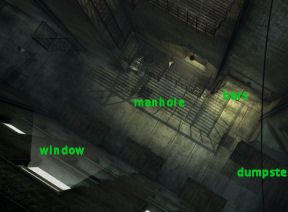
Climb up the theatre balcony: Look around.
Examine the dumpster at right end of the alley. It has wheels to move it and a brake to stop it from rolling downhill.
See that there is a manhole under the balconies of the theatre building. Right click-take a metal bar at right end of the balcony. Use the metal bar on the manhole under the balcony.
Push the dumpster after automatically removing the brake. Climb up the moved dumpster that is now under the balcony.
Check the open window at bottom of screen. Jack sees Susan and Howard.
Use the camera on the open window of Susan's room. Move the crosshair on the kissing couple's faces. Take the picture.
Fix the phone: Go down the ladder. Go to Jack's car parked in front of the theatre. The car is out of gas.
Go back inside the hotel. Talk to the desk clerk. Learn that the phone is out of order - no dial tone.
Take a candy from the bowl on the table right of the reception desk.
Go outside. Look close at the telephone control panel close to the corner of the hotel and the alley.
See that the wire is cut. Ah - the phone technician wants more money. Use the candy on the cut wire.
Go back inside and tell the desk clerk that the phone is working now.
Jack takes a taxi to Essex St - Greta's Red Tulip Bar.
Red Tulip Bar:
Look around outside the bar. Enter the bar.
Look around inside the bar. Check the Marsetti's Cats poster. Greta Reed's is one of the Cats.
Smiley: Talk to Smiley (Peter Lowerstein) completely. Learn that he swindles and makes fake identifications as a living.
Learn that he is waiting for an important call at midnight from an important person. Learn that Jack was once a policeman and was kicked off the force.
Newspaper: Read the newspaper that is on the table at left. Read about the economic crises, mayoral elections and the heavy rains that knocked out telephone lines.
Greta: Talk to Greta. She wants her camera back. Greta also advises Jack to find a dark place to remove the film and to rewind manually.
Camera: Exit the bar and use the camera on the alley right of the poster and mailbox. Jack automatically enters the alley and exits after he gets the film roll from the camera.
Greta: Go back inside the bar and give the camera to Greta. Jack wants whiskey but Greta wants Jack to pay what he owes first.
Talk to Greta. Greta is upset that the bar is empty and the only customer is Smiley.
Get rid of Smiley: Talk to Smiley (after reading the newspaper). Smiley, you'd better get out of here...
Deduction: At the deduction screen; select Smiley's appointment and Heavy rain.
Jack talks Smiley into leaving and going to his contact.
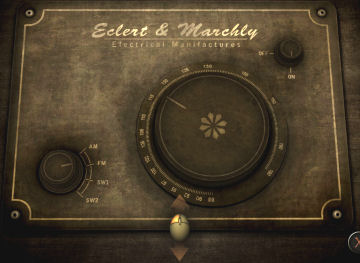
Cheer up Greta: Check the radio by the neon sign. It might loosen up Greta.
Use the radio. Click-hold-move the switch at top right to on position. Then click-hold-move the knob at bottom left to FM.
Click-hold-move the dial to ~ 117 and music is heard clearly.
Talk to Greta about everything. Then ask for a drink and an exception. Jack gets drunk.
Slovanski Apartments - A tip about MacLeane:
At home-office, Jack receives a call about Sean MacLeane. MacLeane is in NY at Melville Port. Jack wants to take his gun.
Find the light switch: Use the F1 key or the question mark at end of the inventory bar to see where the hot spots are at left side of screen. Click the second from right to get light at Jack's home office.
Look around and check everything. Pick up the letter from the floor by the door. Jack reads the overdue rent letter from Vladimir Alexander Slovanski.
Find the gun: Raise the folding bed. Enter the utility room blocked by the bed.
Look around. Check the photo lab on the table and learn that the last red light bulb is broken. Jack has to get another one.
Check the box - gun holster above the mop and pail.
Open the gun box: Jack doesn't remember the combination. Examine Jack's investigator license in inventory. See that the certificate license # is 8172.
Look close at the gun box and enter 8172. Take the gun from opened box.
Go right of the developing table and check the shelves. Take the 3 bullets from the box. The gun is loaded now.
Melville Port:
Exit the office. Look around the lobby.
Read the newspaper on the table. Learn about the storm, Mayor Weston's confidence in winning the election and alcohol abuse. Exit the building.
Look around the alley. The exit to the left goes to the Red Tulip bar area. Exit at top to get to Essex St. Look around.
Cab: Talk to the cabdriver. The Chinese cabdriver is on break for 2-3 hours.
Go back to Jack's office. Use the telephone and select taxi company. Binkle cab says that the Mexican cabdriver assigned to this area has disappeared.
Go back down to the Chinese cabdriver. Talk to him: The company says that there are no drivers in this area.
Deduction: Select Something smell fishy from dialogue to get deduction screen.
Select: The cab driver on a break and The missing cab driver. Hahahaha. Finally, Jack is on the way.
Go to Melville Port: Jack talked the cab driver to wait for him. See another car parked here. Go right and look around.
Telephone: Check the telephone at the corner of the building. Jack sees fresh blood on the ground.
Use the phone to try to call the police. Learn that the phone was cut - no dial tone.
Get light source: Go right to the port. It's dark here.
Open the panel at right corner. Pull to the right to open the cabinet. Click-hold-left to push the lever. It did not work.
Take the flashlight that is on the cabinet door. Learn that the flashlight does not have any batteries.
Get batteries: Go back to the left. Continue to the left of the car and to the crates-boxes. Check the crates to get a piece of pipe.
Check the buoy and note that it runs on batteries.
Use the pipe on the can of pitch under the window and right of the phone to get pipe full of pitch.
Use the pipe full of pitch on the wooden stick on the ground at right side.
Use the improvised stick with hook on the buoy. Take the batteries. Automatically, the batteries are placed in the flashlight.
Blood trail: Go back to the port and use the flashlight on the dark area.
Watch as Jack looks around. Jack finds Sean MacLeane's dead body. Jack checks the body to see a flask of rye whiskey and fake documents under the name John Ford. Jack is attacked by a big man. Jack shoots and tries to follow the man when he gets arrested.
Police department in Hoboken:
Interrogation: Lt. Leroy Malone interrogates Jack. Jack is accused of murder. Learn that Sean was Jack's ex-partner when they were both policemen in the force. Jack was kicked out because of the Valenti scandal.
Answer with the dialogue (top-down): 2, 2, 3, 4, 3, 4, 2, 3, 1, 1, 1, 2.
Learn that Sean was the one that testified that Jack was involved with Valenti. Malone leaves.
Look around the interrogation room and then hear through the door that someone paid Jack's bail.
Open the personal property cabinet left of the door. Pick up the sack of inventory. See that Sean's flask of rye whiskey is included.
Knock on door to exit.
Find out who put up Jack's bail: Look around. See a plaque left of stairs given to Malone by Mayor Weston. Check the signatories at the bottom.
Talk to the service officer at the counter about the bail. Bail was paid by Sgt. Victoria Diaz.
Climb the stairs to the left. Overhear Malone scolding Victoria. Malone threatens Jack and promises that he will be back in jail in 24 hours.
Learn about Victoria's career. Sean and Jack were ordered to train the Mexican rookie, Victoria.
Sgt. Victoria Diaz: Talk to Victoria completely in her office. Learn that Malone has been there for 3 years and that he was a former Fed.
Learn that Sean was living in Los Angeles and was involved in some dirty business there.
Lobby: Exit the office and look around the area.
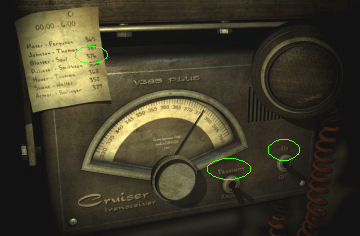
Check the Shift Police Officer board on the wall behind the stairs. Click-see that Glasser-Soul was assigned to Melville Port and their radio frequency is 376.
Taxi driver: Go down the stairs and see the taxi driver - Chon Jia Shi Yuan. Talk to Chon.
Learn that a man with a gun was checking his cab. The man was muttering the name MacLeane. Chon will not say more because he doesn't trust Jack. Chon's cab was impounded.
Go back upstairs to Victoria. Ask Victoria about Chinese cab driver.
Go back down to Chon and talk to him about an offer.
Deduction: Select Chon won't talk and Chon the whiner. Chon wants to see his cab first before telling Jack anything else.
Learn about the taxi's license plate number. Chon only remembers C and I.
Get Chon's taxi: Talk to the service officer at the counter about seized cab. Learn that a form needs to be filled out (in this case of seizure because of investigation form B26).
Then that form needs to be signed out by the lead detective assigned to that case. The signed form is to be given to the service officer at the the counter.
License plate number: Learn that the license plate number can be found in one of documents behind the counter.
Ask the service officer to talk to Malone. He leaves. Immediately enter the counter area and click on counter to look at the seized car list.
Click on the RP 834 CI - Officer Glasser - File 15684. The officer comes back.
If you haven't yet, check the plaque by Chon and see that there are 3 signatures at bottom. Paul Sanders is the Head Detective.
Malone: Enter the door right of stairs to talk to Malone.
Get the form: Go upstairs and check the form stand left of the stairs.
Select from the shown list: B26 form and signed by Paul Sanders (as seen on plaque) to get a seized car release form.
Go back to the service officer and give him the release form. Learn that Sanders died of heart attack.
Give money to the service officer. He will give the order to release the cab.
Chon: Talk to Chon. Learn only that the guy with the gun is looking at the cab and smokes a strong smelling cigarette.
Melville Port:
Chon drives Jack back to Melville port. Jack wants to find out what the bad guy was looking for.
Go right and overhear the policeman answer Malone through the radio about not letting anyone through there. The policeman blocks the access to the port.
Get in the police car: Check the police car at middle of screen. It is locked.
Use the lock pick tool on the locked police car. Move the lock pick until you hear a click. Lower the environment volume in Options to help.
Radio of police car: Take note that Glasser-Soul is frequency 376. Turn the knob to 376.
Flip the right switch to on. Flip the switch to transmit - up.
Use all the dialogue on the policeman.
Deduction: Select the police radio and the indifference of the police.
The policeman uses the radio to talk to the Binkle Taxi company.
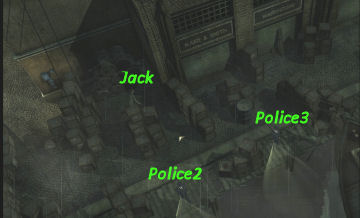
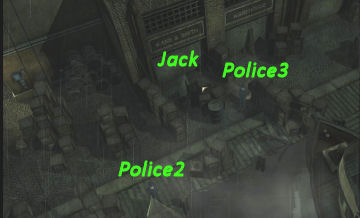
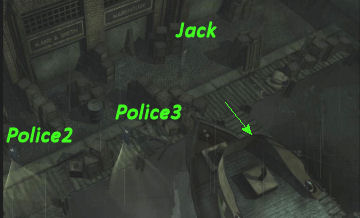
Sneak through port: See Jack sneak to the port. There are 3 policeman standing guard.
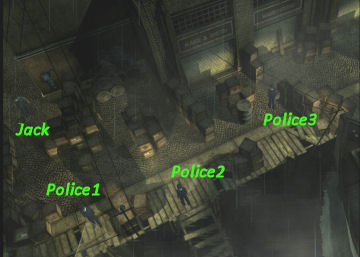
Use the power cabinet right of Jack. Flip the switch to the right to turn off the light. Jack automatically moves.
The left policeman leaves to call Glasser. Save here.
Wait until the second-middle policeman is near the water's edge; then click on-hide behind the crates above him. Save here.
Wait until the second-middle policeman is still at water's edge and the third-right policeman is at his topmost position facing the exit; then immediately go right behind the crate.
When the third policeman is by the water's edge or going there; immediately exit to the right.
Sean's body:
Go to the dock just right of the ship (right of the third policeman). Jack talks to dead Sean about what happened during the Valenti scandal.
Examine Sean. Get 50 bucks and a dord.
Jack remembers when Sean told him about the dord-Irish horn given by his grandfather. Sean punched a priest that molested a 6 year old girl. It reminded Sean of his missing sister. The dords were given to Sean and his sister when they left Dublin. There should be another dord somewhere.
Deduction: Select Sean's good luck charm and follow the lord.
Check what is between the planks right of Jack. It is piece of metal that is stuck.
Get the metal piece: Go back to the dock and to extreme right of the pier and then exit down to the shipyard.
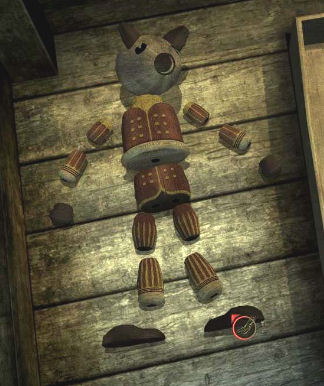
Go to the crates at end of dock at left. One of the crates is opened. See a doll and parts of doll. Take the piece of wire sticking out of the left doll.
Go back to Sean's body. Use the wire from the doll on the metal piece between the planks.
Get a bloody metal piece with the word "Faith" on it. It might have been used on Sean or Sean used it.
Find the other dord:
Shipyard door: Go back to the right dock-shipyard where the doll and wire were seen.
Check the door and see a wheel lock. It is missing one of the 3 Christian Virtues. Faith; Hope and Charity are on the wheel.
Use the Faith metal piece on the empty slot of the wheel.
The other dord: Inside the shipyard building, see that the place is run down. Look around.
Use the dord on any place inside the shipyard. Jack hears another dord.
Jack finds a little girl holding Sean's other dord. The little girl is terrified.
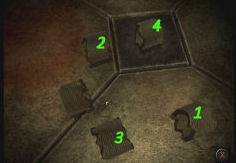
Calm the young girl: Exit the shipyard and go back to the doll in the open crate at end of the dock.
Put the doll together: Put the pieces on the right to the parts on the left. The pattern is on the box.
Left click to pick up and hold. While holding the piece, right click to turn.
Drop the piece with the cursor over the orange dot located on the correct position.
Check the angle of the pieces in the drawing. Jack will say when it is correctly done.
Use the wire to hold the pieces together.
Go back to the little girl inside the shipyard building. The little girl is inside the big square crate at middle of the screen. Give the mouse doll to the little girl.
Get to the other exit door:
Look at the blue door at right side of the screen. It is another exit door to the port entrance. The bridge to get there has collapsed.
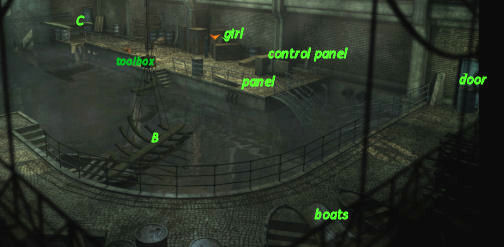
Check the rectangular control panel at right end of the walkway. It is used to control the pulleys hooked on the roof.
Use the control panel. It is not working.
Go to the red toolbox at middle of the walkway. Get a valve.
Check the panel at bottom part of the stand perpendicular to the control panel stand. Use the panel to learn that there is not enough light.
Use the flashlight on the panel at bottom of the left stand.
Use the car keys to remove the 4 screws of the grill.
Jack automatically placed the valve on the panel.
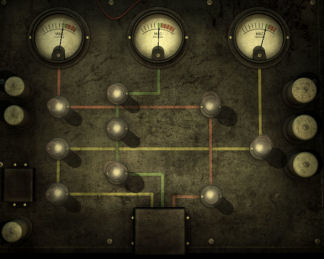
Power valves: Arrange the valves on the holes so that all 3 gauges are on the green area.
There are 2 sizes of valves: small and large.
The left gauge with pink lines takes in order from top to bottom: small, large and small valves.
The middle gauge with green line takes in order from top to bottom: small, small and large valves.
The right gauge with yellow line takes in order top to bottom: large, small and small valves.
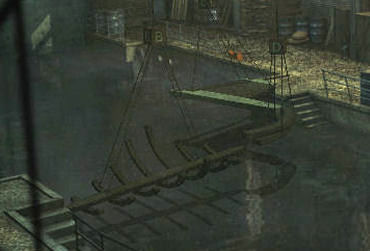
Control panel: Go to the control panel at right.
Move the B and the C pulleys to the position shown below. Use the up-down arrows, left-right arrows and the turn arrow.
When done correctly, the control panel disappears from close up view and Jack will say it is correct.
Use the bridge to automatically pick up the little girl and cross the makeshift bridge.
Blue door: Go to the blue door and see that a heavy drum blocks the door.
Boats: Go to bottom right and see 3 boats on the walkway. Use the boats and Jack will try to take a nail.
Pull the third from top darker colored nail. Left click-hold and simultaneously click continuously on the right mouse button. This pulls the nail.
Drum: Use the nail on the drum blocking the blue door.
Find a safe place:
Escape: Exit and Jack talks to Chon. See that the girl is with them in the taxi. They arrive at Red Tulip.
Greta: Knock on the Red Tulip door. Do this several times until Greta talks.
Greta lets Jack and the girl in. Jack convinces Greta to take care of the girl. Get Greta's handkerchief in inventory.
Sean's activity:
As Sean several hours ago: Hear Sean talk to the little girl about a boat to catch. See Sean at the Melville port. The girl is now carried piggy back by Sean.
Inventory has: gun with silencer, 50 bucks, rye whiskey in a flask, a napkin with Sainte Marie written on it and John Ford's identity document.
Talk to the harbormaster at window at right side of the building. After the talk, show the identity document to the harbormaster.
Answer Sainte Marie to the question about boat. Sean said that the little girl's name is Emily.
Back to Jack: Jack is woken up by Greta. Greta agrees to keep Chon here at the bar.
Slovanski Apartments: Exit the bar and go through the alley at right.
Enter the Slovanski apartments. Slovanski stops him and learn that he knows what happened to Jack. He wants Jack's back rent.
Give money (from Sean) to Slovanski. Have 5 bucks left.
Talk to Slovanski to learn about Detective Ballard of state police. The detective went inside Jack's apartment alone. Ballard is tall, dark skinned and sound like a foreigner. Ballard was unhappy when he left.
Go to the office-apartment. Pull down the folding bed and Jack sleeps.
As Sean (continued): See Sean smoking on the deck of Saint Marie. He says that they are going to Canada and away from Prof. Zindler. A Turk corners Sean. Sean was shot and the Turk falls into the water. A wounded Sean takes Emily and looks for a place to hide her.
Go right to the dock and then right again to the shipyard.
Virtues lock: Look close at the 3 Virtues wheel lock of the door. Pull the Faith metal piece.
Left click-hold and at the same time right click continuously. Use the Faith metal piece on the padlock.
Sean told Emily that they will play hide and seek. Sean gives her one of his dords. Emily will answer with her dord when she hears the whistle of the other dord.
Sean calls the police and then Jack. Sean goes to the dock to die by the water.
Check the fake detective:
Back to Jack: Jack wakes up and wonders why he is getting an explanation of the events in his dreams. He wants to talk to Slovanski about the fake detective.
Slovanski: Check the reception desk and read the note that says Slovanski is on 6th floor fixing the boiler.
Go upstairs and then to right corridor to see Slovanski. Try to talk to him. He's busy.
Go back to the left and see a radiator. Use the pipe that connects to the radiator. Jack kicks the pipe and steam comes out.
Go back to Slovanski and ask - I have a question.
Deduction: Select Inspector Ballard and The hitman with the scar. Learn that the fake detective has a long scar on left cheek.
Jack wants to talk with Victoria and check the dock. Exit the apartment.
Red Tulip: Go to left alley and see Chon's cab drive away. Enter the bar and talk to Greta about the girl, Chon and Smiley. Learn that Smiley wants to marry Greta.
Chon: Go to the alley right of bar and then go left or go to top screen outside the bar to see Chon's cab on main Essex St. Talk to Chon to get to Police station in Hoboken.
Police Station in Hoboken:
Enter the station. Go upstairs and knock on Victoria's door. No answer.
Go back down and talk to the officer at the counter. Malone sent Diaz out of town. Talk to Malone.
Malone: Go to Malone's office through the door right of stairs. Ask about Diaz and tell him about the visitor. Learn that Sean was connected with the Black Lily crime syndicate in LA.
Jack wants to contact Moore about the crime syndicate.
Exit the station and talk to Chon. Go to Essex St, Lower East side.
Moore: Go through the alley and to Jack's office.
Take the phonebook from the box on the third shelf from top left of door.
Click on M; then Moore, Violetta. The phone number is 555-4897.
Use the telephone and ask the operator to dial a number.
Talk to Moore about everything. Learn about Venanzi and Samuel Cutter. Moore doesn't know about the Turk and Sean.
Jack wants to check Samuel Cutter's police record.
Check Cutter's record:
Go back to the police station using Chon's taxi.
Archives: Go down the stairs. See a card reader left of door and a light above the door.
Go back upstairs and talk to the service officer at the counter about files. Only police officers can access the archives using a special card.
Get card: Go upstairs to Victoria's locked door.
Use the lock pick kit on the door.
 |
 |
 |
 |
Enter and use the flashlight on the desk. Jack checks the drawer of the desk and see a combination lock.
Drawer combination lock: Move the 3 dots and note that they cycle the colors.
Enter the colors of the Mexican flag: green, white and red.
Check the ferry flyer from Manhattan to Glen Cove. Move the flyer and automatically take the archives card.
Exit the room.
Archives: Go down to the basement. Use the card on the card reader left of door.
Look around. Check the gadget - stand left of the fire extinguisher.
Use the gadget. Enter: SAMUEL as name on the left. Move the slider below the entry panel from name to surname. Then enter CUTTER for surname. Press the lens button at right. The file # is 6120057.
Venanzi and Sean don't have any file here.
Cutter's file: Use 612 shelves at left. Automatically get Samuel Cutter's file.
Read the file. Move cursor at right side of folder to get the turn page arrow.
Malone was the one responsible for the arrest of Cutter. Patrick Olsen; a member of Black Lily a name mentioned by Victoria is in the report.
Patrick Olsen: Go back to the Police Profile Searcher. Enter Patrick Olsen to get number 6088090.
Use the 608 second on right sign-aisle. Get Olsen's file. Read the file.
Olsen is a gardener. He was arrested for the bombing of Rick's Cafe Nov. 5, 1933.
Newspaper: Go down to the shelves at end of hall and see the archived New York Voice newspapers.
Use the newspaper to look for the edition: 1933, November and 05.
Read the newspaper article. August Zindler is the same name in the dream. Zindler is an archeology professor at Civic Museum.
Exit the station and go to the museum in Chon's cab.
The Civic Museum, Central Park:
Jack says that the museum is closed due to renovation and economic situation.
Go around the corner at left to be in an alley left side of the museum. Look around.
Check the red door and see that it is open. Someone shot the lock. Enter the museum and look around.
Crates: Check the crate close to the door at left side wall. Use flashlight to see.
The label states that the item in crate came from Samarra, Iraq and was moved from room 13.
Map: Check the Persian map on the wall across the hall. It is the professor's expertise.
Click on Samarra. Jack deduces that room 13 is where the professor's office should be.
Look for room 13: Use the stairs-entryway left of the map to be upstairs.
Check the map located at bottom right close to the railing.
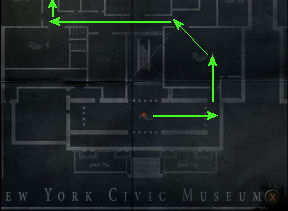
See a close up of the museum map. Jack is the red dot. Click on the map to move him through the museum and get to room 13.
Go right to room 1. Then left to the long hallway and up outside room 5.
Go right on the hallway and up-left to the stairs at top of map.
Go right and around to room 13 at left side of the map.
 |
 |
 |
Room 13: Look around. Enter the small door left of the Ziggurat reproduction on left wall.
Prof. Zindler's office: See Zindler's body. He was shot on the forehead; maybe 7 hours ago.
Check the body and Jack comments about Zindler's death in the newspaper.
Look around. See that there are books missing on middle bookshelves. The desk has spiral drawings that was not done by an adult. The armchair is slept in by a small person.
Dictaphone: Check the pieces of Dictaphone cylinder right of the body.
Put the Dictaphone cylinder together: Left click-hold the piece and right click at the same time to turn it. Drop them when the cursor is on the orange dot.
Use the blood and the notches as guides. Jack will say when it is correct.
Glue them together by using the lighter on the wax cylinder-Dictaphone.
Use the Dictaphone cylinder on the Dictaphone machine on the table at right.
Turn the machine on by using the switch at top left of the loudspeaker.
Hear a French woman's voice. She is Michelle Nicholas from the Congregation of Five. She thanks the professor for taking the girl from a place that is unpronounceable. Someone will pick them up and take them to a safe house.
Exit the museum and go back to Chon's cab.
Police Station in Hoboken:
Enter the station and downstairs to the archives. Use Victoria's punch card on the card reader at left.
Use the Police Profile Searcher. Enter Michelle Nicholas to get file #6070121.
Use aisle 607. Read Michelle's file. The police were tailing Michelle. Malone requested the stakeout. She was last seen 1933 Nov 5th; the day Zindler was reported killed. She resides at Slovanski's apartment.
Exit the police station and use Chon's cab.
Slovanski Apartments:
Go to Slovanski Apartments at Essex St. Talk to Slovanski about Michelle. Her apartment is #607.
#607: Go upstairs. Go to either hallway and see room 607. Knock on door and no one answers.
Use the lock pick tool on door.
1 2 3 4 5 Enter the room and see a body under the sheets. Slovanski arrives and points a gun at Jack.
Learn that like Michelle, he works for the Congregation of 5. Michelle is the body under the sheet. Black Lily got to her first. Black Lily and the Congregation of 5 both want the same thing - the girl. Slovanski just wants to verify that Jack has the girl and will take care of her until Michelle's replacement arrives tomorrow.
Read the writing on the wall - the way to the light. Jack doesn't want to disturb the body.
Slovanski: Exit and go downstairs. Talk to Slovanski about the Congregation of Five. Learn about Slovanski's father who is the member of the Congregation and is a decoder.
Melville Port:
Go to Chon's cab and go to the port.
Harbormaster: Talk to the harbormaster completely. Learn that the harbormaster loves Chilean grog. Learn about Svenson and Cruises to Freedom. He won't verify about the girl or Ford.
Get grog: Go to the trash can around the corner at left and see empty bottles of grog. Get a broken piece with the label of the Chilean grog bottle.
Slovanski apartments: Use Chon's cab to go to Essex St. Go to Slovanski's.
Go upstairs and see the steam coming out of the pipe of the radiator that Jack kicked earlier.
Use the piece of glass with label on the steam to get a label of Grog de Ricardo Blanco.
Red Tulip bar: Exit the apartments and go to left alley. Enter the bar.
Talk to Greta about bottle of grog. She doesn't know but Jack can check the shelf close to the mill.
Make a fake grog: Go to the right end of the bar and use the shelf left of the windmill. The 3 shelves do not have any that looks like grog.
Okay, let's make a fake one. Use the label on the bottles on the shelves left of the windmill to get fake grog (gin).
Harbormaster: Go back to the port.
Give the fake grog to the harbormaster. Talk to the harbormaster about who boarded tonight.
Learn that Sean and the girl boarded the Sainte Marie de la Mer. Another man was there. He looked elegant and stood smoking by the lamppost by the sacks.
Mystery man: Go to the lamppost with the sacks close to the water.
Use the sacks and see cigarette butts. Look and use the cigarette butts to learn that it is hashish.
Deduction: Select The smoking guy with a gun and Smell of hashish. So they are the same man.
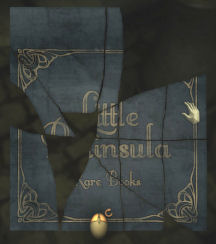
Matchbox: Check and use the matchbox above the butts. Automatically collect the pieces of the matchbox. Put together the matchbox pieces.
Find the business on the matchbox: Go back to Jack's apartment.
Use the phonebook that's in the box on the shelf left of door. Since the matchbox says Rare Books; select Book Shops. Then on the new page, click on The Little Peninsula at upper East side at 65th St.
Exit the apartment and go to Chon's cab.
Little Peninsula:
Go to 65th St, Upper East Side.
Check the book store on the left side of the street. It is closed. Look around.
Go to street-alley at right side of store. See the back of the book store.
Warehouse: Check the crates left of door. Some of them have booze transport stamps.
See a call box right of the door. Use the call box and select warehouse (since you are there).
Talk to the woman that answered the call. They are doing inventory right now.
Mailbox: Check the mailbox on the right wall. Jack wants to check their mail.
Use the private investigator license on the mailbox. Take the phone company bill.
See that the receiver is Edward Marsetti, proprietor of Little Peninsula.
Deduction: Use the telephone bill to recall where Jack heard that name.
Select Greta's tour and telephone bill from Little Peninsula.
Close the mailbox' door.
Red Tulip bar:
Use the cab to go back to Greta's place.
Enter the bar and talk to Greta about Edward Marsetti and Little Peninsula.
Learn that Marsetti owns a lot of the joints that Greta danced in and that Marsetti paid for the dance group-Cats tour in France.
Learn also that Smiley works for Marsetti now and might know the password to get at the book store warehouse.
Ask about Smiley and how to find him - I have a favor to ask you.
Deduction: Select Smiley's crush and Smiley's job.
Plan: Jack formulates a plan for Greta to get Smiley at the bar and then call Jack at his office.
Office: Answer the phone.
Bar: Go to the bar. Talk to Smiley completely. Smiley is not spilling any info.
Another plan: Use Sean's rye whiskey flask on the glass Smiley holds on his right hand.
Jack pours whiskey on the glass when Smiley turns around.
Smiley: Search-use Smiley. Jack finds a piece of paper with the words written: The Art of Chess by Humphrey De Forest (sounds like a password).
Little Peninsula:
Go to 65th St, Upper East Side. Go to the right side alley. Use the call box right of door. Press the button of the warehouse.
Answer: I reserved a book; The Art of Chess by Humphrey De Forest.
Bar: Look around. Talk to the bartender. She doesn't know where Marsetti is.
Tables: Go left and Jack sees Howard, the man in the room with Susan Webber.
Talk to Howard Paul, film producer. Howard gives Jack a calling card. Learn that Marsetti is still in his office.
Bartender: Go back to the bar and talk to the bartender. Learn that the bartender worked there to meet movie people.
Give her Howard's card. After taking Howard's identity; Jack gets direction to Marsetti's office.
Private rooms: Enter the alcove left of the bar.
Enter the first room at right and see that room is set up with a bed and explicit erotic pictures on the wall.
Oscar the bodyguard: Talk to the man standing by the office door.
Jack recognizes the goon as the one that punched him at the port. Marsetti calls out to let Jack through.
Marsetti: Talk to Marsetti in his office. Learn about Marsetti and his wanting to get into the movie business but Howard wants to do everything himself.
Marsetti liked Jack and gives his permission to come back anytime - with no need of password - just his last name - Riley.
Jack leaves the office. He wants to check Marsetti's office without him being there.
Develop the film taken of Susan and Howard:
Red bulb: Enter the first room by the stairs.
Check the red bulb (which Jack needs) at the corner of the bench. Look close at bulb and see that there is a glass case around it.
Remove the glass case by pressing the buttons at the base so that all buttons are in recessed position.
From left to right, press (just one solution): 1 4 5 3 2 5. The glass is removed.
Use the handkerchief on bulb. Jack gets the red bulb.
Jack's office: Exit bar and go back to Jack's office.
Enter the dark room. Replace the light bulb over the table with the red bulb.
Click the film on the trays. Jack automatically develops the film to get Howard and Susan's picture.
Little Peninsula:
Go to 65th St. Upper East Side. Go to the right side alley. Use the call box to let Riley in.
Howard: Go left to the tables and talk to Howard about Marsetti's offer of working with him.
Show Howard the incriminating photo with Susan. Jack makes an offer to Howard.
Deduction: Select Marsetti and the silver screen and spicy photographs.
This convinces Howard to get Marsetti out of his office. Marsetti and bodyguard leave with Howard.
Marsetti's office door: Go upstairs to the locked office door.
Use the lock pick on door.
1 2 3 4 5 Marsetti's office: Look around. The screen at center is a closet.
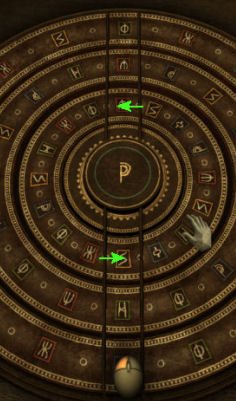
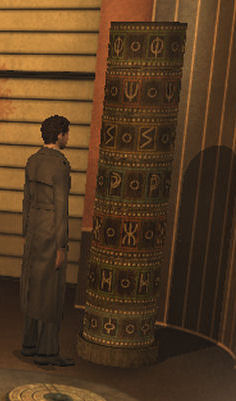
Circular disk: Study the totem at right corner of room and then check the circular disk on Marsetti's desk. They have similar icons.
Note that the icons on the totem repeats on each layer and are encased in colored frames.
Turn the rings on the disk to match the rings in the totem.
From top to bottom: cipher with line, trident, S-lightning, central P, spider, H and circle with 2 lines.
The totem's secret compartment opens.
Safe: Look inside the secret compartment to see a safe.
Take a glass from the small table at left. Use glass on safe.
Turn the dial (up-down arrows) 60, 30, 70, 50 and 80.
Take a wad of money (~100 bucks) and the notebook.
Escape: Hear Marsetti come back. Immediately use the closet left of the totem.
Marsetti uses the phone and finds out that Jack is Riley. He and Oscar look for Jack.
Go right to window and see a balcony. Exit and see the fire escapes on the left. The signboard is on the way.
Go back inside the office. Take the spearhead from the spears left of the shield.
Exit through the window again. Examine the N part of the neon sign and see a close up of the weak mounting.
Use spearhead on the damaged joint. Left click-hold and then continuously click the right mouse button until the lower part of the sign falls off.
Use the fire escape.
Deduction: Examine the notebook in inventory. It is in code.
Select the encrypted booklet and Slovanski's old man.
Slovanski apartments:
Slovanski: Go back to the apartment at Essex St.
Use the notebook on Slovanski. Learn about Caesar's ciphers.
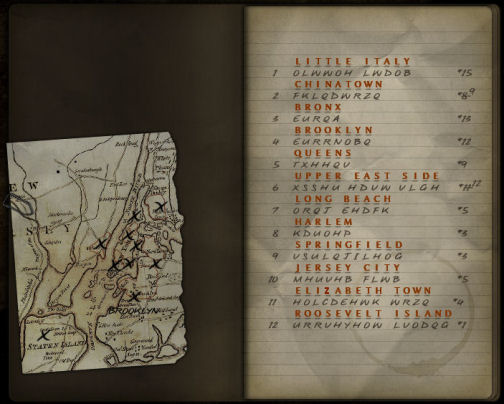
Decode: Open the notebook in inventory. Slovanski says to substitute the letter that is in a position stated by the number associated with it.
Select-click a line above an alphabet and then select from the letters below the letter that it will changed to.
Later - I found out that the substitution number is 23 to the right or 3 to the left. Change the letter to the letter that is 23 letters away to the right or 3 letters away to the left from that written letter; for example - O is L which is 23 letters right or 3 letters left counted from O.
(I am not sure if the erased 9 and 12 at right side of the notebook is the clue for 3 away. I did this in a different way. Brooklyn was written on the map at left; so I selected an 8 letter code at right; which is #4. I entered Brooklyn on #4 and decoded the rest of NY boroughs from there.)
Jack reads the rest of the notebook and learns the names of all the members of Black Lily - including Leroy Malone.
Confront Malone:
Police Station in Hoboken: Jack rashly went to the police station to confront Malone. Enter the station and talk to the service officer.
The officer tells Jack that Malone left a note for him - 5557589.
Jack's office: Go back to Jack's office and use the telephone. Ask to dial 555-7589.
Talk to Malone. Malone wants to meet with Jack at Ellis Island in half an hour.
Ellis Island: Use Chon's taxi to go to Ellis Island.
Go right and talk to Malone. Malone talks about events that include Black Lily, Sean and Jack. Malone wants Jack to destroy Black Lily.
Jack hears a hiss and Malone collapses; then hear another hiss and Jack collapses.
Sean again:
Hear Sean talk about waiting for a guy that can give him his and the girl's documents. The guy is Smiley; wearing strong cologne. He paid Smiley 50 bucks for the documents and also get a paper with the name of the ship - Saint Marie de la Mer.
Get a picture for the passport: Sean is at a bar in Brooklyn. Look around.
Take the documents Smiley left on the bar and the ashtray on the table where the little girl is sleeping in. Learn that Sean doesn't know the little girl with him. Talk to the bartender-owner.
Exit the place. See that this is Mource Gas Station from the sign above the station.
Camera setup: Look around. See a lamp on the railing behind the car.
Click the white wall with The Bunion Derby painted on it. Sean says it's a photographic setup that needs to be plugged in. Check the stand (painted white on top part) at end of the platform. It has the camera that needs to be plugged.
See the water tower and cornfield behind the gas station-bar.
Go back inside and talk to the bartender again. Learn about the Winchesters, the neighbors that own the cornfield at the back of the gas station. The owner shot one of the Winchesters last night. Learn about the Bunion Derby that passes through every year. He is not helpful about having a photo taken.
Check the wooden box on the wall right of the photographs. It is the power source of the camera outside.
Get power to camera: Go back outside. Take corn from the cornfield to get kernels of corns.
Check the lamp on the railing behind the car. Remove the gas cap and see that it is empty.
Go to the left gas pump. Check the bucket with kerosene beside it. Take the bucket and click it on the lamp behind the car.
Now the lamp has fuel. Look close at lamp. Use lighter (cigarettes) on the lamp wick to get light .
Place the ashtray on top of the flame of the lamp. Place the kernel of corns on the ashtray.
Go back inside the bar. Hear the corn popping. The bartender leaves to take care of the Winchesters.
Open the wooden cabinet on the wall. Press down the 2 lower switches labeled Bunion Derby.
Have picture taken: Go outside and see the lights are on on the camera setup.
Use the stand at right to get a photo of Sean. Sean pastes his picture on the passport and is now John Ford.
Go back inside and talk to the little girl. Sean and the little girl drive through Essex County.
Jack is in trouble:
Marsetti tells the story of how he met Oscar. Learn that they took care of Malone.
Hear Victoria scold Edward Marsetti. Victoria deduced where the little girl is hidden. She found Greta's hanky from Jack's pocket. Victoria is in a rush because she has a plane to catch. They left to pick up the girl.
Jack wakes up tied to the chair at the warehouse. It must be 6 AM.
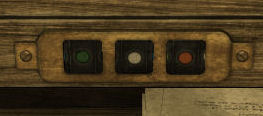
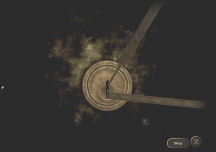
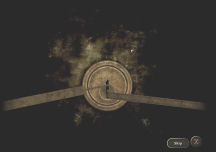
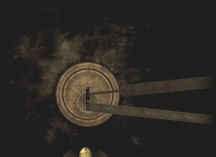
Untie Jack: Look at the control behind Jack. Use the control to start the big wheel.
Flip the black switch at left to turn the machine on.
Press button at top left, bottom left, top right and then bottom right.
Use the wheel to untie Jack.
Fix Jacks' nose: Jack gets 3 tapes from his bondage. His nose is bleeding again.
Go to the table by the barrels under the window. Take Jack's entire inventory (except for the gun).
Look close at Greta's handkerchief at right side of table. Use the rye whiskey (after Jack drinks from it) on the hanky.
Use the 3 tapes that tied Jack on the hanky with whiskey. Use the taped handkerchief.
Get out of the Chinese distillery: Go to the door and talk to Chon that is outside. Chon says that he went to Greta's place after he can't find Jack at Ellis Island. Chon saw Greta and girl taken by man from port. He followed them. They went to a place and met a woman with 2 guys. They are in Chinatown.
Look around. Jack wants a distiller for his office. LOL.
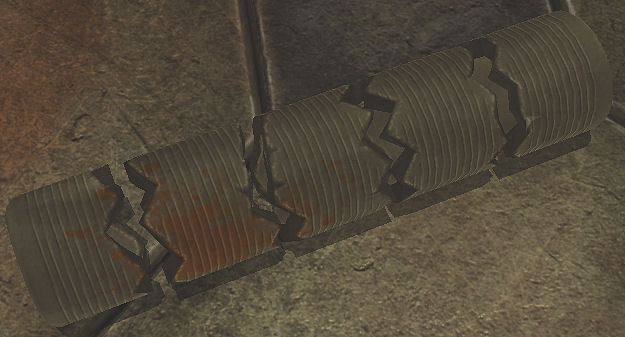
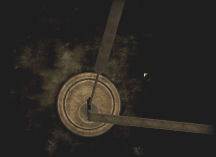
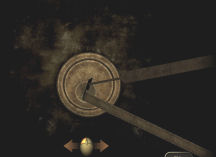
Lock: Examine closely the circular maze on the wall at right.
See that the bars at the center can be moved. Arrange the bars to form a Chinese pagoda or a glyph.
A secret passage is revealed.
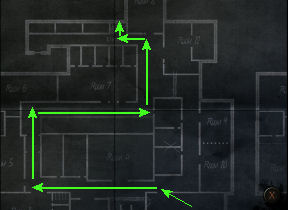
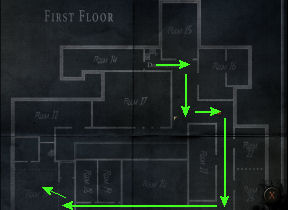
Sewer maze: Enter the secret passage and be in the sewers.
Pick up ropes from the floor at back wall.
Enter the passage at back left. Use the flashlight to light the way. (Save game here).
(The exit of the maze is at bottom right - way down. There are 3 pipes that lead to the exit. When you exit see that the stairs to the outside is unreachable across the way. There is a floating bridge here. We need water to flow to this area to float the bridge.)
Go back to the start of sewer maze or saved game. Jack enters at passage 32.
Go to top (Jack's right) and then left. Go up the 4 way intersection and see a valve. Turn the wheel until water is heard and the wheel stops.
Go back down to intersection and then continue to the left until the end. Go down until the corner and go left.
Continue to the end and then down until the end.
Continue to the right. Go down at 3 way-intersection.
Go down to 4 way-intersection. Go left to the end from here. See another valve. Turn the wheel until water is heard and the wheel stops.
Go back to right and down the 3 way intersection.
Go left and then down until the end. Go right and then down the 3 way intersection.
Go left and see another valve. Turn the wheel until water is heard and the wheel stops.
Go back up to the 3 way intersection. Go right until the end.
Go down, right until the 3 way intersection. Go up and then right to the exit.
Bridge: Now see that the sewer is filled with water. Check the floating bridge at right.
Use the rope on the bridge. Use the bridge. Jack is on other side of the sewer.
Find Greta and girl:
Exit to outside. Talk to Chon. Chon heard the woman and man from port talk about ferry.
Deduction: Select A cruise on the East River and The airport.
Jack asks for map. See a close up of the map.
Look for Glen Cove as stated in Victoria's ferry flyer. Glen Cove is at top right of map.
Follow Highway 107 to be at McArthur Airport. Click on McArthur airport. That's it!
Chon: Jack asks Chon to call Violetta Moore and tell him about the museum. Jack tells Chon that he will take the cab and leave him here. It is not fair!
Take care of Oscar:
Airport: See Oscar guarding the gate to the airport. Marsetti tells Oscar that he doesn't want Diaz (Victoria) to know that he is there. Marsetti wants to talk to Greta in private.
Distract Oscar: Pick up the crowbar on top of the box under the window.
Check the pipes of the downspout. Jack makes a noise but Oscar checks only from corner. Jack wants him closer; so that he can hit him with the crowbar.
Enter the first doorway. Use the flashlight on the table with boarding pass, etc... Jack leaves the flashlight on at the desk.
Use the downspout again. Oscar walks to enter the room when Jack hits him with the crowbar.
Jack gets his gun back. Use rope on Oscar.
Hangar:
Enter the hangar area. Check the windows of the hangar.
Listen to Marsetti and Greta. Learn that the little girl is dangerous and they all want her. Marsetti had a close relationship with Greta. Marsetti exits and goes to the plane.
Use the windows to talk to Greta.
Use the crowbar to open the locked door. Greta tells Jack through the door about her life with Marsetti.
Hear a thud. Jack...
Sean at the museum:
The Turk tells Sean that the professor is at third floor and to be careful.
Go to the alley left of the museum. The door is locked but Sean was told it should be opened.
Use the gun on door. Go upstairs and the hallway at top left.
Zindler: Automatically get to room 13. Go to Zindler's office door at left.
Enter and meet the professor. Zindler holding the Dictaphone asks if Sean is the one that will save them.
Sean answers no. Sean is following the Black Lily's order to get what the professor took from them and to kill the professor. Sean shoots the professor.
Sean is at war with his conscience when he realizes it was the girl that he should take and give to Black Lily. It reminded him of his sister.
Escape the museum: Sean carries the girl outside to the balcony. The Turk and Oscar are there. Oscar is left to guard the lobby while the Turk looks for Sean.
Go downstairs using the stairs behind Sean. At the lobby, Sean hides behind the crates at right.
When Oscar turns to face the dinosaur, sneak to the crates at center. Move close to the left of the crates. Save game here.
When Oscar faces the main door at right, sneak to the exit at bottom left.
Go to and use the car. Sean leaves with the girl.
Back to beginning:
Jack wakes up inside the room with Greta.
Victoria talks to Jack through the door. Her organization wants the girl to fulfill her destiny - to be sacrificed to a god. Victoria is not part of Black Lily. Black Lily was used by them to bring the girl to New York.
Escape this room: Take the propane tank under the stairs and place it by the door. Use the gun on the propane tank by the door.
See the scene from start of the game. Jack and Greta run out of the room. Jack follows the plane while Greta goes to the car.
Marsetti deals with Jack. Marsetti shoots Jack dead.
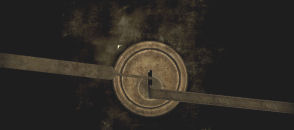
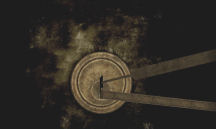
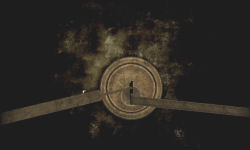
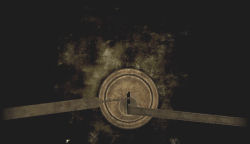
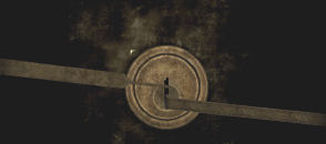
Afterlife:
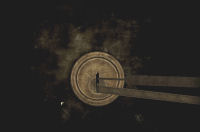
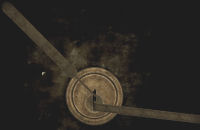
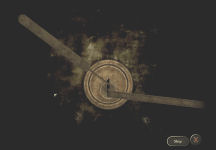
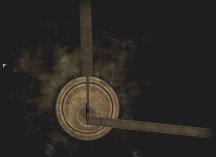
Clock: Check the clock hanging at left. Click on it and it lowers to Jack's level. The clock has stopped.
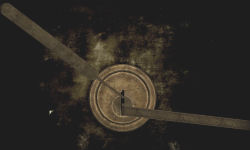
Perdition Cafe: Go right. See a cafe with a guy at the bar.
Talk to the guy - it is Sean. Learn why he admitted to the crime that caused Jack to be incarcerated.
Sean explains why Jack is here; about destiny and the little girl. Goodbye Sean.
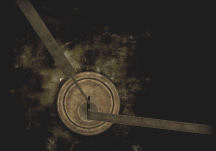
Clock: Go back to the clock. Start the clock again.
Replay: Back to the scene with Marsetti; a different ending to the shootout occurs.
To be continued in Damascus, Syria!
This document may not be distributed without express written permission of the author and the content may not be altered in any way.
For Questions or Comments on this Walkthrough,
Please write to: MaGtRoCopyright © July/2013 MaGtRo