The first hand sign
The Five Cores walkthrough
©
September 2012 Bert Jamin (www.gamesover.com)
This walkthrough, written by Bert Jamin, may not be sold and may not be used for
any commercial purposes. Neither is it permitted to publish this walkthrough in
any way without the written permission of the author Bert Jamin.
Feel free to place this walkthrough on your web site or on your home page, on
condition that no part of this walkthrough is changed and that the name of the
author (Bert Jamin), the URL of the owner of this site (www.gamesover.com)
and his E-mail address (bert@gamesover.com)
are mentioned unchanged. For the most up to date walkthroughs always visit www.gamesover.com.
If you have any suggestions to improve this walkthrough, let me know by sending
me an email: bert@gamesover.com
Foreword
The Five Cores is made by Neebla
Games. You can buy the game for only € 6,99.
Is it worth it? Well I can be short about that. It is worth every penny you pay
for it and even much more. To be honest with you... it is a very long time ago
that I played a game that I loved that much. So my advice... get the game ASAP!
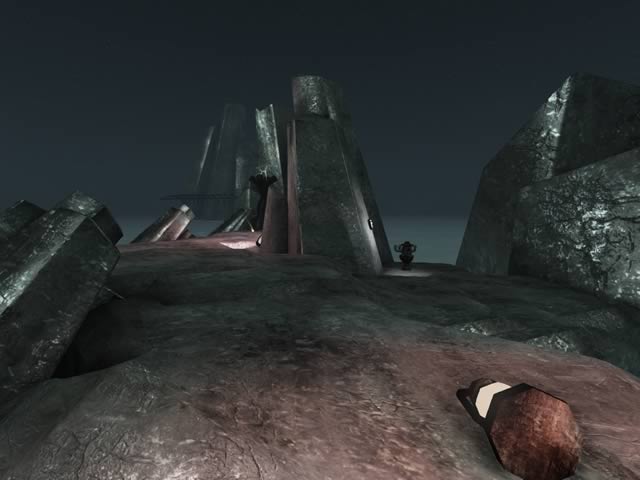
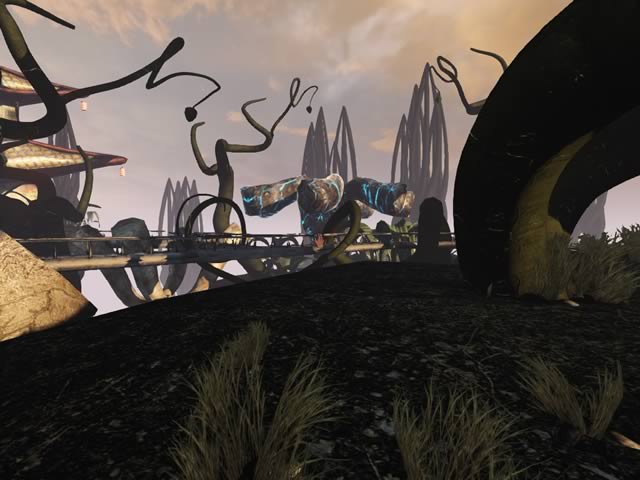
The First (green) Core
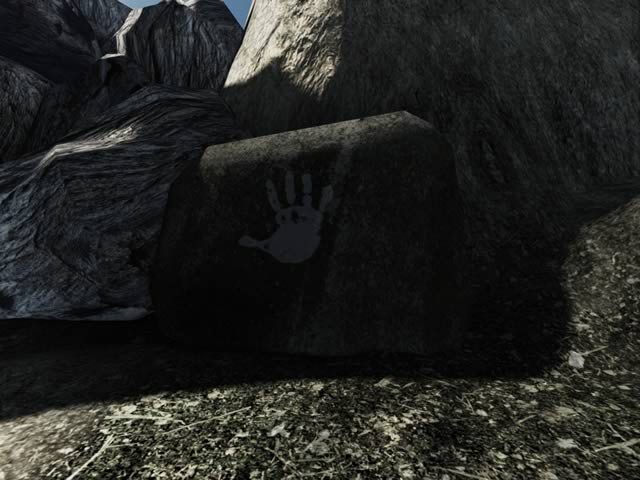
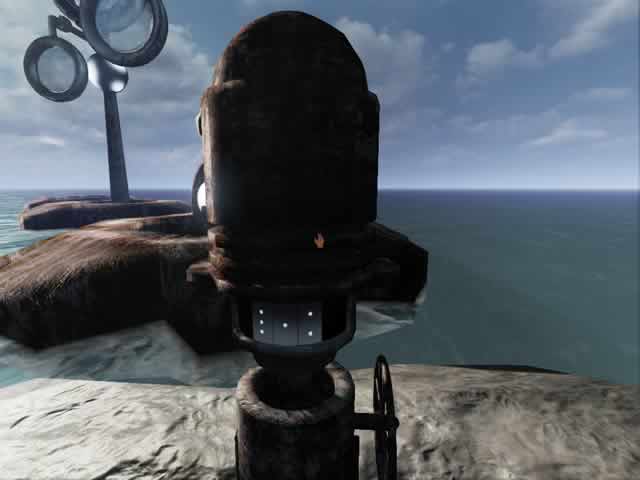
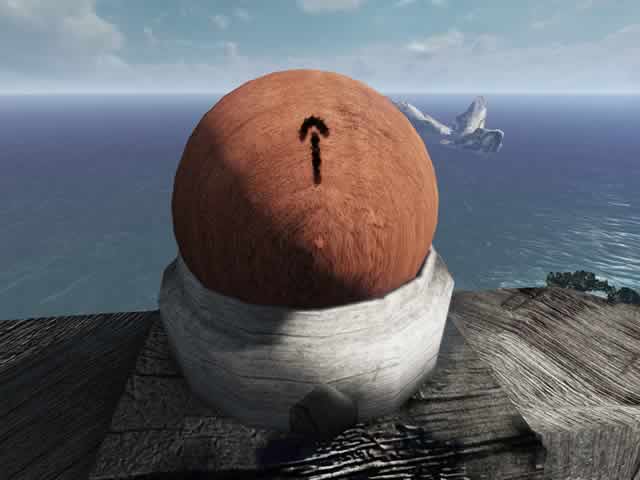
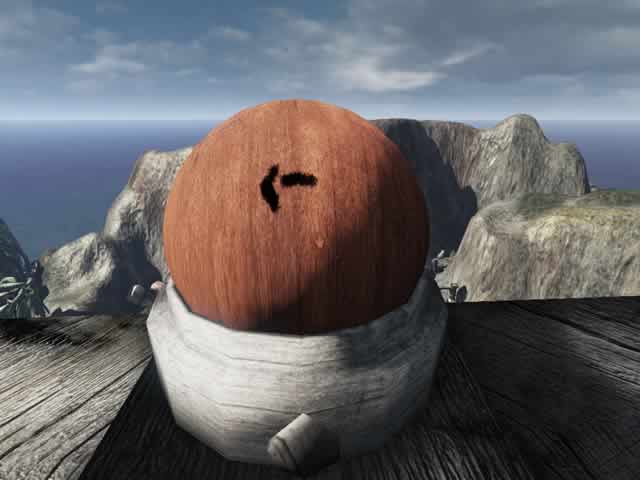
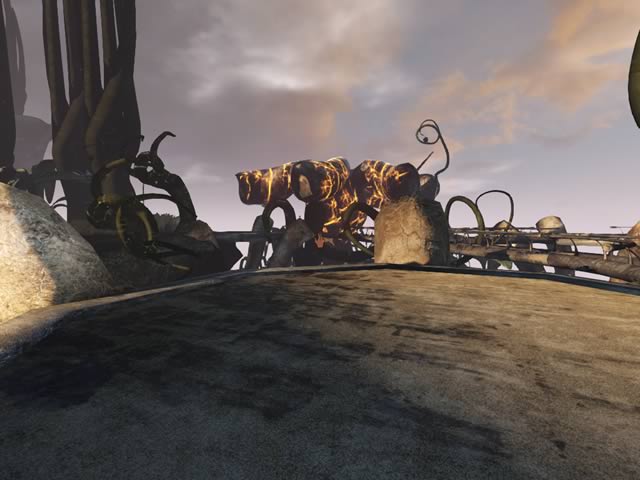
After having read the note click on it to drop it. Turn around and walk towards the big pointy rock. As soon as you reach the plateau with the pink flower notice the rock with the hand sign on top of the stairs leading up to the left. Walk towards the hand sign and press it.
The first hand sign
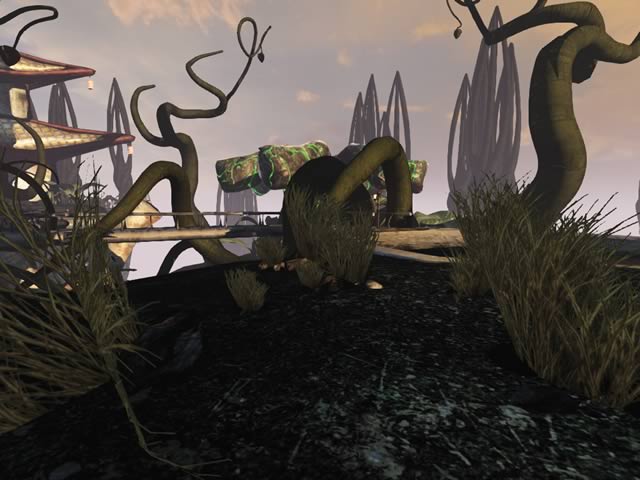
Turn around and go back down the stairs. Turn to the left and go up the other stairs. Walk all the way up the rock at the end of the stairs. When you reach the plateau with the tree go up the stairs to the left. Walk towards the cliff side past the tree. Notice the stairs leading down to the left. Also notice the wooden bridge at the right side leading to a little wooden shed.
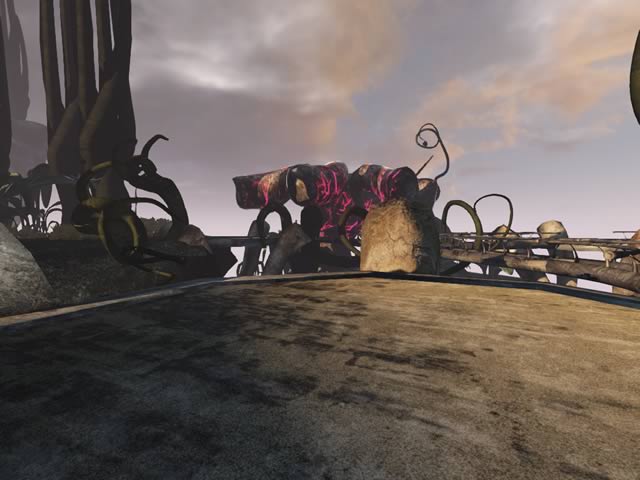
Go down the stairs and walk to the right towards the bridge to the wooden shed. Cross the bridge and enter the shed. Notice the brown wooden device inside the shed. When you touch it a handle will rotate lifting a wooden structure for a moment. Exit the shed and cross the bridge. Climb up the stairs to the right. Keep on walking forward until you reach the three barrels near the brown wooden pointer. Notice the strange dotted tree stump down below. Remember the order of the dots from the left to the right: 1, 4, 9 and 2!
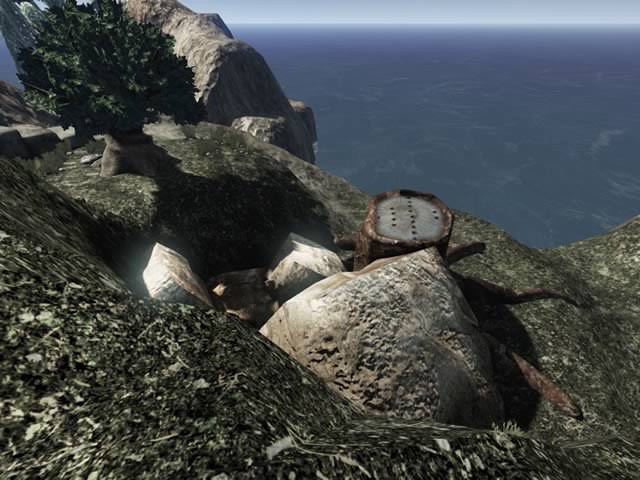
The strange dotted tree stump
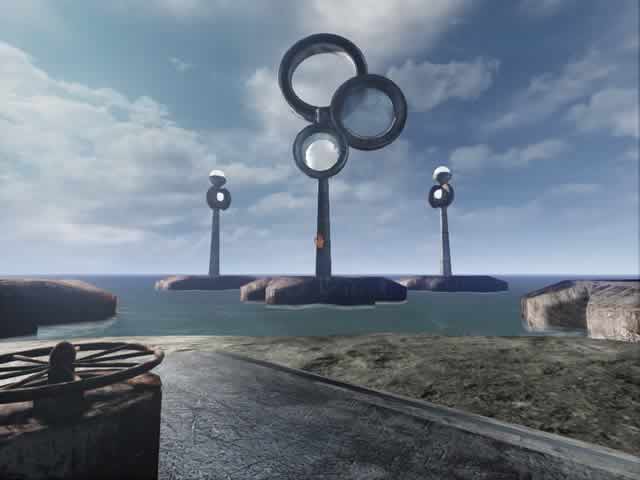
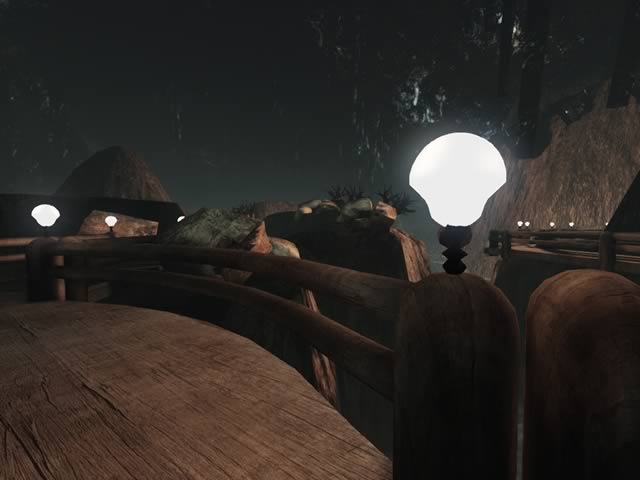
Walk all the way back to the rock where you pressed the hand sign. Notice the strange black columns with the white beams above them a little further. Walk towards those columns. Notice the bright light on the ground in between the columns. Walk towards the light and you will be beamed to another part of the island.
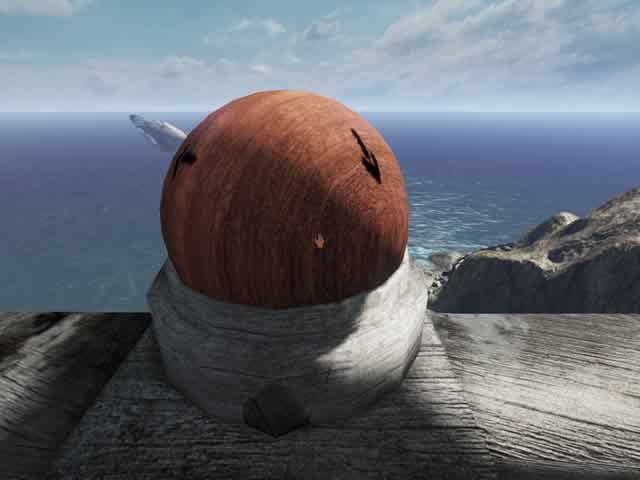
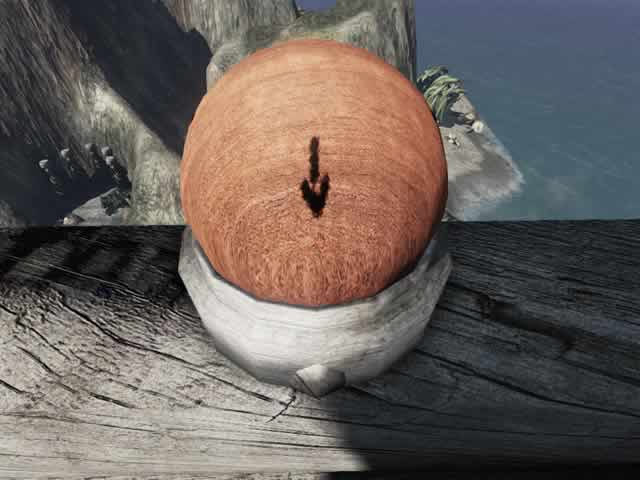
Walk forward until you face two wooden gangways. Climb up the gangway leading to the left. Walk all the way to the end. Notice another hand sign on the rock beneath the tree. Go there and press the hand sign. Turn around and walk towards the stairs leading to the right. Climb those stairs and notice the opened book on the wooden table. When you look at it you notice that there has noting been written in it yet. Turn around and climb down the stairs.
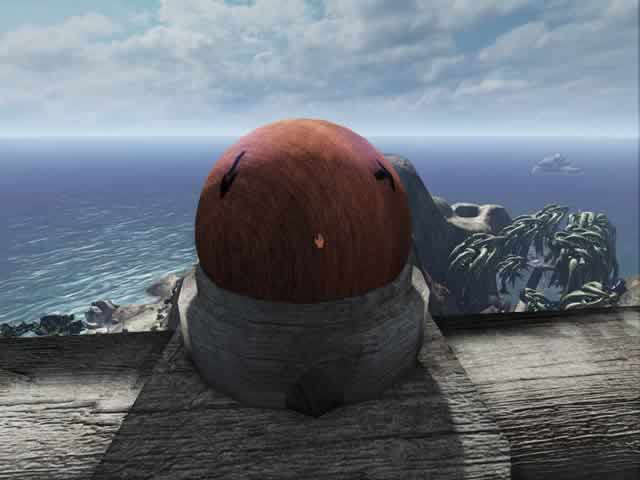
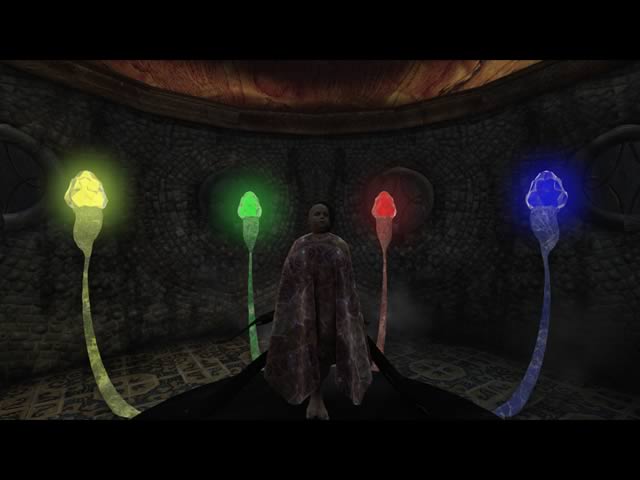
Turn to the right and notice another hand sign on the rock a little further. Go there and press that hand sign too. Step onto the gangway. Keep on walking until you reach a little dome. Enter the dome and walk towards the girl. Notice the faded cores surrounding her. You can't do anything to help her yet. So exit the dome. Walk all the way down the gangway. Cross the rocks and walk all the way back down the other gangway. At the end of the gangway turn to the left and go up the other gangway.
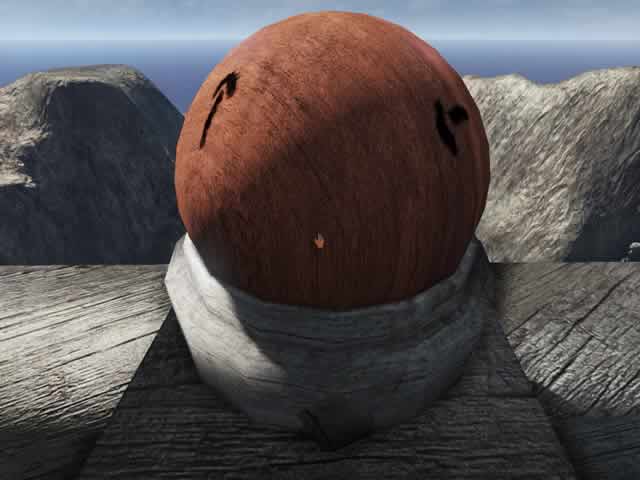
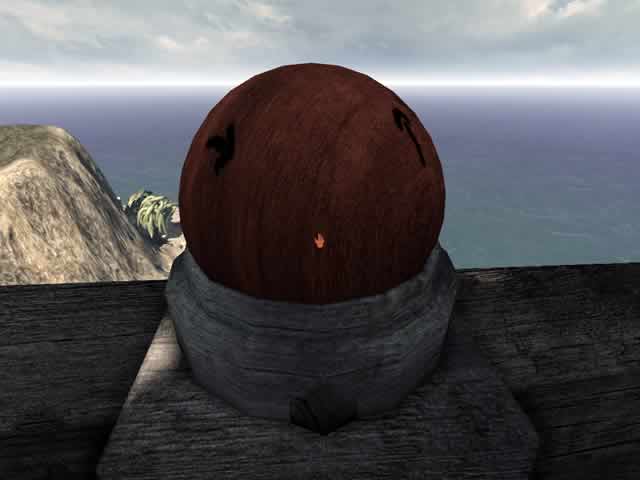
At the end of the gangway press the hand sign on the rock. Turn to the right and go up the stairs until you reach the plateau with the green lit core. Touch it to be beamed to another island.
Walk towards the trees. Turn to the left and enter the building. Keep on walking straight forward until you end up in the bedroom. Read the opened book on the stand at the left wall. Page through the book. Exit the bedroom. Keep on walking until you reach the main hall. Go to the right. Go up the stairs. Walk past the faded core. Open the steel door and step into the cabin.
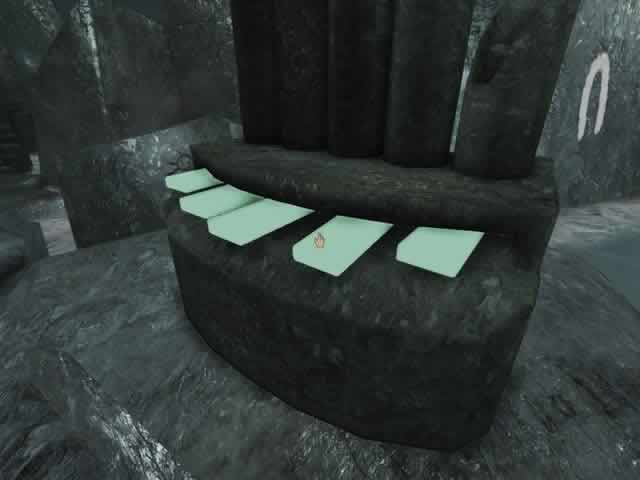
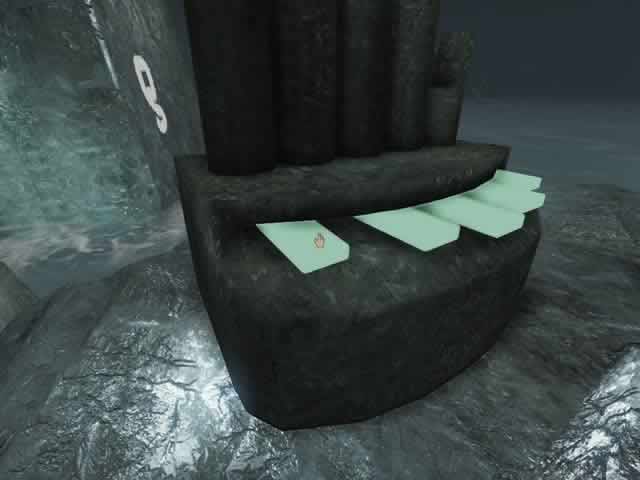
Step out of the cabin and walk onto the platform with the four steel valves. Leave them alone for now. Pan to the right and walk towards the stairs leading up. Go up the stairs. Notice the three strange devices. Also notice that all of them have some sort of grey piece of paper. Only the piece of paper inside the right most device has some dots on it.
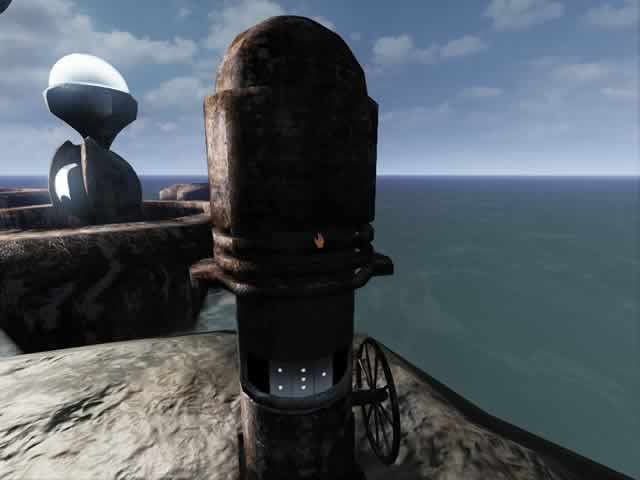
The right most device with the dotted piece of paper
Go back down the stairs. Walk back to the cabin in front of the building. Enter it. Walk past the faded core and go down the stairs. Enter the main hall and walk straight forward onto the blue balcony. Walk to the left. Press the button on the stand in front of the planetarium. Notice that the planets stop briefly at the 10 o'clock position and finally they will stop at the 3 o'clock position. Turn around and re-enter the balcony. Walk forward to go outside at the opposite site.
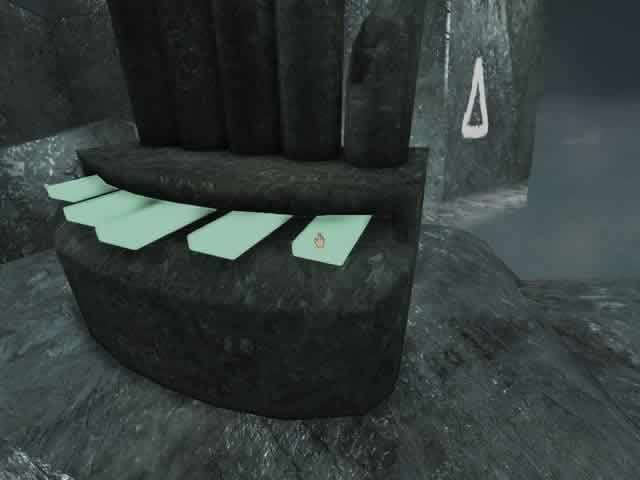
Notice the three buttons here. Press the buttons in the order 2, 1 and 3. The little metal pillars on the board will start to move for a while. If you made a mistake and nothing happens pull the lever at the right side of the board to reset it and try again. Go back onto the balcony, turn to the left and enter the main hall. Keep going forward. Go up the stairs, walk past the faded core and exit the building via the cabin. Walk to the right. Go up the stairs. Look at the left most device to see that this one has a drawing too now.
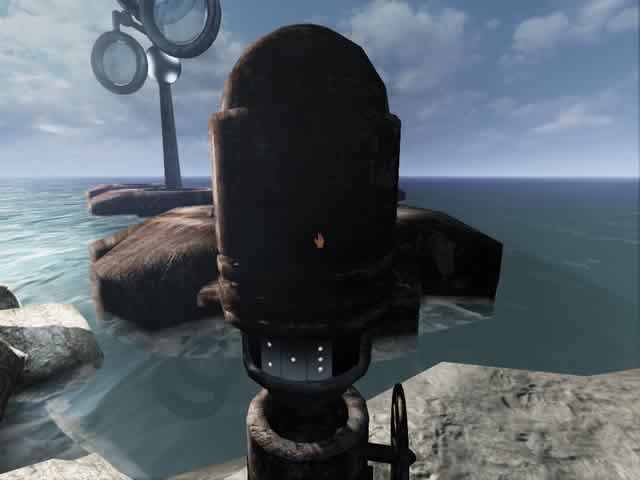
The left most device with the dotted piece of paper
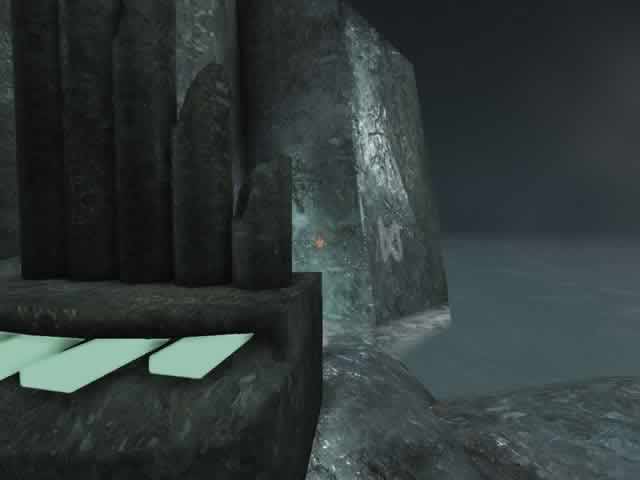
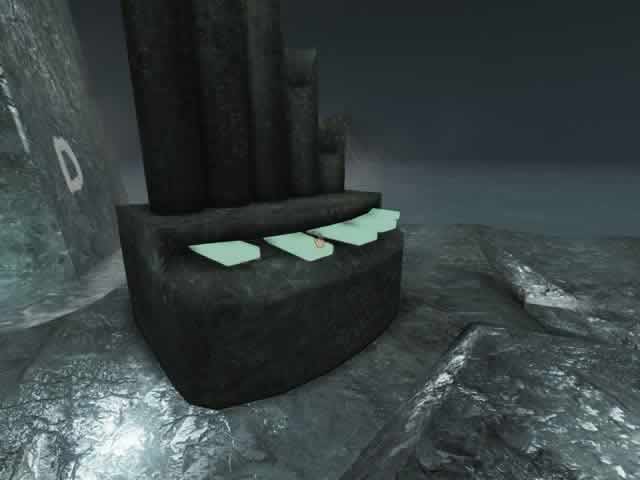
Head back inside and onto the blue balcony. Go to the right. Now press the buttons in the order 3, 1 and 2. Head back to the plateau with the three strange devices once more. Notice that the center device also has a dotted drawing now.
The center device with the dotted piece of paper
Turn the valve of this center device to lower the upper part. Do the same with the left most device. Leave the right most alone! Notice that four masts with mirrors will rise from the water. If nothing happens check to see wether the two devices at the left side are lowered and the right most one is up.
IMPORTANT NOTE:
You must align the masts first before you go back inside. If you go inside now
without having aligned the masts you will be stuck inside the cabin forever! So
be sure to do the next steps before you go back inside!!
Walk onto the platform with the four valves. These valves operate the masts with the mirrors in the water. All four mirrors have to be aligned pointing to the center mast with the lenses. Turn the left most valve twice. Turn the second valve from the left three times, leave the third valve alone and finally turn the right most valve once. If done correctly the light on top of each mast will be lit white and so is the light behind the lens at the center mast.
The masts aligned
correctly
Re-enter the building. Go up the stairs to the left past the faded core. Set the dial to 10. Exit this balcony and go up the opposite stairs. Set this dial to 3. Exit the balcony. Walk towards the green lit core and touch it... and end up on back the island near the green lit core.
The Second (blue) Core
Walk forward towards the wooden bridge leading to the watchtower. Cross the bridge and keep on walking straight ahead until you reach the stairs leading down to the left. Go down the stairs and walk to the right.
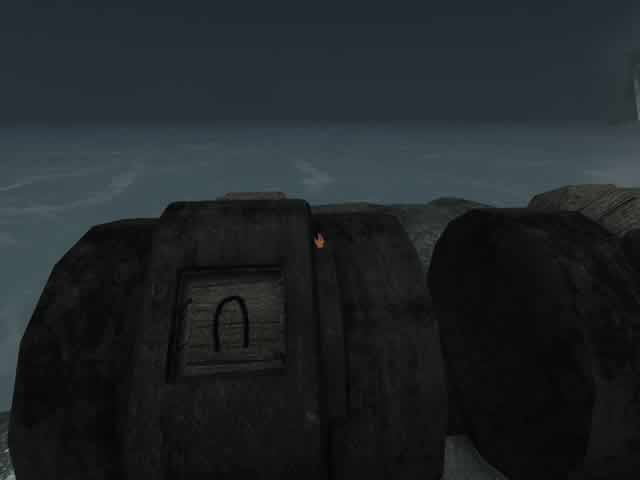
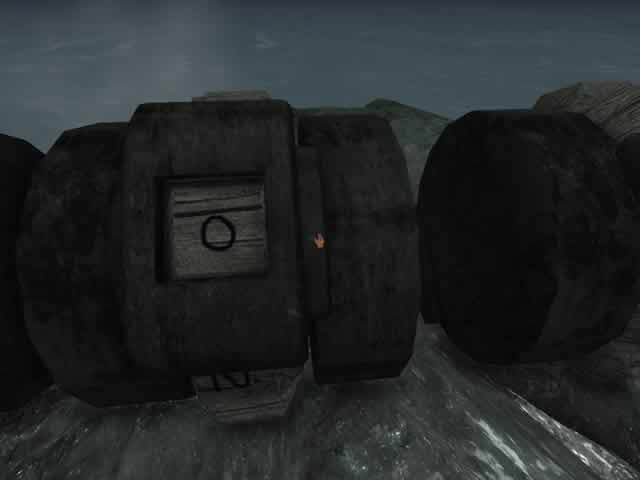
Walk past the huge concrete block. Immediate turn around and notice some sort of clock on the concrete block. Remember this as clock number 1. Turn to the left and step onto the wooden gangway. Keep walk forward until you reach another concrete block with the same sort of clock. Remember this as clock number 2. Turn to the left and keep on walking forward.
At the intersection go to the right. Keep on walking until you reach another concrete block with the same sort of clock. Remember this as clock number 3. Turn to the left and keep on walking forward. At the end of the gangway notice the opened entrance of a room against the rock. Enter the room. Look very closely at the drawing on the wall. Not only gives this vital clues about the clocks but also about the lever(s) you have to flip! The squares at the right side on the drawing represent the four clocks you have seen. Notice that only with the clocks number 1, 2 and 3 are drawn some green dots. The green circle around the little lever and the arrow beneath it, pointing down to the power schedule, can only mean that only those three clocks have to be set to get the correct amount of power. Flip down the grey lever. Exit the room.
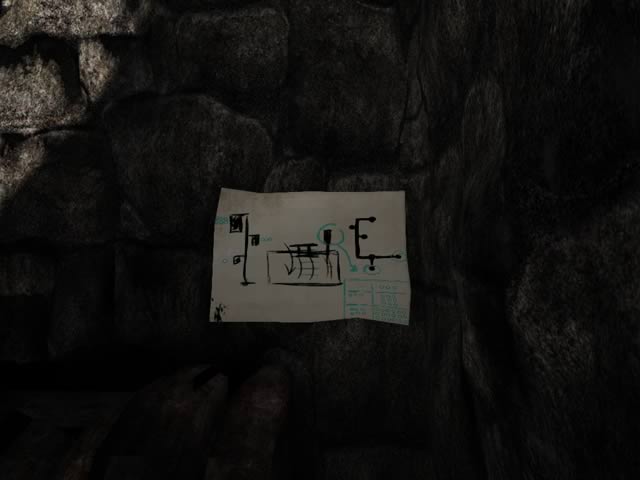
The drawing with some vital clues
Turn to the left and step onto the gangway. At the first clock you reach, which you had to remember as clock number 3, set the dial to the eight o'clock position. At the intersection go to the right. Keep on walking to the end. Enter the room at your left side. Flip down the grey lever. Also flip down the little brown handle at the right side of the device, as instructed on the drawing you saw in the first room. Exit the room.
As soon as you are standing outside the room pan to the right to see another some sort of clock on the concrete block. Leave this one alone!!! Walk towards the gangway at your right side. Step onto the gangway and keep on walking until you reach the intersection. Walk straight forward. Set both of the clocks you pass, which you had to remember as clock number 2 and number 1, to the eight o'clock position too. Keep on walking forward until you reach the plateau with the submarine cabin. Notice the control lights at the left side of the cliff. If you have done everything correctly before the control lights should be: 6 lights green, 1 light orange and 2 red lights. So it should look like this:
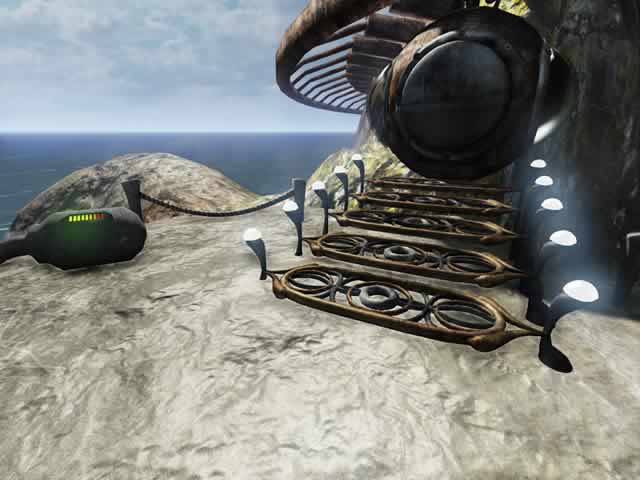
The correct light by the submarine
Climb up the stairs to the submarine. Open the door and enter the submarine. Pull the handle and enjoy the ride and the splash down! When you reach the blue core at the bottom of the sea, pull the handle once more to set course to another part of the island. When the eagle has landed :o) open the hatch to step outside.
Walk towards the bright beaming light to get beamed to another part of the island once more. Walk forward until you reach the plateau where you see three different pathways made of concrete blocks. Step onto the left most pathway. Keep on walking until you reach the next plateau. Notice the three wooden stands. Click on each of them until they all are lit green. Walk further and also set these two wooden stands to lit green. Go up and walk towards the table with the opened book.
Read the book and turn the page. Turn around and walk towards the 10 wooden blocks with symbols on them. Notice that some of the blocks don't show any symbol. This can only mean that the side with the symbol is facing down. The problem is that there is no way to turn these blocks. So no symbols for those ones! Make a note of the order of all blocks that don't show a symbol and of those that do show a symbol!! Also make a note of those symbols!!!
Walk all the way back to the starting point. When you reach the plateau that leads to the beaming point notice the strange device at the right side of it. Walk towards that strange device.
The strange device next to the beaming point
Turn the handle of the strange device to hear five different tones. I guess that rings a bell with you... Yep... you have to replay these tones in the correct order a little later! Turn around and step back unto the plateau. Step onto the right most pathway. Walk all the way to the end. Now you are facing the organ on which you have to replay the tones you just heard on the strange device. And not only that! You also have to note the corresponding symbol that will be projected briefly on the right most rock.
The correct order of playing the keys of the organ is: 4, 5, 3, 1 and 2. These are the corresponding symbols projected on the rock:
The symbol corresponding to tone 4
The symbol corresponding to tone 5
The symbol corresponding to tone 3
The symbol corresponding to tone 1
The symbol corresponding to tone 2
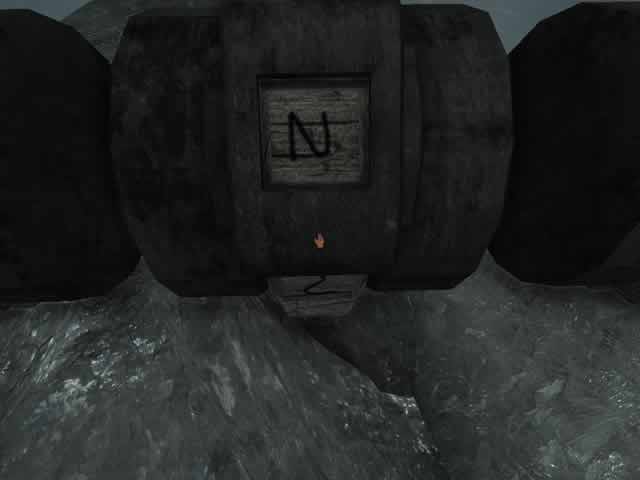
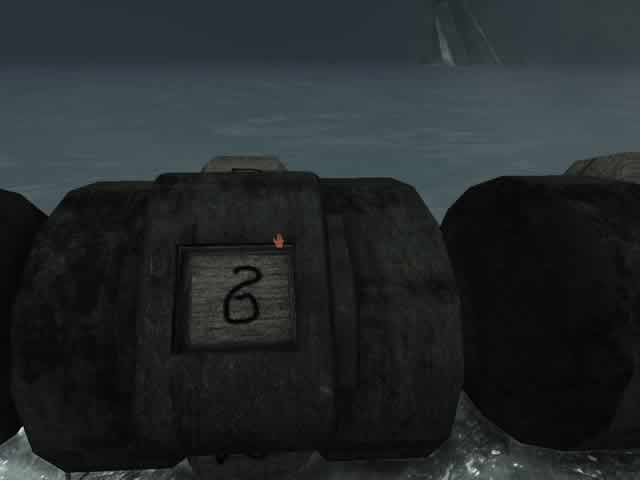
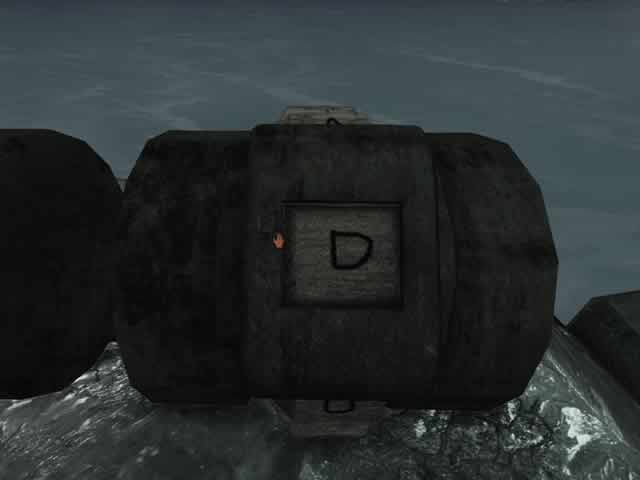
Walk back to the starting point. This time step onto the center pathway. Walk all the way to the end. Notice the faded crystal. Also notice the huge wooden dials at the right side. Your goals of course is to set those dials in the correct order. I don't give you the number of how many times you have to press each and every dial. Why? Simply because it often happens that if you press one dial, the dial next to it will be moved too. In stead of that I give you the images of the correct symbols on all of the dials from the left to the right.
Dial number 1
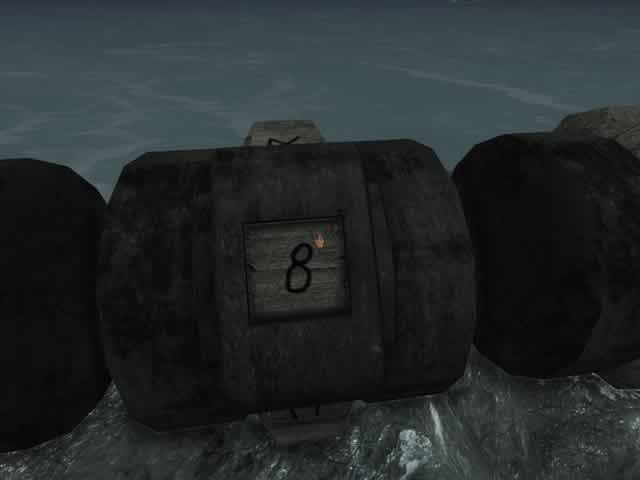
Dial number 2
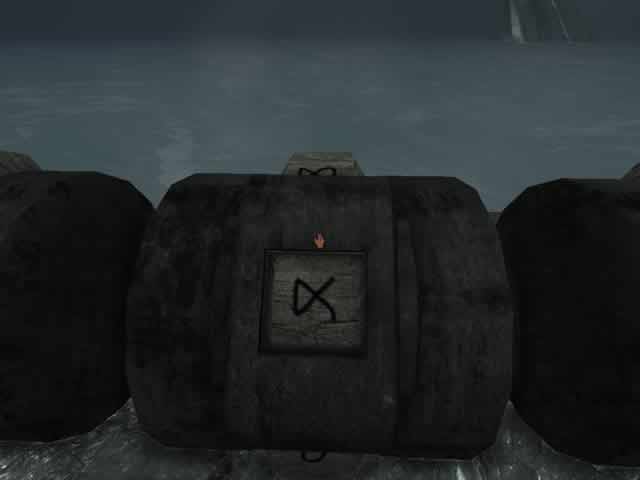
Dial number 3

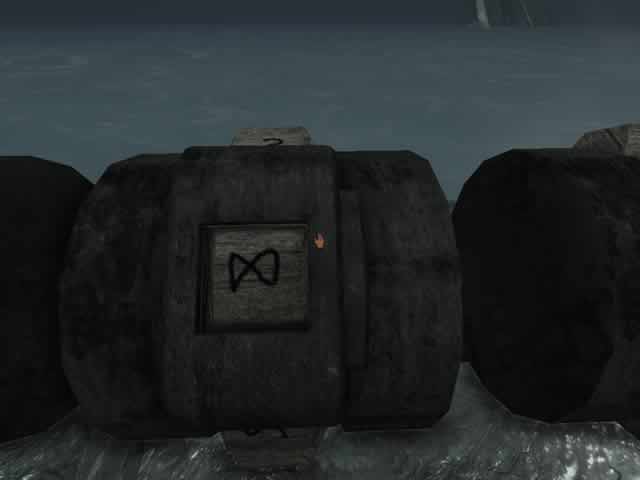
Dial number 4

Dial number 5
Dial number 6
Dial number 7
Dial number 8
Dial number 9
Dial number 10
If done correctly the blue core will be lit. If not, check the dials to see if one or more have been moved to a wrong setting as I mentioned before. Walk towards the blue core and touch it to return to the island in front of the submarine cabin.
The Third (yellow) Core
Walk forward and go to the left. Near the first concrete block go to the right. Go up the stairs leading up into the direction of the watchtower. Turn to the left and keep on walking forward over the cliffs until you are facing the door to the watchtower. Open the door and go inside. Don't step onto the wooden elevator platform yet. Instead of that look closely to the floor beneath and besides the platform. There are some hardly to see drawings of some sort on the floor. And not only that but you can only see a part of the drawings. To get a clear view is easier done than said :o) Step onto the platform. Pull the chain. As soon as the platform starts to move up quickly turn around so you are facing the door and step down the platform! With the departed elevator you have a clear view on the floor. Make a note of the drawings on the floor.
IMPORTANT NOTE:
When you pull the chain make sure you step off the Watchtower elevator platform facing
the door. If you accidentally step off facing into the watchtower you
will be unable to leave this area to recall the elevator and you will be stuck
in the backside of the Watchtower forever! Thanks Leland O'Donnell for this
note.
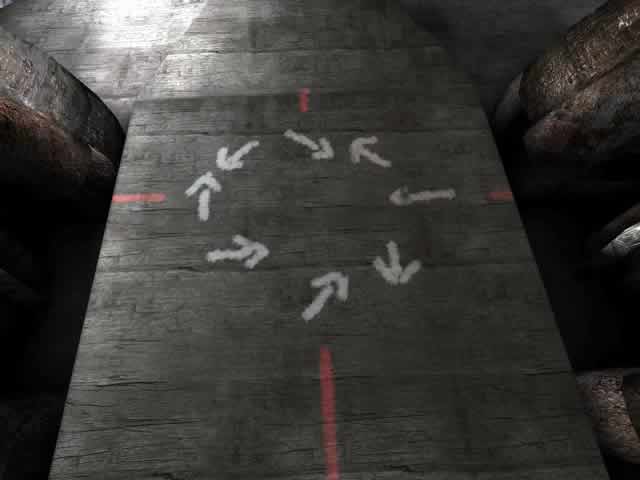
The drawings on the revealed floor
Great... now you have a clear view on the floor... but no elevator... and no button to call the elevator!?!? Well... just step outside which does call down the elevator platform. Go back inside and step onto the elevator platform. Pull the chain once more and this time make the ride up. After the elevator has stopped turn around and walk outside. Walk to the right and notice that the third wooden ball, with the arrow to the right on it, cannot be moved. This must be the starting point!
With the drawing of the arrows beneath the elevator platform in mind you might think... piece of cake!? Well not completely! Notice that on the drawing there are some arrows that don't just point to the right, left, up or down. Some of the arrows are pointing down to the left, down to the right, up to the left and up to the right. And these balls do only have arrows pointing to the right, left, up and down!?!? To simulate an arrow point down to the left you have to turn the corresponding ball so that you see an arrow pointing to the left and an arrow pointing down. You will see what I mean on the next images of how to set the balls correctly.
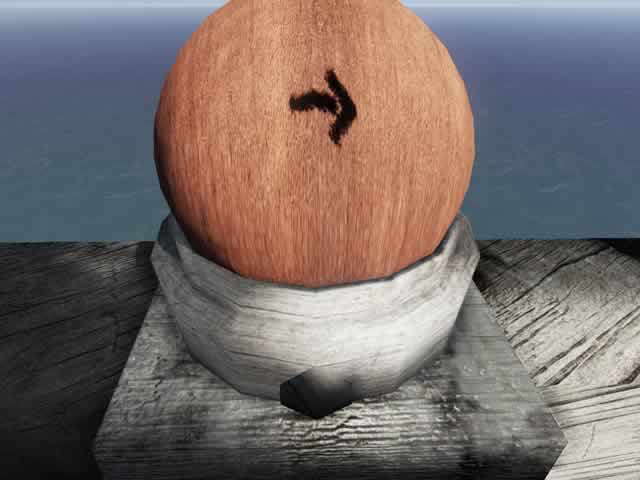
The immovable starting point
The easy pointing
up arrow
The simulated
pointing down to the left arrow
The simulated
pointing down to the right arrow
The simulated
pointing up to the left arrow
The easy pointing
to the left arrow
The easy pointing
down arrow
The simulated
pointing up to the right arrow
Job done! Re-enter the watchtower. Walk to the end of the elevator platform and grab the steel ladder on the wall to climb up. If you have set the balls correctly the core will be lit yellow. Touch it... to set course to a couple of floating islands.
Walk to the right. Cross the wooden platform. Step onto the gangway and keep on walking straight forward. At the intersection go to the right. On the next wooden platform go forward. Walk straight on on the gangway. Halfway you'll see a gangway towards a pagoda. Believe me... there is nothing to see but a faded crystal. So no use yet to go there. In stead of that keep on going forward. Cross the wooden platform and go forward. At the intersection go to the left.
On the next wooden platform walk to the end of it and go down the stairs. At the bottom walk towards the fence at the back. Read the opened book with the colored dots. Remember the colors of these dots. Exit the book. Walk towards the closed flower and touch it to open it.
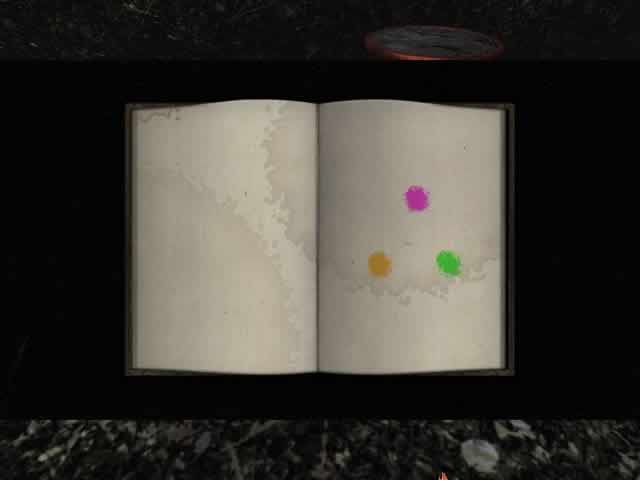
Remember these colors
Go back up the stairs. Cross the wooden platform and walk forward on the gangway. At the intersection go to the right. Cross the next wooden platform and walk forward. At the intersection go straight forward. Cross the next wooden platform and keep on going forward. At the next intersection go to the left. Cross the wooden platform and... you are back at the starting point.
Walk towards the closed flower and touch it to open it. Look up and notice some sort of liana hanging down. Touch it twice to change the color of the flower into blue. Pan to the right and notice the same kind of flower a little further. Walk towards it. Touch it to open it. Touch the liana twice that is hanging down here too. Make sure that the color of this flower has changed into blue too. Look around and notice that the color of a huge tree further away has turned into blue too.
The blue tree
Walk towards the wooden platform and cross it. Keep on walking on the gangway. At the intersection go to the left. Cross the wooden platform and walk straight forward. At the intersection go straight forward. Cross the wooden platform and walk forward. At the intersection go to the right. Keep walking forward until you reach another floating island. Touch the one and only flower to open it. Touch the liana that is hanging down once to change the color of the flower into red.
Step back unto the wooden platform and cross it. At the intersection go straight ahead. Step onto the wooden platform. Notice the liana that is hanging down above this platform. Touch it once. This changes not only the flower in the space down the stairs near the opened book into red but also the tree at the ride side.
The red tree
Step back onto the gangway and walk forward. At the intersection go to the right. Cross the wooden platform and keep walking forward. At the intersection go to the left towards the pagoda. Walk past the pagoda and step onto the gangway. Cross the wooden platform and go forward. At the intersection go to the right. Cross the wooden platform. Touch the nearby flower to open it. Pan to the left and walk towards the other flower. Touch this one too to open it also.
Turn around and walk towards the beaming light. Touch it to get beamed to another floating island with a liana hanging down. Touch the liana once to change the color of the huge tree from green into pink.
The pink tree
Walk towards the beam light to get beamed back. Walk to the right side. Step onto the wooden platform and go forward. At the intersection go to the left and go forward towards the pagoda. Walk past the pagoda. Step onto the gangway and go forward. At the intersection go to the left. Cross the wooden platform and go forward. At the intersection go to the left. Cross the wooden platform. Walk towards the blue flower touch the liana once to not only change the color of the flower into green but also the tree in the distance.
The green tree
Walk to the right and cross the wooden platform. Step onto the gangway and go forward. At the intersection go to the right. Cross the wooden platform and go forward. At the intersection go straight forward. Cross the wooden platform and go forward. At the intersection go to the left. Go forward and step onto the wooden platform. Touch the hanging liana twice to change the color of the tree into orange. Look around to notice that you have set the colors of the trees corresponding to the colored dots you saw inside the book.
The orange tree
Step onto the gangway and walk forward. At the intersection go to the right. Cross the wooden platform and go forward. At the intersection go to the left and walk towards the pagoda. Enter the pagoda. Touch the yellow lit core... to end up... on top of the watchtower with the wooden balls.
The Fourth (red) Core
Go all the way down. Step outside. Go down the stairs. Turn to the left and keep on walking over the cliffs until you reach the wooden bridge. Cross the wooden bridge. Walk towards the strange arches with the white lights hanging down a little further. Go to the right and keep on walking forwards until you reach the gated cave. Open the gate and enter the cave. Walk all the way to the end of the cave to end up in the room with a faded core. Notice the four wooden buttons on top of the stone pillars. Now remember the strange dotted tree stump you saw at the very beginning of your adventure.
You have to press these wooden buttons in the same order of those strange dots on the tree stump. Here is the correct order:
-
press the third button from the left (with 1 dot)
- press the most left button (with 4 dots)
- press the button next to it (with 9 dots)
- press the right most button (with 2 dots)
If done correctly the core will be lit red. Touch it to end up in side a dark brown cave.
The Fifth and Final Core
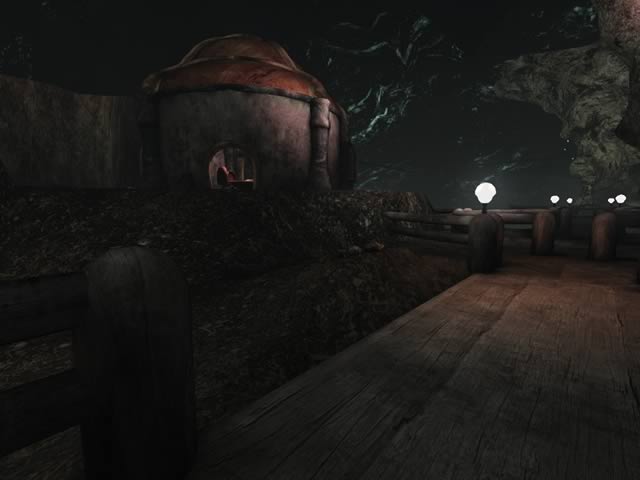
Walk forward and up the slope part. Step into the trolley and enjoy the free ride! As soon as you arrive at your destination point you will be thrown out of the trolley and off it goes. So... no way back for you! Walk forward past the arch. Keep on walking straight ahead and cross the wooden platform. Pan to the left and notice a same kind of arch a little further. Walk past that arch. Keep on walking forward and step onto the dark brown wooden elevator platform to go down.

The first wooden elevator platform
Turn around and step down the elevator platform. Keep going forward a little. Notice that a part of the banister at the left side is missing. Go through the missing part and walk towards the house a little further.
The missing part of the banister
Enter the house and notice two empty books on the table. Exit the house. Walk back to the missing part of the banister and step onto the gangway. Turn to the left and keep on going forward. Step onto the next elevator platform to go further down.

The second elevator platform
Pan to the left and walk towards the next elevator platform. Step on it to go another floor down.
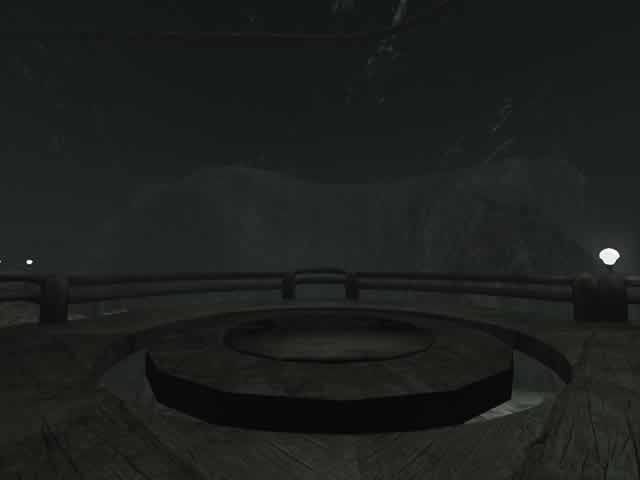
The third elevator platform
Walk around the rim and notice three wooden platforms with in each and every platform some sort of handles. From the left to the right you have a platform with 3 handles, 5 handles and 4 handles. Not only aren't they working yet but you also have no idea what to do with them... right!?
Walk a little further to the right and notice the beaming light on another platform. Walk towards it and touch it to get beamed up. Notice the large lever at the rim of this platform. Nope... it isn't working yet either! Turn around and walk towards the cliff side at the right of the beaming light. Notice the some stairs down below. Go down there and walk towards the stairs.
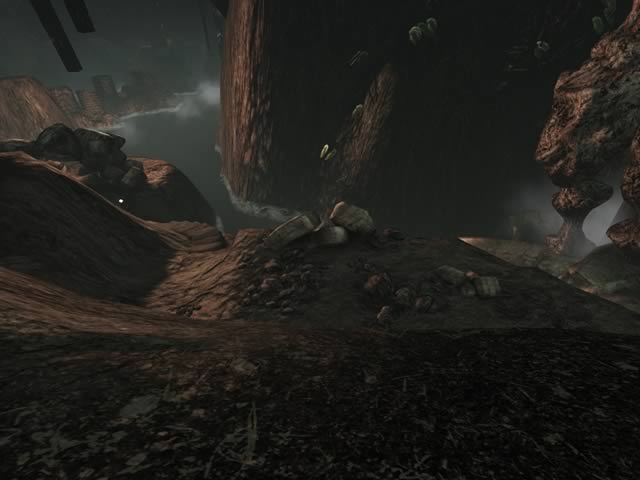
Notice the stairs down there
Go down the stairs and step onto the wooden gangway. Keep going forward until you reach another intersection. Pan to the right and notice some sort of trees branches a little further. Go there.
Notice the tree branches a little further
IMPORTANT NOTE:
A little further in the game you have to read a book in a house. To be able to
read it, you must have lighted four torches in the next part. If you take too
long to enter the house one or more torches might have been extinguished by
which you are unable to read the book. So make sure to light these four torches
quickly enough! If you do take too long and you cannot read the book go back
outside, light the extinguished torches and hurry back inside to read the book!
Keep on going forward over the cliffs. Walk past the grey statue at your right side. At the second stone house at your right side light the torch by clicking on it. Go further and light the next torch on the house at your left side. Keep going forward and light the next torch. Walk towards the houses a little further up. Go there and light the next torch. Go up the stairs and light the final torch. Notice the four dots at the upper right part of this house. In fact this is the only house with these kind of dots on it. That can't be a coincidence of course!

The four dots on the final house
Enter the house and read the book. When you page it through you will see some drawings of circles on each and every page. Of course you can make a drawing of each of them. But believe me, only one page is of impotency! Remember those four dots at the outside of this house! So only make a drawing of the circles on the page with... the four dots!
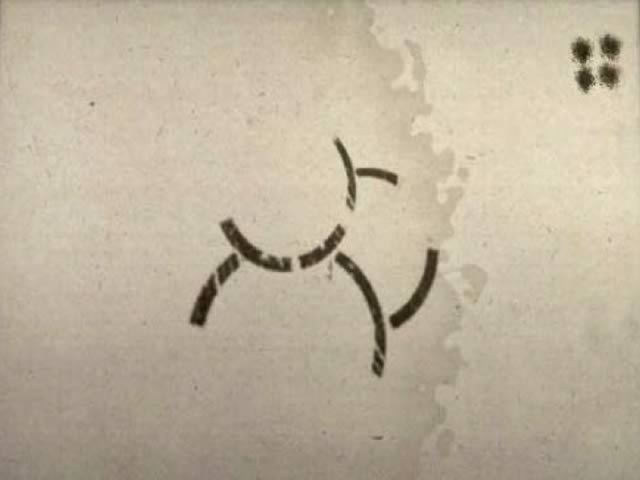
The circles on page... four
Exit the house. Go back down the stairs. Keep on walking straight forward until you reach the gangway. Step onto it and go to the left. Cross the first wooden platform and keep on going forward. Notice the drawing on the rock a little further. At the end of the gangway notice some stairs leading up to the left. But much more important notice the dark brown gas valve at your right. Turn it once.
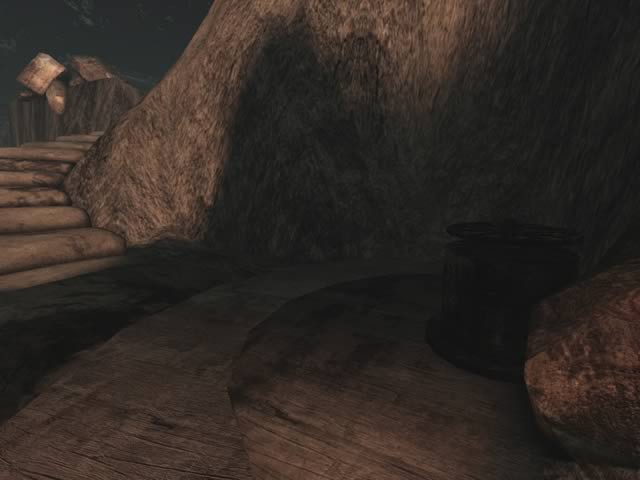
The little bit hidden dark brown gas valve
Now go up the stairs. Keep on walking forward over the cliff until you reach the area with the burning gas burners. Notice that these burners exist of three circles. Remember the strange drawings you saw earlier in the book inside the house with the four dots. Most of those drawings also exist of three circles. Cross the wooden platform and step onto the gangway. Keep on walking forward. At the next dark brown platform go to the left. Step onto the elevator platform to go up. Step onto the gangway to the left where you can see the white beams above the beaming light in the distance.
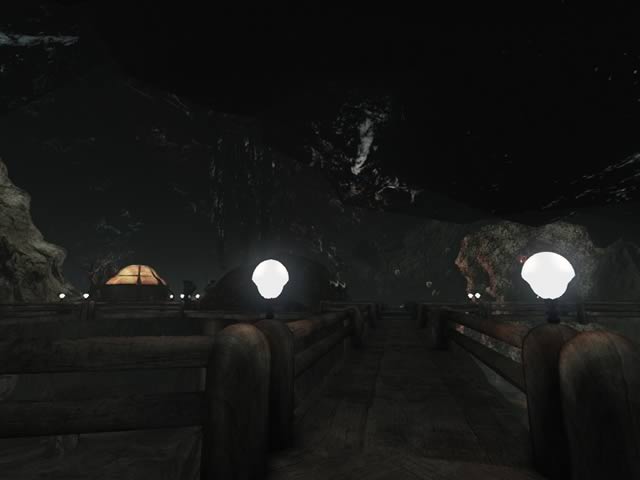
Notice the white beams at the left side of the
gangway further away
Walk towards the beaming light and touch it. You will end up at the lowest level near the platforms with the handles. With the handles you can switch on and switch off the gas burners. Of course you have to set the gas burners on and off corresponding to the strange drawing in the book with the four dots. By trial and error you can switch on and switch off some handles, walk to the gas burners and see the result. But believe me you better do it like this.
Walk to the left around the rim of the wooden elevator platform. Enter the first platform with four handles. Move the two center handles up. Exit this platform and enter the next one with three handles. Flip up the center handle. Exit this platform and enter the next one with five handles. Flip up the second and the third handle from the left. Walk back to the beaming light and touch it to get beamed up.
Walk onto the huge wooden platform in front of you. Pull the large lever. Look up and notice the platform rising from the burner area. Turn to the right and step onto the gangway. At the next dark brown platform go to the left. Keep walking straight ahead. Touch the red lit core to end up inside the cave with the red core.
Exit the cave. Keep walking straight ahead until you are back at the intersection with the trees and the pink flower. Go to the right and walk past the wooden barrels and past the plateau with the green lit core at your right. Go down the stairs. Walk onto the gangway to the left. Keep walking forward.
At the end of this gangway step onto the gangway to the right. Walk all the way to the end. Go up the stairs to the opened book. Page it through. Go back down the stairs and go to the right. Step onto the gangway and keep on walking until you end up inside the dome with the girl...
...the End
This document was provided to GameBoomers.com and may not be distributed without express written permission of the author and the content may not be altered in any way.