|
|
Mystery at Greveholm Walkthrough by Namma |
|
|
|
Mystery at Greveholm Walkthrough by Namma |
|
Story:
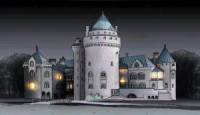
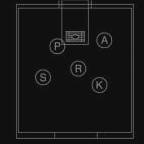
Strange things happen at Greveholm Castle. There are stories dating from the 19th century of a princess from another world who landed on the castle yard in an old space ship. The Count who lived in the castle imprisoned the princess and her space ship behind a stonewall in the darkest part of the fortress. As time passed, the Count became older, and it is said that his ghostly skeleton still haunts the castle.... You have to find the princesses robot, S P R A K, and enlist his help to search through all the rooms and mysteries contained in the castle. Then you have to outwit the Count, mend the space ship and make sure that the princess gets back to her world.
Navigation and Menus:
Mouse controlled. You can use your keyboard arrow keys for walking around.
The Main Menu has 5 options. Start, Quit, Sound, Load & Save. There are only 5 save slots for the game. But this is a short game and 5 are plenty. I never found that I had to return to a previous save. There are 2 spots where you should save. Both are for convenience though.
Navigation Menu (from left to right):
Castle: Brings up the main menu.
Paper: Can be used to bring up a document that provides clues once you have found said document.
Arrow Pad: For moving around
Bag: This is your inventory. Click on bag to view entire contents of bag. Most items can be dragged into the bag. Some will automatically go in. To place an item in your bag, click on item and it will give you a yellow icon of the item. Click and drag yellow icon into the bag. To use an item, click on bag to open, click on the item you want to use, and click on bag again. That item will now be displayed on top of the bag and you may click and drag it to where you want to use it. The yellow icon will turn blue if any item (even the wrong items turn blue) can be used in that spot. You may get a larger view of any item in your bag. Just open the bag and double click on the item you want to see.
Light Bulb: You will only use this one time in the game. Once you have found all the correct pieces and you are standing in the correct spot it will glow green. Click on it then.
Red Herrings:
There are quite a few objects throughout the game that you can tinker with. Do not be concerned if certain items were left out of the walkthrough or if you have items in your inventory at the end of the game. There is a red herring list at the end of the walkthrough.
Coins: There are 10 coins scattered about. Pick up as many as you can find. You must have 5 to win at the slot machine game. If you have not found them by the time you finally see the Princess, then you can freely roam around and get them. However the Coins and Slot Machine are not necessary to complete the game.
Walkthrough
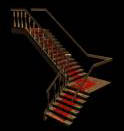
The game opens with you in the Ground Floor Foyer and a couple of ghosts float past you through a door on the left. You need to follow them. Step forward and turn to the left and try the door. It’s locked! We need to find a way in, but first lets check out the rest of the surroundings. Turn right and see a door in front of you, step forward to it. On the door is a large gear. Do you take it or not? Step back and turn to the right. There seems to be some sort of control button on the wall and several wires on the floor. Click on the button and get a closer view. That’s a battery on the floor and several loose wires lying about. Should you fool with it or not? Click again on the red button for an even closer view. The sign says Bridge and the power level indicator shows no power. Step back and click on the ends of the wires on the left. Drag the highlighted plug to the battery. Check the power level again. It’s at 50% now. It looks like you will need to find an additional power source. Step back twice and you will see a staircase. Turn right, move forward, and turn left. This staircase is more like a ramp. Move forward and you will find that the staircase has been shut off. Step back and turn right. Go through the open door into the dark. Explore the path. At the end of the path is a moat that you cannot cross. The bridge is raised. Maybe that is what the red button in the foyer is for. Go back to the Foyer.
Upon reentering the Foyer, step forward once and turn to your left and you will see and door, but it is missing the doorknob. On your right is a floor lamp. Take the bulb and drag it to the hole for the doorknob. The door opens into the Library. Go forward a couple of steps and turn left to the Telescope. Click on the telescope and then click again to begin the game.
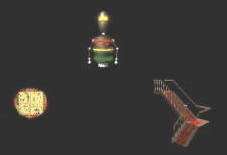
Telescope Game: There is a dish sitting on the roof and a satellite floating about space. There is 3 buttons on each of the upper corners. The bottom right corner is the ‘fire button’. The bottom left corner has a type of roller ball. Use it to direct the roof dish at the satellite. By playing with the roller you will see that you can direct the path of the laser, and also the distance. Once you have it aimed use the fire button to shoot the satellite. You must hit the satellite 6 times in a row to win the game. Each successful hit will light one of the buttons on top. If you miss, it will take away one of your lights. Once you have won you will get a close up of the satellite, click on the skull button to exit. Exiting will take you to the far end of the room where you will see a short video clip and be given your next clue. “Read a book.” There is a lever to the right of the screen that you cannot use yet.
Go back to the other end of the Library to the bookshelf. There are 3 books that you can slide. Find them and click on them. You will here a door unlock. Turn left, step forward, and turn right. The door to the Hallway is open. Go through the door and turn right. Below the wall lamp, on your right there is a pedestal with something sitting on it. Click on it, a mosquito. Click on the mosquito and it will buzz. Turn back to the right and go back through the door into the Library. Turn around and face that same door. To the left of the door is a deer hanging with a red eye. Click on deer and then click on the red eye. It will turn green and then go off. But you hear something start up. It’s the computer. Turn back towards the door into the Foyer and there is a table to the right that has a computer. Click on the computer. Click again to start the Ghost Game.
Ghost Game: This game is similar to pong. Your score is in the upper left and the computer’s score is on the right. Get 10 points first to win. It seems to score most when you hit the ghosts in the head or on the candle. (If you are as bad at pong as I am, then you might want to try my solution; grab a kid and let them play it for you. Thank you Frankie!)
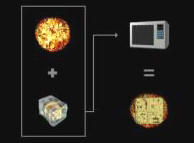
Once you beat the game you will have 3 icons on the computer screen, click on each of them to see them close up. Left icon; pizza clue. Combine pizza and ice cube in microwave. Center icon; parts list and how to assemble SPRAT the robot. Right icon; staircase. Notice that the steps are flattened. Click on the stairs to raise the steps and gain access to the Upper Floor.
 |
 |
 |
Step back from the computer and take Sprat’s head from right side of table. At this point you can either go upstairs and explore a little or try to find a way into the kitchen. If you go upstairs you will find that you don’t have access to the locked doors yet. So we need to find the kitchen.
Go back to the Hallway and go to the far end to the door on the left. Still locked but what a pretty blue seahorse. Take it. Go back towards the Library and when you reach the doorway you will hear a phone ringing. The phone is on the table to the right. Answer it and receive another clue. “Pizza time!” Grab the battery on the table by the phone and go back to the door where you got the seahorse. The kitchen door is open. Click on the inner door and go into the kitchen.
Go to the freezer and find the ice cube. There seems to be something in the ice cube. Take the pizza from the kitchen table. Go put both of them in the microwave and close the door. The door will open when it’s done and you will find the clue from the ice cube lying on top of the pizza. Click on it. There are 4 sections, click on each one to get a close-up view. (This clue does not go in your inventory. Put this away by clicking on the paper symbol to the left of the arrow pad) Save your game here. Later in the game parts of the clues disappear.

Check out the rest of the kitchen while you are here. Find and take the key from the table. Go to the sink and take the lightbulb on the left and the coin on the shelf above that. There is something on the counter to the right of the fridge. Click on it. Buns! Play the buns game and a bun will be placed in your inventory.
Bun Game: This is a memory game. A bun will disappear. Click on the same shape bun and all the buns of the same shape will disappear. You have to make all the buns disappear. If you make a mistake all the buns will reappear and you will need to start over. Here is a cheat sheet:
Bows: 5 Circles: 4 Donuts: 4 Hearts: 5 Stars: 5
Go to door with the red button to the left of the fridge. There are 3 colored boxes on top and 12 symbols below. Click on each of the colored boxes to see what symbol the picture is made up of. Click those same symbols on the panel below in the same order. Left to right they are: heart, @, star. The door swings open and you can enter the clock room. Go forward and play the clock game.
Clock Game: There are 5 clocks on the table that are running at different speeds. The wall clock on the left is a counter. On the right there is a panel with buttons. In the center above the clocks is a digital timer. Click on one of the 5 clocks on the table when it reads the same time as the digital timer. (Keep in mind the timer is a 24-hour timer. So any number above 12, you need to subtract 12. e.g. timer reads 18:00, subtract 12, so the correct time is 6:00.) If you do it right, a button on the right will light up and the wall clock will move one number. If you do it wrong it will take away one light and the counter will move back one number. You must do 7 correct in a row to win. The digital timer will change every time you click on a clock or in 10 seconds if you don’t. I found it was easiest to concentrate on just a couple of the clocks on the table. When you beat the game you will get a clock placed in your inventory.
Leave the kitchen and go back to the Hallway. Go to the door opposite the Library and use the key from the table to open it. Enter the Boxroom. Click on the brown panel on the left. There is an outline of a clock. Place the clock on the shelf there and the door will open. Take the flashlight. Step back. Click on the brown panel on the right and see a hole that looks like the bun you have in your inventory. Put your bun in the hole and the door will open. Take Sprat’s body. Step back. Click on the center panel and push the red button. The bars start moving. When the large gap in the bars is over the handle click the red button to stop the bars. Click on the handle and it will turn green. That green light opens the cellar door. Step back and turn right to find another coin.
Go to the upstairs hallway and find the corridor (just past the pedestal with the green vase on the right) that leads to the cellar. Face corridor and see a battery on the floor, pick it up. (You can choose to go use this battery now or wait until later) Step back and then go forward as far as you can. You will see a short video clip of a ghost and he locks the door on his way out. Turn around and step forward. There is a coin on the shelf to your right. Turn around to the other shelves and take Sprat’s arm. Click on the goblet to open the wall for the chest in the next room. Turn left. Press the floor buttons in the correct order and the chest will move forward.

Step forward, click on the chest to open it and take Sprat’s heart. Turn around and step forward. The light bulb on your navigation tool bar is glowing green. Click on the light bulb to assemble Sprat. Just drag the pieces onto the outlines. You cannot make a mistake. When you have completed Sprat his heart will glow and a skull icon will appear on the bottom right. Click skull to get video of Sprat opening the cellar door for you.
Go back upstairs to the ground floor hallway. Pick up the coin on the floor under the slot machine before you go down the stairs. Halfway down the hall there is a guitar lying on the sofa. Click for a close-up and then take it. Now go back upstairs to the Music Room, last door on the left. The door is now open. Step into the room and you will see a grand piano and a wall map. Go forward and you will be right in front of the wall map. Don’t click on it yet. Look around the room. Turn left and face the piano. Click for a close-up and you will find that the lid is shut tight. Turn left again and click on the freestanding fireplace in the left corner. Click on it for a close-up. There are buttons with letters on it. Turn back to the wall map and click to activate it.
Musical Map Puzzle: You will hear several different regional songs played. Listen to the song, and pick up the candle and place it on the shelf near that region. The puzzle will not allow the candle to go on a shelf where it doesn’t belong. If you try to place the candle on the wrong shelf it will just return to it’s original position and a new tune will play. Place a candle on each shelf to complete the puzzle. Once solved, the piano lid will open.
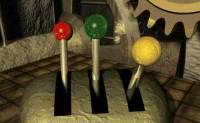
Turn to the piano and press any key. You will hear a sequence of 5 notes. Play those same notes using the buttons on the fireplace. The notes are: C, H, G, E, and C. The first “C” is on the bottom right and the second “C” is the top left one. The doors to the fireplace swing open to reveal a roaring fire. Above the fire is a red button (yes, another one). Press the red button. (Note: It is not necessary to do the Musical Map Puzzle or play the notes on the Piano if you know the correct buttons to push on the fireplace)
Return to the Library downstairs and go to the fireplace. The fire is out, click for a close-up and then click on the newly revealed red button. Go back upstairs to the Music Room and take a look in the fireplace. Take the key.
Go to the door directly across the hall from the Music Room. Use the key on the locked door and enter the Parent’s bedroom. Turn right and pick up the bottles and the coin. Turn back to the left, step forward and turn left. Click on the drapery cord to open drapes and reveal hidden grate. Click on grate and move forward twice. Click on door and climb through hole. Go forward and take bucket. Turn left, move forward, and turn right. Click on picture of anchor to reveal hidden switch. Click on anchor switch. Go left, forward, left, forward left, forward, left, forward. There is a hole in the ceiling that you cannot reach. Leave it for now and move back, left, forward, left and click on bookcase to open.
Exit through bookcase into upstairs hallway. Go to ground floor hallway and find the picture that has swung open to reveal a ship. Click for close-up and then take the anchor. Go back upstairs to the first door on the right. Use the anchor for a key. Enter the children’s bedroom. Turn towards the hall door and pick up the coin. Turn back around and go forward to the blocks. There is a hole at the top of the blocks. Climb the blocks and crawl into the hole. Slide down the tunnel.
You are in a very narrow dark hallway. (Personally, I’m feeling a small sense of Déjà vu here) Pick up the coin on the floor in front of you. Go forward and you will see 4 wires coming through the wall, but one is unplugged. Remember the wires going through the wall in the Foyer for the Bridge? Click on the plug lying on the floor and plug it in. A secret door opened. Go through the door and turn around. Take the battery from your inventory and place it on the floor near the other wires. Plug the wires in to it. The ‘Bridge” sign is flashing. Click on it and see that you have full power now. Press the red button and you will hear something moving. The bridge of course!
Go back outside and follow the path to the moat. Along the way there is a coin lying on the ground by one of the lampposts. The bridge is lowered and there is a room with lots of crates. From where you are standing on the lowered bridge, go forward 5 times and turn around. There is a coin on the bottom ledge of the narrow box in front of you. Take the coin. Go forwards 3 steps and click on the box in front of you with the action cursor to move it out of the way. Take 3 steps forward and turn around. Take the coin on the top of the box on your right. Take 2 steps forward and turn around and move the box on the right. Take 3 steps forward and take the ladder. Turn around and go back into the house.
Go up the stairs and through the bookcase at the end of the hallway. Turn right, step forward, and turn left. Place the ladder on the floor in front of you. Go up the ladder. A skeleton appears; he seems to be guarding a door. Remember the clue from the upper left corner of the pizza. Place the bucket on the floor (left side of room), and add the bottle to it. Your cursor is now the bucket. Hold your bucket just above the center of the door. You will see the bucket turn upside down when the skeleton pauses in front of the door. Click the cursor when the bucket is upside down and the skeleton will melt away. There is something lying on the floor in front of the door. Go forward and pick it up. Put the key in your inventory. Now take the key out of your inventory and use it to open the door. Go forward until you are inside the spaceship. There are some brightly colored levers to the right a bit and several gears in front of you, but one of the gears is missing. (If you did not take the gear from the door in the foyer in the beginning of the game, then you need to retrieve it now) Place the gear onto the empty spindle. Click on the colored levers. Push the red one away from you, pull the yellow one towards you, and just click on the green one, but don’t move it.
All the gears will start moving. Take a step in any direction and the Princess will appear and give you a clue. “I am the princess and you have saved me. Find the lever to start my spaceship.” Go downstairs to the video screen at the far end of the Library on the table. Use the lever on the right side of the screen to see the rocket blast off, taking the princess with it.
Red Herrings List:
Main Foyer: Picture to right of door with gear.
Library: Picture to left of bookcase.
Parent’s Room: Remote Control on bed
Children’s Room: Typewriter type in different words and the pictures on the wall will move.
Upstairs Hallway: Globe and Slot Machine (if you win at the slot machine a secret door will open)
To Play Slot Machine: Take a coin from your bag and click it on the slot machine. Pull green handle. The wheels start turning, you must match the picture in the left most window with a picture that it goes with in the bottom picture. e.g. anchor, sailboat. Just keep pulling the handle until you either win or run out of coins. If done correctly you will hear a ding and one of the top lights will be lit. Get 5 right to open secret door in middle of hallway.
Played on:
Win 98SE
1.2 CPU
512mb ram
128mb graphics
52x cd rom drive
DirectX 9.0b
(also played in my 2 other disc drives)
Installation is quick and easy. You do need Quicktime 2.1.2, which can be found on the game disc.
No adjustments were needed to play the game.
This document may only be distributed
with the express written permission of the author,
Namma
The content of this document
may not be altered in any way without the permission of the author.
Any proposed changes or additions
to the walkthrough may be submitted to
Namma.
copyright © 2004 Namma