Lifestream
by Christopher Brendel and Unimatrix Production
Walkthrough by MaGtRo October 2004
Gameplay: Press ESC to skip cutscenes. Press ESC twice during changes in screen view to stop the fuzzy transition sequence. To use an item on the screen, click-hold the item from inventory and drop it in active spot. There are some parts that are dark and increasing the brightness of your monitor might help. Once installed, the game can be played without the CD in the drive.
This walkthrough describes only the steps to get through the game. You will miss a lot if you do not explore each area and check active items. Read the journal to follow the storyline. The game is loaded with Easter eggs that are hilarious. Do multiple clicks on items and persons to see what surprise you can find.
Watch a priest writing about his research that has now consumed his life. John wakes up from a nightmare.
Prologue: Pathways
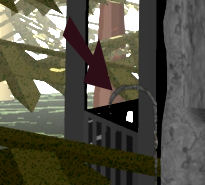
Outside the house:
Walk to the door and find it locked. Turn around, right, look down to the water of the swimming pool. Take the key. Look up, turn around and go to locked shed. Click-hold-drop key on lock.
Shed door puzzle: Look at inventory picture of Father Randolph Holton. Enter HOLTON on keypads. Press the bricklike panel at the bottom.
Click on door, forward down the stairs, left, forward pass another corridor and up the stairs at end of the corridor. Enter the library of John's father's house.
Library:
Bowl: Check the bowl, look in bowl and click on center. Hear a click that opens the secret panel on the bookshelf.
Books: Check the green book of Herbal Mysticism at second from bottom shelf. Read about the different potion preparations.
Office: Turn around and enter the door on the left.
Painting: See a picture by the lamp. Note that there's an active spot at top right outside the frame.
Desk: Look at picture of father and son. Click on right arrow to turn the picture and note a square with 16 small squares. The square is framed in green. Read the letter on the desk. Read the marked page of the bible - note verse 5:30. The top right drawer is locked.
Trash can: Look close at trash can at right of desk. Note the clues on the crumpled paper - melody for 12 o'clock, 3 chimes for 6 o'clock and one chime for the rest.
Clock puzzle: Look up and see that it is missing the hour hand. Based on the clue of the bible and the crumpled paper in the trash can, move the clock to 5:30.
Rotate the minute hand by placing the cursor at right side of clock.
Make a complete rotation of the minute hand and stop at 12. Click the center to hear the sound.
Do this several times until a melody is heard. Now it is 12 o'clock.
Make 5 complete rotations and stop at 12. It is now 5 o'clock.
Move the minute hand to 6 and it is now 5:30.
Press the center of the clock. Hear 5 chimes.
Look down to desk and click on closed drawer. Take the gloves and read the journal from the open drawer.
Chapter I: A place of worship
Father Randolph's room: Turn around and open the closet. Click on white priest cloak. Close closet and exit the room. Exit through the double doors and go to the altar in church. Hear a sermon. Go back to the room and place the priest cloak in the closet. Exit to the front vestibule of the church.
Front vestibule of church: Look close at the paper of the confessional schedule on the counter. Look left and talk to Anne. Enter the church and pick up the purse on the floor at right. Give it to Anne outside. Take Anne's address for dinner at 6.
Confessional: Enter the church and go to the left confessional. Read the procedure for the confessional lights. Click on panel, follow the procedure and listen to 3 confessions from Anne, young man and a stranger. Listen to stranger and take the safety deposit box key. Talk to Father Grandl.
Chapter II: Meetings
Library: Exit the room and talk to Father Grandl completely. He wants to find his rosary.
Foyer: See a couple of ghosts buying the house. Look under the table on the right. Note the familiar 16 small squares with different shaded squares framed in red.
Kitchen: Turn to right and enter the dining room. Hear voices about the place settings. Turn left and enter the kitchen. Go forward to wine rack. Take bottom bottle and see a keyhole shaped liked a cross. Turn right and open cabinet to see settings for oven control.
Oven puzzle: Look at oven. The door is stuck.
The top left small bar resets the puzzle. The long bar shows the oven temperature.
Based on the clue seen in the cabinet, the oven should be preheated to 375. The first 3 dials subtract from the oven temperature and the last 3 add to it.
Turn dials using the clues above and mathematically solve the puzzle.
One solution of the puzzle is: (from L-R, dials are numbered 1-6) Click dial 6 (15xs), click dial 5 (7xs), click dial 4 (1x), click dial 1 (1x) and dial 2 (1x). The temperature should be 375 deg now.
Open the oven door. Use gloves to take pole.
Office: Go to the office and see a woman ghost. Use the pole between right edge of picture and above the lampshade. Turn the pole 3 times and see a slider puzzle. The slider puzzle is random. I saw 2 different start arrangements in my gameplay. When the slider puzzle is done, take journal pages from open safe.
Chapter III: Dinner Guest
Go outside church and click on vestibule doors. This will make Father Randolph repeat talking about the car keys. You won't be able to access the drawer peg puzzle later on if you do not do this. Go to the priests' rooms at the back of the altar.
Father Dan's bedroom: Go to Father Dan's room left after entering through the double doors. Look at the drawer and get a close look at the peg puzzle.
Peg puzzle: The object of the puzzle is to remove all pegs except one by jumping a peg over another one. Labeling from top to bottom and left to right: Click-hold-drop 3 to 11, 5 to 7, 11 to 3, 1 to 7, 9 to 1, 1 to 5, 5 to 13, 12 to 4, 4 to 10 and 13 to 5. Take car keys.
Exit the church.
Post Office:
Safety deposit key puzzle: Use the magnifying lens on the key in inventory. Change the numbers on the key to the letters of the alphabet. 26 is letter Z, 5 is letter E, 18 is letter R, etc... They form Zero One Eight.
Ring the bell and talk to the girl. Type in 018 on the text frame. You now have a box in inventory.
Anne's House: Knock on glass part of window. Watch.
Chapter IV: The Well
Well: Exit the office and go to the glass double doors behind the stairs. Look in well and see another puzzle.
Well puzzle: The object of the puzzle is to form a sentence by clicking on the circles.
Start by forming either one of the 2 3-letters words. Top right is THE and the bottom right is AND.
A sentence is formed: Open the well and save your dads life.
Click on the puzzle and the cover of the well is removed.
Gazebo: Leave the well, turn left, forward, pass the pipes on the wall and look at the gazebo and the statues.
Take the crowbar left of the male statue. Enter the gazebo and click twice on the crystal ball. Note all the plants in the gazebo.
Trap door: Go back inside the house and use pole on the keyhole of the trap door under the stairs. Take bucket and rope. Note the third 16 squares with different shaded squares, framed in blue.
Well: Go back to well. In inventory, click and drop rope on bucket. Drop roped bucket in well and note that the water is too strong.
Water pipes: Go to water pipes on house wall.
Water pipes puzzle: The object of the puzzle is to close pipes so no water flows. The gold squares turn gray when no water flows through it.
With the arrows on the right side of the wheel, turn the bottom wheels twice.
Using the left side arrows, turn the 2 right top wheels until they cannot be turned anymore.
Using the right side arrows, turn the 2 left wheels until they cannot be turned anymore. The water is off.
Well: Click the well to open the cover. Drop the roped bucket in the well. Click on left side of well to turn the crank. The bucket is lowered and more journal papers are added to journal.
Chapter V: Conspiracy and Lies
Father Randolph's room: Look at sealed folder in inventory.
Sealed Folder puzzle: The object of the puzzle is to have a jewel on all the points of the pentagram.
Click on a point and a jewel will appear, then click on another point connected by a line and that jewel is moved to that point.
Numbering clockwise 1-8 starting from the top: Click on point 1 to move the jewel to point 4, 2-7, 8-2, 8-5, 3-8, 6-3, 1-6 and then click on 1. Click on center red dot. Read the folder in inventory.
Look at box on bed.
Box puzzle: The object of the puzzle is to arrange the white lines on each colored circle to point to the correct colored circle.
Follow the color sequence under the word PRESS.
Turn blue to point to green, to red, to yellow to brown and lastly to blue. Then press PRESS. Look at open box and take the gem.
Father Dan's room: Go to Father Dan's room at the other end from Father Randolph's room. Talk to Father Dan. Show the gem to Father Dan as proof. Go back to Father Randolph's room.
Chapter VI: Making Contact
Read the journal. Go to the gazebo.
Gazebo: Based on the book in the library about the Potion of Revealing, there are several plants that are needed to be picked. Enter the gazebo, pick nightshade from left ceiling. Turn right, take blackberries from post, white yarrow at bottom left and daisy-like chamomile from behind woman statue. Go out and take rose petals from the woman statue. Turn around from gazebo and look down on the ground under the tree branches. Take dill from far right and chicory at far left.
Go back to house and on the way, turn the pipes to have water flow again. Be sure that all the gray squares are now gold.
Go back to the house and see the couple again.
Father Randolph's bedroom: Go upstairs and enter the room on the left. See Father Grandl exit the room. Click the bed and see Father Randolph point to right side of bed. Look to where he pointed and take ballerina key.
Go to mirrored dresser. Open the 3 drawers and take candle, cup and matches.
Ballerina music box: Get all the drawers pulled out. With right drawer pulled out and other 2 pushed in, click on left drawer. Look close at music box at opened bottom cabinet.
Use ballerina key on box. Click on ballerina's head and take the map of the maze. Click on the headless part of the ballerina.
Bathroom: Go to the bathroom, the door across from the stairs.
Prepare the Potion of Revealing:
Go to the sink at right. Turn on the faucet and fill the cup with water.
In inventory, click hold plants picked from the gazebo area - nightshade, blackberries, chamomile, rose petals, chicory, dill and yarrow on cup.
Go to the bathtub. Click cup filled with water and plants on bathtub and the contents will be poured on tub.
Place the candle on soap tray. Click the match on candle to light it. Click on candle with lips cursor.
Watch the ghost woman take a bath.
Talk to woman:
Go to mirror above the sink and see that it is fogged up.
Click on mirror and click on letters to form 'Can you see me'. C is already selected, start by clicking on A, then N, etc... Then click on GO.
Chapter VII: The Search Begins
Watch.
Father Dan's room: Go to Father Dan's room. See feet under the bed. Click on the note he's holding.
Father Grandl's room: Exit the room and go to the other side of the priests' quarters. Enter the door to the left. Look around the room. Check the second drawer of the side table and read the music book. Note the suggested beginner melody is FDECG. Take the tile from top shelf of closet.
Balcony: Go to the church doors and climb the stairs to the balcony.
Organ puzzle: Look down at the organ keys. The keys from left to right as stated by the music book are CDEFGAB. Play the music book suggested beginner melody - FDECG or from left to right: 42315. Hear a sound.
Turn right and see a square on the wall. Look close and place the tile taken from Father Grandl's room on the square on the wall.
Tile puzzle: The object of the puzzle is to have a sum of 9 from the numbers on circles connected by lines - the sides and the middle lines.
Click on any circle and see the numbers 1-6. Click-hold-drop the numbers from one circle to another.
One possible solution is L-R: Top - 3, middle 4 and 5 and bottom 2 6 1. When done correctly, a buzz is heard and the numbers disappears.
Turn around to the other wall and see a secret passage.
Secret passage: Enter the secret passage and look around the room at the end. Look close at the table. Read the letters from Dimitri to Father Grandl. Open the Holy Bible. Look at the collar on the base of the skull with the secret insignia of the society.
Watch the cutscene.
Chapter VIII Requiem
Bathroom: The mirror flashes. Click on mirror. Okay, let's look under the carpet. Go to front of bathtub and look down. Click on top right of the carpet and take Grandl's rosary.
John's bedroom: Exit the bathroom, turn left and enter the other bedroom. Hear Grandl say something about a document. Look around and note that a dresser drawer is locked. Turn to right of bed and look at the balls. Move cursor to the left of the biggest ball and click. See a monkey. Click on monkey to see the fourth 16 small squares framed in yellow. Click on monkey again to see it play.
Go to other side of the bed and click on the rocking horse. Click on the flashing eyes and this unlocks the dresser drawer.
16 Squares puzzle: Note the familiar 16 squares seen at the back of the picture in the office (gold), under the right foyer table (red), trap door (blue) and from the monkey toy (yellow). Click on the squares to copy the pattern of the shaded area of the squares.
The box opens. Take more journal papers. Read the journal to understand better what Father Randolph has gone through.
Dining room: Go down the stairs and hear a sound from the dining room. Enter and 'ouch'!
Chapter IX: Trials and Truth
Talk to the Librarian completely.
Trial 1: Turn right and see the bookshelves. The Librarian said - The bookshelves must be returned to order. Note that the 15 books on top shelf quotes Randolph's journal.
Arrange the books in the same sequence as that of Randolph's words in the journal.
Numbering the books from L-R 1-15: The correct sequence is 11, 9, 14, 5, 3, 2, 10, 12, 7, 15, 13, 1, 4, 6 and 8.
Cheat - click at bottom right several times and the books will be arranged.
Trial 2: Exit through the red door left of the Librarian. Go forward 3 times to the jewel. Color is the key.
Click on jewel and see circled colors on right left.
Click on any circle at left of jewel 10 times and the correct color will be placed on the gem.
Trial 3: Click forward and be in a throne room. Click forward and turn right. Talk to the librarian completely. This is the Poor king and the rich king trial. Poor and rich must be merged.
Turn around and see fire in a stand. Climb either stairs on the side and come out in another throne room.
Look at the throne and take the ice cube. Go back down to the fire stand.
Look close at the fire stand
The object of the puzzle is to get the ice through the path without touching the walls. Save your game here.
Place the ice cube at center of fire. Click once on ice cube and navigate the cursor through the path until the end at right before the 30 seconds time elapses. Good luck! If you fail and did not save, get another ice cube from the other room.
When successful, go to the ice cube room and exit through the door.
Trial 4: Find your way out of the maze. Hear whispers. Go to place of the loudest whispers. The wrong path produces laughter.
Go forward, right, right, forward, left and forward. The forward cursor is not at the center but left of center.
Trial 5: Talk to the Librarian. The goal is to get out alive. Follow your heart only it can guide you.
Go forward, left, left and forward to a brick setup. Look down at the hole at base of the brick and click on hole. A spider comes out. Take the spider key ring. Turn around, forward, right and look down at a puzzle on the floor. Insert the key ring at bottom right slot.
Matching puzzle: The object of the game is to turn all the pictures over by clicking on duplicate pictures one after another. Click on a square and find the duplicate picture. Write them down to help you.
Tic Tac Toe puzzle: It's a random puzzle. You're X and starts first. Always start at the center square and click on squares that block the skull from completing a row while trying to make 1-2 lines yourself.
You are enlightened!
Talk to Grandl. Back to Anne's house - knock on door. Watch.
Chapter X: Gateway to the Portal
Grandl took the rosary. John says find out where this map leads.
Library: Ha, Grandl blocked the front door. In the library, click the center bottom of the bowl and hear a click. Pull back and go through the secret panel on the bookcase.
Maze: Go down to the dark passage off the main corridor. Look and study the map.
Go forward, right, forward, right, forward, left, forward, left, forward, left, forward to wall. Then use the back up cursor.
Tile puzzle: Look close at the tile. The object of the puzzle is to plot down the path taken when you entered the maze until this spot of the tile puzzle. Start at top left of the puzzle. Refer on the map also.
g g i Xf f i h i f f h i h i h g g g g g g h Click on the last arrow placed at top right until it changes to an X. When done correctly, automatically pull back. Click the top of the puzzle stand. Take the picture. Push in the shelf.
Look at picture in inventory. Place the picture on the gold clip at top left of the tile puzzle. Use crowbar on stuck bottom drawer. Take the Ancient Prayers and Incantation book, the paper and the rosary. Read the journal paper. Read the prayer book, especially the Prayer for Protection from Evil.
Exit the maze by going forward and right. See a left and right forward path. The left split goes to a map of the maze and the right is the way out. So, take the right split, right, forward, right, forward, left, forward, left and forward. The music stops.
Go back to the house by turning right, forward and up the stairs on the left.
Kitchen: Go to kitchen and the wine rack. Take the bottom wine and use the rosary on the keyhole.
Go down to the end and see Grandl.
End Game: Click on the phrases of the Prayer for Protection from Evil to form a complete prayer within the time allotted. If you fail, there's a 'try again'.
2nd right - Assist us mercifully, O Lord, in these
Top right - supplications and prayers, and
2nd right - dispose the way of our servants
Bottom right - the attainment of everlasting
Top left - salvation: that among all the changes and
3rd right - chances of this mortal life, they
Bottom right - may ever be defended by your gracious and
Bottom left - ready help; Jesus Christ our Lord. Amen.
Use the glove and take the jewel. Throw the jewel into the vortex. Watch the dinner with Anne.
Epilogue: Watch the explanation.
This document may not be distributed without express written permission of the author and the content may not be altered in any way.
For
Questions or Comments on this Walkthrough,
Please write to:
MaGtRo
Copyright © 10/2004 MaGtRo