THE NIGHT OF THE RABBIT
by Daedalic Entertainment
Walkthrough by MaGtRo May 2013
Gameplay: This is a third
person point and click adventure game.
Main Menu has resume game, start a new game, load
game settings and quit game.
The bonus of the game is shown by a gift box is at
right corner of the screen. It has achievements, audio book, stickers,
videos and quartets.
The bonus collection page also shows the
credits and can replay card games. All the goodies in this page can be
played after they have been activated.
Achievements are won by doing specific actions
in the game. It is best to check the descriptions of the achievements to
watch out for those actions.
Audio book has 8 Mousewood stories by Matt
Kempke.
Stickers are pictures of critters from Anja's
daycare.
Videos show the cutscenes in the game.
Quartets show the collectible cards in the
game.
At bottom left of the main menu screen, the other
games by Daedalic Entertainment can be previewed, the Facebook link and
language setting for gameplay.
The ingame menu is accessed by the ESC key.
A tutorial at start of the game shows the gameplay
manipulation.
The journal that appears at top left of game
screen or in inventory shows the tasks or events that is needed to progress
in the game. Once they are done; the text is grayed out.
Inventory can be accessed by the I key or
scrolling the mouse scroll button.
At right perimeter of the inventory bubble,
other items that can be used during the game is kept (example is the
magic ring).
At the stem of the bubble, the main menu,
save-load, journal and bonus icons are seen.
Double click an exit arrow leaves the screen
faster.
To save the game, click on an empty frame and then
click on the "save" word at bottom. Saves can be deleted or overwritten.
A long-haired magician is in front of the First Tree.
Beside him is a trunk full of items for a magic show.
Marquis de Hoto, a 6 foot tall rabbit meets an Odd
Figure-woodsprite at the branches of a fog covered tree. Talk to and follow the
Odd Figure. A lizard appears for a few moments.
The Odd Figure shows the beginning of the story.
Jeremiah Hazelnut, a 12 year old boy wishes to be a magician.
2 days of adventure.
A tutorial can be done at start of the game. The radio
describes the various game manipulations. You can stop this by clicking on the X
at top right or repeat them by clicking on the radio again.
Collect blackberries:
Home: Take the empty
basket from window sill. Talk to Jerry's mother. She asks that Jerry
collect blackberries.
Take a carrot from the bed left of radio.
Jerry notes large animal footprints under his window. Check the Weathered
statue (Old Dwarf).
Take some strawberries. Do the
same for the red currants at right. Jerry eats them.
Sticker (optional): You
can collect 8 stickers spread out in the game. There is a sticker (Lizard)
on the red frame of Jerry's bike - under the seat. (Thanks to July.)
Open the well camouflaged secret stash. Jerry takes matchbook, decayed firecracker and coin with hole.
Walk the path to the woods.
Woods: Take the cola
can on the ground. Check the lamppost and group of small statues right of lamppost. There's a small prone statue under a tree at right.
Check the forest crossroad at bottom of screen.
See acorns up high on the tree above the crossroad.
Deeper in the woods - Old Path Tree:
Take the path at middle of screen.
Examine the pond, round stone over flat stone right
of bridge.
Examine the chalk quarry to take crumbly chalk.
Examine the strangely shaped rock (toad) and the Old
Path tree. Check the circle of mushrooms under the tree at right.
Pick up the stick by
the shore.
Go back to the forest crossroads.
Use the stick on the acorn on the tree. Pick up
the acorns.
Edge of town: Continue to
the right. Look at town.
Check the large statue with acorn at right.
Collect blackberries: Go right and see that the blackberries are blocked
by the brambly bush.
Use the stick from deep woods to remove the thorny
bush. Jerry picks up rose hips from the ground.
Check the spider web at right. Use the stick to
remove the spider web.
Collect all the blackberries (3 times) to get
basket with lots of blackberries.
Go back home. Jerry automatically leaves the
berries on the window sill.
How to make a Carrot flame:
Letter: See a triangular
flying letter enter the mailbox. Try to open the mailbox twice. The flying
letter goes to Jerry's pocket.
Read the letter in inventory. Note that the seal
of the letter has a symbol that consists of 2 circles and a line.
After drawing on rock a symbol all in white -
grinding white powder makes it right.
Be sure that you have collected the carrot and the
contents of the secret stash at home. Go to the deep woods.
Use the crumbly chalk from the quarry on the strangely
shaped rock (toad). Jerry draws the symbol seen on the letter seal.
A squirrel enters the mushroom ring and leaves
something. Pick up the squirrel's tree bark from mushroom ring.
Use the crumbly chalk on the flat stone right of
the bridge.
Pick up and use the round stone on crumbly chalk
Take the chalk powder.
Then add black in turn, the kind you should be
loath to burn.
In inventory, combine the decayed firecracker with
the chalk powder to get powder mixture.
Black and white they combine, the inside of your
vessel line.
Combine the powder mixture with the cola can to
get can with powder mixture.
The three more things: tree skin, tree fruit and
lastly, but not least, a root.
Combine the can with powder mixture with the tree
bark to get can with powder mixture and bark.
Combine the can with powder mixture and bark with
the acorns to get can with powder mixture, bark and acorns.
Combine the can with powder mixture, bark and acorns with carrot to get can with powder mixture, bark, acorns and
carrot.
At crossroads, draw a circle with the powder mix
obtained, put vessel in the center of the powder ring thus gained.
Go to the crossroads; use the can with powder
mixture, bark, acorns and carrot on crossroad. Jerry draws a circle on the
ground and places the can with mixture at center.
Set the circle - bang! - on fire, the carrot flame
leaps high and higher, and I will swallow it in haste to enjoy the lovely
taste.
Use the matchbook on mysterious circle. See it
explode and a magic show trunk appears. Fanfare is heard.
Magician's Apprentice:
Check the trunk of Great Zaroff. Take the
poster to expose a rip on the lining.
Check the rip. Take the magic wand.
Take the top hat and something moves inside. Use
the magic wand on top hat.
Meet Marquis de Hoto. Jerry becomes the magician's
apprentice. The Marquis promises that they will be back before dinner.
A new feature is added - the magic coin (coin with
hole). Using the magic coin or pressing the space bar or the middle mouse button will
show all the active items in the screen.
The Marquis explains about Treewalkers. At deep
woods, Jerry sees the Toad and the Path tree differently. Learn about
Portals.
The Marquis looks far and sees 4 nails enter the
clearing.
Jerry enters the portal and comes out in another
world. He is smaller; like the backpack mouse. The Odd Creature appears for a moment.
They are in Mousewood; where Jerry will undergo
wizard training. The Marquis leaves Jerry to talk with the town
council.
Look around Mousewood
Town Center:
Talk to Edith the squirrel. She is waiting for
Plato the mailman to deliver her package from Supersquirrel Boutique.
Talk to the Dancing Mouse who is practicing his dancing
for a birthday party tonight.
Talk to Spitzweg the pudgy animal with umbrella. Spitzweg is a traveler and wants to meet with Jerry at the barrier.
Jerry can get there by taking the ramp right of the gate.
Talk to the backpack mouse. He thinks
there's a ghost following him. He picked up a book in the woods and the
ghost attached to him.
Use the magic coin or space bar to see the
woodsprite behind the mouse. The mouse gives the mysterious book to
Jerry and enters the Coffee Shop.
Town Council:
Marquis de Hoto calls Jerry and they enter the Town
Hall.
See Jonathan the squirrel and Conrad the owl. Jonathan recognizes the
Marquis as one of the first Treewalkers.
The Marquis asks permission for Jeremiah Hazelnut,
his apprentice to learn his art in the Mousewood woods.
The treewalker apprentice alone should prepare for
the Treetop Festival. The apprentice should deliver invitations to everyone
for the Treetop Festival, order baked goods and blue juice.
Jonathan recommends to talk to Anja about the
orders.
Look around. See Ursula, Conrad's niece
disarranging the books. Check the books, windows, Rider painting, fire, iron
armors and balustrade. Learn that the rider is the founder of the town and
established the moral foundation of the town. Only citizens of the town can check the town documents kept at the balustrade.
Talk to the Marquis again. He snaps a 90 year old
ancient invitation from the documents above and gives it to Jerry.
The Marquis also gives a magic postage stamp that should be placed in
an envelope that has the invitation in it.
The Marquis also added Advice Seeker, a
minor spell in inventory. It is a "question mark" icon.
Check the table in the shape of a 3 leafed clover.
Hannah Mouse, the third council member disappeared after the last crow
attack.
Center: Exit the Town
Hall and look around.
Dewdrops (optional): Click on
all dewdrops seen in the game. There are 32. If you clicked on all of them
you can get an achievement and access a picture in the game.
There's a dewdrop on the hanging bridge above
the center.
Sticker (optional): There is a sticker (Ninja) at bottom
part of the advertisement pillar behind the mail call-golden horn.
Check the colorful wooden clock on top of the Town
Hall and the statues.
Check the golden horn with frog beside Edith.
Check the advertisements left of Town Hall. Learn that blue juice is made by
wood dwarves.
Treetrunk Coffeeshop:
Look at the Cafe at other side of the brook.
Enter and look around. See the mouse with backpack
enter from backdoor and locks it.
Herbal shop: Ring the bell at
herbal shop. Anja comes out and explains that Uli is not here.
She gives a sugar-free lollipop and a
very dry cupcake.
Check the Herbal Pharmacy at right and the
pictures of Uli the herbalist. There are Valerian Drops-sleeping
drops that cost one leafbuck.
Talk to the mouse and overhear that he misses his
friend Uli and that he is tending his garden while Uli is gone.
If the backdoor is open, try to exit and be
stopped by a grouchy hare.
DJ: Talk to Ludwig Burrower, the mole at right and
Jeremy recognizes the voice. He is the radio DJ. He stopped broadcasting
since the swamp path is flooded.
Read the warning sign on stairway.
Check the cheese wheel at bottom right of screen.
The note states that the cheese is free.
Anja: Check the herbal
cupcakes at left or ring the bell. Anja comes out. Talk to Anja. Learn about
Humbert, the gifted child Anja is babysitting.
Anja asks about a tall frog. Hmm... Anja will
prepare the baked goods for the festival.
Learn that the dwarves have stopped delivering
blue juice. The dwarves live at Coldwater Brook in the Darkwood.
Coffee: Check the coffee
maker, the sheet with writing above it and the sink under the machine. The
coffee is free.
Check the door key beside the sink and the radio
above the key. Exit the Cafe.
The Gardens & Hare Family House:
Take the path over tree root left of the Town
Hall.
Check the signs on the signpost.
Gardens: Talk to the
grumpy garden owner.
Try the gate and the grumpy man will not let Jerry
in.
See the mouse with backpack come in and out of the
cafe backdoor. There is a large pretty flower there.
Hare Family House: Talk
to the party guest on the table. He wants coffee.
Check the bowl of dirty dishes and mailboxes
outside the Hare house.
The grumpy rabbit will not allow Jerry to enter
the Hare garden at bottom right.
Borrow the rake left of the party guest.
Dewdrops (optional): There is a
dewdrop on the barrel at bottom right; on the large pretty flower and plant
left of the bridge-ramp.
Check the flagstone with cloverleaf and the half
statue.
Take the tap of the empty keg of blue
juice.
Edge of Town:
Go to bottom left. Look around.
Check the beehive with honey. Use the sugarfree
lollipop on the honey to get honey lollipop.
Check the crow statue and all the pumpkins around
the area. The one with the chimney seen at left feels different to Jerry.
Check the Hedgehog Brothers Carpentry building.
Check the leafboat.
Check the strange door with a mailbox labeled - A.
Molena. The door has an etched spiral on it.
A post horn is in front of the different pumpkin.
See a narrow tunnel left of the path under the
brothers; house.
Dewdrops (optional): There's a
dewdrop above the strange door and on top of the pumpkin at bottom right.
Behind Town Hall:
Go through the tunnel under the house. Look
around.
Check the gigantic brown mushrooms, view of Mousewood, overgrown mural and round window of the Town Hall.
Check the odd crystal statue with amber inside
at right that makes a fine sound.
Dewdrops (optional): There's a
dewdrop at bottom right, left of mural and tip of plant left of the arch at
center of screen.
Sticker (optional): Take
the sticker (Ladybug) at top left of the mural.
Mr. Churchmouse and Junior:
Talk to Mr. Churchmouse. They are traveling salesman.
Mr. Churchmouse ties a red thread on the coin with
hole to get coin with hole on thread.
Take the path at bottom left to get back to town
center.
City wall:
Take the ramp right of the town gate to be on city
wall.
Gunner: Talk to the
gunner. Check the cannon and the pea shot beside him. Learn about the crow
invasion that flies in from northwest.
Spitzweg: Go down to the
left. Talk to Spitzweg. He is a suslik. He is off travelling and start here
at Coldwater Brook.
He is waiting for the delivery of his leafboat to
be built by the Hedgehog Brothers.
Barrier: Click on the barrier
and the catfish behind the barrier. Learn that the barrier is to keep the
catfish out of town.
See that there is a securely locked gate at left.
Dewdrops (optional): There's a
dewdrop on leaf left of catfish; on a leaf left of gunner and on tip of leaf
at bottom of screen by red flowers.
Town gate:
Go back to town center and exit through gate.
Talk to the guards. Check the 2 marker stones at
bottom right.
Sticker (optional):
There's a sticker (Snail) on the gatehouse behind the guard with a leaf.
Woods of Path tree:
Go to way through grass path right of the screen.
Check the statues and wall that are the same from Jerry's woods.
Dewdrops (optional): There's a
dewdrop at tip of the ledge at center of screen and at plant at bottom
right.
Path-Portal tree:
Go left and see the portal tree.
See that there is another odd crystal statue here.
Check the spider and web at left.
Dewdrops (optional): There's a
dewdrop at bottom center and right of mushroom ring.
Go back to town gate.
Coldwater Brook Bridge:
Group of animal statues: Check
the statues.
Dewdrops (optional): There's a
dewdrop behind the swaying wheat stalk at center of screen. The hard to find
dewdrop is on the top of the stone tablet etched with words at left.
(Thanks, July!)
A figure of a man with a pug appears at other
side of the brook.
Humbert: Hear Humbert say
that he is hungry and wants dessert before meal.
Talk to Humbert and he charges money to allow
Jerry to pass. He is one of Anja's charges.
Give the honey lollipop to Humbert and he allows
Jerry to pass.
Wheat fields: Go to the other
side and see dry wheat field.
Dewdrops (optional): There's a
dewdrop at extreme bottom right.
Help others.
Save Ursula from the crow:
Go through the path to be at the Coldwater Brook.
Ursula is trapped inside the destroyed radio
station. A crow is on the roof of the radio station.
The crow taps on the roof. Use the very
dry cupcake on the crow. Now it taps on the cupcake.
Try going near Ursula and the crow pecks on the
roof again.
Check the radio antenna.
Go to the large boot at left. Take the shoelace.
Use the shoelace on radio antenna. Jerry pulls the
shoelace and gets a sharp grappling hook.
Use the grappling hook on the radio antenna. Bam!
Check on Ursula.
The backpack mouse saw the heroism and gives
a flyer to Jerry. Read the advertisement for a violin lesson for one highly
gifted student.
Jerry places Ursula and a crow feather
in his backpack.
Sticker (optional): There's a
sticker (Bumblebee) on inside wall of the destroyed radio station.
Coldwater Brook:
Radio station: Check the
destroyed radio station. Read the note left by Ludwig Burrower.
Look around. Check the berries right of the radio
station, flooded area, small statue, flooded path, signpost and old boot.
Pick up yellow marsh marigold right of the
post horn. Jerry says it's an ingredient in a relaxation tea.
Dewdrops (optional): There's a
dewdrop on top of a marsh marigold flower and one on the wall where it is
snowing.
Wood dwarves house:
Take the path right of the berries. Check the wood
dwarves house. A lizard appears for a few moments.
Check the sign and the post horn. The
wooden gate is locked.
Read the notice and learn that Steinberg dwarf is
sick. The production of blue juice is discontinued until Steinberg recovers.
The note was written by Softsteel and Logger.
Read the poster and check the gurgling brook.
Dewdrops (optional): There's a
dewdrop at bottom right of screen and one at tip of ledge above the chimney
and on tip of leaf at left edge of screen.
Help Plato the mailman:
Go back to the radio station area. Talk to Plato,
the frog in uniform.
Plato's bicycle is frozen to the ground.
Check the snow behind the bicycle. It is snowing at right and also
on the mushrooms between the rocks.
Click on the mail-packages on the ground. Jerry
asks if he can deliver the mail for Plato. Plato gives him his
Get the package for Mr. Churchmouse, pink
package for Edith Squirrel from Supersquirrel Boutique, a magical
letter for Senor Molena and a perfumed letter for the radio DJ.
Examine the stone with marking of the Treewalkers
beside Plato.
Blue Juice Vending Machine:
Check the vending machine at left. Read the
advertisement.
It costs 2 leafbucks and Jerry does not have any
money. There's only one keg in the machine.
Use the coin with hole on thread on the vending
machine. Take the blue juice keg and a blue juice sticker.
Ursula rearranges the inventory from time to time.
Other side of brook:
Old Tree stump: Take the
path right of the screen. Look around.
Check the misshapen rock with pattern below the
hole in the old tree stump.
The hole concentrates the wind sounds.
Lower path: Talk to a
suspicious figure that says only - We have arrived. We will be the
solution. The stranger is holding a piece of paper and wearing a hard
hat.
Check the horn with frog, fish statue, smiling
statue and the statue balancing rocks.
Use the magic ring or space bar to see the fish
scale on the fish statue. Take the fish scale.
See the view of Mousewood.
Take the trail to the left to open the gate left
of the Town gate.
Deliver the mail:
Pink package: Go to town
center. Give the pink package to Edith the young squirrel. Edith gives a tip
of one leafbuck.
Town Hall: Give Ursula to
Conrad. Jerry also gives him the crow feather.
Card (optional): Sometime
during the game when Ursula is at the balustrade and have been saved from
the crow; click on Ursula and Conrad will ask Jerry to play with Ursula
outside. Jerry must find Ursula 4 times while playing hide and seek.
Ursula will hide within the town walls: left
pumpkin by the Hedgehog brothers; close to the Hare garden, behind the stone
owl close to Spitzweg's house and behind the stone statue right of town hall
door. Conrad will give a card.
Perfumed letter: Go to
Cafe and give the perfumed letter to Ludwig Burrower. Get a complimentary
mug with logo.
Cheese: Use the
sharp grappling hook (or nail) on cheese wheel right of Burrower to get
aromatic but hard piece of cheese.
Coffee: Use the mug on
the coffee machine to get hit mug of coffee.
Party Guest: Go to the
gardens behind the cafe. Give the hot mug of coffee to the party guest.
He gives a quartet card.
Heavy well-packed package:
Go to back of town hall and give the package to Mr. Churchmouse. It is
his language package. Another lizard appears momentarily.
Magical letter: Go to edge of
town. Use the magical letter on strange mailbox left of strange door with
the spiral. A mysterious voice from a dark room says Thank You!
Help the Hedgehog Brothers:
Talk to the Hedgehog brothers about Spitzweg's
leafboat. Their tools disappeared and they can't finish the boat. The red
pants brother think there is a greenhat around.
Hear a voice. Use the magic ring to see a
leprechaun. The greenhat stole the tools.
Follow the greenhat:
Examine the green footprints on the path. It goes through the small tunnel.
Go through the tunnel to town hall. Green
footprint and the leprechaun appear. The footprints appear on the brown
mushroom toward the town.
Go left to town center and up to back of cafe. The
leprechaun appears again and stands on the flagstone with cloverleaf to
enhance his magic. He gets away again.
Get the tools from
the leprechaun: Use the rake on the flagstone with
cloverleaf.
Then chase the leprechaun. Go to edge of town by
the Hedgehog brothers, then to back of town hall and then to back of cafe.
See what happens to the leprechaun when he stands
on the rake.
Take the stolen tools and nail.
Go back to the brothers and try to give them the
stolen tools.
Make the leprechaun go away:
The brothers do not want to work because they believe the greenhat will do
something again.
Pick up the wooden board right of the boat.
Use the wooden board on the small tunnel where the
greenhat's footprints entered. Jerry boards up the opening.
Chase the leprechaun again: back of town hall,
garden and back to the pumpkin patch.
The leprechaun hits the board. It gets angry and
enters his house - the weird pumpkin with the chimney.
Examine the weird pumpkin and Jerry breaks the
wall of the hollowed pumpkin.
Jerry takes the silver spoon and the
leprechaun cobalt.
Leafboat: Give the
brothers the stolen tools.
The leafboat is finished and the Jerry launches
the boat. It reaches the barrier in front of Spitzweg. Fanfare is heard.
Set sail:
Cafe: Go to the cafe.
Take the empty envelope from Ludwig Burrower's table.
In inventory combine the envelope with the ancient
invitation to the festival to get old invitation in open envelope. It
is still unsealed.
Take the sleeping potion-Valerian drops from the
herb shop counter. Jerry pays for it using the tip given by Edith.
Spiztweg and boat: Go to
the barrier by city wall. Talk to Spitzweg. The boat needs an anchor and
rudder.
Use the silver spoon as rudder and grappling hook
as anchor on the boat.
Take care of the catfish:
Use the Valerian drops on catfish. The catfish falls asleep.
Jerry lowers the barrier. Go downstream.
Humbert: Humbert stops
them from passing through unless they pay troll toll. He brags that he is
gifted.
Go to the cafe and ring the bell. Give the
advertisement about free violin lesson for one gifted student to Anja.
Anja says it is perfect for Humbert. Go back to
Humbert and see Anja there. Anja is a mouse on roller skates. Humbert leaves to get his violin lessons.
Coldwater Brook: Enter the
boat and go downstream.
They arrive at Coldwater Brook area. Spitzweg
leaves the boat to start his adventuring. He gives Jerry some Indian
white pepper.
Enter the boat and go downstream. Waterfall?
Order the blue juice and help Steinberg:
Get to the wood dwarf home:
The boat goes over the waterfall. Jerry saves
himself using the grappling hook and spoon.
Jerry is at the backside of the wood dwarves'
house.
Dandelion seeds float in the wind. Look
around. Check the large beet left of the staircase.
Take the shimmering snail.
Dewdrops (optional): There's a
dewdrop on a dandelion at bottom right and on the beet leaf at left.
Enter the house: Check
the locked door. Hear someone grouchy responds.
Check the window. The grouch coughs. Use the nail
on the window. Jerry cuts a circle on the window.
Use the snail on the cut glass. Jerry enters the
house.
Talk to Steinberg. He mentions only Anja might
help since Uli is gone.
Look around. Take the wicket key left
of door. Read the note on the pin board.
Check the top and bottom bunk to learn that Logger
and Softsteel are Steinberg's roommates.
Check the sink by bunk and the metal door at
corner.
Check the dwarves blue juice machine.
Sticker (optional): There's a
sticker (Butterfly) on the vase with flowers.
Card: Open the loose floorboard
by the bunk to get a quartets card - the strangers.
Get help: Exit the house. Use
the wicket key on gate. Go back to cafe in town.
Ring the bell and talk to Anja about the sick
dwarf. Anja checks Steinberg.
Prepare medicine: Anja
gives a recipe for the medicine.
At the cafe, read the doctor's prescription. The
medicine needs marsh marigold (taken from Coldwater Brook), fish scales
(taken from overlook) and some pepper (given by Spitzweg).
Ring the bell and give an ingredient to Anja. She
prepares the medicine and gives back the extra pepper.
The cold medicine should be added to some
liquid before administering to patient.
In inventory combine the blue juice keg with the
empty mug. Combine the mug with blue juice with the cold medicine to
get cold medicine in blue juice.
Cure Steinberg: Go back
to the wood dwarves' house.
Give the cold medicine in blue juice to Steinberg.
Steinberg can carry or drink the medicine.
Combine the cold medicine in blue juice with
silver spoon. Give the medicine in spoon to Steinberg.
Steinberg says he will start the harvest tomorrow
and there will be blue juice again.
He tells Jerry of the secret tunnel 47 to get to town
and promptly falls asleep.
Deliver the invitation:
Anja: Jerry enters tunnel
47 and comes out inside the cafe.
Ring the bell and tell Anja about the blue juice.
Thaw out Plato's bicycle:
Use the mug on the coffee maker.
Enter the secret tunnel to exit at the dwarves'
house.
Exit the house and go to radio station.
Use the hot coffee on Plato's mail bicycle and the
bike is thawed.
Get the invitation ready:
If you haven't yet; combine the old invitation with the empty envelope taken
from the DJ.
Seal the envelope by using the shimmering snail on
the open envelope with invitation. Jerry releases the snail.
Place the stamp given by the Marquis on the old
invitation in sealed envelope. When the stamp was added, the invitation
multiplied.
Give the giant pile of invitation to Plato.
Plato gives Jerry a clicker frog to use on
any post horn. This will call Plato and he will Jerry anywhere he wants
around town.
Dewdrops (optional): After
Plato's bike is removed; there's a dewdrop that is exposed on the log
bridge.
Festival preparation is completed:
Town Hall: Go to Town Hall and
talk to the Marquis. The magical power training is started.
The Marquis snaps the Rider painting to change to
a tree.
Magical training starts.
Hall of Apprentices
Jerry enters the painting and comes out into a
circular hall. The Marquis explains that the training starts and ends here.
He explains about the First Tree.
Look around at the stele of former Treewalker
apprentices and the stone First tree.
Help fix the machine: The
Marquis cannot fix the machine.
Pick up the 2 half arcs-metal parts from
the floor. Use the 2 half arcs on the smaller machine behind the Marquis.
There's a metal ball inside the tube. Use the
Leprechaun cobalt on the metal ball. Jerry takes the metal ball out
of the tube.
Place the ball on the hole made by the 2 half arcs
on the smaller machine. It works.
The machine spews out cards. Jerry picks the 16
cards. The cards are like dreams; they are individually interpreted.
The machine spews another card; it is Jerry's 3
acorns card.
Magician of Mousewood: A
ghostly man floats. It is the Magician of Mousewood. The old man asks the
Marquis how he escaped. Hmmm...
The old man asks Jerry to visit him in his
house. He drops a ghostly key. The Magician of Mousewood is also the
Guardian of the Portals.
They return to the Mousewood Town Hall.
Meet the Magician of Mousewood:
Go to the house of the Magician of Mousewood:
Go to the edge of town. Remember where Jerry delivered the
magical letter.
Use the ghostly key on strange door with spiral.
Jerry walks to an abandoned train station. Look around.
Dewdrops (optional): There's a
dew on leaf at top left.
Stickers (optional):
There's a sticker (Goldfish) on the wall below the ledge at center of screen.
Check the thermometer and railway.
Examine the stone stele. A voice explains that it
was a column from the Hall of Apprentices. It was spat out by the Hall and
spread out as 32 magic drops of dew. Anyone that collects the 32 dewdrops
will see the image of the expelled apprentice. Later when you learn the
rockwhisper spell; use it on the stone stele and it will respond.
If you wait long enough, a train will pass by.
The house of the Magician:
Enter through hole on wall. It is a room for a giant.
Look around. Check the shelves and milk. Take the
napkin from the milk cup and the chocolate with heat
resistant tinfoil from foreground.
Check the hammock and the ivy. Jerry tries to wake
up the snoring man.
Go to the
clock: The ivy is wrapped on a stick. There is a
cuckoo clock above the snoring man.
Use the grappling hook on the ivy. It made a ramp
to the clock.
Fix the clock: Go
to the clock and check the parts of the clock.
Move the metal arm once and see that it won't move
anymore.
Use the napkin on the drop of oil to get napkin
with oil.
Use the napkin with oil on the metal arm. Move the
metal arm again to hook it unto the ring on the bellows.
Pick up a key-shaped clock part that
dropped out of the mechanism.
Wake up the Magician: Turn the
clock on by turning the metal knob with thin slot. The cuckoo clock cuckoos.
Still the man is asleep.
The train passes by. Uh oh! The clock drops on the man and he wakes up.
The Marquis comes in.
Aro Molena the magician says that Jerry needs to find the
4 portals in Mousewood. In each portal; Jerry can learn a spell.
Jerry returns the book to the woodsprite that
appeared. It is the same woodsprite that talked with the Marquis at the fog
covered area.
Jerry sleeps on the hammock. While Jerry sleeps, the Magician says that it is
impossible for the rabbit to be here. Nighttime, Jerry wakes up.
The Magician gives a magic book to Jerry.
It enables Jerry to switch back forth from night and day or by sleeping in
the hammock.
Learn how to play Cards-Quartets:
There are 32 cards in a set; they consist of 8 quartets (4 cards per
quartet).
First - select a family or type of card. Then pick the card that you don't have.
Tactics are stated by the Magician. Remember what
is taken by the opponent or what the opponent asks for. This way, you will
know what cards he hold.
After the teaching card game, the Magician gives a
starmap that shows the location of the portals.
Exit the Magician's home.
If you play and win in quartet card game with
the citizens of Mousewood, you get an achievement (optional).
Cabinet (optional):
Change to day. The Hedgehog brothers are fixing a cabinet. Check the cabinet
and learn that it was left by the Magician. There is something inside.
Talk to the brothers. Select the dialogue that
will distract them - You work to earn money - it doesn't need to be fun. The
brothers argue.
Check the cabinet and get a whole quartet of
cards (treewalker set).
Fox: See a fox with
several tails. Try to talk to the fox and it giggles.
First Portal.
On the way to the first portal:
Stage: Change to night.
Go to the Town Center. A stage is set at
Town Center.
Talk to Mr. Churchmouse. Jerry goes to stage and
places the waternut in the glass.
Borrow the waternut. Mr. Churchmouse will give the waternut to Jerry if
he can do jokes. Jerry makes a joke that is not appreciated.
Mr. Churchmouse gives Jerry a blank paper and
pencil to write some good jokes.
Learn about the beetle from Mr. Churchmouse. Check the green beetle picture beside Junior. The
crackbeetle ran off yesterday.
Crackbeetle: Exit the
town gate. Turn to the right wall with no guard
and see a beetle come out from behind a leaf.
Jerry catches it and automatically returns it to
Junior. In return, Mr. Churchmouse gives a quartet card (Zaroff).
(optional) If you click 1000 times on the
crackbeetle on the board beside Junior, you get an achievement.
Star Map: Exit the town
and go right towards Coldwater Brook.
See Plato on other side of the brook. Talk to
Plato. The field has an eerie green light above it.
Use the star map on the sky over the wheat field.
See the constellations and the 4 locations of the 4 portals. Get an
achievement.
First Portal:
4 strangers: Go back to
the town gate and take the path going to the woods.
Listen to the 4 strangers seen throughout the town. They
are dividing the future spoils of a scheme of revenge. One wants the bodies
since he was the one who freed him from prison, another wants the belongings
since he gave the 4 metals, one wants the land and the monk wants the soul.
They see Jerry - One of us.
Talk to the 4 strangers. They are
worried. They say they have solutions for money, land, luck and health.
Path tree: Enter the
woods at left and see the old Magician and the Marquis. They sent Jerry back
to his own world.
Note that the spider is not in its web at night.
Wake up the toad:
See that the toad is asleep. It talks in his sleep
about the woodpecker, cuckoo, sparrow and crickets. The sounds of the woods
is relaxing to the toad.
Let's see if the removal of those sounds that he
talks
about will wake him.
Cuckoo and sparrows: Use the
Indian white pepper on the toad. The sparrows fly away but the toad is still
asleep.
Wood pecker: Go to forest
crossroads. Zaroff posters are here.
A woodpecker is on the lamppost. Use the stick on
the lamppost. A dialogue with the woodpecker starts. The woodpecker flies away.
Cricket: The cricket sounds far
away. Go left to home. Look around.
Look inside the dry rain barrel. There's a cricket
inside. Jerry kicks the barrel.
Toad: Go back to the toad and
talk to it. Hmm...
Use the clicker from Plato on the toad. The
toad wakes up and answers.
Answer correctly: Select
the correct answers to get him to continue talking.
- I'm Jerry Hazelnut, mighty magician!
- The streams of time?
- The whispering of the rocks?
The toad teaches Jerry how to listen to the voices
of the rocks. Fanfare!
A new spell purple Rockwhisper is added to inventory. The toad warns
of horror but Jerry will find joy also if he finds what he doesn't know he
lost.
Rockwhisper - New spell:
The Marquis meets him at the Path Tree.
Use the new spell on the crystal statue right of
the tree. It says that what Jerry lost, it has seen. The figure of the man
with the pug appears again and calls Jerry.
A hand pounds a black nail into a picture. The
ghostly nail drives through the Path tree.
Do the Rockwhisper spell on the stone figures
encountered to learn things or get possible clues.
Second
Portal.
Find the second portal:
Magical people: The
Marquis tells Jerry to seek the magical people in town. One of them - the
man in green will teach him a new spell in its own world. Jerry has to get the
leprechaun to open his own world and bring him there.
A fox is here. See if you can talk to
it. The fox just giggles. Later, see that the fox follows Jerry around.
Strangers: At the gate,
see the money stranger holding a pen is there. Talk to him.
Go to the town center and see the smoking health stranger
is there. Talk to him. A Zaroff poster is seen here.
Enter the town hall and see the land stranger is
there. Talk to him.
Garden: Go to the garden
behind the cafe.
A large butterfly is on the large flower. Click on
it to get it to fly
over and land on the half statue. The statue now has eyes.
Use the Rockwhisper spell to talk to the half
statue.
Leprechaun: At the
gardens, hear someone singing.
Use the magic ring and see the leprechaun taking a
bath in the bowl of dirty dishes. He has a shamrock on his head. LOL.
Take his green garments from the table.
Jerry asks about the tree portal.
Jerry kept the hat. The leprechaun agrees
to open the tree portal and bring Jerry through.
Tree portal: Change to
night by reading the exciting book.
Go to behind the town hall. Look up and see that
the leprechaun is up on a tree limb.
Get up there: Enter
through the window of the town hall.
Inside the town hall see Conrad and Ursula. Talk
to Conrad to realize that he is asleep. Check the Zaroff poster above the fireplace.
Card (optional): Check the
papers at the balustrade. Get a quartet card of the leaf
family.
Go up the tower by moving the cursor to top right. It's dark up here.
Talk to leprechaun. Look at the
view of the town and see the gunner below.
Go back inside and out of the town hall via the
window.
Light up the tree branch:
Hare birthday party: Go
to the gardens behind the cafe. See a party going on.
Talk to the grumpy garden owner. You can't get in
without an invitation.
Learn that the cake made by Anja is still not
delivered.
Learn about glownuts. It is difficult to get one
but the hare family has a lot of them. Maybe we can get one if we can enter
the party.
Check the backdoor of the cafe. It is locked.
Cafe: Change to daylight by
reading the exciting book or sleep in the hammock at the Magician's home.
Enter the cafe and talk to Steinberg. He got
insomnia as a side effect of the cold medicine and he's bored.
(Optional) If you want; play cards with
Steinberg by clicking on the cards in inventory. Get a card after playing the game.
Ring the bell and talk to Anja about the birthday
cake. She gives a list of the missing ingredients.
Get the ingredients:
The missing ingredients are beet syrup, sweet red
berries, milk and chocolate.
Get the Cafe backdoor open:
We need to enter the cafe at night; so we need access through backdoor.
Wait until the mouse with the backpack exits
through the backdoor. While he is gone place the key shaped clock part from
cuckoo clock over the door key hanging right of the coffee machine.
The mouse with the backpack comes in and uses the
clock part on the key hole. He thinks the door is locked but is not.
Chocolate and milk: Go to
edge of town and see the Hedgehog brothers still fixing a furniture. The fox is
also here.
Enter the Magician's home.
Use the empty blue juice keg on bowl of mil to get
keg of milk. If you haven't yet, take the chocolate on
tinfoil.
Sleep again in the hammock. Wake up at night.
Exit the house. Talk to the night watchman. Learn
what the glownuts glow like female fireflies; so it attracts the male
fireflies.
Red berries: Go to the
area where the destroyed radio station is located. See a guard on the roof
of the destroyed radio station.
Talk to the guard. Try to pick some berries behind
the guard. The guard is wishing for a well peppered cheese fondue and stops
Jerry from getting berries.
Use the heat resistant tinfoil on the small
campfire.
Use the hard cheese from the cafe on the
tinfoil-pot.
Use some white pepper on the cheese fondue.
Take tasty smelling berries.
Beet syrup: Go to the
dwarves' house. Go to the back side of the house.
Check the huge beet left of the stairs. Use the
tap taken from the blue juice barrel at the garden on the huge beet.
Collect the beet syrup in the mug.
Dwarves' guest bed: Go inside
the house and look around.
Sleep on the guest bed at bottom of screen and it
will change to daylight. (If you want, you can sleep again to change to
daylight.)
Calendar (optional): If you sleep and wake here
for a month, you will get the calendar achievement.
Bake the cake: Now that
it is daylight, go back to town. On the way, talk to the DJ and the luck stranger.
Go left and see Edith by the wheat field. Talk to
Edith.
Go to the cafe and ring bell to call Anja. Give
Anja all 4 ingredients: milk, chocolate, beet syrup and berries. The cake is
to be picked up the next day.
Woodsprites and stories (optional):
Exit and change to night.
Enter the backdoor of the cafe. See the woodsprite
sitting on the table at right.
Talk to him. He gives a story (#1) that can be
listened to at the bonus page. Maybe he can find what Jerry lost.
Go to Coldwater Brook area where the radio station
is located.
Talk to the woodsprite there and get another
story (#2). He mentions that the light over the field portends the start of the
sad part of the people of Mousewood.
Go to the back of the house dwarves and see the
dwarves harvesting the roots. Talk to the woodsprite and get a story (#3).
Go to the edge of town by the Hedgehog brothers'
house. Talk to the woodsprite and get a story (#4).
Go to the babbling brook by the wheat field and
see the woodsprite. Talk to the woodsprite to get another story (#5).
Go to the other side of the brook or other side of
the dwarves' house and see the woodsprite. Talk to him to get another story
(7).
Go to the Path tree in the woods and see the woodsprite. Get the
(#8) story in his book.
Get the cake: Change to
daylight by sleeping in the hammock at the Magician's place or read the
exciting book or sleep at the dwarves' guest bed.
Go to the cafe and pick the cake from the
counter. Anja asks that you deliver it to the party.
Hare birthday party:
Change to night. Go to the garden and the Hare
family area.
Give the cake to the grumpy garden owner. Jerry is
now invited to the party.
The party guest talks to Jerry and gives him a
trophy. Talk to him again and he gives a quartets card.
Look around at the different guests. Talk to the
dancing mouse by the door. Check the punch.
Jonathan: Talk to
Jonathan sitting at right side. He gives 3 jokes with no punch line. Jerry
wrote down the start of the jokes.
Check the glownuts in front of Jonathan. The juice
itself attracts the fireflies but be careful or there will be juice
everywhere. Jonathan gets a glownut.
Light the tree limb:
Gunner: Go to the city
wall and see that the gunner is asleep. When the cannon or the pea shot is
touched, the gunner wakes up.
See the tree over Mousewood. Talk to the gunner
and he mentions he needs strong black coffee to keep him awake.
Jerry says he will get some coffee. Go through the
backdoor of the cafe.
Use the mug on coffee maker. Combine the mug with
hot coffee with the Valerian drops to get hot coffee with reverse effect.
Go back to the gunner at city wall. Give him the
hot coffee with reverse effect. The gunner falls asleep.
Fire the cannon: Turn the
cannon to point to the treetop above the town.
Use the glownut on cannon. Automatically fire the cannon. See
that the tree limb over the town is green and has attracted the fireflies.
Spitzweg's house: Check the
note on the door left of the city wall. Spitzweg left a message.
Go through the second portal:
Now that the tree limb has lights; go to the back
of town hall. Go through the window and up to the balustrade.
Get another quartet card from the documents
at balustrade. Go up to the
tower.
See that the tree limb now has a lot of fireflies.
See Emmet Melanoplus O'Donnell waiting impatiently.
Use the branch to get to the leprechaun. Talk to
the greenhat. Anyone that looks for magic in his world goes to him.
The leprechaun opens the portal and jumps through.
Jerry follows.
Ireland:
Talk to the grim man in green-leprechaun.
Jerry gives the hat to cover the shamrock on top
of his head. It is cold and wet here.
The man in green talks Jerry to making 3 wishes.
Talk to the Leprechaun and select the third
dialogue whenever possible - (What was that you called me? Can you repeat
the names you called me one more time.) - three times and get the Leprechaun
patience achievement. (Thanks to Iurii).
Jerry gave back the spoon and cobalt in return for
the undoing of the wishes.
The man in green let him keep the plumber trade.
Examine the cross.
Where is the greenhat man?
Look around. Look at the rainy green island across the water.
Check the stone tower. Go inside the stone tower.
Look around. Zaroff poster is also here.
Check to take the flag that smells like a
dog.
Use the magic ring and see the leprechaun. Talk to
Mr. O'Donnell.
The man in green cannot cast a spell to make a
rainbow because he is not in a good mood. Without a rainbow, the leprechaun is stuck here.
Get Mr. O'Donnell
in a good mood:
Go outside and place the trophy on the tower
window. The trophy is not shiny enough.
The man in green must think he is stealing the
trophy.
Use the flag on the dull goblet-trophy. Jerry gets
the leprechaun to steal the trophy.
That made the leprechaun so happy he conjured a
rainbow and hops on it to go to the next island.
Greengrow spell: Jerry enters
the tower and sees that the leprechaun is gone. The Marquis tells Jerry how
to learn the spell.
Touch the rainbow and Jerry learns the green Greengrow
spell. It is now in inventory. The spell makes things grow and makes rain.
Jerry picks up the quartet card from the ground.
It shows Jerry with a pug.
Go outside and see the portal open. Jump in the
portal.
A bronze nail is driven into the poster and one
appears on this tree portal. The ghostly man calls Jerry.
The Marquis tells Jerry that a fox is roaming the
field by night. Exit the tower.
Third portal.
Get the waternut from Mr. Chuchmouse:
Get the other half of the jokes:
Remember that the waternut absorbs water and that Mr. Churchmouse wants
Jerry to get good jokes.
Also recall that Jerry got half jokes from
Jonathan at the Hare party.
Change to daylight. Go to the destroyed radio
station. On the way, see the fox statue.
Talk to Ludwig Burrower by the radio station. He
says that his place is all wet.
Give the half jokes to the DJ. The DJ finishes the
jokes and Jerry writes them down.
Waternut: Change to
night. Go to Mr. Churchmouse at Town Center. Give him the jokes.
Jerry did his standup routine. They love the
jokes. Jerry takes the waternut.
Get the DJ to broadcasts again:
Dry the swamp: Change to
daylight. Go to the destroyed radio station.
Check the flooded path to the swamp right of the
large boot.
Place the waternut in the flooded path. Use the
greengrow spell on the waternut. The nut grows into a large tree. The path
to the swamp is now dry.
Swamp radio: See that
Ludwig Burrower has started to broadcast again at the improvised radio
station.
Check the blue beet, pretty flower and the dewfly.
Check the fox statue. There's a gnarled tree here.
Use the rockwhisper spell on the fox statue and
the crystal statue.
It says again about something lost...
See the house on the water where Plato the mailman
lives.
Dewdrops (optional): There's a
dew on leaf at top left leaf and one above Plato's house.
Sticker (optional): There's a
sticker (Harvey) on the base of Plato's house. I was given credit for the
sticker achievement even though only 7 were collected.
Find the third portal:
Fox fire in the wheat fields:
Go to the wheat fields and see that it needs rain.
Change to night again. Talk to Plato. See the fox fire.
Use the greengrow spell on the wheat fields. The rain comes. The foxfire drops to
the wheat.
Follow the fox: The fire
changes to a fox with a lot of tails. Follow the fox.
It goes into the swamp. The fox disappears but
there is a fox statue with 9 tails here.
Do the rockwhisper spell on the fox with 9 tails.
It says it has to go home now and opens a portal on the gnarled tree.
Jerry follows the fox to Japan.
Open the gate:
Kitsune, the fox is greeted by a voice. Kitsune
runs through the gate and the gate closes.
Look around. See a Zaroff poster here also. It is
on the portal tree at right.
Do a rockwhisper spell on the fox statue. It says
the tree is a path for the foxes.
Use the magic ring and find the source of the
sound. Take the golden bell from the bushes left of the fox statue.
Check the large wooden statue. It has a blindfold.
Check the iron bell at foreground.
Find the gatekeeper: Check the
fox statues at left.
Do a rockwhisper spell on the fox statues. It will
give clues. Follow the clues to locate the gatekeeper.
The gatekeeper is the second from left top row.
The gatekeeper goes back to the large wooden
statue by the gate. He can sense the human presence.
Trick the gatekeeper: Talk to
the gatekeeper.
Ring the bell on the foreground and he gets quite
rattled. He says that his sense of smell is better than his hearing.
Use the small bell on the gatekeeper. He thinks
Jerry is Kitsune but he smells Jerry-human.
Jerry says that he only wants to return the bell
to Kitsune. Never trust a fox.
The gatekeeper opens the gate and let's Jerry
enter. The gatekeeper goes back to sleep as one of the statues at left.
Look for Kitsune:
Jerry sees a lady say goodbye to a man-poet sitting
by the pond. The lady leaves.
Jerry follows the lady. See a fox outside the
gate. Talk to Kitsune that changed to a young girl.
Ask - Are you sure they really hate you?
Kitsune let Jerry keep the golden bell.
Kitsune is a really a fox but can change to human.
Jerry want to know how to do it.
Tell her - For your information :happy: is my
favorite word in the whole dictionary.
Kitsune gives Jerry a test - make a sad person
happy enough to inspire them to do something extraordinary.
Give inspiration to sad person:
Go back to the Basho, the poet by the pond. Check
the frog pond and the bamboo grove.
Talk to the
rejected poet. The poet talks about losing his inspiration.
Use the clicker frog on the frog pond. See a frog
leap on the rock.
Use the clicker frog on the curious frog. The frog
leaps again. The poet writes a new poem.
Talk to the poet and he will finish his poem. Go back to Kitsune.
New Spell:
Kitsune shows and tells Jerry about the new spell.
Jerry learns the red Fox' cunning spell. The spell can deceive the eyes of
others.
They go back to Mousewood; but Kitsune growls and
runs back through the portal.
A gold nail is driven through the poster and the
tree. The ghostly man asks a question - do you know where we are?
The woodsprite gives the last story (#6).
The Marquis wants to learn what is happening also.
The last portal is at the cold tree. Jerry has to
go to the treetops.
Fourth portal.
Get to the fourth portal tree:
Swamp radio station: While at
third portal tree, see that Anja and Plato are sitting at his house. Now,
they're together.
Find the portal: Change to
daylight. Go to the mushrooms under the falling
snow.
Use the Greengrow spell on mushrooms. Climb up the
mushrooms.
Mothperson: Try to talk
to the mothperson. It is asleep.
Check the rear area by clicking on the black leaf
at right.
Checked the locked entrance blocked by the
spiderweb.
Dewdrops (optional): There's a
dew on leaf at top of the column at center and one under the rock where
Hespera sits.
They must be nocturnal. Change to nighttime.
Talk to the Hespera, the mothwoman. Jerry is
wingless and so has bad vibes.
Use Fox' cunning on the mothwoman. Jerry gets a
pair of glorious wings.
Priestess Phospera: Enter
to get to the rear area of the Temple of the Moths.
Talk to the priestess. She is holding the High
Priestess egg. But she might not hatch since there is no nourishment.
The gray mountain on the horizon is destroying
them. The gray flood-cement came.
The high priestess when hatched will be called
Moonlight.
Gray Mountain: Go right and see
the gray mountain-waste dump. The crows hover the trash.
The environment is being destroyed. The priestess
lost hope that they can be stopped.
Winged statue: Examine the
statue of the high priestess to come.
Check the clay pot with soil in front of the
statue. There's a dead plant in the soil.
Take the bundle of flax from the fence at
left.
Dewdrop and stone stele (optional):
Now that all 32 dewdrops are located; go back to the home of the old
Magician.
Click on the stone stele outside the entrance
(hole on wall) of the Magician's home. It will show the picture of the
latest apprentice of the Marquis de Hoto; a boy of the same age as Jerry.
This picture was banished from the Hall of Apprentice.
If you check the 2 pictures of the Marquis'
apprentices; they differ in hairstyles and clothes.
Get nourishment for the moths and the high priestess
to come:
Make a net to catch a seed:
Go down and then go to the dark woods where the Path portal tree and
spiderweb is located.
Since it is night the spider left the spiderweb.
Take the spiderweb.
Go to the dwarves house. See the dwarves harvest
at night.
Change to daylight. The dwarves are now asleep.
Use the grappling hook on the forked branch. Jerry
can't pull the shoelace.
Place the end of the shoelace through the cut window. Enter the
house and see the 2 dwarves asleep (Steinberg has insomnia remember).
The blue juice machine is running. Turn off the
machine by flipping the switch to the left.
Attach the shoelace end to the large flywheel at
bottom. Turn the machine back on again.
See that the forked branch is pulled up closer.
Exit outside.
Collect beet syrup to use as glue. Use the mug on
the tap of the large beet at left.
In inventory combine the bundle of flax with the
stick to make a long brush.
Combine the long brush with the mug with beet
syrup to get sticky brush.
Use the long brush with syrup on the restrained
forked branch.
Use the spider web on the sticky forked branch.
The spiderweb is attached.
Go back inside the house and see the shoelace
snap.
Go back outside and see the net catch a dandelion
seed.
Use the long brush with syrup on the caught
dandelion parachute-seed.
Plant the seed: Go back to the
Temple of the Moths.
Change to night and enter the temple.
Use the dandelion parachute on the clay soil.
Use the Greengrow spell on the claypot with seed.
The dandelion grew.
North Pole:
Portal: The priestess
opens the portal. She describes her former home. Jerry will be protected from the cold by the High
Priestess' power.
Bonus actions: If you have done everything
you want (bonus actions), go through portal. You can do the bonus actions
using a saved game before this part and they will still be credited.
North Pole: Look around.
Statue: Check the snow
covered rock at right twice. It's a statue.
Use the Rockwhisper spell on the rock statue. Talk
to the statue. The statue is touchy about being called just a statue and not
a god. He brings out lightning.
Icy Sea camp: Take the
path at left. Check the sea.
See a Polar scientist that thinks she is
hallucinating. Talk to the scientist.
Learn that she has been waiting for the polar
whale and her radio and equipment broke down. Today is Christmas eve.
Scrub: Check the
shrub that was hit by lightning more than once.
Equipment: Remove the
tarp under the broken radio and see the battery block.
Remove the tarp on the right. Take string of
lights from the middle crate.
Fix the equipment: Use
the string of lights on the shrub-tree.
Use the end of the string of lights-plug on the
battery under broken radio.
Now jumpstart the battery by going back to the god
statue. Do the Rockwhisper spell on the statue. Talk to
statue.
Irritate the statue by using the first dialogue
choice. A lightning bolt strikes the poor shrub-tree. The lights comes on
when the battery is charged.
Go back to the camp. Hear that the radio is on and
the polar scientist talks to Marie about hope.
See the Aurora Borealis and the polar whale. The
scientist takes pictures of the whale.
Glimmer of Hope spell:
Talk to the whale. The whale sings in response. Jerry is finished here and
the portal is opened for him.
Jerry learns the blue Glimmer of Hope spell. Go back to the portal and leave.
Correct the wrong done.
Jerry's trial:
Phospera: Back at the
Temple of the Moths, Jerry is welcomed by the priestess.
Marquis de Hoto arrives. The Phospera warns Jerry
not to trust the Marquis - The Cold One. He will betray your trust.
The moths fly away to a better place.
Marquis: The Marquis says
that the moths do not know him. He also says that Jerry still need to face
his greatest test - danger.
Jerry wants to go home.
The silver nail is driven in the last portal. The
Marquis disappears. Only a leaf is left of the Marquis.
The specter-man appears. The Marquis says Jerry is
the only one that right the wrong and calls him Apprentice magician.
The leaf pulls Jerry within and his wish is
granted.
Jerry's old woods: Jerry
is now back to Jerry's home woods. See that the woods is now a dump site for
old refrigerators.
Go to the crossing. Go right and see the city
pushing at the woods.
Go back home at left and see that it is now a
construction site.
Harsh reality: Go home
and see a rundown house. Look around.
See a poster of Jerry on the dilapidated house. 8
months!
Do Rockwhisper spell on the weathered statue-dwarf left
of door. Learn what happened to mom.
Jerry cries and has lost hope.
Use the Glimmer of Hope on Jerry. Hear hopeful and
happy words. Anything is possible. Jerry will be home before dinner.
Correct the wrong: Go
back to the Old Path tree in the woods. Jerry opens the portal and he goes
back to Mousewood.
Jerry is met by Plato. Plato asks Jerry to help
the Mousewood citizens. The 4 strangers who might be wearing masks have
placed the citizens to sleep.
The Magician has placed one in a bottle already.
The Magician went home to get more bottles but since disappeared.
Find the Magician:
Go back to town. Fog or smog covers the town.
Zaroff's posters are all over the town.
Health stranger: The stranger
that spouts that he can help with health worries sells his bottles of cure
to the hare. The grouchy hare gives his garden as payment.
Magician: Continue to the
edge of town.
Talk to Edith. She wants a ticket to see Zaroff.
Enter the Magician's home. Look at the shelf and
see the Magician in a bottle.
Free the Magician: The
magician raise Jerry up to the shelf. Talk to the Magician. He wants Jerry
to break the crystal.
There is a lizard in one of the bottles. The mask
beside it shows that it is the land stranger.
Look around at the shelf. There's a sunlit gap at
right part of the shelf.
Take the monocle from under the red bag at
left.
Check the bag above. Use the nail on the bag to
get a kernel of corn.
Use corn kernel on sunlit gap. Use the monocle on
the sunlit gap. The corn pops and removes that plank of the shelf dropping
the bottle containing the Magician.
The Magician explains that the Squamata Consortium
made up of lizards have taken over Mousewoods.
The Magician opened a banishing bottle and got
entrapped himself.
Capture the lizard in bottles:
The lizard must open the banishing bottles
themselves.
Capture the Health Lizard: Go
to Town Center.
Watch the stranger and see that he pulls a bottle
from the cart behind him.
Place the banishing bottle in the bottle
rack-cart.
Talk to the stranger. The elixir works by sniffing
it - from nose to body. The lizard is caught.
Jerry checks the ticket for the Great Zaroff show.
Capture the Money Lizard:
Go to Town Hall.
See that Conrad is already asleep. Jonathan
doesn't have any money to pay for a ticket to Zaroff show.
Talk to the money lizard. He doesn't take Jerry
seriously because he is just a child. The lizard smells of alcohol.
Do the Fox' cunning spell on the stranger. Talk to
him again. Jerry is now so rich.
Choose to sign. The lizard drinks alcohol.
Talk and choose to sign another contract again.
The lizard continues to drink in celebration. Hic...
Talk to him again and say that the price of acorns
and nuts just crashed. The lizard gets very upset.
The lizard sheds his costume and enters the armor
at left. Check the costume.
Check the armor and see that the lizard is stuck
in the armor.
Check inventory and see that the rose hips dried
up into itching powder. Use the itching powder on the armor with the
lizard.
Follow the lizard through the window behind
Jonathan.
The lizard disappeared. Use the magic ring and see
him on the walls of the tower.
Talk to the lizard. He coughs and he is thirsty.
Use a bottle on the lizard. The lizard is caught.
Capture the Luck Lizard:
Go to the radio station at the swamp.
See the luck lizard work on Ludwig, the DJ. Ludwig
gets black balls consistently.
Look around. See Kitsune here.
Talk to the luck lizard. Ask him to tell his own
fortune. See that he gets only white balls.
When Ludwig finally wins and gets to see Zaroff;
he falls asleep. The dewfly is released and flies to the pretty flower.
The blue beet drops to the ground. Take the blue beet.
Talk to the luck lizard again. Ask him to tell his own
fortune. See that he gets only white balls.
Immediately use the pretty flower and see that the
dewfly hovers over the lizard. The lizard tries to catch the dewfly over
him.
Then use the blue beet on the open hatch that
contains the balls thus blocking it.
The white ball falls on the ground. Pick up the
white ball.
In inventory, place the blue juice sticker on the
white ball to get manipulated white ball.
Ask him to tell Jerry's fortune.
Use the pretty flower again. Then use the
manipulated white ball on the hatch while the lizard tries to catch the
dewfly. You might need to do this several times.
Then ask the lizard to tell his own fortune again.
The lizard reads the white ball fortune - Take
the jug for some good luck.
Give the empty banishing bottle to the lizard. The
lizard is captured.
Kitsune changes to girl form. She is upset that
she cannot go home and that the lizards must be the cause.
Last test:
Magician: Go back to the
Magician's home.
Give him the lizard filled bottles. There is a disaster that Jerry alone can avert.
Choose your coat: Check
the red coat, royal blue coat with gold trimming, stylish second hand
tuxedo, motley ensemble, daring robe with hat and simple checkered jacket.
None of these is chosen.
See a light. Click on keyhole on the door exposed
by the moved coats. Enter another room.
Jerry's room: The
Magician tells Jerry that this is a dream only. Again, Jerry is asked to
pick his coat.
Look around the room. Open the sliding door at
left.
Pull up the corner of the rug that was inside the
closet. A storage niche is exposed.
Open the niche. Open the musty cardboard box.
Jerry picks his coat - the leather jacket.
Back at the Magician's home, the jacket
disappears. Now, Jerry is a treewalker.
Something that was forgotten:
The memory lost is remembered. Jerry remembers after seeing his father's
card.
Woodsprite appears. Learn that when someone goes
into the world; another is taken out. Jerry's father wanders the space
between world.
There is only one way - go to the first tree.
Fifth portal
Jerry has to go to the clearing of the first Tree.
The posters and the appearance of the lizard showed that that spell was cast
on the first tree. That is how Zaroff has spread to all the worlds that the
is connected to the first tree.
The Marquis knew about this. Now, only one
trained by the Marquis can break Zaroff's curse. This is the only way to
rescue the inhabitants of all 4 worlds, for Jerry to go home and enable his
father to return to this world.
Hall of Apprentices: Jerry's
picture is added to the wall. Note the master holding Jerry. This confirms
that Jerry is now a true treewalker.
Jerry has to find the 5th portal. In the hall is a
sound carrier that will open the 5th portal. The Magician will be there in
his dreams.
Find the sound carrier:
Look around.
Check the metal frame at base of the tree. It
lights up for a short time and shows a picture of a leaf.
Use the leaf the Marquis left when he disappeared
on the blue circle. The seal is removed and Jerry picks up the sound
carrier. It has a weird shape.
Old tree stump: Jerry was
sent here by the Magician.
Use the sound carrier on the hole of the old tree
stump. The sound carrier vibrates and sounds like the crystal statues song
that is in the wind going through the hole.
Examine the tree stump and see that it has 4
openings on the side of the large hole.
Crystal statues: Go to
the crystal statue at swamp where the radio station is located.
Use the sound carrier on the crystal statue. Take
the left hand amber. The crystal statue forms back again.
Do this to the crystal statue at Temple of the
Moth (eye), deep wood beside the old Path tree (heart) and the crystal
statue behind the town hall (right hand).
At the crystal statue behind the town hall, see
the pebbles and twigs that was once the woodsprite.
The town is empty of inhabitants.
Obtain 4 ambers.
Open the portal: Go back
to the old tree stump.
Place the 4 ambers on the old tree stump. A door
opens with a keyhole.
See a statue made of green glass that has a
pungent smelling fountain. The fountain keeps the key to the door.
Check the image plate below the head of the
caterpillar. It's a slider possible. It's hopeless. Use the Glimmer of Hope
spell on the slider puzzle. Hahahaha. Wish it was that easy. Take the
silver key.
Use the silver key on the door.
See Kitsune and Plato. They want to keep Jerry
company.
Jerry enters the portal but Kitsune and Plato
didn't go through.
Place between worlds:
Look around. Use the Advice Seeker spell. The
Magician appears and says that Zaroff is stopping his spirit and Jerry's body
access to the clearing of the first tree. This is a place between worlds.
There is only one that can help Jerry; a dangerous
magician. Jerry already knows how to call him. Do not show any weakness when
he appears.
The magician gives a tree bark.
Raven: Talk to the raven.
He lives in the clearing of the first tree. He can't find it now.
He remembers one that made the wheel (appears at
hole of tree) which when turned changes the paths. The wheel shows the
places that you have seen, will see and ones that have shaped your life.
He has seen the 4 lizards, a tall man and a rabbit
with funny eyes that have passed through here.
Call the dangerous magician:
We have called a magician before - the Marquis.
Review the triangular letter in inventory.
Collect items: Turn the
wheel to show memories.
Take black powder from the cannon of the
gunner in Mousewood at center window.
Turn the wheel again.
Take 3 acorns from the net in town hall at
top window.
See the dwarves rusty metal door at left window.
Use the stick to pry the door open. The stick broke but get a dwarf beet
root.
Do the recipe of the carrot flame:
- Use white pepper on the stone with marking -
treewalker mark at center window.
- In inventory combine the white pepper and the
black powder.
- Place the powder mixture with the mug.
- Add the tree bark to mug.
- Add the acorns to the mug.
- Add the dwarf beet root to the mug.
- Use the mug with all the ingredients on the
crossroad (center of the 3 circular stones).
Turn the wheel again.
- Get log from campfire at left window.
- Use the lit log on the circular powder on the
crossroad.
Masked magician: The
masked magician looks like the one at the picture with Jerry at Hall of
Apprentice.
Answer the magician with all the dialogue. The
dangerous magician chants and said that he has bestowed a gift to Jerry.
He advises to follow the light.
Follow the light:
On each screen; use the magic coin. Move the ring
on all the windows. Go to or enter the one with the strongest purple aura.
- Path into the light at bottom.
- Bright path at left.
- Path into the light at bottom.
- Into the white at right.
The Clearing of the First Tree:
Zaroff: See the Great
Zaroff under the First Tree. Zaroff introduces Jerry as a volunteer. The
dreaming audience applauds Jerry's arrival.
Zaroff banishes Jerry inside the First Tree.
The old Magician wakes Jerry up. He tells that
there are nails driven on the tree. Also tells Jerry to find the others that
must be trapped inside the tree.
Act 1:
Jerry is on stage. See Plato at other side. Plato
does not recognize the real Jerry; just the cardboard Jerry beside him.
Stone toad: The stone
toad from the Path tree wood is at center of stage. He is loaded with Zaroff
posters. He doesn't want Jerry to get close.
Pick up the Styrofoam chestnuts that fell
on stage when the toad got angry.
Read the script at left.
Move the boulder scenery left of the toad.
Use the light switch exposed when the scenery is
removed. Now there is light on stage.
Use the voice tube at left wall. The lighting
person answers. It will focus the limelight on the toad.
This causes the toad to close his eyes and won't
see Jerry. Immediately use the Styrofoam chestnuts on the toad.
The toad sneezes Styrofoam chestnuts off
his nose. This cleared his head. He goes back to the stream of time.
Plato: Talk to Plato. He
does not recognize Jerry.
Use the clicker frog with Plato. Plato now
recognizes Jerry.
Friendship causes the black iron nail to
fall off the tree. Mousewood is released.
Act 2:
Mr. O'Donnell: See the
leprechaun on top of a pot of gold. There is a pot of shamrock on the lawn.
It s nailed to the floor.
Look at the sandbags hanging on the ceiling.
Read the script. Zaroff tries to get
Jerry's head to hurt.
Talk to the deluded leprechaun. He thinks Jerry
wants his pot of gold.
Remove all that the leprechaun loves:
Go left and see a rip on the landscape. Enlarge the rip using the black nail
from Act 1.
There is a lever and a button that controls the
sandbags above the stage.
The lever moves the sandbag and the button lowers
it.
Move the lever to the middle position. Push the
round button. The shamrock pot as well as the fake lawn is removed by the
sandbag.
Move the lever to lower position and press the
button to tilt the exposed wood plank. This tips the pot of
gold over. The leprechaun is distraught about his scattered gold.
Try to take the leprechaun's hat and this jars the
leprechaun to be aware. He realizes that the gold coins are plastic chips.
Mr. O'Donnell's curse is broken. He grants Jerry a
wish. Jerry asks for help in getting the nail.
A rainbow ramp appears. The leprechaun disappears
to go back home.
Take the bronze nail from the tree. Ireland
is released.
Act 3:
See Kitsune with a fox mask. Kitsune is held by
the guardian fox' paws. Kitsune cannot change back to being a fox. The
guardian fox tells Kitsune that he will remove her liking for humans or
devour her as human.
Try to talk to Kitsune. The guardian covers her
ears to stop her from hearing Jerry.
Remember that the guardian is blind but can hear
and smell.
Read the script.
Check the large bell at foreground. Jerry kicks
the bell.
Use the sound carrier with the large bell. It
enhances the sound and the guardian releases Kitsune to cover his ears.
Use Kitsune's bell with Kitsune. Kitsune removes
her mask. The guardian again holds Kitsune.
Guardian threatens Kitsune. Zaroff destroys the
sound carrier.
Talk to Kitsune to get her to realize that Jerry
accepts her as a fox.
Kitsune fights. She removes the Zaroff posters off
the guardian. The guardian's curse is removed and he thanks Jerry.
The guardian asks that Jerry take good care of
Kitsune. He disappears.
The gold nail falls off the tree. Japan is
released.
Act 4:
Jerry is at North Pole and is cold. Zaroff tells
Jerry that he is not following the script.
The polar whale is seen in the monitor. The whale
has Zaroff posters under its eyes. It invites Jerry to join it under the
cold water of the ocean.
Look at the whale and the ocean. Read the script.
Check the Christmas tree. After the audience's
comment; Jerry takes the string of lights.
Take the candy cane.
In inventory combine the candy cane with the
string of lights to get festive fishing rod.
Use the fishing rod on the ocean. A cable is
caught.
Pull the cable twice until the wind machine is
close to the ice floe Jerry is standing on.
Turn-click the wind machine to face the polar
whale in the monitor.
The posters are removed from the whale. The whale
says that his smallness is what it makes The whale thanks Jerry.
Take the silver key. North Pole is
released.
Jerry changes the script and Zaroff follows it.
Clearing. Zaroff sees the poster
removed on the first tree.
The audience are angry and restless. Kitsume and
Plato made music to entertain the audience while Jerry looks for Zaroff.
Duel:
Zaroff and Jerry face off in a duel. Zaroff has 4 spells to be destroyed.
When Zaroff casts a spell, a counterspell must be
used by Jerry on that spell. Then a nail should be selected to throw the
cast spell back at Zaroff.
During the first duel, the inventory should be
opened to select the spell and later the nail. After that first duel, the
spells and nails will be seen at bottom of the screen.
Zaroff casts a spell; select same colored spell
and click it on Zaroff's spell at center of screen.
Then select the correct nail for that color and
click it on the floating spells.
The dueling spells will move towards Jerry and
Jerry will then throw them to Zaroff.
The duel puzzle can be skipped. A skip X icon is
at top right of screen.
| Zaroff's cast
spell color |
|
Jerry's
counterspell color |
|
Nail used
|
| blue |
|
blue |
|
gold |
| red |
|
red |
|
bronze |
| green |
|
green |
|
silver |
| purple |
|
purple |
|
black |
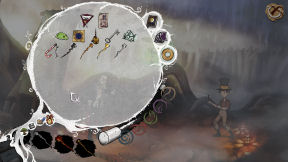
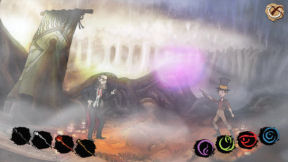
The story of Zaroff and the Marquis is told.
If you greet all the guest at the Festival, an
achievement is obtained.
See the imprisoned dangerous Magician's face when
he removed his mask.
I will never forget you.
The Marquis, the tree... he will remember him.
Jeremiah Hazelnut, the Rabbit's apprentice!
NOTHING IS IMPOSSIBLE!
This document may not be
distributed without express written permission of the author and the content may
not be altered in any way.
For Questions or Comments
on this Walkthrough,
Please write to:
MaGtRo
Copyright © May/2013
MaGtRo
 GameBoomers
Walkthroughs and Solutions
GameBoomers
Walkthroughs and Solutions