THE RAVEN:
Legacy of a Master Thief
By KING Art Games
Walkthrough by MaGtRo
Gameplay: This is a third
person point and click game.
The main menu has resume game, new game, load
game, extras, settings and exit game.
Settings have adjustments for: screen resolution,
graphics quality, speech volume, sound effects volume, music, volume, audio
language and subtitles language.
Extras or bonus materials are credits (unlocked),
concept art gallery, artwork gallery, 3D models gallery, The Raven in
concert and soundtracks. The rest are unlocked during gameplay.
ESC key accesses the main menu.
At top right of the game screen, is a counter of
points. These are adventure points that
can be used to buy hotspots usage and hints.
Magnifying glass and the space bar highlights all
current hot spots.
Notebook has content, notes and secrets that are
accumulated during gameplay. There's the table of Contents. Notes have
observations. Secrets have tasks that needs to be done in the game and hidden
hints that can be bought with adventure points.
The gear accesses the in-game menu.
(The achievements shown in the walkthrough might
be a Steam exclusive only.)
Chapter 1: Eye of the Sphinx
July 2013
London 1964, British Museum:
Charles Langley, museum guard looks for Harold, the other guard assigned
that night. A bobby-cop covers his mouth and tells the guard that The Raven is
here to rob the museum. The cop also says that the other guard is
unconscious outside. The cop wants to be the hero that catches The Raven or
his Heir. A sound is heard and they see that the ancient ruby, one of the
Eyes of the Sphinx is gone from the pedestal. A raven feather is in its
place. The guard chases the shadow of the thief. An explosion occurs and the
guard is hurt.
ORIENT EXPRESS
A Train in the Alps
Meet the characters:
See the Orient Express travel through scenic
mountain pass. Swiss Constable Anton Jakob Zellner reads a mystery novel.
Matt Miller: Matthew Miller, a
young boy from Pennsylvania wants to play guns and robber with Zellner. Find
out that they are to get off in Venice and go on a cruise. His mother works
for a rich lady.
Inspector Nicolas Legrand:
Legrand arrives to stop Zellner from revealing too much about the latest
Raven robbery. Zellner tries to convince Legrand that he needs him for his
investigation.
Answer Legrand's questions - He's guarding
something. A jewel. It's a trap. Although impressed with Zellner,
Legrand still would not let him in the investigation.
Zellner explains to Matt about Legrand and The
Raven.
A tutorial is offered.
Window: Look out the
window across the Zellner's table. Open the window. The violinist wants the
window closed.
Violinist (David Kreutzer):
Examine and then talk completely to the violinist. The man's hands
shake. He is also getting off in Venice and taking a ship to Cairo. He will
be performing at the Egyptian Museum.
Check the violinist again to make a comment about
his shaking hands.
Professor Edgar Lucien:
Go to next car and meet Professor Lucien of the British Museum. Lucien
spills his tea on Zellner's uniform. Talk to the professor completely.
The
professor cannot open his compartment. He gets very agitated. He needs to
get back to his compartment. He is also getting off in Venice.
Examine the professor again. Examine the door
several times.
James the Butler and Baroness Von Trebitz:
Knock on the door of the next compartment. The Baroness' butler opens the door. Have a 3 way conversation. Learn that the
Baroness lost her purse at the station in Zurich.
Go to Saloon car.
Lady Clarissa Westmacott: Meet
Lady Westmacott Talk to her completely. She quit writing now. They are also
getting off in Venice and going to Cairo. She funds excavations. She comments
about David Kreutzer, the violinist.
Observe Lady Westmacott again.
Mrs. Mary Miller: Observe
Mrs. Miller, mother of Matt. Talk to Mrs. Miller. Try to talk to Mrs. Miller
again.
Dr. Gebhardt: Go to
dining salon. Talk completely to Dr. Gebhardt, a German physician reading the paper. His suitcase was stolen in Zurich. The doctor notes that Legrand
watched a cash box placed in a safe and now guards it. He deduce that it
contains the emerald that is the pair of the ruby that was stolen. The gem
is to be exhibited in Cairo Museum.
Get a part of the newspaper. Read the
newspaper about the Eye of the Sphinx and the injured guard and policeman -
Charles Langley and Robert Oliver. Read the announcement about Luna Drops;
the Cleopatra movie and story about John Surtees, the only man that won the
Formula 1 and motorcycle race.
Freight car: Go outside and enter
the freight car.
Meet Robert Oliver of Scotland Yard and Legrand.
Talk to them completely. Zellner tells Legrand about the archeologist and
the missing purse.
Open the professor's compartment:
Toolbox: See a toolbox by the steps
of the freight car. Try to open the
toolbox that is right of the steps to the freight car. It is locked.
Matt scares Zellner with his toy gun. Matt says he
saw a ghost that flew across the window. Matt's wooden pistol is
confiscated.
Check the ladder to the roof. Go back to the saloon car.
Bar area: Examine the bowl on top of the bar. Take some
butterscotch.
Look behind the
bar. Examine the notepad. Take the pencil on the pad. Examine the
scissors, the drawer under the notepad and the radio that is right of the
small fridge.
Use the pencil with the scissors to get
graphite on paper.
Turn on the short wave radio. (Achievement Music
Lover
obtained).
Dining area: Go to dining
area.
Mrs. Miller talks to Zellner about Matt. She takes
back the wooden pistol.
Examine the glass of toothpicks on the table
across Lady Westmacott. Take toothpick.
Go to sitting area pass the compartments.
Matt: Talk to an upset
Matt. Give him butterscotch from the bar. Friends again.
Talk to Matt completely. Learn that he saw the
violinist pick up a purse in Zurich and placed it in his case. Also learn
that his mom has hairpins.
Take the detective book from table.
Coal tender car: Go to
the rear of the car. Study the map on the wall twice. It shows the Orient
Express route.
Check the door to the coal tender car. Go back
to Lady Westmacott.
Autograph of Lady Westmacott:
Give the detective book to Lady Westmacott to get her autograph.
Mrs. Miller's hairpin: Ask
Mrs. Miller for hairpins. Get a hairpin.
Bar: Go behind the bar
and use the hairpin on the drawer under the pad. Get a small key.
Toolbox: Go outside and
use the small key on the toolbox. Get pliers.
Professor Lucien's compartment:
Go to Lucien's compartment. Open the lock with the pliers. The door is
opened.
The widow is ajar. Zellner loses his hat looking
out the window. Lucien checks his bag and sounded relieved.
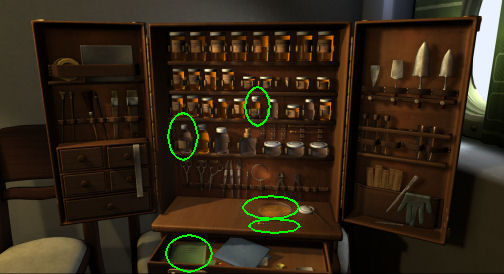
Look around. Check the bottles, corner cupboard
and the desk set. Try to check the bag.
Examine the button on the floor under the window.
It must have come from a uniform worn by the burglar.
Check the window and
see some marks. Use the graphite from the pencil on the window.
There are 2 prints that might have been made by a gloved hand. (Accurate
Detective achievement obtained).
Read the locked compartment notes. Zellner thinks
that the door was locked from inside and the culprit escaped through window.
Exit the compartment, go to dining area and bump into the steward.
Mrs. Miller: Return the
hairpin to Mrs. Miller.
Dr. Gebhardt: Talk to the
doctor about his gloves.
Read the notebook for updates.
Get the Baroness' purse:
Violinist: Go to the
sitting area. Examine Kreutzer's
violin case twice. Talk to Kreutzer about the Baroness' purse. Kreutzer
refuses to have his case checked.
Matt: Talk to Matt about
the uncooperative violinist. Matt offers to distract Kreutzer. Agree
to the distraction. Matt gives 2 plans to distract Kreutzer. Zellner decides
not to get Matt involved in this attempt.
Distract Kreutzer: Open
the window across Matt. Kreutzer after some discussion closes the window.
Open the window again and use the toothpick on the
runner to stop it from closing. Kreutzer tries to close the window.
Immediately open his case. See a violin, gun and
the purse. Examine the violin and gun. Take the purse.
Kreutzer says that he has a gun license and
tells Zellner to give the purse back to the Baroness.
Matt: Talk to Matt and he
will keep an eye on Kreutzer.
Purse: Check the purse
and see that it has 2 personal letters and an old picture. Turn the picture
over and read that it was addressed to my sister Meta, taken during summer in Masuria 1926.
Return the purse to Baroness:
Go to the Baroness' compartment and knock on door. The purse is returned.
(Achievement Humble Helper obtained).
Talk to Baroness. Learn that she financed the
exhibition in Cairo - Eye of the Sphinx. The jewel in the British museum was
stolen from Professor Lucien's collection. Lucien is the Director of the Museum's Egyptian
Dept.
Lucien: Go to Lucien and
talk to him completely about his involvement with the jewels.
James the butler: Go back to
the compartments car. See James the butler exit the compartment and check
the train route map.
Follow the butler and talk to him completely. His
real name is Clive Alfred Inch. The notebook states that James has a lame
arm received during the war.
Check the coal car door.
Radio: Go to the bar
area. Dr. Gebhardt is not here. Go behind the bar.
Check the radio and see that someone broke the antenna.
Trapped in Stones
The trap (triggered by opening the professor's compartment):
Go to the freight car. Talk to Legrand about the
purse and then the professor.
The lights go out. An envelope is on top of the
safe. It has a black feather in it and a letter addressed to Nico. Legrand opens the safe and
then the box. It's a bomb!
Zellner quickly throws the bomb to the back of the
train and pulls the 2 men out. He closes the door. The bomb goes off.
Uncouple the freight car:
Legrand issues orders. Oliver is to go to the
engineer; Legrand will take care of the passengers while Zellner uncouples
the freight car. (Achievement Survivor
obtained).
Read the notebook for updates.
Check damage: Go outside. Examine the damage
on side of freight car.
Try to open the freight door twice. Climb the
ladder by clicking at top of ladder. It's dark there.
Go down the car and look at the coupling of the
cars. Go back to the saloon car.
Look for items: Look
through the window. There's quite a fire.
Examine the bottle of alcohol from the shelf
behind the bar. Take bottle of alcohol. Zellner places the bottle of high
proof rum on the bar.
Examine the candy bowl on the base of the bar
stool. Zellner places it on the bar.
Go to next car. Meet Dr. Gebhardt. Talk to him
completely. Get matches from the doctor.
Take the curtain from right side window.
Look at the overturned chair of the last left
table. See that there is a fire extinguisher on the floor here also. Use the
extinguisher.
Break a leg off the chair with fire extinguisher.
Take the chair leg. Zellner places the chair leg on the bar.
Make a torch: At the bar,
wrap the curtain around the chair leg. Use the
bottle of alcohol on the made torch.
Use the matches. (Achievement Pyromaniac - if 5
matches are used -
obtained).
Use the lit match in inventory on
the alcohol soaked torch. The torch burns out quickly.
Automatically, Zellner takes off the curtain.
Make a stronger lit torch: Use
the curtain on the bottle of alcohol to get an alcohol soaked curtain.
Go outside. Climb off the train and be on the
connection of the 2 cars.
Check the coupling of the cars. Zellner touches
the coupling.
Use the alcohol soaked curtain on the coupling to
clean the oil and grease from mechanism to get oily curtain.
Go back up to
the bar. Wrap the oily curtain around the chair leg.
Pour the rum into the bowl. Light a match and then use the burning match on
the bowl with alcohol to get a bowl with fire.
Use the torch daubed in oil on the fire in the
bowl. I'm the God of Fire. (Achievement Prometheus
obtained).
Uncouple the train: Go
outside. Climb down the train. Examine and then turn the lever. Uncouple the
train.
Fire, Steel and Steam
See the passengers outside the train.
Oliver comes back after releasing the brakes of
the train. He said that the engineer is not there. The train moves out of
the tunnel. Mrs. Miller realizes that Matt is not here. They see Matt in the
moving train with an engine that is on fire. Zellner runs to catch the train
and finally jumps on the train. (Achievement Sprinter
obtained).
Matt:
Look for Matt. Go to the next car.
Pull the emergency brake on the wall right of the
window above table at left. That doesn't work.
Look out the window to see that the engine and the
coal tender cars are burning stronger.
Examine the handbag of Mrs. Miller beside the
table at left. Search the bag
to get the wooden pistol.
See and talk to Matt
under the table at left. Matt says there's a man that was coughing that
came from the roof of the train. Matt wants to stay under the table.
Stop the train:
Go to next car. Try to enter the Baroness'
compartment.
Archeologist compartment:
Enter the next compartment. Check the gin bottle on shelf.
Explore the corner compartment. Look at the
mirror. Examine and take the towel.
Turn on the tap. Use the towel on running water of
the tap to get wet towel.
Sitting area car: Go to next
car. Check the emergency brake on the wall middle of the open doorway.
See an axe just behind the glass doors of the
sitting room car and left of the emergency brake. Take the axe.
Pick up Zellner's book from the floor
beside the chair at right.
Coal tender door: Go to
the end of the car.
Since the emergency brakes are now known not to
work, open the door. Ouch!
Use the wet towel on the door. It is locked.
Take the axe Zellner laid down on floor and then use
it on the door.
Open the door and Zellner crawls to escape the
smoke above him.
Uncouple the cars:
Examine the coupling. Turn the lever. It's not working.
Use the axe beside Zellner. Release the lever with the help of
the axe.
Examine the coupling again after the lever is
release.
Use the axe again. Strike the coupling with the
axe. Cough, cough. (Achievement Hero of the Hour
obtained).
Matt's mystery man:
Zellner talks to Matt. While in search of his
wooden pistol, Matt hears a man coughing. Matt hides. He see a shadowy man
wearing a cap.
The man drops an envelope which Matt kept. Inside
are cash, Italian passport and a ticket for the cruise.
MS LYDIA CRUISE SHIP
Ah, Venice!
Legrand and Zellner drive to the ship. Zellner
tries to convince Legrand that he should come along.
Dock in Venice:
They arrive at the dock and Legrand is given a
telegram. Legrand is asked to return to Paris to explain the events in the
train. The Egyptian authorities are
warned about the arrival of the emerald. But no one will protect it at sea. Legrand throws the telegram away. Oliver is jealous of Zellner.
The emerald in the safe was placed there by
Legrand himself. Prof Lucien certified it. 3 keys will open the safe.
Lucien, the Baroness and Abbas Mokhtar the Director of
Egyptian Museum have
keys.
Legrand explains that the heir might really
be the original Raven; that he might not have shot the real Raven.
Look around. Check the view twice. There's a red convertible at right
and a crane above it.
Constable Oliver: See
Oliver guarding the safe at right end of the dock.
Talk to Oliver. Oliver believes that Zellner is
the one that placed the envelope on top of the safe in the train. Oliver is
rude to Zellner.
Red convertible: See a young
lady in the red convertible at right. Check the young woman. Examine the luggage twice and Zellner will take an
inconspicuous look at the luggage. The young woman is Patricia Meyers. She is
traveling to meet her father in Egypt. Her father is building the railroad
system in Egypt.
Dr. Gebhardt: Talk to Dr.
Gebhardt standing by the gangway of MS Lydia. The doctor is a war veteran. He took care of Mrs. Miller
and the Lady while James took care of the Baroness. A car
arrives.
Learn about the captain of the ship - Mario diConti, a war hero. The captain is in poor health right now. The doctor gives
Zellner's heart medicine that they found in the tunnel.
Zellner throws the medicine in the water.
Kreutzer: The
violinist arrives with the Baroness. Kreutzer smirks when he passes by.
Baroness: Go to Baroness'
car and talk to her. She wants Zellner to sail with them and is willing to
pay for his fare.
The Baroness uses the binocular on the ship and
then faints. James brings her to the ship.
Pick up to use the binocular. The only ones on
deck are the Baroness and James greeted by the captain; Legrand and Dr. Gebhardt talking and Kreutzer being snubbed by Patricia.
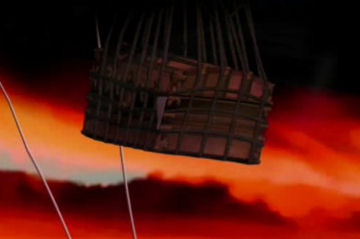
Suspicious chest:
See a chest being loaded by the crane into the ship's cargo hold. A piece of
cloth is sticking out of the chest.
MS Lydia:
Board the ship: Zellner
is greeted by the captain. Legrand says that Zellner is not joining them.
Talk to both the captain and Legrand. There is a
suspicious chest that Zellner wants to check at the cargo hold.
Learn that anyone can board without a ticket. As
long as they are on the list of passengers; they are allowed to sail.
The ship will sail in 15 minutes and 2 loud blasts
will signal for the dock workers to leave.
A Suspicious Trunk
Cargo Hold: It is dark
here. Look around. There's a cylindrical object at left. Take the
flashlight. Use the flashlight with the room. Check the red convertible.
Chest: Go to the back of
the room and see the chest.
Examine the suspicious chest at left foreground. Open
the chest. It is empty.
Go back to bottom right of the screen to the
car and stairs.
Shards: Examine the
shards by the foot of the stairs. Hear another sound. Zellner is hit on the
head.
Escape the cargo hold:
Zellner wakes up tied to a chair and mouth is
bound. Hear something - gunshot? Hear some other sound. Look around.
Remove the ropes: Take the knife that is on the crate beside
Zellner. It falls under the crate. Ugh!
Pull the
cloth on the shelf behind the chair. A flat iron falls off.
Use the flat iron with the crate at right. The
crate is opened.
Cut through the fetters with the saw that is
inside the crate. The leg fetters are cut off.
Use the yellow crane controls on the left. Zellner
hooks the rope/chair on hook and eventually gets release. (Achievement
Houdini
obtained).
Search the cargo hold: Go
to the back room. Examine the white bulkhead door. Try to open the bulkhead door at left.
Go back to
the front area by car. Examine the cell under the stairs, chairs and lockers.
Examine the crate at right and see it has a bullet
hole. Examine the bullet hole. It needs to be examined later.
Examine the pipe by the car and shards. Take the
bloody pipe.
Go upstairs and try to open the door. Open the
door with the pipe. Leave the cargo hold.
The stowaway:
Legrand: Talk to Legrand.
Legrand brings Zellner to the lounge.
See the captain holding up the drunken Baroness.
The Baroness goes back to her cabin.
Dr. Gebhardt: The doctor
hands the glass of champagne to the captain. He examines Zellner. He says that Zellner has a mild concussion.
Oliver comes in saying he saw a dark shadow.
Zellner drinks the champagne. Oliver is to guard the Baroness and knocks on
her door. Legrand will check above deck.
Search with Gebhardt: Go
to side deck at left. Zellner starts getting sick.
Legrand corners the stowaway, a young Arab. Oliver brings him to
the detention cell. A shot is heard.
Baroness von Trevitz:
Gebhardt opens the cabin. The Baroness is in bed. We have a murderer on
board.
At the deck, Zellner collapses. A fire alarm
sounds.
Murder on the Mediterranean
Oliver is still rude at Zellner but updates him on
the investigation. Zellner was drugged by the champagne held by Captain
Conti. Legrand has a lab in his cabin. The murder weapon was recovered on
the folded up gangway.
Look around the ship:
Gangway: Go outside
and look over the railing to the gangway. Examine the gangway to learn
Zellner's thoughts. Go to side deck and examine the crates.
Go left to the afterdeck and look around.
Examine the towels at left and the speakers at front post. Examine the deck
chair.
Go inside the saloon and look around. Check the
glass roof.
Go outside-upstairs and examine the pipes
above and grate-ventilation shaft several times. Examine the lifeboat. Check
the door to the bridge several times. Go down.
Forecastle: Go to the forecastle. Look around at the
shuffleboard equipment and door to the cargo hold.
Look at and then talk to
Oliver. He refuses to let Zellner interrogate the stowaway. Note the
water bottle beside Oliver.
Check the Baroness' body and Legrand:
Go back inside the ship. Go downstairs. Look
around at the foyer. Examine the cargo ship model at left and plant with
stones. Examine the red alarm at right wall.
Dr.
Gebhardt: Enter the medical center. Talk to Dr.
Gebhardt. The doctor is not in a nice mood.
The doctor himself didn't have a chance to have
anything to drink in the saloon last night. The Baroness was shot once at
point blank range. The doctor gives the bullet and pulls Zellner out
of the room.
Legrand: Enter Legrand's
cabin. Chloral hydrate was in the champagne glass that Zellner drank from.
Learn about the circumstances of the murder. The murder weapon is a Luger 08
owned by David Kreutzer. There are 2 bullets missing in the clip of the gun.
Legrand gives evidence packet. Legrand has Baroness' safe key.
Find out who gave the champagne to Zellner:
Captain diConti: Go
upstairs. Talk to the captain in the saloon. Learn about the alarm, Baroness
and champagne. It was Dr. Gebhardt' champagne glass.
Ice bucket: Check the ice bucket
beside the captain. Zellner takes the ice tongs.
Lady Westmacott: Talk to
Lady Westmacott. She believes that the thief is a "new" Raven.
Legrand: Go down to
Legrand's cabin. Report about the possibility of the doctor being the
intended victim of the drugged champagne.
Examine the Baroness' cabin:
Crack the seal to enter the Baroness' cabin. Look
around.
Lock of door: Examine the
lock and chain. Zellner speculates on the presence of the murderer.
Check the red alarm at top left corner by the
door. It's been tripped.
Check the cover of the vent on the ceiling by the
door. Zellner speculates on the entry/exit of the murderer.
Check the portable cupboard twice and see that it
is a bar.
Message:
Examine the notepad on the desk. Click-hold the pencil on notepad to see
what was previously written on it.
Inspector, Be in the saloon at 10 pm.
There is a murderer on board and I will expose him! B. Zellner takes the
message from the Baroness.
Check the mannequin and painting on the wall.
Legrand: Go down to
Legrand's cabin. Report about the message and learn that Legrand ignored the
message sent by the Baroness. He found it slipped under the door.
Vase: Go back to the
Baroness' cabin.
Examine the vase
left of the cupboard. Zellner tilts the vase. Pick up the down feathers
that came out. There's burn mark at tip of one feather.
Check under the bed to get more down feathers.
Zellner adds it to the sample bag.
Legrand: Go down to
Legrand's cabin. Report about the feathers. Zellner thinks that someone
fired through a pillow. Legrand wants the pillow.
Vase again: (If you did
this part, before going down to Legrand - as above, Legrand will not have
the singed feather report. I don't think it matters for the end of Chapter
1). Go back to the Baroness' cabin. Examine the vase again. Use the ice tongs in the
vase and get pillowcase with burn marks.
Audiotape: Search the
cupboard beside the bed. See a tape recorder. Check the tape recorder twice.
The reel is the wrong one. The original wheel is not here. Examine and then
take the Seibling audiotape reel that is usually used in offices.
Bed and bloodspot: Examine and search
the bed. Examine the blood spot. The blood is so red - it should darken by
now. We need to get a sample.
Go left and examine the locked portholes twice.
Baroness' diary: Examine the
luggage. Zellner opens the Baroness' handbag.
Read the 1964
diary inside the handbag. There's a shaky entry about Bubi's birthday and
next week - J's. Try to take the diary.
Search the handbag one more time - nothing
special. (Achievement Crime Scene Investigator - if all items have been
examined -
obtained).
Evidence: Check all the
items in inventory to learn more about them.
James-Inch the butler: Leave the
cabin. Talk to the butler. Learn that the Baroness was searching for
something that afternoon but might have found it. The photos in the cabin are memories from the war.
James is also a veteran of the war.
Get access to the stowaway:
Legrand: Go downstairs
and enter Legrand's cabin. See that Legrand is in the bathroom; he dropped a
syringe in the sink.
Legrand urges Zellner out of his room before
Zellner can report. The inspector
is very stressed.
Examine the lock of Legrand's door. Zellner needs only a
wire or something similar to pick the lock.
Go upstairs, outside and then to the forecastle.
Mrs. Miller and Professor Lucien:
Go to the forecastle. Talk to Mrs. Miller and Lucien. Lucien got agitated when he learned that the
murderer is still loose.
Talk to Mrs. Miller again. Learn about the scream
she heard. The bobby crossed her path as well as Lucien. She married an
Englishman while she worked in a pharmacy. Learn about an unpublished
Inspector Partout manuscript.
Matt: Talk to Matt. Learn about his relationship with his father, mother and
Lady Westmacott. A bet about shuffleboard ensues.
Shuffleboard: Learn about the
rules of the game. Zellner is blue puck and Matt is red puck. The pucks are
pushed into the numbers using the stick. There are 6 pucks per player. The
player is allowed to shoot the opponent's puck out of the zone.
Click-hold-move the blue puck downward to get a
line. The longer the line; the stronger is the release of the puck. The aim
of the puck is shown by the line's position.
Try to block the opponent's trajectory by placing the blue puck lower in the
zone and it will also be moved to a higher number if/when it is hit by the
opponent. The score is shown at
bottom right.
Matt bets his brand new slingshot. Win to get the
slingshot.
Oliver: Wake up and talk to Oliver.
He is hungry.
Ammunition: Go inside and
then downstairs to the lower deck. Take stones from the plant left of
the medical center door.
Miss Mayers: Go to the
afterdeck outside. Talk to the sunbathing Miss Mayers. Learn that she got engaged
right before her trip.
Lady Westmacott: Enter
the saloon. See Legrand interrogate Kreutzer.
Talk to the Lady. Learn about Matt's father and
Mrs. Miller. Learn more about the Partout's manuscript.
Food: Face the table with
the food. Check the coffee to get Zellner a cup of coffee.
Check the chafing
dish. Take something to eat.
Oliver: Automatically,
give Oliver the salted ham and eggs.
Combine the stones and the slingshot in inventory.
Shoot the water bottle with the slingshot.
Zellner missed and hits Oliver's knee. Oliver breaks the
bottle of water. Oliver leaves to get a drink.
Cargo hold:
Stowaway: Zellner enters
the cargo hold and talks to the stowaway.
Adil Jamal is the Arabian stowaway. It is highly
probable that he was the one that hit Zellner.
Adil was with the bobby-Oliver when they heard the
gunshot. Adil was placed in cell and was alone when the alarm went off.
The Egyptian lost his accent. Talk to him
completely and examine him several times.
Investigation items: Check the locker at left. Open the toolbox. Take
the wire and screwdriver.
Bullet hole: Look for the
shot fired at cargo hold. Examine the crate with bullet hole right of the
lockers-red wheel. Examine the bullet hole.
Use the screwdriver on the bullet hole on the
crate. The bullet looks like the same one that was given by the
doctor. What is the reason a shot was fired here?
Oliver: Leave the cargo
hold. Tell the waiting Oliver that he wasn't paying attention and that they
can tell that to Legrand.
Return the
slingshot to Matt. Talk to Mrs. Miller.
Legrand's laboratory in the cabin:
Open Legrand's cabin: Go
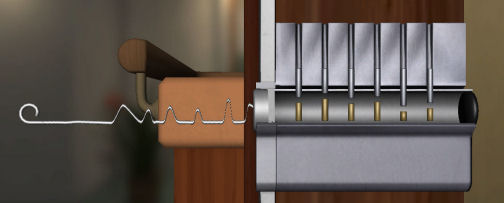
downstairs to Legrand's cabin. Use the wire on the door.
The wire on the left must be shaped similar to
the heights of the gold tubes. The gold tubes should all be even and
allow space for the long rod to pass through.
Click-hold the wire to shape it. To test,
click-hold the shaped wire and move to the right. See which part of the
wire needs to be reshaped.
To undo the pattern, flatten (click-hold-pull
down) the wire points.
Enter the cabin and look around. Check the safe
twice
and the beddings. Check the bathroom.
Check the alarm and see that it is tripped.
Photos: Check the
enlarger on the desk at right. It is for photo developing.
Look at the photos on the wall between the
portholes.
The blood photo shows that there were a lot of
blood on the sheets. The blanket and sheets must be at the medical center.
Table-desk: Examine the table. Check the police file.
Check the pipe used on Zellner. No prints. Check
the empty vial that might have been used by Legrand on himself.
Take the Luger bullet taken from the
Baroness.
Bullets: Examine the
microscope on the table behind the sofa. Analyze-place
both bullets on the microscope.
Look through the microscope. Click-hold-slide
the right side pattern to move it up-down.
Match the lines together. They match. Why was
the gun fired in the cargo hold? (Achievement Forensic Officer
obtained).
Baroness' blood: Examine
the forensic box at left of the table. Check all the instruments.
Get a sachet - cotton swab left of the dropper and
Petri dish-glass bowl.
Exit the room and go to the Baroness' room. Use
the cotton swab to collect blood sample of the blood stain on the
bed.
Go back to Legrand's cabin. Look close at the
forensic box.
Open the drawer. Read the leaflet - manual on blood. It says
to mix luminol and hydrogen peroxide. Then add a little bit to the sample.
It should turn blue if it is blood.
Click on the luminol bottle at middle of the third
from top row. Automatically add it to the bowl.
Add hydrogen peroxide which is the bottle at left
on fourth row from top. Automatically add it to the bowl.
Use the pipette on the mixture on the bowl. Check
the blood sample by clicking the bloody cotton swab on the pipette. No
blood.
Medical center:
Click on door to automatically pick the lock of the medical center. Zellner
enters the medical center.
Look around. Check the wheel chair and sink.
Rubber glove: Search the
cupboard at the foot of the table. Get a rubber glove that was filled with
fake blood from the trash bin. Examine the rubber glove several times.
Tape recorder: Examine
the tape recorder at right.
Check the drawer under the tape recorder to get
the real audio tape reel.
Use the tape that Zellner placed on the counter on
the tape recorder (load the audiotape). Hear a gunshot. Click on tape again
to make Zellner comment.
Read the notebook for updates.
Leave the medical center. Come face to face with... and Zellner is subdued.
(Achievement Amateur/Advanced/Master Detective
obtained for finishing Chapter 1).
CHAPTER 2: ANCESTRY OF LIES
August 2013
Select "New Games" and then select Chapter 2 from the 3
chapter screenshots.
Zellner is incapacitated:
Medical Center:
Dr. Gebhardt talks to Zellner. Gebhardt prepares a
syringe.
Talk to Gebhardt completely to gain time and
distract him.
Put up the footrest up. Keep on talking to
Gebhardt - "on and on". (Another chance is given if Gebhardt injects
Zellner on the neck.)
Search the bowl on the table beside the
chloroform. Zellner moves forward to see a scissor in the bowl.
Take the scissor from inventory. Cut the
straps on Zellner's wrist. Zellner walks to Gebhardt but is too dizzy and
falls down.
Pick up the syringe on the floor beside Zellner.
Use the syringe.
Saloon: Zellner wakes up
at the saloon.
Answer Legrand's questions.
The shot came from the tape. Audiotape in the
medical facility.
Constable Oliver comes in with a letter. The
doctor in the cabin. I can only speculate. (Brilliant Mind achievement
obtained for a correct reconstructed murder's course of events).
Legrand reads the confession letter and leaves the
saloon.
Talk to Legrand completely. The inspector believes
that the doctor is the Raven. Learn that the dead man Legrand killed was a
petty thief.
Legrand gives Zellner a day to do his
investigating.
The Eye of the Sphinx
Look around the Museum:
Museum entrance: Meet the
museum director Abbas Mokhtar looking for Grace, his dachshund. Talk to the
director. Learn that the doctor's body was not recovered and that the
solving of the Baroness' murder was attributed by the newspapers to Legrand.
Zellner bumps into Mr. Inch who is on his who way
out of the museum.
Museum foyer: Check the guard room at left
to see that it is locked.
Talk to Mrs. Miller who is waiting for Professor
Lucien. Zellner says he will feel out Matt's feeling about Lucien joining
them on the Nile cruise.
Rear area: Go left to the
rear area. Look around.
Examine the display case in the sitting area
twice.
Read the newspaper on the bench twice.
Examine and talk to David Kreutzer twice. Learn
about other guests and about Lady Westmacott's son.
Examine the banner at top left twice. Look at
guard.
Examine and try to enter the treasure chamber. The
guard stops Zellner. Go back to the right.
Main Hall: At the foyer,
go to bottom screen to be at the main hall.
Displays: Examine the
showcase at bottom left to learn about desert glass.
Examine the dagger display twice behind Lady
Westmacott.
Examine the showcase right of Lady Westmacott
twice to see the way the Egyptians build the pyramids.
Examine the statue of Akhenaten twice.
Examine the figure of Imhotep on stand right of
statue twice. (History Fan achievement obtained for examining all the
exhibits in the museum).
Lady Westmacott: Talk to
Lady Westmacott. She was here during the excavation and this is where he met her
husband. She alludes about Matt's father. They discuss the murder.
Matt: Talk to Matt by the
statue. Matt hears the statue talking. The voice said a bad word in English.
Believe Matt.
For a happy result, select "did you think of her
at all" on the dialogue about the Nile cruise.
The safe is coming. Legrand, Oliver and Lucien
arrive with the safe. Lucien greets Mrs. Miller.
Matt (if the above dialogue was chosen) urges his mom to let the
professor join them in the cruise. Lady Westmacott is happy about the
result. They leave to get ice cream.
Safe: Go left to treasure
chamber and follow the safe.
Legrand opens the safe with his, the director and
Lucien's keys.
The safe is empty. Lucien shows that he kept the
jewel when the other was stolen in London. Lucien places the green eye that
he kept on the display case.
Examine the security:
Legrand, Oliver and Lucien leave. Legrand has to
go back to the French embassy to answer questions from the reporters. He
tells Zellner to examine the security.
Examine the surveillance camera on the ceiling by
the exit.
Examine the jewel display case twice and then the
other display case at right. Check the wooden sarcophagus at left.
Talk to the director several times. Learn when the
alarm system was installed and secret passages.
Gate: Leave the treasure
chamber. Zellner asks the director about the gate that closes the treasure
chamber.
Into the Dark
Get help to open the treasure chamber:
Feather: The director
tells Zellner about the guard room.
Zellner sees a black feather on the banister. He
tells the director to alert the guards and to call Legrand at French embassy.
Treasure chamber: The alarm
goes off and the gate starts to come down. Zellner runs to the gate and was
thrown by an explosion inside the chamber.
The director clutches his chest and Zellner guides
him to sit down.
Gate: Examine the metal
gate several times. Zellner tries to open the gate.
Guard room: Go right and
enter the guard room. See Oliver checking the unconscious guard.
Talk to Oliver. Oliver suspects Zellner and gives
him a hard time.
Examine the coffee machine on the counter at left.
Use the telephone to call for help. The telephone
is dead.
Metal case: Open the
metal case on wall by telephone. It is locked.
Check the bowl by the telephone to get a paper
clip.
Use the paper clip to pick the lock of the metal
case.
Examine the control box. Zellner automatically
flips the switch for the treasure chamber.
Guard: Search the guard
to get a keychain (can also be used to open the metal case on
wall). Check the guard again.
Devices: Examine the
machine-device on back wall. Zellner pushes buttons until he sees camera
3 in the treasure chamber.
Examine the device again and Zellner sees the tape-movie
of camera 3. Zellner sees what happened at the treasure chamber.
Look at Oliver twice. Exit the room.
Open the treasure chamber:
Oliver gives Zellner 5 minutes to open the
chamber.
Lance: Examine the lance
held by the right statue. Zellner doesn't want to destroy it.
Flagpole: Go to the front
area. Examine to take the flagpole on the ground beside the flag by
the main door.
Automatically be back by chamber gate. Use the
flagpole on gate - force the gate open.
Zellner calls Oliver. They try to open the gate. That doesn't
work. Zellner drops the flagpole on ground.
Wooden pole: Go right
again and down to main hall.
Use the guard keychain to unlock the showcase on
the back wall.
Take the wooden pole.
Automatically be back by chamber gate. Use the
wooden pole on gate - force the gate open.
Zellner calls on Oliver to help him. Oliver picks
up the flagpole and they lift the gate a little bit.
Zellner calls the director to put something on
gate. The director picks up the metal ashtray and places it under the gate.
Zellner enters the chamber. Oliver follows.
Go down the hole:
Destruction of the treasure chamber:
Look around and see the destroyed
treasure chamber. Click on destruction at right twice. Check the
sarcophagus.
Talk to Oliver.
Hole: Examine the hole on
the floor. Oliver wants to call Legrand and tries to exit. The gate crushes
the ashtray and closes the exit.
Examine the hole again and they see the display
case below.
Go down: Examine the 2 red
cords on floor.
Use the left cord (with metal stand) with the
other cord - connect the cords.
Examine the improvised rope twice. Use the rope
with... hole (at left side) to climb down the hole.
Trust Constable Oliver.
Look around the basement:
Display case: Go right to
the dark area. Examine the display case at bottom left twice. It is empty.
Map: Examine the map at
center of screen. It is a map with lots of holes. It is dated 1940.
Desk: Examine the desk
behind the map twice. It has documents, letters... They are at least 20, 30
years old.
Wall: Examine the wall and see
scruff marks on floor. It might be a secret exit.
Oliver: Zellner goes back
to rope and talks to Oliver. Select dialogue "raven escapes"; "Legrand would
act now" and "don't rely on others".
Oliver agrees and drops the flashlight. Zellner
places the flashlight to shine on panel on wall.
Mechanism: Go right use
the mechanism. See 4 discs with animal heads depicted on each disc. It is a
combination lock and in Arabic.
Zellner writes the words down.
Exit the basement: Go to the
hatch in the tunnel at back wall. Open the hatch and find the back wall
of Matt's talking statue.
Open the mechanism:
Arabic writing: Exit to
the main hall. Go to the entrance by clicking on bottom of stairs.
Zellner automatically goes to the director.
Talk to Director Mokhtar. Ah.. The director is part of the scheme.
Learn about the basement and resistance.
Learn that the Arabic writing means the Sons of
Horus. Learn about the canopic jars vessels of organs.
The director wants to follow the constable's
direction. Select any dialogue.
Canopic jars: Go back to
the main hall.
Examine the canopic jars by left wall. They have
animal heads.
Examine the board right of the jars. Learn the
name of the 4 sons and that they are associated with cardinal directions.
They are usually depicted on coffins.
Examine the jackal shaped canopic jar.
Duamutef - stomach.
Examine the human shaped canopic jar. Amset
- liver.
Examine the falcon shaped canopic jar.
Kebechsenuef - intestines.
Sarcophagus: Go to the stone
sarcophagus at right by the stairs.
Examine the sarcophagus and then the board in
front of the sarcophagus.
Learn that Hapi is north, Amset is south,
Kebechsenuef is west and Duamutef is east.
Last jar: Go back inside
secret basement; then go back to the main hall.
Now check the baboon shaped canopic jar. Hapi -
lungs.
Mechanism: Go back inside
the secret basement and use the mechanism.
Arrange the heads to correspond with the clues of
the canopic jars and the cardinal directions stated on the sarcophagus' board.
Arrange the heads to be inside of the discs.
Top disc should have baboon head at bottom of
circle.
Right disc should have jackal head at left
side of circle.
Left disc should have the falcon head at right
side of circle.
Bottom disc should have the human head on top
of circle.
Secret hideout:
Go upstairs. Look around.
Check the radio set, fan (twice) and pigeon nest
on roof.
Raven: Examine the chair
and see that it doesn't have dust. It has handcuffs like someone was
interrogated here.
Hear a sound and Zellner calls out to the Raven.
Select the suspect that you think is the Raven.
Choose Mr. Alfred Inch. (Snooper achievement
obtained for guessing the villain).
Talk to the Raven. Learn the reason for the theft here; the
bomb on the train and the Baroness' murder. Learn more information.
Meet the Raven's arm and legs - Adil.
Adil's gun is not loaded. The Raven's gun is
loaded and a shot is fired.
Zurich, main station
See the events on the train from the perspective
of Adil.
Oliver watches over the stowing of the safe.
Legrand enters the train. Mrs. Miller and Matt follows. Zellner talks to
Gebhardt.
The baddies confer:
Mr. Inch confronts Adil about what happened at the
robbery at the London museum. Someone tipped Scotland Yard about the
robbery.
Adil gives the red gem to Inch.
Talk to the butler. Learn that it was Inch that
gave Legrand the tip about robbery of train. He plans to steal the other
jewel in Cairo.
Inch wants Adil to board the ship in Cairo and to
place the letter on top of the safe in the train. Inch will hide the stolen
jewel in Baroness' belongings.
Inch gives train ticket to Adil.
Read the diary to learn Adil's involvement with
Inch.
Get on the train:
Check the items in inventory. Inventory has a pen
knife, Inch's letter to be placed in the safe and an envelope. Look
inside the large envelope to get travel documents: ticket for the MS
Lydia, money and blank passport.
Make a distraction:
Look around. Examine the waste bin.
Look at the conductor. Adil wants his uniform as a
disguise. Examine the 2 doors on the train.
Look at the kiosk with the newspaper at right.
Examine the other pile of newspapers. The newspaper has article about the
museum theft.
Examine the freight car behind Gebhardt.
Look at the man- Dr. Gebhardt twice and deduce
that he is a doctor because of his bag.
Examine the doctor's bag. Adil wants to swipe the
doctor's bag and to cause a distraction.
Crate: Examine the empty
crate right of the kiosk.
Use the pen knife in inventory on the empty banana
crate. Adil removes the bottom of the crate.
Use the bottomless crate on the doctor's bag. The
conductor tells Adil to go away.
The conductor tells the men to board the train.
Gebhardt demands his bag. The conductor will look for the bag.
Conductor: Talk to the
perplexed conductor. Adil tells the conductor that a blond boy has a brown
bag.
The conductor goes to the kiosk. Watch as Adil
takes care of the conductor and gets his uniform. (Master of Disguise
achievement obtained for disguising as a conductor).
Hear the train whistle. See Adil carrying the
conductor's uniform and shoes run beside the train. Oh, man.
The Train Robbery
Adil changes clothes inside the professor's
compartment. Hear the professor and Zellner outside noting that the door
is locked.
The inventory now has a keychain from the
conductor's uniform.
Exit the professor's compartment:
Examine the professor's luggage.
Open the corner cupboard and look in mirror twice.
Examine the sink. Examine and then take the towel that can be used as
rope.
Examine and then open the window to exit. Examine
the roof. Examine the air ducts. It's too far.
Use the towel on air duct to get Adil on the roof
of the train.
Examine freight car:
Adil walks to the back of the train. Jump on the
freight car roof.
Examine and then open the ventilation shaft. There
are 2 screws that close the ventilation shaft.
Look through ventilation shaft. Adil wants the
view of the front of the car.
Go back to the left. Adil goes down to the front
of the freight car. Examine the door and the padlocked toolbox by the step.
Find a way to look inside the freight car:
Get coffee: Enter the
saloon car. Gebhardt calls Adil. He wants coffee.
Go behind the bar. Examine the candy dish and take
a butterscotch candy.
Examine the locked drawer. Use the keychain on
drawer. Search the drawer to get a mirror.
Examine the radio. Take the radio for Adil to
break off the antenna.
Examine the coffee pot. Use the coffee pot on the
coffee cup beside the radio - pour some coffee on the cup.
Adil gives the coffee to Gebhardt. (Good boy
achievement obtained for giving coffee to the doctor).
Examine the spirits on the bar wall.
Mirror: In inventory
combine the candy and the antenna.
Stick the mirror to the antenna with candy
to get antenna with mirror.
Ventilation shaft: Go back to
the roof of the freight car.
Use the antenna with mirror on the ventilation
shaft. See that the safe is just underneath the ventilation shaft.
Hear Legrand talk to the guard. Adil formulates a
plan to throw the letter on top of the safe during the blackout and tunnel
mentioned by Inch.
Use the antenna with mirror on the ventilation
shaft again.
Get tools to open the ventilation shaft for the
freight car:
Matt and Zellner: After
completely examining the ventilation shaft and inside the freight car; go
back to the left and see Matt and Zellner.
See Zellner scold Matt about the toy gun and open
the toolbox.
Examine and then search the toolbox. Adil gets a
wrench.
Ventilation shaft: Go
back to the roof.
Use the wrench on the screws of the
ventilation shaft to unscrew the cover.
The nut of the screw falls down inside and alerts
Legrand and Robert.
Lady Westmacott and Mrs. Miller:
Go back inside the saloon car and then to the next carriage.
Look at the older lady - Lady Westmacott three
times.
Look at the woman - Mrs. Miller twice. Examine
then take the ball of wool on the table. Watch as Adil smoothly takes the
ball of wool.
Compartments: Go to next
carriage. Professor Lucien is now inside his compartment. Bump Zellner on
the way.
Check the Baroness' door twice and the Lucien's
door twice.
Next saloon car: Go
to the next carriage by clicking on the wall closest to the bottom screen.
David Kreutzer: Examine the
violin case by David twice.
Examine the book on the table at right twice.
Notice on wall: Go forward and
examine the notice on the right of the coal car door.
Open the cabinet using the keychain of the
conductor.
Examine the notice to get a large magnet.
Examine the coal car door twice.
Combine the ball of wool and the magnet to get
magnet on string.
Ventilation shaft: Go back to
the roof of the freight car.
Use the magnet on string on the ventilation shaft;
to secure the nut with magnet.
See the magnet attach to the nut while the mirror
is focused on it.
The Stowaway
Cairo pier:
Inch and Adil have a heated discussion. Inch wanted
to dispose Legrand. Learn why Inch wants to do the plan this way.
The Baroness calls the butler.
Adil wants to prove himself and automatically get
on board the MS Lydia. (Traveler achievement obtained for finding a way to
board the ship).
Open the cover:
Adil is inside the trunk. He wants to see
if there is anyone around.
Touch the clothes inside the trunk.
Feel around in the dark and feel a metal piece. It
might be the trunk lock.
Touch the lock to learn that there might be
screws.
Use the Swiss army knife in inventory on the metal
lock. Aha!
Open the cover. The cover opens only a bit since
the trunk is inside metal shelving.
Move the trunk:
Check the shelf above the trunk. Adil touches the
strap but can't reach the clasp.
Use the Swiss army knife on the strap - cut the
strap. Adil pulls the strap.
Examine the tool box across the shelf twice.
Use the strap on the box - throw one end of the
strap to the box. Adil pulls the box. See a metal pipe roll towards Adil.
Examine the still too far pipe.
Combine the Swiss army knife with strap.
Fish the pipe with the strap with knife.
Combine the pipe with the strap with knife.
Examine the metal pipe behind the wooden box
across the way twice.
Use the strap with pipe with the metal
pipe.
Adil pulls himself out of the shelf.
Zellner: Adil hears
someone come inside the cargo hold.
Adil uses the metal pipe on Zellner.
Hide:
Adil knows where he can hide. He enters the room.
Adil kisses Patricia. Patricia knows about Inch. (Amateur/Advanced/Master Detective obtained for finishing Chapter 2).
CHAPTER 3: A MURDER OF RAVENS
September 2013
Read the journal to know the story based on Adil
and Patricia-Alex' perspective.
A Thief and a Murder
As Alex-Patricia.
Patricia's cabin:
Patricia and Adil are conspirators. Alex is posing
as a rich dumb blonde named Patricia Mayers. Talk to Adil.
The Plan: The plan is to
break into the Baroness' cabin and steal the London stolen eye from baroness' hiding
place where Inch hid it.
They also need to get the combination of the
hiding place as mentioned by Inch. They will then steal the second jewel at
the Cairo museum.
Adil gives Patricia the fake jewel to
replace the red jewel stolen in London. Adil failed to replace the real one
with the fake.
Adil doesn't think Legrand, the bobby and Inch
will be any problem.
Assess the situation:
Patricia exits her cabin.
Baroness' door: Go to the
Baroness' door and eavesdrop. Hear Inch asking the Baroness if she needs his
help in searching for something.
Inch exits the cabin and nearly catches Patricia
eavesdropping.
Outside: Examine the
gangway.
Upper deck: Go upstairs.
Examine the bridge door.
Examine the flag and take the pole. Patricia leaves the pole leaning on the
ventilation shaft.
Examine the ventilation shaft twice. The cover is
screwed shut. This could be the access place to the Baroness' cabin.
By stairs: Go down and
back inside the ship. See Inch sitting by the stairs. Examine the butler 3
times.
Check the poster on the wall.
Lower deck: Go down the stairs
and look around. Check the model of the ship twice behind the plant
and the magazines on side table at right.
Medical center: Enter and talk
to Gebhardt. Patricia does her dumb act.
Legrand's door: Examine
Legrand's door twice.
Go back upstairs. See Inch.
Saloon: Enter the saloon. See Kreutzer
perform.
Mrs. Miller goes out to the forecastle and is
followed by Professor Lucien.
Examine and take the wooden salad tong from
the buffet.
Examine and talk to the Captain and Kreutzer. Lady
Westmacott voices some derogatory remarks to Kreutzer. Examine Kreutzer
again.
Talk to Lady Westmacott. The Lady likes the Swiss
policeman but not Kreutzer.
Kreutzer leaves the saloon and is followed by the
Captain.
Lady Westmacott talks about her husband and son.
Afterdeck: Go out to the
afterdeck at bottom screen. Examine the deck chair. Patricia plans to sunbathe tomorrow. Examine and take the towel on the deck
chair.
Kreutzer: Go right to the
front and talk to Kreutzer about his life. He realizes that his father's
pistol is gone.
Find a way in the Baroness' cabin:
Patricia's cabin: Go back and
enter Patricia's cabin left of the stairs.
Adil is asleep. Look at Adil 3xs.
Examine the bathroom 2xs, the hat box and suitcase.
Get a necklace with a penny attached to it
from the suitcase. Examine the suitcase again.
Exit the cabin.
Ventilation shaft: Go
back to the side deck and then upstairs.
Unscrew the ventilation cover with the necklace.
Penny fits the screw but her fingers can't turn the screw. The necklace
and a penny are in inventory.
In inventory combine the penny and the wooden tong
taken from the buffet to get improvised screwdriver.
Use the improvised screwdriver on the ventilation
shaft to unscrew the cover. The cover is opened.
Use the towel with the pole leaning left of the
open ventilation cover to tie the bath towel around the wooden pole.
Use the pole on ventilation shaft to climb the
ventilation shaft.
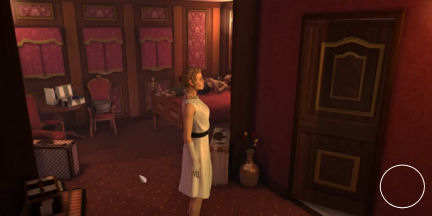
Search the Baroness' cabin:
The Baroness looks at pictures scattered on the
floor. She finally finds what she's looking for and says Jacob Aust. She
writes something on a paper and says Justice will be done. The
Baroness leaves the cabin and is met by Inch. She refuses to have her cabin
cleaned because it is time for celebration.
Search the cabin: Look at the
photos on the floor twice. Examine the notepad on the desk.
Examine the cabin door. Examine the mannequin twice and the painting
twice.
Search the cupboard by bed and the handbag by the
port holes. Examine the luggage beside it.
Portable cupboard: Open the portable cupboard by the door.
Examine the bottles twice and 2 drawers at left
compartment. Examine glasses and bottom shelf on right compartment.
Secret compartment: Examine the
leather strap at middle shelf of the right compartment.
A secret compartment is pulled around.
(Achievement Explorer obtained).
Examine the
door twice.
Examine the mechanism above the door. Patricia
noted the animals on the lock: dog, bear, rooters... There are 4
symbols needed.
Examine the slip behind the mechanism twice. It
has Nefertiti, Guernica, Ad and Buonarroti's Adam. It is the Baroness'
memory aid.
Finish the investigation twice.
Intruder: Now that the secret compartment
is found, climb the towel and it will trigger someone entering the cabin.
Patricia throws the towel back to the hole and
hides under the bed. See the brown shoes and white pants of you-know-who.
Check the cupboard by the bed to see the tape
recorder.
Slide the chair to the ventilation shaft and
Patricia pulls the towel out of the shaft. Climb the towel again.
Find the meaning of the memory aid names:
Go downstairs and inside the ship. See Gebhardt
standing there but Inch is gone.
Patricia's cabin: Go to
Patricia's cabin. Talk to Adil who is taking a shower. Patricia tells him about the
man in the cabin,
tape recording that is playing with no sound and the secret compartment. The
memory aid has work of arts and there are animals on the lock.
Ask Adil about the combination and learn about
Guernica, Nazi and Picasso.
Gebhardt: Examine
Gebhardt. Talk to Gebhardt about the memory aid names.
Learn that Nefertiti has a famous bust. Guernica
makes him defensive - remember what Adil said about the Nazis. Ad is Albrecht
Dürer a German
Artist. Try talking to him again about Picasso and Buonarrotti. LOL.
Magazine: Go to lower
deck and read the magazine on the table again. Learn that Nefertiti's bust
is in Berlin and Berlin's coat of arms has a bear.
Now to look for the city where the arts are
located and find out the animals associated to those cities.
Baroness: Go to the
saloon and examine the Baroness twice.
Captain DiConti: Examine the captain. The captain is sick. Talk to the
captain.
Learn more about Lady Westmacott and her family
(sounds familiar).
Talk to him again about the memory aids. Albrecht Dürer-Alberto Durero are the same man.
Buonarrotti is Michelangelo. He painted the Sistine
Chapel and the famous work there - the Creation of Adam. Pope John the
XXIII's coat of arms' animal is the lion.
Lady Westmacott: Talk to
Lady Westmacott about Picasso. Learn that Guernica is in New York's Museum
of Art. The lady didn't give any info on Dürer.
New York poster: Exit the
saloon and examine the poster on the wall above the table. The New York
emblem has 2 beavers.
Patricia's cabin: Go to
Patricia's cabin. Talk to Adil behind the bathroom door. Patricia asks about Durero.
His works are displayed at Prado, Madrid museum. Madrid's coat of arms
animal is the bear. (Achievement Know it All is obtained).
Baroness' murder:
Baroness' cabin: Go the
upper deck and enter the ventilation shaft.
Patricia goes down the shaft and sees the murdered
Baroness. Patricia gasps. Mrs. Miller knocks on the door after hearing
Patricia.
Patricia exits the shafts and is met by Adil. They
hear people climbing the ladder. Adil lifts Patricia to the roof of
the bridge.
Adil is caught. Adil and Oliver hear the gunshot.
Legrand and Zellner go down.
Under Pressure
Adil in detention cell:
Next morning, Inch faces Adil in the detention
cell. Inch scolds Adil.
Zellner walks in the cargo hold. Now Inch knows how much Zellner is involved. Inch
will clue Zellner to the doctor and hope that they dispose of each other.
Inch leaves through the airlock door at back
room.
Open the cell door: Look
around. Look at the blanket on the cell floor. Examine the bars.
Examine the hinge of the cell door twice. Adil can't
pull or push the bolt of the hinge out.
Examine the board right of the red hose wheel. The
board has a nail.
Use the
blanket with the board with a nail. Automatically, Adil removes the nail
from the board.
Use the nail on the hinge of the cell door. Adil
press the bolt out of the hinge. He uses the cup to hammer the bolt out.
Adil exits the cell and arranges the cell door upright.
Look for a way out of the cargo hold:
Cargo hold door:
Click on
the stairs to examine the door twice. Adil comments on Oliver guarding the
cargo hold.
Convertible: Examine the
convertible. Adil reminisce about the French Riviera trip with Alex and proposing to her
at Toulon. Search the car.
Grate: Go to the back
room. Look around.
Examine the cavity at center of floor. Examine the
shelf on the right to see a heavy pulley.
Examine the shelf on the left and Adil climbs up
to see a grate on top of wall.
Check the grate 3xs. This could be the way out. The
grate is welded shut and it is not old like the other parts of the ship.
Pull out the grate:
Go back down and go to the cell at right. Pick up
the fire hose. Adil places the hose on top of a crate.
Take the pulley from the right shelf.
Use the pulley on the holder of the cavity at center of the floor.
Use the hose on the pulley on the cavity. Adil
threads the hose through the pulley.
Use the other end of hose on the bars of the grate
above the shelves. Go down.
Examine the crane control on second tier of the
left shelving. Adil lowers the crane.
Use the other end of the hose on the hook of the
lowered crane.
Use the crane control. Adil pulls the bars of the
grate.
Climb up the shelf and escape.
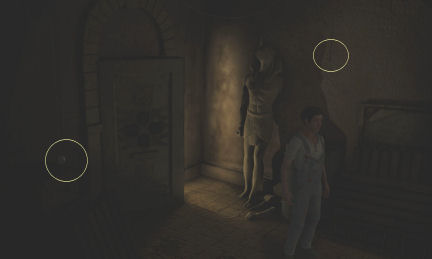
Gebhardt:
At the Medical Center, Adil pulls the doctor off
Zellner. While Adil is tending Zellner, Gebhardt runs away.
Follow Gebhardt. Check the saloon. Legrand is in
there.
Exit to the side deck. Then go right or left or to
the gangway. Adil is attacked by
Gebhardt.
Adil follows Gebhardt to the forecastle. Gebhardt
climbs on the railing.
Talk to Gebhardt. Learn about his love for the
Baroness' sister, protecting the family, betrayal and meeting the Baroness.
Inch: Inch taunts
Gebhardt so that Gebhardt will jump. Adil tries to stop Inch.
Inch pushes Gebhardt off the railing. Inch tells
Adil to go back to the cell as he leaves to write a suicide note.
(Achievement Witness obtained).
A Simple Plan
Cairo Museum:
Adil is in front of Cairo museum. Alex-Patricia
drives pass Adil.
Inch waits for Adil at side of the museum.
They will steal the jewel as soon as the safe is
in the treasure chamber and Legrand has left; not during the gala.
Adil is to get the blueprint of the museum that has the resistance
hideouts marked. Mr. X left the
blueprints under the statue of Imhotep. There is a basement below the
Treasure Chamber and when he's got the blueprint to signal Inch.
Enter the museum:
The museum is closed until tomorrow. Adil has to
find the way on his own.
Direct approach: Go to
the museum entrance. See a dog in front of the door. Talk to Grace, the
director's dachshund.
Enter the museum. Talk with the guard in the
office. The guard would not let Adil in.
Get disguise:
Truck: Go back to the side street.
Examine the
truck-van. Try to open the door 3xs. It is locked. Examine the van door.
Trash can: Search the
trash can twice. Get an umbrella. Check the umbrella to get wire.
Wire: Use the wire on the van door. The wire would not hold the lock.
Go left to the bottom of the museum steps.
Examine the drain on the street twice. Put the
wire in the drain to get bended wire.
Go back to the truck. Open the door with the
bended wire.
Van: Search the van. Turn
on the radio.
Search the footwell to get painter's clothes. Put
on painter's clothes.
Guard: Go back to the
guard in the museum.
Talk to the guard. Yes, Adil is a craftsman.
Hamid's company is not on the list.
Place name on list:
Play with the dog:
Go back to the van-truck. Go to the back of the truck.
Move the cursor at back of the truck and click on
"Examine the hitch". Take the tennis ball.
Go back to the director's dog at the entrance. Use
the tennis ball to play with Grace. Grace returns the ball. (Achievement
Animal Lover obtained if you play with Grace 3 times.)
Distract the guard: Throw
the tennis ball into the museum. See the guard chase Grace out of the
museum.
Do it again - throw the ball into the museum. This time immediately sneak into the museum.
Enter the name on list: Adil
enters the guard room and hides under the table.
The guard comes back in and turns the coffee
machine on.
Open the drawer left of the guard. Adil searches the drawer. Adil hides
again.
Write the company name on list. Adil hides again.
Tamper with the coffee machine on the left
counter.
Sneak out. This triggers the guard to drink
coffee. He burns his mouth. Adil goes out of room and outside.
Get a pass: Go back
inside and talk to the guard again. He gives a pass. Now Adil can walk
freely inside the museum.
Search for Imhotep:
Mrs. Miller: Examine Mrs.
Miller waiting by the office twice.
Main Hall: Go into the
main hall at bottom of screen.
Look around. See Lady Westmacott facing a
sarcophagus. Examine Lady Westmacott by clicking on the top display case.
Look beneath the small statue at top left corner.
Take the blueprint. Adil reads the
blueprint.
Alex talks to Adil. Adil updates her on what
happened at the ship. There is a basement under the treasure chamber.
Mister X is in on the planning.
After studying the layout; see two entrances to
the secret basement. The one behind the statue on the left and one on the
roof.
The one at the roof leads down to the basement by
stairs. A roof code of a triangle with 3 6 2 is seen marked on the
blueprint.
Examine the statue that is the other entrance to
the basement and the wall behind the statue. Adil decides to go through the
roof entrance.
Open door to basement:
Get to roof: Exit the museum.
Go to side street.
Examine the fire ladder on the wall twice.
Enter the van and release the handbrake. Exit.
Push the van backwards. Climb the ladder.
Roof-skylight: Look
around. Check the skylight that looks down to the treasure chamber.
Chimney: Examine the
chimney right of the water tower. There are 4 protruding numbered bricks at bottom and one
with the triangle symbol on top.
It has the same triangle and numbers as in the blue
print - 3 6 2.
Read the numbers from right to left as done in
Arabic countries and shown by the way the numbers are written - 2 6 3.
Pull the stone back out if you make a mistake.
After pressing 2, 6 and 3. Adil states that the
order might be wrong. Pull stone back out.
This time press bricks marked 2, 3 and 6.
A Nasty Surprise
Secret basement:
There's a Swiss Army knife in inventory.
Attic:
Look around. Examine the equipment on the table
twice, the lamp above twice, coil of tar paper at right twice and the hatch.
Go down the hatch.
Get light: It's dark in here. (Achievement
Discoverer obtained).
Move the cursor to the left of door and examine
the switch. Nothing.
Examine the cable right of the head of the statue.
The lamp was removed and the cable was severed.
Go back up to the attic. Cut the cable of the lamp
to get lamp with cable.
Go back down to the basement. Use the Swiss army
knife on the lamp to strip the cables to get lamp with exposed wires.
Use the Swiss army knife to strip the covering of
the cable right of the statue.
Use the lamp with exposed wires on the exposed
cable right of the statue. Examine lamp now.
Turn the light on using the switch. Crackling
sound...
Examine the lamp. The contact of the light bulb is dirty - covered
with rust.
Go upstairs. Use the light bulb on the tar paper
coil to remove the rust.
Go back down and use the cleaned light bulb on the
lamp.
Flip the switch and there's light.
Look around and check the table twice.
Inch:
Other entrance: Go to far left
and examine the mechanism. It opens the entrance by the statue.
Patricia-Alex: Patricia
and Inch enter. They go to the attic. Patricia tries to escape but was
blocked by Inch.
Use the cuff to get Adil to tie Patricia to the
chair.
Talk to Inch to learn what is the plan and what he
wants Adil to do.
Adil leaves with the bag. Inch needs a scapegoat.
Open the skylight:
Bag: Search the bag to
get bag and chewing gum. The rope and climbing equipment are
laid on the table.
Examine the climbing equipment that Adil used in
London without the mask. Inch might want his face seen. Put on the climbing
equipment.
Skylight: Examine the skylight
window at left 3 times. The treasure chamber is below and the safe is being
delivered.
See crank and contact on the window. Adil needs to severe the
contact to prevent an alarm.
Look around: Examine the crank
on top of the crate by window. Adil lays the crank by the window.
Examine the tarp on the floor at bottom of screen twice. Get
a rag from the window washer tools.
In inventory, chew the gum to get chewing gum,
wrapper and diamond.
Access the contacts on the window:
Use the Swiss Army knife on window. The rubber seal around the window is
removed.
A 1-2 cm gap between the window and frame is made.
Override the contacts: Use the
chewing gum wrapper on the gap to override the circuit. The gap was too
small and the wrapper was lost.
Examine the water tap of the water tower. Take the rag from inventory and wet the rag on the
tap.
Use the wet rag on the window. The wet rag is now
lying on the contact.
Open the skylight: Use the
crank with the window. The window is opened.
Access the treasure chamber:
Abseil down into the chamber:
Take the rope to automatically go down the open window.
Hear the director and Zellner checking the display
case and video camera.
Take care of the camera:
Examine the camera under Adil twice. Use the cloth bag on the camera.
Access the display case:
Display case: Climb down to the treasure chamber.
(Achievement Climber obtained).
Examine the
display case with the jewel twice. It has bullet proof glass.
Stick the chewing gum on glass. Adil chews the gum
first. :)
Press the diamond into the chewing gum on the
glass. Adil positions the diamond to have the tip point towards the glass.
Examine the cordon around the display.
Use the metal stand of the cordon on the diamond on the window. Adil hits the diamond on the display case window.
No, no Inch drops the rope down. He wants me
locked in. Hear the alarm go off and the explosion.
Confront Inch:
Constable Oliver: See the
destroyed treasure chamber. Adil hid inside the sarcophagus. Open the cover
of the sarcophagus. (Achievement Walking Dead obtained).
Examine the sarcophagus.
Check Constable Oliver. Pick up the stone right of
Oliver and use it on the Constable.
Examine the hole. Adil knows that he was
supposed to be the scapegoat.
Inch and Zellner: Climb
down the hole. Adil takes Oliver's gun.
Automatically be in the attic. Zellner is shot by Inch.
Learn who Inch is. He is the brother of the man
that was thought to be the Raven during Legrand's moment of triumph.
Inch wants to get revenge on the Raven who might
be alive or
dead. Adil's girlfriend escaped. Inch throws the murder weapon to Adil and
locks Adil in the attic.
The fall of the Raven: Inch is
deliriously happy because he has his revenge on the real Raven and is in
possession of the 2 jewels.
Legrand comes out from hiding. Legrand shoots the
fake Raven.
Inch falls to his death and the 2 jewels break like glass.
Who is the raven?
Legrand reads the newspaper about the master thief
that fell to his death after stealing the fake jewels.
Mystery in Egypt: Robbery gone wrong - Raven
died, again.
Eyes of the Sphinx return to Museum. Director
Mokhtar relieved about return of precious gems.
Cairo - After a reunion of the world famous
jewels had been prevented by one of them being stolen in London, both of
them have returned. French Inspector Nicholas Legrand, known for
apprehending the legendary burglar called "The Raven: several years ago,
shot the thief during an attempt to steal the second Eye. Museum
director Mokhtar was exhilarated at hearing the news about the jewels'
recovery...
Another article describes Inch as the Raven or
maybe a copycat.
At a picnic on the beach, Adil goes to his
fiancée Alex. Alex' father joins them. Learn about the fake jewels: Alex'
part and the safe from Switzerland.
Legrand looks for clues and says finally.
He reads a letter that has words that was already said to
him.
The envelope has a black feather. Legrand finally
relaxes and sleeps.
(Amateur/Advanced/Master Detective obtained for
finishing Chapter 3).
(Achievement The Raven obtained for finishing the
game).
(Achievement Completionist obtained - if all bonus
materials are unlocked).
This document may not be
distributed without express written permission of the author and the content may
not be altered in any way.
For Questions or Comments
on this Walkthrough,
Please write to:
MaGtRo
Copyright © 9/2013
MaGtRo
 GameBoomers
Walkthroughs and Solutions
GameBoomers
Walkthroughs and Solutions