The
Rockin' Dead
by
bitComposer Games
Walkthrough by
MaGtRo June 2011
Gameplay:
This is a third person point and click game that can be played in 2D or 3D.
The disk version of
the game has to go through Steam activation and has the 3-D glasses.
The main menu page has
a character's icon at top right of the screen. Click on her icon to toggle
between 2D and 3D.
At the bottom of the
screen see new game, load, credits and exit.
ESC key pressed during
gameplay shows the picture link to main menu or continue game.
The gameplay screen
has the save game (diskette), change 3-D/2D mode and exit icons at bottom
right of screen.
The inventory (bag)
and hints icons are at bottom left of screen.
The options icon is at
top left of screen. The globe Alyssa is holding is the option for special
effects and the skull is for toggling 2D-3D mode. The guitar has volume
setting and the water valve by fountain has the water effects selection. The
machine above the waterfall has the particles selection. The klieg light at
top center has light on-off selection. The control panel on the left has
refraction effects selection.
The skull at top right
of screen has the zoom in-out selection.
The inventory bar can
be toggled off by clicking the bag icon.
There is an autosave
seen on first frame of the save screen.
Move the cursor over
the hints-light bulb at bottom left to see all the active spots in the screen. Clicking on it opens the hints frame. The hints page shows hints for the first 2 clues. The third-spoiler needs hitting with a hammer to open it. The hammer is at right of the frame.
Left mouse click skips
intro and cutscenes.
See a castle on top of a
hill. A man in glasses experiments with skeletons. He prints out an invitation to a
festival.
See Alyssa, lead
guitarist and song writer riding her bike to rehearsal. Together with Cassandra
and Sahara, they form the Deadly Lullabyes.
Their neighbor Quentin
polishes his red mustang.
INVITATION TO
CREATOR'S CREATION FESTIVAL
Warehouse:
Look around.
Mailbox:
Open the mailbox left of the warehouse door.
Take the Creator's
Creation Festival invitation for tomorrow at midnight.
Rehearsal room:
Enter through the big sliding door. Look around.
Take the volleyball (optional) on
the floor by the door.
Talk to Cassandra
over and over. Learn that Quentin, the neighbor places an ad for
a racy old timer seeking equally racy woman." Learn that the bus doesn't
have any battery.
Check the magazine on
top of the mixer at bottom of screen and learn that the Deadly Lullabyes were
voted metal band of the year. Turn the pages to learn about the band members.
Check the band mascot
at left of the room. Exit the warehouse.
Get a battery for the
band bus:
Talk to the Quentin,
the old man at right.
Get Quentin to
leave: Remember the ad the girls mentioned.
Go to telephone booth.
Pan down and take the 1 dollar coin from the coin slot.
Go to the newspaper
vending machine at foreground. Use the coin on coin slot of the machine.
Pick up the change -
50 cent coin. Automatically have the Dark City Tribune in inventory.
Click on newspaper in
inventory to read Quentin's ad and get his phone number - 555-3379.
Go back to the phone
booth and use the coin on the slot. Dial 555-3379. Alyssa talks to Quentin.
Battery:
Now that Quentin is gone, open the hood of the red mustang. Take the car
battery.
Go to the band bus.
Open the car hood. Use the car battery on the bus' engine. Now it is ready to
go.
Click on bus door to
automatically leave.
Watch the trip. After 50
miles, they reach the mountains. The sky turns black and starts to rain. They
are on the zigzag road at side of mountain. After a tunnel, see a roadblock
ahead with skeletons doing the Twist. The bus crashes.
FIND INFORMATION
ABOUT CASSANDRA AND SAHARA.
Upon waking up, Alyssa
sees that the bus is trashed and that Cassandra and Sahara are gone.
Find clue:
Bridge:
Go right pass the bus and see that the bridge collapsed. That is the reason for the road block.
Continue to end of the
existing bridge and see peculiar plant. Try to check it and an eagle swoops
down.
Bus:
Go back to the bus. Check the back of the bus and see that all equipment is
gone.
Go left of bus and
pick up the traffic cone (optional) from the road. Take the anchor pendant
from Cassandra's necklace beside the cone.
Check the signpost.
The arrows point to Pig's Head Castle and graveyard.
Check the old sign
with skull and crossbones. See the back of the sign has a plan of sorts.
Cemetery:
Pick up the paint
bucket and brush from the ground under the graffiti on the wall.
Gate:
Check the gate. Alyssa sees the stone slabs that she says are connected to the
gate.
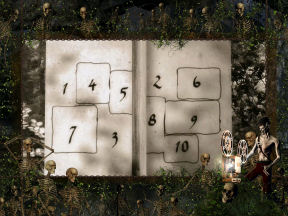
Remember the plan
behind the sign. Stand on slabs 1 - 2 - 3. The gate opens.
Bouncer skeleton: Enter and look around. See mushrooms, crow
and stairs at background.
Go left and talk to the skeleton with a metal ball guarding a mausoleum. No
mortals are to go through there. He wants a light for his cigar.
There's a broken
shovel at foreground.
Stroller:
Climb the stairs to the right. See a stroller rolling by. It's too fast.
Open the metal door
and see that it is part of an elevator.
Check the water pump left
of the first metal door.
Pick up the fishing
line left of Bernie Bass' gravestone.
Go right and open
another metal door. Again it is part of an elevator.
Go right and click on the
paving stone on the ground. Alyssa moves it and it stops the stroller beside
the gravestone with strange inscription.
Look inside the pram.
The crying baby skeleton has a toy cat.
See basil left of the
stopped stroller.
Playing skeleton:
Go right and see a skeleton controlling a model airplane with a remote
control.
Pick up the 3D
cartridge for an instant camera from the ground by Alyssa's feet and the
shovel propped on the left mausoleum.
See parsley beside the
Celtic cross gravestone.
See that there is a
watering can with bottom rusted away at left. See a wooden barrel, matchbox
and dirty cloth in front of the playing skeleton.
Talk to the playing
skeleton and Alyssa warns him about lightning in a thunderstorm. Too late.
Take the glowing
bone and the remote control. See a fruit crate in
front of the mausoleum door at right.
Mausoleum:
Enter the mausoleum. Look around. An ogre pops up and scares Alyssa away.
Go back inside and
open the door at back of room. The clutter holds the door over the trap door
and prevents the ogre from coming up.
Now, look around. Read
the ornate urn and understand the clue now.
Take the empty
glass bottle from top of the pile of tires.
Take the 3-D camera
from inside the closet. Combine the camera and the 3-D film to get a 3-D
camera with film.
Take the blue
duster (optional) from the box at right.
Exit the mausoleum.
See a boat mooring at back of the path. We'll check that later.
Bouncer skeleton:
Go back to the left until the bouncer skeleton.
Talk to him
completely. The power is not working in the crypt so there is no show. He starts giving info after the "light
the cigar" dialogue.
Cassandra and Sahara
were with the guy from the castle.
Alyssa gives the
glowing bone to light his cigar. There you go!
Take the bouncer's stuff: the
leather cap, the silver ball, glowing cigar and the
sunglasses.
Crypt:
Enter the crypt. Look
around.
See a mousetrap with
cheese right of the stairs. Check the metal cage, harp and the old coffin.
Go right. Check the
band equipment. Someone changed the logo.
Check the piano player
and sheet music.
Elvis:
Talk to shakin' Elvis. He asks if you want a photo of him.
Use the 3-D camera
with film on Elvis. Use the photo on Elvis.
Talk nice to Elvis.
Then mention the paparazzi. This will get fake Elvis to autograph the photo -
signed photo of Elvis.
Pool player
skeleton: Continue to the right.
Check the water valve
at right. Turn the valve. Water is now flowing somewhere; probably at the
water pump beside the stairs outside.
Check the metal gate
and see another elevator.
8 ball: Talk to the pool
players. They are missing the 8 ball.
In inventory combine
the metal ball held by the bouncer with the paint can taken outside the
cemetery gates to get an 8 ball.
Give the 8 ball to the
pool players and in return get pool trophy of the annual Undead-Masters
Pool Tournament.
Check another metal
gate and see another elevator.
Check the wooden
barrel with hole and see a family of mice in there. There's a pair of shoes at right.
Take a pool cue
beside the wooden barrel and cork from the floor.
Harry's Bar:
Look close at bar.
Talk to Harry.
Sticky stuff:
When you ask about the restroom, he places toilet paper on the bar. Take
toilet paper.
See sticky stuff at
left of counter. Use the toilet paper on the gunk to get sticky stuff.
Cassandra and
Sahara: Ask about the other band members. He wants to
see a picture of Cassandra and Sahara.
Check the poster on the wall. Look at the poster in
inventory and see the band's tour poster at the back.
Use the poster on
Harry. Harry says that the Cassandra and Sahara were here but left in a hurry.
Wine bottle:
Try to take the wine bottle at right of bar. Harry did not like that.
Ask him for a drink.
Ask for a Bloody Mary. Huh! Harry goes to cellar to check is she's here with
her chainsaw.
Take the wine bottle when he leaves.
Mouse trap:
Go back to the left pass the band equipment.
Use the pool cue to
take the mousetrap with cheese right of the stairs. Pick up the cheese
and mousetrap from floor.
Climb the stairs to
exit the crypt.
LOOK AROUND.
Boat mooring:
Climb the stairs and
see the water pump is now flowing.
Baby skeleton:
Continue to the right.
Look close at the
stroller. Use the wine bottle on
the toy cat. The baby is happy.
Check the toy cat and see that it is a windup
toy.
Dock:
Go through the path behind the former playing skeleton to be at a dock.
Get model aircraft
from right of dock.
Dinghy:
Go left and check the dinghy. See that the motor won't start because there is
no gasoline.
Take the empty
jerry-gas can.
Fish:
See a large fish under the dock.
Make a fishing pole.
Combine the pool cue and the fishing line. Then combine it with the cork from
the bar. Combine the setup with the anchor from the necklace to get rod with
hook.
Go to left end of dock
and see mosquitoes in the air. Catch the large mosquito using the empty glass
bottle from the mausoleum.
Combine the rod with
hook with the mosquito in glass bottle to get a complete fishing rod.
Use complete fishing
rod on fish under the dock.
See a close up of the
water with swimming fish. Click on water in front of the largest fish. Then
see if it eats the bait. Get a large fish.
Rest room:
Go to the rest room at background center of dock and left of the archways.
Take the iron bar,
flower pot, rusty bucket. Take the bathroom reading (optional) from
inside the restroom.
Take the rusty
gutter (optional) at top right of the roof of the rest room.
See chives at right of
the barrel.
There is a large gas
tank behind the rest room. Use the empty gas can on the gas tank to get full
gas can.
The wooden door at
left would not open. Use the rod with hook with wooden door.
Swamp:
Go through the door
and be in a swamp.
See thyme between the
2 trees in the foreground.
Go left to the 2
barrels. Use the iron bar with hook on the left floating barrel. Alyssa
pulls it closer.
Walk across over the
barrels to the next log.
Again - go left to the
2 barrels. Use the iron bar with hook on the left floating barrel.
Alyssa pulls it closer.
Walk across over the
barrels to the next log.
Rat:
Go left and see a giant rat. The cheese we have is too small.
See a tree house at
the background. Go back to the right.
Go right to the 2
barrels. Use the iron bar with hook on the right floating barrel. Alyssa
pulls it closer.
Walk across over the
barrels to the next log.
Go right to the 2
barrels. Use the iron bar with hook on the right floating barrel. Alyssa
pulls it closer.
Walk across over the
barrels to the next log.
Now continue to the
left until the tree house.
Tree house:
Pick up the metal key from the ground.
Pull the rope with
handle and hear something.
See holes on the tree trunk. The rods in inventory do not fit.
Go back to the restroom. Exit at right.
Dinghy:
Go back to the dinghy.
Use the full gas can
on the outboard motor.
Start the outboard
motor but the creepers are still stopping the motor. Use the iron bar to
remove the creepers.
Go left and across to
the other side of the river to another dock.
Other dock:
Take the iron chain
on the mooring of the dinghy.
Hand:
See a running hand on the dock.
It goes to the right
on an unstable part of the dock.
Go left to a more
stable part of the dock. Use the mouse trap on the running hand.
Go left away from the
trap. See the hand get caught by the mouse trap. Take the captured hand.
Look at the captured
hand in inventory. It is in metal shackles.
Use the iron rod with
the captured hand to get icy cold handshake and metal shackles.
Leave the jetty.
Tentacles:
See tentacles come up on both sides of the path. Combine the shackle
and chain from the dock.
When the right
tentacle disappears, use the shackle and chain on the post at foreground (left of
the right tentacle). See that the right tentacle is now shackled.
Go forward until the
greenhouse.
BIO-EXPERIMENTS.
Greenhouse:
Look through the
window. See bookshelves farther back.
The door is locked.
Pick up the sneakers (optional).
Go right and see a
hole in the window. There's something glittering close to the hole. Reach in
and get a key.
Take red rose (optional)
at right. Use the key on the locked door.
Inside:
Check the books on the floor and the well-fountain at left. Check the giant tomato
at right of door.
Office:
Go right to be at the office. Look around at the books, armchair, clock and
plans.
Take the rolled
plan-site plan at top of the left bookshelf. Look at the map of the lake in
inventory and see an X in the middle of the lake.
Look through the
window. Alyssa wants to look at the swampy forest.
Check the notices
beside the clock. It states: Seven centuries and another quarter will open the
way to the locker.
Take the pocket
watch (optional) from the table. See that it stopped at one minute to four.
Open the drawer and
get a key ring.
Basement:
Go left and down to
the basement across the main door.
Lockers:
See lockers-closets at right. Use the key ring on the padlock until it opens.
Get an empty
canister from the Hellfire gas station and diving suit.
Keypad:
See a keypad - input field on the wall of the locker. It needs a code.
Remember the notice in
the office. 7 centuries and a quarter = enter 725 on the keypad and then press
enter button.
See a peculiar machine
with a spiral. Check the machine but nothing happens.
Go right and see
control console. It is missing a tube.
Go back to the left
and the basement.
Control panel:
See 2 metal doors and 3
test canisters in the room.
See a control panel on the left. It has 3 levers.
Pull up the right
lever and see the right test chamber fill up. The plant inside is normal.
Pull up the middle
lever and see the middle test chamber fill up. The plant inside grows fast.
The side bottle is leaking. Use the empty canister on the leak to get filled
canister with quick grow fertilizer.
Pull up the left lever
and the left test canister is filled up. It is empty.
Now pull all the
levers down to empty the 3 test canisters.
Place the cheese in
the left empty canister.
Pull the left lever up
to fill the canister with the cheese. That is a big cheese.
Pull the lever down.
Take the large piece of cheese. Guess who will like that cheese.
Laboratory:
Right metal door:
Go right and see the locked metal door. Check the first aid sign on the wall.
Use the key ring on
the metal door to unlock it. Go through.
Look around at the
bio-experiments that failed.
Go left and check the
dirty control consoles. It is dirty and rusty. It looks like it runs the
bio-capsule with skeletons at right.
Go back to the right.
Climb to the next level-path at left. See a giant spider over the dirty
control console.
There's ghost here
trying to get Alyssa's attention.
Go left and take
peculiar fruit husks from a chamber.
Passageways:
Go up one more level.
Go right and when you're across the big spider in the foreground see a ladder in the background.
Office:
Climb that ladder and look around.
Check the clock that
points to just before twelve. Note that the desk has a paper with color wheel.
Secret passageway:
Check dusty books with yellow book on top. Read the note that states: "From 3
colors, choose 2. Left is green, the middle is red and right will be blue.
Your path is violet."
Check the 3 hanging
chains at bottom right of screen. They can be pulled down.
If the left chain is
green, middle chain is red and right is blue. We need violet. Red combined with blue
makes violet.
Pull the middle and
right chains fast to make them lower together.
See a secret door
open. Go through secret passageway.
Alyssa walks the halls
and comes out down the stairs. She is blocked by a wall.
See that beyond that
wall is a room full of skeletons and large amplifiers. There's a guitar
hanging on the wall.
Mirror image
office: Go back to the left and
down to the lab. At the landing just below the ladder to the office; go
right.
You should pass behind
the test canister with a huge man with open stomach and abdomen.
See another ladder. Go
up the ladder. Alyssa says this is a mirror image of the other
office.
Let's check here.
Check the dusty book stack with the yellow book on top.
The note states:
yellow.
See the 3 chains at
bottom left. If this is mirror image of the other office - the left chain is
blue, middle chain is red and right is green. We need yellow. Red mixed with green
makes yellow.
Pull the middle and
right chains fast to make them lower together.
See a secret door
open. Go through secret passageway.
Alyssa walks the halls
and comes out the room that was seen blocked by the wall at other secret
passageway.
Alyssa's favorite
guitar is hanging on the wall. Take the guitar.
Alyssa plays rock music.
Look at the large
amplifiers at the back. Take the middle tube from the amplifier.
Exit at right to be at
office. Exit at left to go back to the lab. Go down the different levels and
exit at far right.
Use the key ring on the
left locked metal door and see the other end of the lab. Exit.
Peculiar spiral
machine - Portal:
Go right and through
the opened locker to be at peculiar machine room.
Go right to the
control console. Use the tube take from the amplifiers on the control console.
Now the peculiar
machine is working. Enter the machine - portal.
Alyssa enjoyed the
trip. She comes out at the cemetery gate.
Cemetery:
Enter the cemetery.
Climb the stairs. Go forward until the boat mooring.
Strange - the dinghy
is on this side. You can also go back to the other side through the spiral
machine and go out the greenhouse to find the dinghy at the dock there.
Underwater:
Dive:
Enter the dinghy and move the cursor to center of the river.
See the dive icon.
Dive. Continuously click the dive down cursor until Alyssa is at bottom of the
water while she swims to the right. She passes through an arch and sees a
sluice gate.
Turn the wheel valve
to open the sluice gate. Enter.
Laboratory:
Check the switch right of the sluice gate. A bridge is moved.
Cross the bridge.
Check the bolted metal door.
Test labs bottom
level:
Zombie and rat:
Go right to the lab as seen behind the glass. Check the peculiar
lounger-operating table.
Use the controller and
Alyssa says it controls the operating table. There's no juice-power.
Use the test lab and
see a zombie riding a giant rat.
Frankenstein:
Go right and electricity junction box.
Check another test lab
machine. See a Frankenstein creation. Alyssa says again that this is mentioned
in her Creator Creation song (like other creatures, places and events in the
adventure).
See another controller
for the operating table.
3 lady zombies:
Go right and check the third test lab. See 3 lady zombies.
Top level:
Go back to the left
until the metal stairs.
Climb the stairs and
go left. The hidden path is missing a piece of walkway. Go back down and click on the
switchboard at start of the metal ladder. Hear something happening up there.
Go back up and now
there's a way to go left pass the hidden path.
Continue to the left.
Another piece of the path is missing. Use the switchboard.
See the path move to
the left.
Climb the metal
stairs. Go right to the general control console. It's not working. Take the
old brass key at top left of the console.
Go back down. Use the
switchboard of the moving walkway to go right. Go right and down the stairs.
Go left pass the metal
door and out the sluice door. Go to the surface.
MEET UNCLE WALDO.
Swamp:
Go to the dock at
right. Go the rest room area at middle of the dock.
Go through the wood
door and be at the swamp again.
Rat:
Go left until the rat. Give the large cheese to the rat. It dies. The
cheese must have been poisoned.
Bloody Mary:
Walk across to the shed. See moonshine distillery at left.
Talk to a crying
Bloody Mary. She moans that Elvis doesn't notice her.
Use the signed photo
of Elvis with Bloody Mary.
Select dialogues: I shot
the picture in Harry's Bar and the King signed it just for you and then He
said he'll be waiting for you at the jetty tonight. That will get her out of
the way til later.
Take the bloody
chainsaw Bloody Mary left by the barrel.
Moonshine:
Check the moonshine still. Take the mash and the empty gas tank
behind the barrels inside the shack at right.
Tree house:
Go right and walk the
logs and barrels until you get to the tree house.
Portal:
See another portal left of the tree house.
Get up the tree
house: If you haven't yet, pick up the metal key from
the ground.
See holes on the tree
trunk. In inventory use
Bloody Mary's chainsaw with the shovel to get pieces of wood -kindling.
Use kindling on the
holes of the tree trunk. Climb up.
Look around. Check the
large kettle and the coal burner underneath. See hanging dead giant rats.
Go up the wooden steps
to the armchair.
See an old wooden
trunk (uh oh), cookbooks, large gun with no ammunition and the armchair.
Get a trickster
coin from the armchair. Look at coin inventory and see that it is heads on
both sides. :D
Uncle Waldo:
Go down and left. See an old man.
Check the poster left
of the entryway. It is for Uncle Waldo's Chicken Soup. The wall is thin here and
the poster is put up to seal it.
Talk to Uncle Waldo. Select follow the delicious smell, drool, staff, what to do and cooking, cleaning, discretion dialogue. You got the job.
The first job is to
collect basil, chives, thyme and parsley. He gives herb sickle.
Collect herbs:
Go down the tree
house. Go left to the portal and enter.
Arrive at top of the
stairs inside the cemetery.
Running water:
Use the rusty bucket from the rest room on the running water pump at left to
get bucket of water.
Basil:
Go right and use sickle on basil in front of the stroller.
Parsley:
Go right and use sickle on parsley left of the Celtic cross and watering can.
Chives:
Go to boat mooring at top of screen and then to rest room. Use sickle on
chives right of barrel.
Gas:
Use the empty gas tank from the still on the large gas tank to get full gas
tank.
Thyme:
Go through wood door at left to be at swamp. Use sickle on thyme
at foreground between the 2 trees.
Moonshine distillery:
Walk the logs and
barrel to go left to the moonshine still.
Open the filling plant
at top right. Place the mash inside the filling plant.
Place the bucket of
water in the large wooden barrel at right.
The distillery is
running. When finished processing, take the moonshine barrel at left.
Uncle Waldo and the
Chicken Soup Factory:
Go back to the tree
house. Talk to Uncle Waldo. He now tells Alyssa to supervise the automated
production of the chicken soup. Waldo goes back inside his hut.
Chest:
Go up the steps to the wooden chest. Use the metal key taken from the ground
beside the tree trunk on the chest. It's full of guns. Take the fireworks
and the diary.
Turn the page to read
the entire diary. Learn about being imprisoned and his nephew that betrayed
him. The nephew is the lord of the castle. Learn also that giant rat meat is
used in the chicken soup production and the herbs are used to mask the taste.
Uncle Waldo's main aim is world domination.
Poster:
Go down and let to poster. Remember this wall is thin.
Use the flower pot on
the poster to eavesdrop on Uncle Waldo. He's pacing back and forth like he is
waiting for something.
Soup production:
Go right and down to the soup production.
There is a
surveillance camera at end of the walkway. Use the sticky stuff taken from Harry's Bar on the camera.
Alyssa's recipe:
Check the empty container at middle of the line. It is where you add
ingredients to the line.
Use the peculiar husk
taken from the biolab at the greenhouse with the empty container.
Alyssa marks the crate
that will have the fruit addition.
Start production by
flipping the main switch right of Uncle Waldo's poster.
See rat carcass is
brought in for shredding. The first container adds the shredded rat, the
middle container adds the herbs and the third container adds the fruit that
Alyssa added.
The filled crate is
automatically taken away.
Uncle Waldo:
Go back to the left and up to Uncle Waldo's hut.
Eavesdrop on him again
using the flower pot on the poster. Hear him say that the
delivery is still at the old broken bridge.
Go to broken bridge
delivery:
Ferryman:
Go back to the soup production line at right and down.
Go to the right end.
Go down the ladder to the ferryman. See a lot of skeletons.
The ferryman doesn't
want to take just anyone on the ferry.
He would talk
only if shown something of interest. Show him the moonshine barrel.
Tell him it is full of
moonshine. What do I get in return?
The ferryman says they
will play a drinking game. If Alyssa wins she will be taken to the other side on the
raft.
Select to flip a
coin. Alyssa uses the trickster coin taken from the armchair.
The ferryman drinks
the moonshine, collapses and then shrinks.
Take the ferryman's
oar. Get on the raft. Alyssa rows to the other side.
Generator:
On the other side, see a big machine. Go left and then check the generator.
Alyssa says that it
must power Uncle Waldo's production line.
See a pile of pallets
at left. Push them one by one until a metal lid is seen on the floor.
Use the iron bar on
the metal lid. See a lever. Move the lever to reroute the generator. Now there is no power
to Uncle Waldo's factory. The power is rerouted somewhere.
Exit close up and
Harry comes out of the portal. Showtime. Harry takes Alyssa back to the Crypt.
The show is on. Alyssa returns through the portal left of Harry's Bar. The power was rerouted to the Crypt.
Soup pickup:
Enter the portal again. Exit the crypt.
Exit the cemetery. Go right to the bus. See the soup crates are being picked
up.
In inventory combine
the remote control taken from the player skeleton and the model aircraft taken
from the dock.
Use the aircraft
and remote on the huge dude - deliveryman. Alyssa controls the plane to
dive bomb the huge dude. He runs away.
Examine soup delivery.
Check the box of soup at bottom of the screen. Take the box of soup
with an X.
GO TO CASSANDRA AND
SAHARA
Find Cassandra and
Sahara:
Eagle:
Go right of the band bus. Check the peculiar plant remains at end of bridge. The eagle swoops down.
Use the caught fish
with the end of the bridge (protruding wood). The eagle takes the fish.
Bridge:
Now check the peculiar plant. Alyssa says it's slowly growing to the other
side. She wants it speeded up.
Use the canister with
quick grow on plant remains. The plant grows and connects the bridge.
Go across the plant
bridge.
Taxi Express:
Check the pigs and the despondent skeleton.
Check the trash can to
get rock hard bread.
Check the shed and see
a motorbike.
Viewing platform:
Go to the gazebo at back left.
Take the jewelry (optional) hanging on the post of the gazebo.
See a peculiar shadow - shadow of himself on the bench.
Take blood bag.
Take the food tray beside him. Pick up the binoculars at left.
Cassandra and
Sahara: Pull back and use the binoculars on the castle
at left.
See Cassandra and
Sahara with the man in glasses looking down at the Gazebo. The man releases a
pigeon.
Pigeon:
Click the peculiar shadow again to get a close up. See the carrier pigeon
with the message.
Place the rock hard
bread in the wastebasket. Then place the food tray over it. That traps the pigeon.
Take the message tied
to the pigeon.
Bob brought the
creatures of Alyssa's song Creator's Creation to life but someone hacked his
computer. The girls and Bob want Alyssa to join them at the castle.
Get a ride to the
mountain:
Taxi Express:
Go back to the shed-Taxi Express. Check the motorbike.
It doesn't have gas.
Use the full gas tank with the motorbike with a sidecar.
Despondent
skeleton: Try to talk to the despondent skeleton to get
him to drive the motorbike.
He says he is not
driving anymore. The good old times with the pool table are over.
Use the pool trophy on
him. He said that the trophy is his. He is the champion.
After threatening to
melt the trophy, he will take you but not up to the castle. Skeletons are
not allowed there.
Click on the cab
driver and away they ride.
Find a way to the
castle:
House:
The cab driver let Alyssa off outside a cozy house.
Pick up Sahara's
DAT recorder from the bench. The headphones are missing.
Enter the house. Take
the skull key from the table and the crucifix on top of the
shelf.
Take the lubricant
from left wood planks. Exit the house.
Mosquitoes:
Go right. Try to go to the right but huge mosquitoes are in the way.
Place the blood bag on
the tree stump. The mosquitoes drink their fill and fly away.
Water tank:
Go to the water tank.
Enter the hot air
balloon. Use the still glowing cigar on the burner above Alyssa.
Go up.
Take care of the
zombie guard: Try to leave balloon.
There is a guard at end of the
walkway. See chains in front of the zombie guard.
Go down. Leave water
tank.
Go right. See
heavy tree trunks hanging on chains above a control panel at left.
Check the lever on the
panel. The tree trunks are raised and are now above the zombie guard at top of the mountain.
Unhitch load using the
same control panel. Unseen, the tree trunks fall on the zombie guard. The guard is
now beside Alyssa.
Examine the guard to
get helmet with ultrasound transmitter.
Zombie transmitter:
Go back to the left and then the water tank.
Go up using the
balloon. Go right up to the shed at left.
The sound heard is
coming from the transmitter that Alyssa thinks is for the zombies.
Use a better sound to
be transmitted to the zombies - use Sahara's recorder on the transmitter
controls. That's much nicer.
Go down to the ground.
Mine:
Mine entrance: Go right pass the truck-mine car. See that boards are blocking the railcar.
Use Bloody Mary's
chainsaw on the boards. That takes care of that.
Go inside. Examine all
barrels seen.
Take the 6 pack of
beer on the second set of barrels.
Dwarves:
Exit the mine. Go left until the cabdriver. See a waterfall at left.
Go left. Meet Ronald
the boss. He wants a toll. He said he has a thirst and needs to be satisfied.
Give him the 6 pack of
beer. He said the mill is broken and they are making charcoal.
Check the wooden ramp
at left. Note the chains holding it up.
Go left and Alyssa
will be up above by the waterfall.
Use the iron chain by
Alyssa. She releases the chain. Go back to the left
and down.
Pick up the end of the
iron chain by the water and automatically wrap it around the ramp.
Use the wooden ramp
now. Watch as Alyssa positions the water ramp to bring water to the mill.
Talk to Ronald. Ask if
there is anything else to do.
Ronald wants a new
outfit. Use the leather hat from the bouncer skeleton on Ronald.
Ask for something in
return. You get 3 suitcases. Check what are in the cases: dynamite,
pumpkin and ice cream. Be sure to take the dynamite.
Go back to the right
until the rail car.
Enter the mine:
Try to use the rail car. It is rusty. Use the lubricant on rail car.
Enter the rail
car-truck. That's quite a ride.
Catch Bats:
Look around. Check the barrel at foreground to get wooden pole.
Go right and be up at
back ramp. Check the barrels hidden behind the rock column. Get an old
cloth bag.
Go back to the right
and back to the level at foreground.
Go left and see bats
flying close to a big cobweb.
Go left and check the
barrels to get noose made of rope.
Check the small
crevasse in front of the cobweb. Place the helmet with ultrasound transmitter
in the crevasse. The bats sense of directions are scrambled. They get caught in
the cobweb. Alyssa wonders if it works the other way around.
Take the helmet
with ultrasound transmitter back.
The bats are too high.
In inventory combine noose made of rope with wooden pole.
Combine the wooden
pole and noose with the icy cold handshake to get hand with pole extension.
Now that you have the
cloth bag to store the bats, use the hand with pole extension with the bats in
the cobweb. The captured bats are now in the bag.
(Back to the
surface: If you want or need to go back to the surface, use
the control panel at right rock column. The hook goes down to the rail car.
Enter the rail car and rise to the surface.)
Spider:
Continue down here in the deep part of the mine - go right to be at back
walkway.
Continue to the left
and down the ladder. Pick up the toy trombone (optional).
At left see the
hanging skeleton and spider. Go left and be at an unstable part of the
walkway, Alyssa says to lure the spider there.
In inventory combine
the skull key and the toy cat from the baby skeleton. Use the wound toy cat on
the unstable path. Watch what happens.
Now there's a gap in
the walkway. Taking a cue from the skeleton - click on the hanging metal chain
to do a Tarzan swing.
Ogre:
Go through the cobweb at the back to be in a big hall with snake statues and
big door.
The left snakes of the
sets on either side of the door are tipped forward.
There is a food bowl
in front of the door. Check the food bowl and see the ogre come out of the big
door.
He's hungry. Use Uncle
Waldo's box of soup on the food bowl. That soup is potent.
Elevator:
Enter the large gate. See the elevator. The elevator car is on a different floor.
There are snakes on
either side of the elevator. They look like the snakes outside.
Just like those
outside - click the left snakes to tip them forward. Numbering 1-4; left to
right: click on 1 and 3.
Enter the elevator.
Save the world.
Castle:
Find Cassandra, Sahara
and Bob: Look around and see all doors are locked. There's a
zombie guarding the door on second level.
Use the old brass key
taken from the console at the underwater lab on the left wooden door.
Dungeon:
Enter and see Bob, Cassandra and Sahara tied to torture instruments. They are
guarded by 2 zombies wearing helmets with ultrasound transmitter.
Aha! Let's see if it
does work the other way around. Use the captured bats with the zombie guards.
It works! All guards are incapacitated.
Go down the small ladder and
talk to Bob.
Learn that Uncle Waldo
took over the groundwork he did on making Alyssa's lyrics come to life.
Waldo is in the
command center. The zombie army is powered by the generator in the underwater
lab. Alyssa has to destroy that generator. Bob gives the castle key that opens all
the castle doors.
Talk to Cassandra. She
wants Alyssa to stop Waldo first before releasing them.
Climb the small ladder
and then go out to castle foyer.
Command Center:
Climb the stairs to the room above.
Use the castle key on
wooden door. Enter and see Waldo at the
computer by the fireplace. He activates the program. The underwater lab
provided energy to the zombies.
Distraction:
Alyssa wants a distraction so she can get to the computers.
Go right to the right
wooden door on lower level. Use the castle key to open it.
Go to the roof and see
the chimney of the fireplace beside Waldo at the command center.
Use the fireworks on
the chimney. That scares Waldo.
Go down and back to
the command center.
Computers:
See Waldo is now totally mad.
Check the right
monitor and see that the underwater lab is activated.
The middle monitor
shows the invasion strategy.
The left monitor shows
the metal door at the underwater lab. Press the keyboard in front of the left
monitor to open that metal door.
Underwater lab:
Go down to the door below the command center.
Use the castle key to
open the door. Enter the room and the portal.
Be at the underwater
lab. Go left and be at the opened metal door. Hear the sirens.
Generator:
Go right and climb the stairs. Go left and be at the sliding walkway.
Use the switch board
to go left. Go up to the commissioned generator controller.
Check the controller.
Blasting would be the best.
Use the box of
dynamite on the generator.
Go left and use the
glowing cigar on the fuse at end of the wire (right of the left post).
Watch what happens.
Alyssa, Cassandra and
Sahara are with Bob at the castle.
Bloody Mary and Elvis
see the underwater explosion.
The girls get an
explanation from Bob.
Waldo escapes.
The Deadly Lullabyes
performs at the Crypt.
This document may not be distributed without express written permission of the author and the content may not be altered in any way.
For Questions or Comments on this Walkthrough,
Please write to: MaGtRo
Copyright © 6/2011 MaGtRo
 GameBoomers Walkthroughs and Solutions