-This is a point and click game using 4 icons to progress during the game: walk, use (hand), talk and description. These icons can also be seen and used when dragging the mouse to the top of the screen.
-The main menu is at the top of the screen in the middle.
-The Inventory is also on top of the screen on the right.
-It is interesting to explore this world to get a good feeling for the game.
-Get some good comments when you use the description icon on everything.

A Walkthrough by Chief
CASTLE OF THE CROWN
After the long opening scene and witnessing the spell being cast on Alexander and Rosella, King Graham of Daventry is in front of a door guarded by two soldiers.
Go up screen to the corridor and then to the last door on the right before the stairs. Enter.
GRAHAM’S ROOM
Click the clothes on the room’s screen on the left and Graham goes behind it to get dress for the journey.
In the chest, pick up the brown bag of gold coins .
Walk to the door on the right and open it to be on a balcony. Find a gold coin in a pot.
Exit the room, go down the stairs and walk in between the stairs to go to the door on the left. Go forward in the hall to be at the courtyard.
COURTYARD
Pick up the cloak.
Then talk with Edgar’s father and mother using the subject lines at the bottom left of the screen.
Go back to the hall behind and to the door on the left.
Walk down screen to the double doors to exit the castle.
VILLAGE
Go down the path and at the intersection, see a flash of lightning. A big tree falls down.
Graham can only continue on up screen to the left.
At the village, see another lightning hit the banner.
The bookstore and the Pawn Shoppe are close.
See a man holding a sign.
Go left screen to be at the village square and market. Nothing to do here.
Back to where the man is and walk under the arch.
See what happens to the man.
FERRY
Walk to the house but nobody is there.
Continue down on the path and walk the quay to the end and meet Hassan.
Talk to him.
Give him the gold coin and talk to him again. Click the bag of coins on him.
Talk to Hassan again: “Ready To Sail?” YES
ISLE OF THE SACRED MOUNTAIN
On the map, click on the map correctly until you are on the Isle of the Sacred Mountain.
Go up the stairs and be brought by two guards to a man and a woman sitting on big thrones. “My Lord”
Can the Oracle be of assistance?
Graham is escorted to the Oracle that can’t do much but suggest to go to the Isle of the Mists.
Go to the ferry and talk to Hassan.
ISLE OF THE MISTS
Graham talks with a Druid.
He must bring the ingredients for a spell.
Get a scroll with the ingredients written on it.
See the final scene to end Episode 1.

A Walkthrough by Chief
After the opening scene with the Druid, Graham walks to the ferry. See it sail. Look also at the scroll that will help Graham in his journey. See Shamir on the scroll.
Go to the…….
ISLE OF THE CROWN
Near the ferry at the end of the quay, talk to the young boy. Notice the fishing rod.
Walk to the bookstore at the Village and enter.
Talk to Jollo the man sitting down and take the fake arm. A funny man that Jollo.
Now talk to Ali, the owner of the book store and show him the scroll.
Talk with him completely. A map!
After the conversation, read some of the books by clicking on the shelves beside the fireplace. Graham can read these books: Folklore of the Sea, The Power of Nightshade, Classic Faerie Tales and Amazing Myths and get some good information.
VILLAGE SQUARE AND CASTLE
Exit the bookstore and walk in front of the Bookstore to go left to the Village square.
Go completely to the left and to the left again to be at the blue stand and see maps.
Talk to the man to get some good information.
Give him some money and receive a map in return.
Near by, see some pieces of candy at the next stand. Using the money, get some candies .
Go back to the right and notice the newspaper office, the Four Winds, with a spider web as a door. Before going up the stairs, read some news on the panel on the left. Exit the pages.
Go up the stairs BUT do not touch the spider or you will die. But if you do touch the spider, you will be able to retry when a choice is offer.
Now, using the fake arm, touch the spider and see what happens: the arm turns green.
You just pick up the Lethal Liquid , one of the ingredient on the scroll. It will be cross out on the scroll.
After that little adventure with the Black Widow, talk completely with the spider to get some interesting news.
Let’s go back to the Bookstore and to Ali. Click the map on him. He will circle an island on the map. A place to go……….
But before going there, may as well go to the Castle. In the entry hall of the castle, meet Shamir and be at the courtyard. He gives Graham a document to read and talks about the Black Cloak Society and other subjects.
When Shamir leaves, go down the stairs to see Edgar sleeping on a bench. Have a complete conversation with him.
Go to the hall of the courtyard between the two sets of stairs and take the spray bottle . From there, go through the door on the left at the end of the hall.
Using the staircase on the left, go up to the center of the corridor and at the statue on the right, take the necklace .
Time to go to the ferry.
FERRY
Go to the end of the quay and to the boy. In exchange for the candies, get a fishing rod .
Talk with Hassan (if you get a list of topic to talk about, choose “Ready to sail”) and go to that spot Ali marked on the map.
MERMAID ISLAND
Well, it is a very small island.
In Inventory, combine the fishing rod and the necklace.
Three Mermaid will come up after you use the combination of necklace and rod on the sea. You will receive a cape of invisibility and a magical bag. Get the necklace back. Of course they will need a gold coin in return.
That magical bag is one of the ingredients. See it be cross out on the scroll.
Talk to Hassan to go to….
ISLE OF THE SACRED MOUNTAIN
As you go to the bottom of the stairs, pick up the flower” Nightshade” on the left.
Go up and meet a funny little thing and Graham takes the Hole in the Wall. Strange object…..
Go back to Hassan and go to…..
ISLE OF WONDER
Walk to the end of the quay and come back on the left to the water to fill up the spray bottle. You can look at the oyster if you want and get a description.
Go the opening in the forest and walk to the area before the gate. Look around and get some descriptions on the objects you see there. Funny.
Then, go to the wall on the left of the gate. Use the spray bottle on the vines on the wall. See a key. DO NOT try to take the key now or you die.
Walk to the right to that weird little thing on a small table: a magnet.
Click the bag of coins on it and your icon becomes the magnet that you click on the key.
Graham will then attract the magnet with gold to the hole in the wall to get a key on the ground.
Use that key on the padlock of the gate and walk in. Get a padlock in inventory. Talk with the two chess knights that will tell Graham he can’t go on further.
Back outside, click the cape of invisibility on Graham and he goes back in between the two knights to follow the path to the castle.
At the castle, talk to the cloaked man (the Ranger????) sitting on the step. Get some valuable information. He disappears.
See a cupboard with glass door on the left and use the Hole in the Wall on it.
Take the animated vessel , the last ingredient to gather listed on the scroll. See Valanice, Graham’s wife, on the scroll……..What’s happening?
Walk out to leave the castle and the path and talk to Hassan to go to….
ISLE OF THE CROWN
Go to the castle and when Graham arrives at the doors, see the final scene:
-Graham has a vision of Alexander in front of a Black Castle and talking with Manannan.
-Graham goes to Valanice’s room.
The game ends as Valanice is in her bed and Graham is in despair.

A Walkthrough by Chief
Thank you to Katie and Venus for the help.
Note: it is important that you read closely the books at the Bookstore and the news at the Four Winds.
Talk to everyone and click on everything to get a comment.
CASTLE OF THE CROWN
See the opening scene giving a short résumé of the previous episode.
See also Valanice in a Tower 23 years ago and then Graham observing her as she is in her bed. He will keep his promise.
He will stop this nightmare.
We now see the scroll with the next four ingredients to look for and the objective of this episode.
Male Subject’s Strength
Female Subject’s Voice
A Silver Moon
A Pinch of Lively Shaken Salt
Exit the scroll.
Look at Valanice to get a comment. Go to the balcony on the right, click on anything and get another comment.
Then, go out of the room and talk to the Captain: he will stand guard in front of their room.
Go up screen in the corridor and to the left and enter the door between the guards. This is Cassima’s room.
See Alexander and Rosella on the bed and click on them to get a comment.
Talk completely with Cassima sitting on the floor by the bed.
She wants to write a speech.
Have a look at the shelves on the left of the bed.
Exit the room at the bottom of the screen.
Time to go downstairs. Notice the lady guard. Go through the door under the left set of stairs and walk to the cart. Pick up the meet.
Go to the double door at the end of this hall and to the courtyard.
Meet Edgar and have a complete conversation with him and get some good information.
After the meeting with Edgar, go up the stairs and talk to Shamir.
He does not know about what is going on with Valanice.
Go back up to be in front of Cassima’s room. That door is guarded by two guards. On the right of the door, place the food on the bench. See the reaction of the guards. Go down the stairs to a lady lieutenant guard in front of the Throne Room. Send her to Cassima’s room. See her shout at the guards.
While she is away, enter the Throne Room and take the red tile.
It is now the time to leave the castle. Go outside and walk the path to the…….
VILLAGE
Go to the Bookstore. Jollo is still there and from him, you will learn some stories from the past and information on the present.
And then talk to Ali.
Suggestion: you should read four books from the shelves beside the fireplace. They are the same books from Episode two. Read also the book that is on the small round table by the door: “Dieties of the Forest Realm”.
Exit the Bookstore and go to the…….
VILLAGE SQUARE
Go to the Four Winds and see a butterfly trapped in the spider’s web on top of the door. Graham tries to free it with his hands but it is beyond his reach. We seem to be missing an item.
DO NOT touch the door nor the spider web of the door or you will die.
Suggestion: read the news on the board at the left of the stairs. Write down the names and the symbols of the Horoscope.
Go to the blacksmith; he has some problems also. Magic?
Maybe it is time to sail. Go to the quay, talk with Hassan.
Ready to sail.
ISLE OF THE SACRED MOUNTAIN
Swim to the shore and at the bottom of the stairs, pick up the flower “Nightshade”. You can go up the stairs and try to talk to the guards, but they wont answer.
Back to the boat to go to the…….
ISLE OF THE MISTS
Walk to past in front of the big tree in front of the boat to go to the right and to the Stones of the Secret Circle. Pick up the branch from the ground. Walk beyond the stones and enter the tree on the right.
Talk with the Archdruid completely about the portrait of his sister, the ingredients Graham must bring back to him and to look for the signs of Mother Nature.
Try to move the candle under the portrait: Graham can take the candle.
Exit the tree and take the white animal skull beside the tree.
Go back to the boat by going right at the bottom of the screen.
ISLE OF WONDER
As you arrive, see a red piece of checkers rolling by and going to the left. Follow it and see something on the sand. Try to take the pink shell but the piece of checkers will take it from you and will roll to the opening in the forest. Follow it and see it go through the doors.
Walk forward on the path and get caught by a plant.
What to do? Have Graham talk to himself and see all the plants reacting around him. Graham is now free.
You can click on the plants to get a comment.
Pick up the piece of iceberg salad.
Now time to go through the doors and to pass beside the knights still talking. See the red checkers piece with the shell. Get close to it and it will hit the shell towards the castle. Home run!
See also the tomato plant in the net attach to the guillotine. Talk to the tomato plant.
Have Graham walk around the guillotine and click it to have him stand on the guillotine base. Use the branch on the side of the guillotine to have it hold the blade if necessary. Untie the rope near the branch and walk back in front. Click and take the net as well as the tomato plant. Take back the branch.
Let’s search for that shell. Go to the castle and see our friend “The Hole in the Wall” in front of a checkers/chest board. Talk to it to have some help to get the shell: bring the checkers/chest pieces to pass the shell to our friend.
The Chessboard puzzle:
For this puzzle, you will need the red tile (or white) to change the colour of the squares from which the shell is being thrown between checkers and chess pieces. Change the colour of the squares with the proper tile when the shell is not on the piece of checkers or chess you want to fool.
In Inventory, when sending the red tile to the window on the right, you can flip it using the hand icon to see the white side.
The shell goes from checkers to checkers or pawn to pawn when clicked on with the hand icon.
So, start by clicking the shell on the three checkers pieces and notice from which square the white one will throw the shell.
Place the red tile on the square diagonally up right from the white one. That will make it throw the shell to the upper red pawn. Pick up the red tile and notice from which square that red pawn throws the shell.
Place the “white tile” on the square diagonally down right from that upper red pawn.
The shell will then go to the white pawn on top. But before clicking this white pawn to throw the shell, place the white tile on the square diagonally up right from the white pawn at the bottom.
When the shell gets to this pawn and you click it, the shell will go to our friend “The Hole in the Wall”. Get a shell in Inventory.
As you go back and pass the doors to the plants, notice a plant moving on the right and near the chair. From that plant, take a pea. Walk forward and an edge cutter will fly by. Click it to get a comment and pick up the edge cutter.
Walk to the boat and go to the…….
ISLE OF THE MISTS
When you arrive for the second time (and other visits), you can go forward left screen to be beside the tree where the Archdruid is.
From that tree, go up screen and walk on the left of the center tree passing in front of the white fence.
See a banshee (woman) lying on the ground near the river and crying.
SAVE HERE. (Get ready………)
Go to the woman and when she starts to scream, be fast to take the flower in Inventory and to click it on her: see a stream of breath going to the flower.
We now see a big black bird, the Guardian of the Forest. Get a comment by clicking on the bird.
Click the flower in Inventory to have it in the window on the right and click the hand icon on it: now that we have the breath in the flower, how can we store the voice?
Go back to the Archdruid to talk about the Guardian. Past the bird is the Sanctuary of Nature. Only the Druids can pass the Guardian.
In Inventory, have the skull in the window on the right and click the hand icon on it: the skull has now blue and red eyes, just like the bird. Use the skull on the bird and it becomes less aggressive.
So, let’s talk to it to see if we can pass. Still can’t pass.
Go back and talk to the Archdruid for a hint on the bird: it likes birds and butterflies. Graham must prove that he is a friend of nature. Where did we see a butterfly? At the Village Square.
May as well go to the…….
ISLE OF THE CROWN
Go to the Four Winds and up the stairs to the door.
In Inventory, combine the branch and the net and use that on the web on top of the door. Take the butterfly in a web and have a look at it in Inventory.
From there, go to the tree and the bird nightingale to see if you can take it. You can’t.
Walk back to the Village and see the owner of the Pawn Shoppe entering the store. Go in also and talk to him completely.
Long conversation. But then, the information is excellent.
Check the green bottle on the counter: Web-B-Gone. It says that it cleans web. Try to take it. We do not have the item to exchange it with: crystal tear, as you can read on the sign.
Exit the store to go to the…….
ISLE OF WONDER
Go to the “crying cabbage” on the left of the path. Use the iceberg salad on it and get a frozen baby’s tear.
Back to the…….
ISLE OF THE CROWN
Go to the Pawn Shoppe and exchange the frozen tear for the Web-B-gone. In Inventory, use it on the butterfly in the web. It is now free again.
Let’s go back to the Guardian at the…….
ISLE OF THE MISTS
and click the butterfly on it. See a cutscene where the butterfly stays with Graham. The Guardian likes that and Graham can go forward onto the path.
So, have Graham go forward to the Dryad, the Spirit of Nature, a big tree with emeralds on it.
Clicking to get a comment on the tree, we can see that one of the emeralds has the shape of a Crescent Moon.
Try to take an emerald and the tree starts to talk. It’s the Nature’s Spirit that knows about Graham. Protect Valanice of Druid’s heritage….
Read the inscription on the rock on the right.
Walk back and see a cutscene going on at the Castle: a black cloud appears in Valanice’s room. See Shadrack talking to her.
After the cutscene, have Graham go back to the…….
ISLE OF THE CROWN
and to his room at the Castle.
Click on Valanice for a comment on her heritage.
Click the hand icon on her to get her crown.
THE TOWER
Graham is then transported to a black mountain near the Tower.
Go left to see a horse and more left to see the Tower and the black cloud. Hear the voice of Valanice.
SAVE HERE. RETRY when necessary.
Go back to click the horse and ride it to the Tower.
Graham has the black cloud getting close to him: YOU MUST DODGE when under attack. Look for the word DODGE on the screen. Not easy to get through that sequence of play.
Watch the red column on the left and try to keep the line as high as possible while you ride the horse and try to avoid one and then two clouds.
Suggestion: remember and/or write down the pattern of the attacks. Ex: 3x from the right, 2x from the left, etc. It may be useful when you retry.
You will be attack from the left, the right and from above. So, you need to dodge on the opposite side.
You will eventually arrive near a carriage. Go left to see the cloud and come back to get into the carriage. Open the left or right drawer to get the key to the tower. After a second attack, click the back window. Graham will go through it. When you get the word JUMP on the screen, do so.
Go up the stairs and use the key on the door. Get in and close the door.
Go up the stairs and when you see the black cloud again, take the torch and hit the cloud with it. Go up more and do what is ask of you on the screen. At the door, open it, get in, close it and push the piece of furniture in front of the door.
Go to Valanice and click to talk to her. Get a cutscene: Valanice is transported to the Tower. Back to all the things she wanted to forget.
After that tragic scenery, Graham is back in his room.
ISLE OF THE MISTS
Go to the tree with the emeralds and click the crown on the rock to get a fire and a new inscription. Read it.
On the fire, click the candle to get it lit. Get a comment on it in Inventory that it does not melt.
Go to the Archdruid and see that he is not there.
Light all the candle on the floor and hear a sound coming from outside.
Walk out and go to the Stones of the Secret Circle. See a circle of energy in the middle and all the symbols on the stones.
DO NOT TOUCH THE SYMBOLS.
Have Graham touch the circle of energy to get a button of crying emoticon. (Nothing to do with this game except for a contest going on now at the Phoenix Online site)
Let’s get back to the task at hand.
Go back to the tree of the Archdruid.
Now we need to empower the edge cutter and the flower.
To do that, you will find some hints in the books at the Bookstore and in the news at the Four Winds on the left of the stairs.
To empower the cutter, you need to light up only the candles of all the Earth and Fire symbols on the floor.
Earth symbols: Capricorn, Taurus and Virgo.
Fire symbols: Aries, Leo and Sagittarius.
Then go to the stones and put the edge cutter in the circle of energy: you will get an empower edge cutter.
To empower the flower, you need to light up only the candles of all the Air and Water symbols. (Do not forget to use the hand icon to light off the previous candles)
Air symbols: Aquarius, Gemini and Libra.
Water Symbols: Pisces, Scorpio and Cancer.
Then go to the stones and put the flower in the circle: you will get an empower flower.
ISLE OF THE CROWN
Go to Cassima’s bedroom and use the edge cutter on Alexander and his hair.
You will get your first ingredient on the scroll: Male Subject’s Strength and see this ingredient being cross out on the scroll.
Now go to Rosella and use the pea on her to place it under the mattress. Then, in Inventory, combine the flower and the shell and use this on Rosella.
You now have the second ingredient on the scroll: Female Subject’s Voice. See that it is cross out on the scroll. Take back the pea by clicking on Rosella.
Exit the castle and go to the Village Square and the blacksmith.
Click the scroll on him to ask him if he would make a Silver Moon.
He will do it if you bring him a mould.
ISLE OF THE MISTS
Walk to the tree with the emeralds. Use the melted candle on the tree to get a mould for the Silver Moon.
Go back to the…….
ISLE OF THE CROWN
and give the mould to the blacksmith.
He needs some time to do this. So walk to the Castle doors and come back.
Get A Silver Moon. You now have the third ingredient of the scroll.
And now to look for the last ingredient.
ISLE OF WONDER
Go there and walk to the left of the quay. Take the cup from Inventory and click it on the sea water. You now have a cup with see water and thus with salt.
ISLE OF THE MISTS
Go to the tree of emeralds.
Put the cup on the burning stone.
Get your fourth ingredient: A Pinch of Lively Shaken Salt.
See that it is cross out on the scroll and see also a drawing of Cassima giving her speech.
Look at the final scene to learn about some events of the past.
A Walkthrough by Venus and Chief
Note: Thank you to KatieHal
The game opens with some cutscenes from the previous episodes and continues with a scene where Rosella enters a cave to see Pandora's Box.
Be witness of her meeting with Shadrack.
THE CASTLE
In the next scene, at the Entry Hall of the Castle, see Cassima give her speech to the people of the Green Isles.
After the speech, see Graham with the scroll and the list of Ingredients he must pick up for the spell to cure Alexander and Rosella.
The list of ingredients: -The Richest Fruit in the Land
-An Evening Glory
-An Ebony Rose Bathed in the Blood of the one who wishes to travel to the Realm of Dreams.
Let’s have a look around the castle.
Go upstairs to Graham’s room using the right stairway and talk to Captain Saladin. He has no new information about the cloaked stranger. Enter the room and click on Valanice to get a comment on her Druid heritage. Graham will not disturb her sleep.
You can go to the balcony through the double doors and get some comments on his family if you click on the ramp.
Exit the room and go up screen and left to Alexander’s room, guarded by two soldiers. Enter. Click on Alexander and Rosella to get some comments.
Go to the shelves on the left and take the tinder box (lamp) and the flute.
Exit the room and go down screen to go down the stairs. Go through the open left door under the stairs. Walk to the courtyard, and take the stairs on the right to go to the right mezzanine and meet Pan. Talk to him, and he will mention that he misses his home. Remember Rosella's encounter with him in King's Quest IV. Give him the flute and get the lute in exchange. Hear Pan play the familiar King’s Quest IV music.
Go back to the Entry Hall of the Castle. You can check through the double door in between the stairs, but nothing to do there. (You can look at the glue, and the Narrator will mention that there is nothing to do with it now, but Graham now knows where it is in case he needs it later.)
Having explored the Castle, have Graham go outside. On the screen directly south of the castle, notice Cassima's nightingale, Sing Sing. Click on her for a description. Odd, weren't those eggs in her nest baby chicks before?
THE VILLAGE
Walk to the Village and enter the Pawn Shoppe to talk completely with the owner. They will talk about Pandora’s Box and the strange man. (Note: this only happens if you haven't had this conversation in Episode 3.)
Exit and go to Ali’s Books and say hello to the book keeper.
Go to the small round table in front of the fire place and take the book of Poetry. You can go to the shelves, but you will pick up the same books as in the previous episodes.
Exit and walk forward to the Village square. Passing in front of the magic carpet and dress store, hear the owners talk. When talking to them, Graham will learn that their air balloon needs to be repaired and that they have no money. You can talk to the woman behind them, but Graham won't be interested in any of her wares at the moment. Nevertheless, take note that she sells cloth.
The Blacksmith is busy.
At the Four Winds, you can have a look at the board of messages. Stay away from the Black Widow on the door.
Go to the merchant selling lamps. See a cutscene of the merchant examining a new lamp with flames rising from its neck. Talk to him about his new lamp.
Walk out of the Village Square, and go left to the ferry passing under the banner. One thing you may notice before passing through the archway: The banner that was struck by lightning the day before appears to be back in place. It now reads "Happy 21st Birthday King Alexander and Princess Rose." That's odd.
Go to the ferry and talk to the nymph splashing in the water. Ask about the treasure and the Isle of Sacred Mountain. The nymph talks about winged shoes. If Graham can find something to help her fly, she will give him the winged shoes.
Walk to the boat and talk to Hassan. Ready to sail.
ISLE OF WONDER
As you get there, talk to Hassan about this Isle. Then, have Graham walk all the way to the castle in the distance and the chessboard.
Listen to the two Lady Queens' comments. They want Graham to be the White King that they lost. Graham does not want to play but is ready to look for the White King to have his life spared.
Graham will get the Evening Glory in return.
Return to the boat. Ready to sail.
Note: Do not come back to the chessboard without the White King because Graham will die by the guillotine.
ISLE OF THE MISTS
Talk to Hassan about the Isle. Walk to the left, and go to the Archdruid and talk to him. The Archdruid is very surprised by about the cloaked stranger, the afflict on the two children and the previous night's storm.
Take note of the druid woman playing a drum.
Go to the white fence at the top of the screen and left to be near the stream. Follow the path to go to the tree and meet and talk with the cloaked stranger.
See the cutscene. The stranger disappears. Graham looks at the scroll and listens to the story about the Black and Silver Cloak Societies and mainly about the Black Cloak and the Pandora’s Box.
The tree talks to Graham and tells him he can take a gem. The gem stores the memory. Click on the tree in order to do so.
Go back to the boat and go to the….
ISLE OF THE BEAST
Talk with Hassan about the Isle. Walk past the big boulder and be in front of a fountain: see that the water is going up, not down.
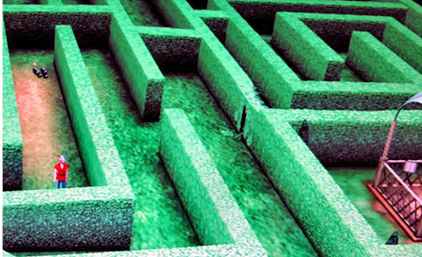
Open the gate and see a maze.
It is easy enough to go to the gazebo. On a blue round table, see and take a golden baton. Click on a music stand and get a comment on Rosella.
Exit the gazebo and go right to enter the circles of hedges in front of the castle door. See a statue. Go there. Click the statue to get a comment and read the plaque: a poem about a Black Rose: “….So now the black rose which is love's last bloom Lies inside her statue….” Should an object go on the plaque?
Exit and see the scroll of ingredients: click the arrow at bottom right, read the text and see a picture titled “The Path to the Lock.” See an X somewhere on these grounds where we can see the statue in the distance at the far back on the left and one of the support of the gazebo.
Exit these circles and go right to a small pool. On the ground, see and take a lamp.
Come back toward the gazebo, and go in the corridor on it’s left to see a thinner part of the hedge. Use the shears on it. Go through. Walk that part behind the gazebo and be close to the castle. Walk to the door and have Graham knock on the door. Talk to His Highness, Prince Cocteau, and go in.
Follow him and see a cutscene.
Talk to Prince Cocteau and Beauty completely.
Exit to the right and be in the Main Hall.
Behind the fireplace is a door that leads down to the basement, but it is too dark to go there. Use the tinder box on the darkness, and go down.
Take the shovel leaning against the post of the stairs. (Notice the termites on the barrels. Don't walk over the grating or Graham will fall in.) Go left from where the shovel was, use the tinder box at the bottom of the barrels and see Graham pick up some fur. Go back up.
There is also a door on top of the stairs, but it is locked.
Going back down, have a look at the painting on top of the fireplace. The horn coming out of the painting is real. Try to have Graham take the horn, and he will refuse. Walk to the prince to ask about it. The prince does not want Graham to take the horn.
Go back to the Main Hall and use the gem from your Inventory on the horn painting to capture its memory and get a very interesting cutscene. What could be causing these events?
Graham walks out of the garden. Walk him right back in and have Graham pick up the white rose. Exit the castle.
Now that Graham has a shovel, it is time to search for that key and a keyhole that will go in the middle of the plaque.
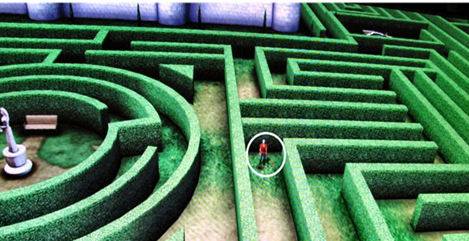
As you come back from the castle and through the opening in the edge, go forward in the opening in front, then upscreen, left and down to the end of this second corridor: click the hand icon on the ground and Graham will say he can’t dig with his hands. Use the shovel and find a keyhole.
Note: when using the shovel at the right spot, you will get a close up and a greener spot where Graham will dig.
Note on the picture: you will dig where Graham is on the bottom left. See the gazebo on the right.
Now to find the key:
follow the instructions on the poem to find the key. The names of the women serve as directions. Nora is north, Sera is south, Elena is east, and Wanda is west. So, from the pool at the right of the castle, use these directions: E,S,W,S,W and N. Look where Graham is on the picture and dig there. Take the key.
Note on the picture: Graham is in the middle of the picture.
Now that Graham has the key, go to the statue and insert the keyhole on the plaque and then the key. Open the small door and take the black rose that almost matches one of the ingredients on the scroll.
The rose must be “bathed in the blood of the one who wishes to travel to the realm of dreams.”
Use the white rose on Graham and some blood will get on the rose. Look at it in Inventory to see the blood.
In Inventory, combine the white rose with blood with the black rose.
You now have your first ingredient on the scroll: Ebony Rose and see this ingredient being crossed out on the scroll.
Time to leave this Isle and to go to….
ISLE OF THE CROWN
Walk to the castle and go to the double doors between the stairs and enter the Throne Hall. Use the baton on the pot of glue. In Inventory, combine the baton with glue and the fur to get a golden paint brush.
Let’s explore more of the Isle. If you haven’t done so already, go talk to the nymph by the ferry completely.
Go to the Village Square and the lamp trader. Give him the lamp from the pool in the maze and get the old green lamp that shoots flames in return.
A valve adjusts the flames it produces.
After that, go and talk to the carpet merchant that needs cloths and a new source of hot air for his air balloon. Graham will help and in return gets a magic carpet. Talk also to the lady cloth merchant: to repair the balloon, she will need cloths with special threads and something magical to keep it together.
In Inventory, click the magic carpet and use the hand icon on it to get a thread.
Give the woman the thread and she will mention that the thread can be used to sew the balloon. Give the green lamp to the merchant. You should now be in business. Go to the ferry boat.
See a cutscene of Graham flying over the Isle of the Crown with the merchants and the nymph.
ISLE OF THE SACRED MOUNTAIN
They leave Graham at the bottom of the stairs with the winged shoes.
Have Graham go up the stairs to the guards.
The winged shoes now need a little magic to fly again: click the magic carpet on them in Inventory. Use the shoes on Graham who will put them on and fly to be above the city.
Have Graham fly to the temple at the upper part on the left and to Lord Azure and Lady Ariel. Talk to them completely. See the cutscene. (Lady Celeste has become even more spoiled over the years, hasn't she?)
Graham may travel the city of the Winged Ones.
Exit the throne hall and be above the city again. See that there are four big statues holding musical instruments: a lute, a harp, a drum and a horn. Click the eye icon on each statue to get a description of each. Should we have these instruments? We already have a lute!
Go to the temples in the center of the city and to the Artists Boulevard.
Go to the painter on the left standing in front of a white canvas. Talk to him.
Give him the gem with the memory of the painting that is above the fireplace in the Main Hall at the Isle of the Beast. He will reproduce it.
Walk around the area for a bit or leave the screen and come back. When it is done, talk to the painter and take the painting.
Go to the three muses and talk to them completely. They mention the statues and the musical instruments. Give them the book of poetry and while they are reading it, take the harp.
Before leaving the area, walk over to the theatre and watch some of the rehearsal for Othello if you would like.
Now that we have two musical instruments, let’s go get the other two.
ISLE OF THE MISTS
Go to the Archdruid and take the drum that is on the ground near him.
ISLE OF THE BEAST
Go to the painting above the fireplace in the Main Hall. Use the reproduction on the real painting and take the real painting.
In Inventory, click the hand icon on the painting. You should now have the horn.
In Inventory, combine all four musical instruments.
Go back to the….
ISLE OF THE SACRED MOUNTAIN
and go to the wall. Fly to the far back of the screen over the city in order to do so. Do not forget to use the winged shoes on Graham.
When Graham is at the wall, click the musical instruments on him. Graham becomes a one man band. See the cutscene. Go through the hole and see the golden tree.
From under the left eye (it can be the right), take the Richest Fruit, a second ingredient of the scroll. See it being crossed out on the scroll.
Go back to the wall and exit on the side.
Go to the….
ISLE OF THE CROWN
Walk to the Pawn Shoppe and see a big block of wood. Try to take it and talk to the merchant. He will give it to you free of charge. Take the block of wood.
ISLE OF THE BEAST
Now, who or what can sculpt a king?
Go to the castle’s basement and use the block of wood on the termites that are on the barrel at the bottom of the screen on the left. (Make sure you steer Graham around the grating first or he will fall in) See a cutscene. Funny.
Take back the sculpted king. Now to paint it.
ISLE OF THE SACRED MOUNTAIN
Go to the painter at the Artists Boulevard and click the wooden king on him. He asks for a brush. Give him the golden paintbrush you created earlier. He will now paint the king.
While waiting, walk around the area and wait if you'd like, or leave the screen and come back. You may have to do the latter a couple of times. When it is painted, take the white king.
Now, let’s go to the….
ISLE OF WONDER
Walk all the way to the guillotine. In Inventory, combine the Stick in the Mud and Rotten Tomato with the White King. See the cutscene. Funny.
In return, receive the Evening Glory, the third and last ingredient on the scroll. See this ingredient being crossed out on the scroll.
See Shamir appear on the scroll.
ISLE OF THE CROWN
Go to the castle courtyard and climb the stairs to the balcony. You should see Shamir standing there. Talk to him and he gives you Shadrack’s name and tells you that Pandora’s box may have been opened, causing time to reverse itself. What can we do about this?
When you have finished your conversation, start heading back to the Entry Hall. The scroll should stop you and show you another picture, this time of the Archdruid. Go to the . . .
ISLE OF THE MISTS
The Archdruid has gone inside his hut. Enter and speak with him. Graham will tell him he now has all the ingredients. The Archdruid tells Graham to send Valanice and his children to Daventry. He also keeps the animated cup.
See a cutscene with Graham and Valanice. Valanice fears her past.
After Graham leaves, Valanice remembers what happens the night before. The scene changes to the cave we saw in the beginning of the episode. Valanice enters and sees Rosella magically bound to the wall by Shadrack. He tells Valanice to open Pandora's Box.
You are now playing as Valanice. A box will pop up, saying that the game will now create save points for you. Click to close that window and use the hand icon on Pandora's Box.
Choose Easy or Normal Mode for opening the box when prompted. They are basically the same, except in Normal Mode, the swirling images you will be working with start fading in and out a little sooner.
See Pandora's Box and four sets of swirling symbols surrounding it. Create all of the Zodiac signs printed on Pandora's Box by clicking the swirling symbols with the hand icon.
You can move the box itself with the arrows to see all the different symbols and use them as reference points. Click the swirling circles to create four different parts of each picture. If you make a mistake in one area, you can keep clicking that particular circle until you get it right. Once you have three pieces of a symbol matched up, however, you will only have three of four guesses to choose the last piece of the image.
This may take some time. Once you have finished constructing all of the pictures on the box, a black smoke monster will appear behind Valanice. Click the hand icon on the smoke monster and click the smoke monster icon on Pandora's Box. The box will open. Oh, no.
See the Silver Cloaked man disappear with Valanice.
Back to Graham. A brief conversation will take place between Graham and Edgar, and then Graham and Hassan will set sail for Daventry.
They will be stopped by Shadrack. Don't worry when Shadrack initially starts attacking Graham. There is nothing you can do against him yet.
Watch as Graham is nearly defeated. Then, see the Silver Cloaked man stop time. He will give Graham an Amulet of Dreams made from objects Graham carries to aid him in his battle against Shadrack.
You will now begin an action sequence. Follow the game's instructions for the first two steps. Then you will be on your own.
When Shadrack attacks, dodge or use Wind or Water power to defend yourself:
-when he raises his arms and creates lightning, dodge to the right or left using the arrow icons on the amulet, either side works.
-when he rolls a ball of lightning in his hands in front of him, look at the green clouds and dodge on the opposite side of where they are in the sky.
-when he charges toward you in a swooping motion, use the Water defence.
-when he charges toward you in a swirling motion, use the Wind defence.
One of his attacks that I found particularly difficult was his rocking of the boat. When Shadrack says "Hold still, Graham," ready your cursor and quickly click the arrow on the amulet in the opposite direction the boat is rocking and to where graham slides.
The only attack I found that would work against him when it was Graham's turn to charge was the Earth attack. Keep using this attack until the very end, when Shadrack is almost defeated. Then, when he starts creating green swirling lights with his hand, use the Fire attack against him.
That's it, you will have defeated him. Shadrack says you are still strong and leaves. Watch the final cutscenes.
Watch through the credits to see a brief cutscene at the end.
This document was provided to GameBoomers.com and may not be distributed without express written permission of the author and GameBoomers and the content may not be altered in any way.