SYBERIA II WALKTHROUGH
By BillyBob
CONVERSATIONS: Use all conversation possibilities, even when they appear after you think you’ve exhausted that line of the conversation. If it reappears, try to use it. Also click on the character for the possibility of more conversation even when all possibilities seem exhausted…..until you’re sure they are. Sometimes you can start new, though short, conversations three or four times. When the conversation starts repeating, of course, it’s time to move on.
SKIPPING CONVERSATION: Right click to do this.
NAVIGATION: As usual, the glowing circle cursor indicates travel to another scene. There may be two or more glowing circle cursors in any given scene. These glowing circles also have pointer indicators on them showing which direction they will lead so that you will not mistake them all as one.
Also, some scenes will not have a glowing circle but you can continue past the boundaries of the screen into new scenes by clicking at the edge of the screen. This can lead to a glowing cursor.
This can be important to your progress……...If you can’t think of what to do next or where to go then try continuing past the boundaries of the scene. If this doesn’t work it is possible you need to look up someone for more conversation.
NOTE: I have included much of the navigation in this WT until you reach the Youkol Village. I’ll leave it to you to learn your way around since it isn’t too difficult to find the places where I tell you to find inventory items.
SKIPPING A CUT SCENE: Use the "Esc" Key…….Only works occasionally.
SAVE OFTEN: If you suspect you’re going to be roaming lost for awhile or about to begin a puzzle…….save. It can often save you a lot of unnecessary repetition.
ALT/TAB: Hold the Alt key and hit the Tab key. This will allow you to toggle between the game and a Walkthrough if you’re using one.
The story begins with Kate’s boss (Mr. Marson) talking, in the background, to someone about getting her back and his being told she’s not coming back. The scene is of the train rolling along amid the falling snow. “Call her”, the boss says.
There will later be another, similar occurrence where the boss calls a private detective (Nick Cantin) with the intention of sending him to look for Kate.
ROMANSBOURG
Then we find Kate on the train, talking to Hans about his dream of finding
Syberia. She doesn’t seem to believe it really exists but he tells her of the grass that grows through the snow and of the Mammoths eating this year round.
When the conversation ends the scene changes as she is ready to leave the train. One step and her cell phone rings and she finds Oscar is now able to talk to her from HIS cell phone, which Hans has made for him. Oscar tells her they are in the town of Romansbourg.
Before leaving you might want to check out the bathroom. It’s through the door to the left of the exit………where Oscar always stood in the first SYBERIA game. After all, you may have to go there later.
Upon leaving the train she meets a man with a peg leg and a cane. The conversation with him is automatic. He is Retired Colonel Emeliov Goupatchiev, Guardian of the Imperial Marches and General Store Manager. In the middle of the introduction he is interrupted by a public address system welcome to the city of Romansbourg.
Down the platform to the rear of the train is a lever and a gate; the lever accomplishes nothing and the gate is locked and impassable.
Across from where you got off the train is a machine of some sort. Pull the handle and operate it and it appears to be a coal machine…….with no coal being dispensed.
Go back to where you departed from the train and there is a store at that point along the platform. Inside you can talk, again, to the Colonel who tells you he’s in charge of the administration of this jurisdiction
If you want, continue further past the Colonel and you’ll find a close up of a broken candy machine with a key in the tray to the left. Take the Key. Also, note the telephone number on the bottom of the candy machine…….625-122
On your way out, stop at the candy machines near the door. You have no money so you’re not going to buy any candy at this point, are you? Maybe there’s some money in the candy machines. We’ve already taken the key, why not the money? And maybe a little candy, too. Use the KEY to open the first machine…..well, no money! Second machine……same! Third machine…….coins in the drawer. Take the coins and use them to buy Candy from the first two machines. Want to take back the money, too. Why not? Close the drawers; first two close O.K. but not the third. It’s stuck open. Oh, well, leave it at that.
Going toward the front of the train we find a big machine (aerial view) to the side of the platform. Going to it we see a little girl on the ground below. Click on her to talk to her. Her name is Malka. We ask about the gate. When she leaves give the machine there a try. It operates but does nothing. Appears to be a loader of some kind for the train. Continue toward the front of the train.
Here we find, and talk to Oscar, who is not too happy with being there. He will tell you Hans is in the rear car of the train and he’d like you to talk to him in his behalf.
Go back to the train and talk to Hans. He says Oscar dictates when the train leaves. He says Oscar will show you where the winding machine is located. Of course, we’ve already found it but we go back to talk to Oscar again.
When we go back and talk to Oscar he doesn’t mention the winding machine. He does say we can leave as soon as the train is wound. Now, be sure the wheel is turned and the shaft extended toward the train. Then operate the lever to the left of the equipment and the train opens and the winder does it’s thing.
Try calling the candy company. You might can get that third machines’ drawer fixed. Remember the phone number?…. 625-122
Didn’t help, did it? They’re closed down and all you got was a commercial for the candy. Oh, well, it seemed like a good idea at the time.
So, it’s time to talk to Hans again.
Now he says we need Coal before we can go. I’m wondering, why we need coal for a windup train? “Ours’ is not to question why”…………I'm sure we'll find out, eventually.
Back to the Colonel in the store to tell him we need Coal.
He says to use the coal machine for free but we have to tell him it doesn’t seem to work. It’s going to take a week or more to wait for the maintenance people to come and fix it. So we ask if he has a key to the gate. He lost it and has no spare.
Go back to the coal machine (still topside, of course) and talk to the little girl, Malka, about the key to the gate. She says she will give it to you for some of her favorite candy. Throw down the Sugar Candy (not the Fish Candy) and she ties the Key to the gate to a balloon and floats it up to you.
Go to the gate and open it with the Key. The key disappears from inventory and the gate opens and you see a cut scene of the gate at the bottom opening, too.
Turn out of the gate to the right (scene background) and there are two men a machine of some kind. You can only click on the machine (to no avail).
Come back towards the bottom of the screen and you’ll see Malka again. Talk to her and you’ll learn she is being taken care of by someone called Cirkos but that the Bourgoff Brothers are the ones to possibly help get the coal machine working.
Go to the door to the right as you face Malka. Go to the counter and talk to the man behind it. He is Cirkos (Malka’s benefactor). Nothing much new to learn here. Go outside and to the left of Malka (as you face her) and beyond her.
This takes you to the coal machine. Here you find a Fuel Can on the left and a gas driven generator with the starter switch on the pole to the right. Darned if the fuel can isn’t empty. What a surprise!!
Go and talk to Malka, although the conversation tells you little.
Go left, down the fence line, until you come to a closed gate and ring the bell. You’ve found the Bourgoff Brothers, a nasty pair. They say they have no gas, despite the motor running behind the fence.
Go a little further down the fence line and you’ll see an opening under a sign on the fence. Click on it and she will tear the sign down and uncover an opening big enough to go through. Click to go through and get a cut scene.
Click on the big box about mid-screen and you’ll find there is a white animal in the box. Click to unlock the box and let him out and the nasty little brother will chase after him, allowing you to get a Can of Fuel sitting on a barrel to the left of the “open shelter” area.
Try talking to the brother on the couch and the other brother will be heard returning. Kate departs.
Go to the Coal Machine.
Put the Fuel into the fuel tank. Then push the Red Button on the post to the right to crank it.
Go back up to the machine by the train and operate the lever to put Coal in the train. After that Oscar comes running up to say Hans has disappeared. Kate has to calm him down and go looking for him.
Go talk to the Colonel and Kate tells him the gate is unlocked and she got the Coal. He lets you know you’ve broken the law but that it’s O.K. You also tell him Hans has disappeared.
Go talk to Malka and find that she has talked to Hans.
Go to the tavern and find Hans there. In a cut scene he collapses.
The next scene Kate is standing over him as he lays under covers in bed.
Clicking on Hans gets you three different responses, only.
Talking to Oscar only gets you an excited response to Hans’ condition.
Go to the store and talk to the Colonel. You tell him you have to go to the Monastery but need warm clothes. He tells you there might be something in the attic and pulls the ladder down for you.
You find warm clothes up there and then realize you need a place to change. Go to the bathroom on the train. Clicking on the bathroom door, you see KATE enter and immediately see her back again, dressed in the clothes from the store attic.
Go talk to Malka. She will tell you that you have to go to the Monastery but that you have to follow their rules.
A pull cord at the entrance rings a bell but no one comes to let you in although one Monk looks down on you from up high. So go to the Tavern and talk to Cirkos. It is a long conversation in which he will tell you that you, among other things, you need Hans face imprint on a cloth (a Shroud). He will also tell you that Malka can get you a piece of cloth on which to make this impression.
Go talk to Malka and she gives you a Token to get a Shroud from the box at the bridge. She also tells you how to use it.
Go to the box at the bridge and use the Token and pull the handle to get a Shroud.
Go back to the train and place the Shroud over Hans’ face.
Go back to the Monastery and try the bell. Then, when that fails, go past it to the end of the path. You’ll find one of the Monks there and have a long conversation. He will tell you how to pull the rope so one can get into the Monastery (by pulling the rope, but not so hard as to frighten the birds) and you will also learn women are not allowed into the Monastery. He also lets you know he is interested in a particular kind of bird, a Mekula Alba. You just KNOW this is going to be important in some way. J
Go talk to Oscar and he is no help. You can’t get him to leave to look for help and so you tell him you are going to the Monastery and he says he will stay and look after Hans.
Leave and go talk to the Colonel. He will give you three Bird Calls (One Gold, one Silver, one Black).
Go back down the path to the Monastery and beyond to the end of the path. There you find the Monk, still washing clothes.
Click the Silver Bird Call on him. He will take it to call the Mekula Alba and will leave the scene, following the bird.
Go to the MONK at the end of the path.
Pick up Clothes he left behind and Kate disappears behind the rocks and comes back dressed as a Monk.
THE MONASTERY
Go to the entrance and ring the bell and the elevator is sent down for you. Get into the elevator and you arrive at the top of the tower.
You’ll find you cannot talk to any of the Monks
There’s a machine of some kind to the left. There are several things to click on but, for the moment, pass it by and click to continue into the Monastery and you will find yourself in a outer passage. Continue forward and you have an aerial view of where you are. There are Monks there but, as said before, you cannot talk to them.
Go screen bottom and get an aerial view from another angle. There are two entrances to the building you can take or you can go to what appears to be a garden to the left with an old tree in the center. Going to the “garden” it turns out to be a Cemetery.
There is a Grave Stone to click on there but the information seems to be in another language. Still, the dates on the stone are 1895 – 1996. Is there a name? Back out and go right screen. You now have the aerial view again and can go to the building entrance to your right. This leads nowhere.
Go outside and click bottom screen for an aerial view and go into the Library……left screen.
You are looking down to a lower floor and are on a ramp that leads up (left screen) and down (right screen). Going up leads to nothing. Going down takes you to the lower level where you can attempt to take something from the wall to the right but cannot as “Someone might see me”. Later, maybe? J
Go back outside (to an aerial view) and click on the entrance to the Chapel.
Click just to the right of Kate on a gate. It’s locked. A little more into the Chapel and you can click on a wall to the right. It’s a painting of a man holding a book. Click on the book twice for a comment from Kate.
Click on the door at the far end of the room and a curtain opens and the Priest Healer comes into the room. A lot of conversation ensues and eventually KATE convinces him to look at Hans, where in he tells her he needs and she gives him the imprint of Hans face.
There is now a cut scene in which Kate"s Boss, Marson, is heard talking to Nick Cantin on the telephone.
There are some cut scenes in which Hans is brought to the Monastery and then the Priest Healer tells Kate that Hans is dying. She wants to see him but the Priest doesn’t want her to. He finally agrees to let her talk to Hans and for her to meet him in the Chapel afterwards.
Go to see HANS.
HANS tells her to find a Monk named Alexei Toukianov; that he can heal him with medicine learned with the Youkols. Kate leaves and finds a Monk has been listening at the door. Talking to him (believe the same one that was washing clothes earlier), he denies knowing Alexei but gives her a paper and a circular Stained Glass Mammoth (a glass piece with a Mammoth drawn on it) and leaves her. The paper is about Alexei and it says on it that "the key is in the light of the Mammoths’ eye".
Leaving the building you see a bucket and a brush on the ground outside. Pick up the Brush. Go to the Chapel and use the Brush on the book on the picture on the wall inside and to the left. This uncovers a symbol of a Cross with light and dark circles around it (a clue to a puzzle to come). You need to draw this out and be sure and line up things with their relative position to the cross.
Click on the door at the far end of the room and the Priest comes out to talk. He thinks badly of Hans and is obviously just going to wait for him to die. There is a lot of conversation here…….get all of it. You learn Alexei Toukianov is dead. Isn't there a Cemetery close by?
Go to the Library. Go to the lower level.
Take the object from the wall to the right. This is used to pull the Candles down from above and light them. The scene changes to looking down on Kate from above with the candles making a circle and her in the middle. Use the object from the wall to light the proper candles. Use the pattern with the cross and dark and light circles from the picture on the wall in the Chapel.
CANDLE PUZZLE (LIGHTING THE CANDLES)
t doesn't matter in what order you light the candles but I used the following method to keep me straight because a few of the candles are hard to tell exactly where they are in relation to the others.
Note which way the Cross on the floor is facing and start with the candle just to the left of the Cross (left of opening to ramp). Click on this candle to light it; go clockwise from here, and leave the next two unlit; light the next two; leave the next three unlit; light the next two; leave the next two unlit.
Candle Puzzle is done.
When you solved the Candle Puzzle you were given a flash of where an opening appeared, letting in a bright light. Go up the ramp until you find this opening.
Click on it for a close up view and you click again and you will see the town and train and the Bourgoff Brother’s junk yard. Get the Stained Glass Mammoth from inventory and put it in the opening. Then back off and click on the leaves of the opening, starting with the bottom one and going clockwise until you have clicked on all four. The opening closes some and focuses the image of the Mammoth onto another place on the far wall. Note the location of the “EYE” of the Mammoth. Go down the ramp to that point.
NOTE: If you close up the window without the Stained Glass Mammoth in it you can re-open it by clicking the petals in reverse order from…..Right; Top; Left; Bottom.
Click on the Eye of the Mammoth and the wall next to it will open. Go inside and you find some shelves. Take the Book and the Goblet.
Leave and go to the Wheelbarrow near where you came off the elevator and then go to the Cemetery and cut the Brambles from in front of Alexei’s Tombstone. Pick up the Brambles before backing out.
MAKING A SPECIAL CANDLE
Go to the machinery at the elevator (left screen) and use the Brambles (put them into the pot)
Click on the mould under the funnel to open it
Click on the Wicks hanging to the left of there (look like screen mesh – you won’t see anything happen but one of them will now be in that mold)
Click on the mould again to close it: click on the handle to the left of that to pump the bellows and fire up the heat
Click on the handle above the mold; click on the mold to open it and take the candle from it
You now have a special Candle. Pick up the Matches before you leave
Go back to Hans and place the Goblet on the table; place the Candle in the Goblet; light the Candle with the Matches from the Candle Machine. Hans is cured but unable to leave.
Go back to the elevator area and you’ll find the Priest there. Talk to him until all conversation is exhausted and you’ll find he isn’t letting Hans go and you’re not letting him stay. When Kate leaves go to the Chapel (we know the Priest isn’t there) and go to the back room. Get the Ornate Key that is hanging in there.
Go back to that locked gate just inside the entrance and use the key on it. Go inside.
Pull the Bell Rope and you’ll see the Monks are leaving their locations, apparently to answer the call of the Bell. Go back to get Hans.
Click on Hans but he can’t go yet. Kate leaves to prepare the Casket for a ride down the hill. Go back for Hans and he follows Kate out. As they are about to push off one of the Monks tries to stop them…….but it’s too late. They plummet down the hill in, of all things, the casket in which he was to be buried.
When the ride ends the scene shifts to Hans and Kate in his shop on the train.
Talk to Hand and he wants you to take a Mechanical Heart for the Horses in Cirkos’ Cabaret and install it for him. Stop to talk to Malka on the way to the Cabaret. The conversation is a little strange in that she says she will go with you to see the show at the Cabaret but then she says she will wait for you. So you go alone to the Cabaret.
Cirkos is trying to teach a YOUKI a trick but he won’t cooperate. So Cirkos chases him away and goes behind the counter. Talk to him and at the end of the conversation go to the mechanism for the Horses.
MECHANICAL HORSE PUZZLE (MAKE THE HORSES DANCE)
To solve the horse puzzle open the mechanism.
Put the Heart onto the spindle.
Click the spindle until the little horse at the top moves to the far right. Then, count the 3 holes in each of the four sections of the heart as 1, 2, 3 (from left to right of each section.
Start with the bottom left section: hole 2
…….top left section: hole 1
…….top right section: hole 3
……….bottom right section: hole 3.
You will get animated scene of the four horses rearing and then (looking real this time) of them "dancing".
Suddenly, there's a loud rumbling noise and the Cabaret shakes. Kate realizes the train is leaving the station and she races out to catch it. Too late!!
Go to the store and talk to the Colonel. He will tell you about the Gangcar under the tracks and that you can have it.
Go to the end of the platform and pull that lever. The Gangcar rotates from below to the top. Get in and start after the train. Unfortunately, you only make it to the other end of the platform.
Go talk to Malka and she will tell you the Youki likes fish.
Go back and talk to Cirkos and he will tell you you can have the Youki if you find him.
Go to the Bourgoff Brothers’ junk yard and when you walk in the yard the phone rings. It’s Oscar, telling you the Bourgoff Brothers said you didn’t want to continue on and was going back to New York. But he’s not too sure about that now and suspects something is wrong. After that conversation go to the shed past the Youki and pick up the newspaper on the table and look at it. Then go back to the Youki.
You’ll find he won’t pay attention to you until you click your FISH CANDY on him. Then, he’ll follow you anywhere. J
Go back to the Gangcar and when you get in it you will begin a wild ride down the tracks in search of the train………with the Youki peddling madly in the cage behind.
Just as you are about to catch up with the train it crosses a bridge and the bridge disintegrates behind it…… leaving you on the wrong side of the bridge. It’s time for a little walking.
Go to the right of the scene three clicks and you will come to a bird in a tree and some rocks with a Fish frozen to them. You can click on them for a close up view. Continue on until the Youki chases a beaver into the water. Go slightly left and you will find some Dry Wood. Click on the stream ahead and discover a house at the bottom of the falls. Go back to the Fish frozen to the rocks.
Place the Dry Wood at the bottom and use the Matches on it. The rocks will thaw and you can get the Fish. Give it to the Youki. When you go back to the water there will be a fallen tree which will allow you to get to the other side of the stream. Continue right and then slightly left. Follow the path ahead until you find a cut to the left. Along the way you should see a broken bridge but you can’t go that way. So go right screen and follow the path to a point where you can go upscreen or rightscreen. Continuing right you will see a Wolf moving in the background. Go back to the split and click upscreen and go in that direction to find the Cabin.
Go into the Cabin and find three items on the mantel…….a Book on Salmon fishing; a Russian Doll; and a Hatchet. Take these and go to the kitchen and take a Fish Tank from the counter next to the refrigerator. Click to go out the front door and Youki won’t go. Kate opens the door to find she's face to face with a huge bear. Seems that big Grizzly Bear isn't letting anyone or anything past. Kate slams the door and looks out the front window. The bear is not going anywhere so how does she get rid of him. Bears like fish, don’t they? You have a book on fishing for Salmon!? J Kate and Youki go out the back door to the dock.
PUZZLE……HOW TO GET PAST THE BEAR AT THE DOOR
The book says Salmon like green frogs. Click on the fishing rod and Kate puts down the Fist Tank and picks up the rod.
Click on the tackle box at her feet and she has her choice of nine lures. Click on the top right lure (# 3) and then you have three areas for her to cast into. One is amid the rocks just to the left and above her head. Another is at the area of the rod, itself. If you try to use fish from either of these two locations to feed the bear through the front window of the cabin you’ll find he is a “finicky eater” because these are Green and Blue Salmon.
So, to catch an Orange Salmon (as in the book) cast to her right and just off the edge of the dock.
Take your Orange Salmon and throw it to the bear through the window to the left of the cabin's front door. He eats and leaves.
Leave the Cabin and go back the way you came (two clicks). You’re now at the chasm with the broken bridge you saw earlier. Click on the rope on the bridge and she makes a comment about the knot. Click the HATCHET on the knot and she chops it off. Now she has a “plate” with a rope wrapped around it. Click this onto the long fallen log above. Scene of her swinging across. She calls the Youki and he jumps across.
The Youki takes off and leaves Kate and in the next scene the Youki is chasing an owl flying around. Click the right edge of the screen (no glowing indictor) and proceed up the hill until you find the Youki barking at something up above the cliff.
There are the two Bourgoff Brothers up there and they're hurling rocks down on Kate. An airplane, obviously in trouble, suddenly roars over their heads and crashes somewhere behind them.
When it settles down click on the cliff face and she comments she can’t reach the first foot hold. Click the Hatchet on the cliff face and the scene will shift to a view of Kate standing ready to climb the cliff.
PUZZLE…….HOW TO CLIMB THE CLIFF
NOTE:
To climb up, click above her head.
To go to the right, click to the right of her shoulder height
To go left, click to the left of her shoulder height.
This is how to climb the cliff:
Click on the hatchet for her first move. She grabs the handle and makes the first move to begin the climb. When she stops you click in the following sequence, using the proper cursor.
UP 2; RIGHT 2; UP 4; LEFT 4; UP 2; RIGHT 2; UP 2; RIGHT 2; UP 4; and this will put her over the cliff edge.
You get a cutscene of the Cabaret and hear Nick Cantin, apparently now in Romansbourg, talking to her boss.
The next scene shows Kate is on top of the cliff.
Go downscreen, leftscreen, continue left until you see the pilot hanging from a tree. Click on him and you’ll find he is asleep and snoring and can’t hear anything because his headset is on his ears. Looks like you’ll have to find a way to talk or signal him through his headset to wake him up.
HOW TO LEARN THE RADIO FREQUENCY TO WAKEN BORIS
Go to the cockpit and turn on the round switch on the top left of the panel (under the “B” in Boris.
There will be two lights lit to the right of this switch (next to an “A” and a “B” switch). Turn off the “B” switch.
The vertical panel on the right side of this big panel has, at the top, a four section digital area. Below that is a speaker and below that are a series of switches. You’ll be concerned with only the yellow, red, and green switches after you
turn on the toggle switch below the red switch.
Put the yellow and red switches in the up position and the green down.
In the digital area above are the numbers “03”. Note these.
Now, go up top and turn off the “A” switch and turn on the “B” switch.
Go back and put the yellow switch down, the red and green switches up.
On the digital panel above will appear the numbers “28”.
So you now have “0328”, the frequency needed to talk to Boris.
Leave that area and just before getting to the cliff click on the cursor on the bottom of the screen. Go to the Microwave Tower and shed.
In the shed is a radio and a radar screen. Each has it’s own red On/Off switch. Turn both on.
Using the button on the top radio set them to 0308 and click the red microphone button. Kate calls Boris and wakes him up. Go back to the wreckage and find Boris working on the cockpit of the airplane. Remember Boris…….the Astronaut from the first SYBERIA?
After telling Boris about the situation with Hans and the train and the Bourgoff Brothers, Boris tells her she can use the Ejection Seat from the plane to take her to the train.
Talk to Boris again to learn how to use the Ejector Seat. She has to enter the exact coordinates of the train into the panel of the ejector seat.
Go back to the Microwave Tower and climb it and set the pointer on “B”. Go back down and find the radar blips and beeps on coordinates ”80/20” of the bottom left area of the radar screen.
SETTING TRAIN COORDINATES IN EJECTOR SEAT OF THE PLANE
Go back to the cockpit of the airplane and you find the vertical panel on the left side of the main panel is now open. Input 8020 to it and hit the large button below and ……….off you go in the ejection seat to parachute down to the train!!
At the train you can go to the train engine or to the cars. Start for the engine and the cell phone rings. Colonel Emiliov is calling to say a man is looking for Kate. He insinuates he will slow him down in finding her.
If you look carefully you can see an arm and a hand sticking out of the snow. Looks like it belongs to Oscar.
Go over and pull on it and Oscar pops out of the snow. A conversation with him shows he is too frozen to be of any help and needs help himself. Go to the car where the Mammoth Doll and such were previously stored and you see a panel on the floor. Click on it for a comment. In the bedroom you find plans for the train on the floor and pick them up. Continue into the shop car and find an Oil Dispenser on the floor (just left of Kate’s knee).
Go back to Oscar and give him a “lube job” with the Oil Dispenser.
He heads for the Engine Controls tells Kate to go to the Passenger Car.
As she steps into the train you get an overhead view of the train throwing sparks from the wheels as it attempts to pull the load away from the bridge.
When you reach the panel it doesn’t open so call Oscar on the cell phone and he says he can’t hear you very well and wants you to come talk to him. So Kate goes to talk to Oscar at the Engine Controls.
He says the Passenger Car is stuck and has to be disconnected from the Engine.
He tells her to find the panel where the coupling is and he will open it for her and she must work the disconnect. Go back to the panel in the floor.
The panel opens and you click on the first, third and fifth “button” on the right and the locking bars disappear.
Cut scene…….the rear of the train is about to fall away and the engine takes off with Oscar, Kate, and the Youki.
Next thing is Cantin talking to Marson about the bridge has collapsed and it’s going to take some time to find Kate. “John” tells Marson that Kate isn’t the same as she was when she left and does he really want to find her?
THE TRAIN HAS STOPPED
Go to the front of the train and then upscreen. This will take you to Igor, roaming around in the cold and afraid of the the spirits the Shaman has summoned. Talk to him and return to the train.
Another telephone call comes in…….from Oscar. He’s staying with the train, naturally!
Click on the “Totem” on the other side of Kate and you find something needs to go into it’s mouth.
Click on the back of the snowmobile and you get a close up and can take a Gauze Blanket from the bag on the rear.
Put the Gauze Blanket in the mouth of the Totem. This prevents the wind from blowing through here and making that howling sound.
Go back and talk to Igor and convince him the Spirits have stopped howling and he leaves. Next scene he is hopping on the Snowmobile and roaring away.
In the snow nearby are a Pair of Attachments for shoes for walking on ice. Click on them and Kate puts them on and goes to the tall statue with the Mammoth tusks. It looks like a frozen lake surrounded with Mammoth tusks.
Ivan suddenly appears and threatens Kate with a large Mammoth tusk. Do some talking to him and try to approach the tusks near Kate (cursor indicator) to get a tusk to protect her. He won’t allow it.
When the conversation will take you nowhere it’s time to call Oscar on the cell phone. He won’t come but will try to think of something……….right!! J
Oscar blows the train whistle and distracts IVAN.
Go to the bones in the cart and, in close up, take the Knife. Still in close up, use the Knife on the rope at the front of the sled holding the bones. The sled slides down the ice toward Ivan but he says that’s not enough to stop him. As he starts to approach her the ice under her cracks and she falls through.
Another cut scene of Marson talking by telephone to Kate’s Mother, who wants to know why he sent her to such a place and that she holds him responsible for whatever happens to Kate.
Now a cut scene of a White Owl with yellow eyes flying through darkness.
Next scene Kate wakes up under a blanket in a bed belonging to……..(?)
Kate is up and dressed and ready to go. Going outside, she meets the Chief of the Youkols and has a conversation. He says Hans is with the Spirit Woman and to listen to the drums. He also says the Youkols are already up there to help with the train. After that conversation turn around and pick up an Antler from the bucket behind her.
NOTE: I’m going to leave out details of navigating the Youkol Village and leave it for you to find your way around. I will tell you what to find for inventory, and, generally, where to find it and what to locate for interaction later.
WHAT AND WHERE TO FIND INVENTORY ITEMS
Near the drums is a bird, a Harfang, on a perch.
In a cave is, to the right, is another perch for the Harfang.
In the same cave, to the left, is another perch for the Harfang.
At the far end of this area are a series of Lemming Tunnels.
Across from the man stirring a pot you will pick up a Leather Strap, which will unite in inventory with the Antler and become a Slingshot.
A little farther along, beside the water, is a fishing rig with a bone hook on the line and a handle to wind it in. Winding it now will do nothing but there is an Empty Flask hanging there to be taken and, If you want, you can attach the Empty Flask to the bone hook on the end of the line and lower it into the water to fill it. This will save you from having to do it later in the game.
To the left (still in close-up), under the pot to it’s left and on the ground is a Cork Bung to be taken.
At the gate to the fence surrounding the Youki where you will pick up a Fishbone.
Up above the tracks is a platform with a mechanism with two handles on the floor. The left one is stuck and the right one makes the massive axle turn. Well, we know what that must be for but how do we get it attached? J
Talk to all the Youkols you find, just in case it will help trip something in the game later, even though they don’t seem to speak English.
Head for the train and be sure and talk to the two Youkols at the end of the tunnel, just before going out to the train. They’re apparently afraid of Oscar.
Did you notice the rope on the tracks leading to the train?
Talk to Oscar. The Youkols were going to tie to the train but were frightened of Oscar. Hans is yet to be found.
Go to the front of the train and try to attach the rope (click on the end of the rope). Too heavy, she needs help.
Go back and talk to the Chief again and learn that Hans is with the Spirit Woman and then go to the drums.
Make an attempt to get past them. No can do……so, use the Slingshot on the ice hanging above and just to the left of the left flag above the entrance beyond the beating drums. This drops an icicle into the mechanism and stops the beating of the drums.
You find Hans with the Spirit Woman and he is hanging from ropes above a bed.
The Spirit Woman says Hans is in “Other world, dream world”. He’s making journey to country of ancesters. The “Spirit” is waiting for a sign. To get the Spirit near, call Spirit with MUSIC.
The Spirit Woman says to get Hans back you have to go to him in the LONG TUNNEL of DREAMS and talk to him. To go there you need the FRUIT of the SPIRIT DOOR. To get inside the Tunnel of Dreams you need an old Youkol RECIPE. One item is needed that is missing before it can be made……..the FRUIT of the SPIRIT DOOR, which is the small red fruit of the LAUGHING TREE.
Go to the wall on the right of the bed and get the Spirit Mask.
Go left screen to another room and click on the table. Click on the item on the table and she will tell you to take it. It is a Prayer Wheel.
Click on the "Dream Catcher" hanging on the wall to the right before going through the door to the outside.
In talking to the Spirit Woman you’ve learned:
Call spirit with music.
To get inside dreams you need old "Youkol recipe”, requiring the
“FRUIT of the SPIRIT DOOR”………..Small red fruit of the Laughing Tree.
Laughing Tree gone “Country of the Ancestors".
From the Spirit Woman go to the train to see Oscar.
During the conversation with Oscar, Kate gives him the Spirit Mask to wear so he no longer frightens the Youkols. He’s not happy with it but agrees and calls out to the Youkols to see he’s a nice guy after all.
Kate goes to the two Youkols at the end of the tunnel and talks to them and they come and hook up the rope to the train.
Have Kate go to the front of the train and click on the hook for a close up. Another click on the hook and she works the ratchet until the rope is taunt.
Go to the "T" shaped area of the platform over the tracks and go to the two levers. Click for a close up and click on the right hand lever to actuate the mechanism and pull the train into the tunnel and to the end of the tracks.
Leave here by the left stairs and go down the ladder and find the Chief right where he’s been all along.
Talk to him and learn the train ride is over but not the voyage.
Now……If you didn't fill the Empty Flask when you found it, go back to where you found the Empty Flask and the Cork Bung (at the fishing mechanism by the water) and fill it by connecting the Empty Flask to the bone hook raised from the water by the handle. Click on the lever to drop the flask into the water and click on it again to bring it up again, full of water.
Take the flask back into inventory.
Go to the cave; left side.
GETTING THE "DREAM FRUIT BERRIES
Go to the left in the cave and all the way to the back to the Lemming Tunnels.
Put the Cork Bung into the first hole on the bottom right.
Go back to the perch and attach the Prayer Wheel and click on it to call the Harfang.
After he comes, click on it again so he frightens the Lemming.
Go to the tunnels and see the Lemming enters the tunnel hole second from the right (being blocked from the first on the right by the Cork).
Take the cork from the hole it is in and put it in the second hole from the left.
The Lemming jumps on it and to the last place on the left.
Now put the Cork Bung into the first hole on the left. This prevents him from backing up.
Put the Fishbone into the top center hold and it drops into place.
Use the Flask Full of Water on the top left hole and this floats the Lemming to the top where he climbs the Fishbone and drops through the right hand tunnel………spewing out three Dream Fruit Berries which you then pick up into inventory!
Wasn’t THAT fun?? :D
Go to the Spirit Woman and Hans.
Talk to the Spirit Woman and give her the Berries and you are transported to a familiar cave.
DREAM SEQUENCE
You find yourself in a surreal world of Syberia One and in the cave where you found the Wooly Mammoth Toy then. Soooo, two clicks in and you find a Wooly Mammoth Toy that you take into inventory.
Go back the way you came and follow the familiar path from SYBERIA ONE back past the dry creek, past the wrecked boat, past the bridge and the woods until you come to the flat rest area.
Look to the right and you see a little girl…….Anna.
A long conversation with Anna and you leave to go to the Voralsberg Home.
You enter and find you are in the Foyer.
Look at the Clock next to the stairs.
Go to the side room and talk to Mr. Voralsberg. He won’t let you see Hans. He’s being punished, sent to the attic. You’ll learn that he will be going to the office and Hans cannot go with him; he must stay in the attic.
Go up the stairs to find the door at the top is locked.
Leave and go talk to Anna again.
Back to see Anna and she will tell you that he will go to the office at precisely seven fifteen (7:15 o’clock).
Go back to the Voralberg Home and into the foyer to get the clock to chime so Mr. Voralsberg will leave to go to the factory.
This is how to get the clock to chime 7:15 o’clock:
Get a close up on the upper part (the face) of the clock.
The clock reads 2:45
Back out of the close up and click on the lower part of the clock for a close up.
Under the face of the clock is a set of Roman Numerals reading 3:00
The switch to the left of this adjusts these numerals on the quarter and three-quarter hour.
The switch to the right of this adjusts the clock on the hour and the half hour.
Using these two switches set this dial to 2:45
Click on the little man to the right of the bell and he moves around and raises his hammer in preparation to striking the bell between.
Click on the little man to the left of the bell and he moves around and raises his hammer in preparation to striking the bell.
Click on the pendulum to set it in motion.
Now set the Roman Numerals to 7:15
Click on the right hand weight and then on the bell.
The clock will chime, Mr. Voralsberg will place something on the table across the room and leave, waving to Kate as he does.
Now go into the room he just left and pick up the Key on the small table across the room.
Go up the stairs to the locked door.
Use the Key on the locked door and enter to find Hans (as a little boy) working at his workbench. Click the Wooly Mammoth Doll on him and he will talk to you. He will tell you to “open Oscars heart”. During the conversation he changes from little boy to man a couple of times and then disappears.
Click on the table top and an object he was working on opens up with a blinding light.
Kate begins to wake up in the chair at the foot of the bed where Hans is suspended by ropes.
Talk to the Spirit Woman. You “will find help in your dreams”.
On your way out be sure and click a few times on the item hanging to the right of the exit door. You will hear Hans instructions again.
Go through the door and you get a conversation between Cantin and Kate’s Boss where Cantin says he’s in a cabin where she stopped to fish for food. Then he finds himself trapped by a bear just as communications begin to go bad.
Go to the train and talk to Oscar.
Kate tells Oscar she is supposed to open his heart.
Oscar tells her it was nice to meet her and has been a beautiful voyage and it’s time to say “farewell”. He tells her goodbye and that he is only an automaton and must serve his purpose.
Oscar leaves the train ahead of Kate, on his way to the Spirit Woman and Hans.
Kate leaves the train and gets a phone call from Marson. He wants her to get with Cantin and come back. She tells him he’s wasting his time.
Kate finds Oscar on the bed with Hans hanging above him.
Talk to Oscar and Hans.
Click a close up on Oscar and you will see his "HEART". First click on the 3 and 7 o’clock keys (to represent 7:15), then make a cross by clicking on the 12 o’clock, 3 o’clock, 6 o’clock, and 9 o’clock positions and a Key will pop up in the center of the heart. Click on the Key (be sure you have the key in inventory after the following scene) and Oscar’s body will start opening up and Hans will be lowered and closed into Oscars Automaton Frame.
Hans is back, albeit in Oscar’s “body”.
Talk to Hans and the Spirit Woman.
Find the Chief and have a short talk with him and head for the train.
MELTING THE ICE FROM THE SHIP
Click on and get a close up of the Control Panel. There are three white gauges, none showing any power (needles are to the left).
Follow the steps below to accomplish the next necessary step:
Use the Voralsberg KEY from Oscar’s heart on the top middle part of the panel (a hard to see area).
Click the bottom left switch by the bottom white gauge and a cutscene shows something project from the front of the train.
Click the lever on the top right and the the large lever on the top left of the panel and get a cut scene of a beaked mechanism coming out of the top of the train.
Click on the bottom right switch and it will show that mechanism retrieving coal from the coal car. The right top gauge now shows power.
Click the top right lever again and a mechanism comes out the bottom of the train.
Click the left switch on the bottom right of the panel and the mechanism sticking out of the bottom of the train operates..
There is now power on the other top gauge.
Click the small wheel between the top and bottom gauges and get a cut scene of steam coming out of the bottom of the train.
Turn the large wheel on the bottom left and get a cut scene of the gauges operating, steam coming out of the side of the train and the train shaking like it’s going to fall apart.
The mechanism in front of the train is shown coming out more and then steam erupts from it to melt the ice surrounding the ship.
When Kate leaves the train and gets to the ground you get a cutscene of Hans walking onto the ship.
Continue till you reach the ship and about to talk to the Chief once more. He’s at the boarding ramp to the ship.
Talk to the Chief and he will tell you to take the Youki with you and for you and the Youki to return with the ship.
He says he will open the gates to the sea for you.
You can board the ship and talk to Hans; he’s standing just to the right of the ship’s mast (almost invisible). He, too, will tell you to take the Youki.
Go to the Youki pen and get a close up and then click on the lower part of the gate post on the right. The gate will open and the Youki and his brethern will run out.
Go back to the ship and you’ll find the Youki waiting for you on the boarding ramp.
Board the ship and get a cutscene of the gates opening and the ship is on it’s way.
MAROONED ON THE ICE
During the trip there will be another conversation heard between Marson and Cantin in which he says she has gone into another world and he is quitting.
The ship crashes to a halt. Talk to Hans and he says the ship has run aground on an ice shelf.
Kate tells Hans she is going ashore to see what’s going on.
Go down the ladder to the hole and click on the Youki. Seems he has gone into hibernaton and is fast asleep, having slept through the whole voyage.
Following the anchor rope, you find a bunch of skeletons onshore. They look like whale skeletons. Pick up the Narwhal Tusk from the snow.
Continue on and find some noisy Penguins…………..
……………And the ships anchor.
Use the Narwhal Tusk to dig out the anchor.
Go back to the ship……but just as you get near you see the elevator go up and Ivan is on it and now he is on the ship.
Go back on the ice shelf to where the group of penguin are to the right of the screen. They won’t let you go that way so go back to the left and find a penguin nest.
Finally! A use for the Russian Doll. Put the Russian Doll into the Penguin Nest and Kate calls to the Penguins. They all come to see the new egg in the nest and Kate can now go to the little peninsula of ice where they had been standing.
Clicking on the ship in the distance you see a door flopping open on the ship at the water level and small pieces of ice floating towards the ship.
When she steps onto that area of the ice the ice cracks.
Click the Narwhal Tusk on the crack in the ice and she chops it free to float her back to the ship.
She’s back in the hole of the ship.
Once inside she sees and hears Ivan walking around on the deck above.
Take a good look around and pay particular interest in the drawings on both side of the Whale Backbone leaning against the wall. There are drawings on both sides with markings underneath each. Pay particular attention to the drawing of the Mammoth and the markings on the drawing (to the right side of backbone).
Go back across the room and move the barrel blocking the door.
Click on the top of the mast pole where it goes through the deck. You find a knot in the rope but cannot do anything with it at this point.
Go through the door and talk to Hans. The Youki sleeps on.
Click on Hans seven or eight times for a series of short conversations with him and then go up the ladder to the area where Ivan had hid earlier.
Under the window to the right is an Ivory Hook which you place into inventory. Go back down the ladder and through the door to the barrel beside the mast.
Click on the top of the mast and she climbs aboard the barrel. Click the Ivory Hook on the mast just below where it goes through the hole in the deck.
Now click on the knot and it jumps to the hook.
Off the ladder and pull the lever to the left of the barrel.
The sail is taken up the mast and……….knocks Ivan off the boat and into the midst of the Penguins. The ship breaks loose, Ivan picks up an egg to throw at the boat and the Penguins become very upset at this action and begin to attack him.
The ship sails on through a rainstorm on the open seas. There is a view over the head of a grey haired old man (a Sentry, of sorts) as the ship sails into a new port.
Next scene here is Hans walking off the ship and down a path while Kate watches.
Kate is standing on the deck of the ship, about to follow Hans.
You can get the glowing cursor to go right or left. Let’s go right.
This takes us to a ladder to a higher level where we find that grey haired old man who was watching us as we sailed into port.
Click on him and he falls over backward, losing an arm and his head in the process. He’s apparently been dead a long time but watching for the ship, nonetheless.
Click on him to retrieve a Youkol Medallion from the body.
Go back down the ladder and a click or two past the ship (to the left) until you’re stopped. Ahead, to Kate’s left, is a stairway down. Go down that and you’ll see a large trunk at the end of the walkway.
Click on the trunk to get a close up and retrieve three Stone Plates from it.
Then click the glowing “up cursor” and this takes you up the path at the far end of the walk way, beyond the stairs you took to get to the trunk from the ship.
You are on the path to the gates to the land of the Mammoths. There’s something on the ground to Kate’s right. Pick up the "Syberia Flower ". To it's left is also another Stone Plate to retrieve.
Continue ahead until you reach the gates.
Click on and talk 3 times to Hans. It’s obvious we need power to operate the gate. Wonder why we brought the Youki along? Of course, Youki power, but he’s asleep. How are we going to wake him? What was that plant that will wake a hibernating Youki? Of course…..Blue Grass! Otherwise known as "Syberian Flower ".
Didn’t we find some at the beginning of this path to this gate?
Go back to the ship and into the hole to find the Youki, still peacefully asleep.
Now to wake the Youki. Click the Blue Grass on the Youki. He awakens and takes off up the ladder to the deck. Follow him up and then go back to the path to Hans. The Youki will follow.
Take Kate to the gate and you see the Youki jump into the cage and power the gate up. Hans walks through the gate and down a path to and up a stairway.
Kate is left standing outside the gate.
Take Kate through the gate and follow the same path you saw Hans walking.
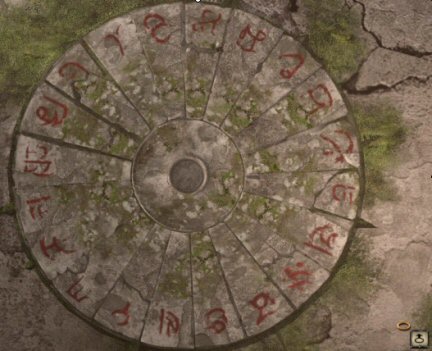
SOLVING THE GLYPH PUZZLE
Use the following picture of the Youkol Medallion to locate which Stone Plate goes where.
Click for a close up on the ground and the mechanism here.
There are five missing Stone Plates. We have four and pick up one here on the ground. Now we have to put these five Stone Plates into the correct place on the ground copy of the Youkol Medallion we carry in inventory.
When the five Stone Plates have been put into their proper place you can turn the wheel on the left end of the upper shaft and sand will pour into the center of the glyphs below. This brings up an Ivory Key which you take into inventory.
CALLING THE MAMMOTHS
There are three areas (and therefore three puzzles) to this puzzle.
Click on the left side of the puzzle near the wheel. This reveals a panel with a keyhole at the bottom.
Put the Ivory Key into this key hole and twenty symbols with matching holes appear.
Take the Ivory Key out and place it in hole number eighteen (bottom row, two holes from left).
Leave the Ivory Key in place and back out and click on the wheel on the right of this panel.
Kate will rotate the upper horn until you hear the sound of the wind blowing through the horn.
Click left of the panel with the Ivory Key and you will find two levels of three valves. You can set them open, half closed, or fully closed by clicking on the handles (sliders) of each Valve.
SETTING THE VALVES TO CALL THE MAMMOTHS
Top row: OPEN ½ OPEN OPEN
Bottom row: ½ OPEN CLOSED OPEN
Click on either the top or bottom far right handle and watch the
closing sequences………with Kate. :-D
My first try at a Walkthrough so if anyone has any comments I'd like to hear them.
Write to: BillyBob. Please place Syberia WT on subject line.