TREASURE ISLAND
by Radon Labs
Walkthrough by MaGtRo December 2009
Gameplay: There is no manual included in
the game.
The main menu has start game, load & save, options,
credits and quit game.
Options has video quality and resolution selections.
Music, sounds and speech volume selections are also found.
The hotspots selection is also seen.
The in game menu is accessed by the ESC key. It has
continue, load & save, options and main menu selections.
Left click is the action key. Right click is the
examine key. Double click makes the main character run.
Space bar shows the hotspots as green lights on
items.
The inventory bar is at bottom of the screen.
The journal is seen when the cursor is moved to
bottom right of the screen.
To take an item; left click the item and see a close
up. Move the cursor outside the close up the item and see a back arrow. Click
the back arrow to place the item in inventory.
At start of the game, you are given a choice whether
you want the hotspots activated. Pressing the space bar shows green spots on
active items or areas.
Chapter I: The old sailor's secret
Barren Bay
Cemetery: Jim Hawkins is
visiting the grave of his parents. Mary Hawkins recently died.
Talk to Dr. Livesey. Learn that the only guest at
Benbow Inn, the inn left to him by his parents is a captain that arrived 3
nights ago. The captain was pulling an old chest. He only paid for one day.
Dr. Livesey gives Jim his mother's iron amulet
and leaves.
Go right and look at the statue of Admiral Benbow.
Take the sword held by the statue.
Go right and exit the cemetery.
Go right and be at a crossroad. Check the signpost
at right: Village-Barren Bay to the left, Bristol at right and cemetery at
bottom.
Admiral Benbow Inn: Enter the
yard of the Inn at the crossroad.
Get information from Bill Bones:
Check the sign, the well, coal chute right of well and the building itself.
Enter the inn. Hear the Bill Bones say that he's
safe; he won't find me here.
Take the empty tankard-pitcher in front of
Bill Bones.
Look at the low hanging chandelier. Dr. Livesey hits
his head on it.
Enter behind the bar and use the pitcher-tankard on
rum barrel at end of the bar area.
Talk to Bill Bones. Learn that the peg leg is
looking for him. Bones' hiding here. Flint is his captain.
He wants more rum. Take the pitcher-tankard
again.
Give Bill Bones something to drink:
Use the tankard-pitcher on the rum barrel and see that it is empty.
Exit the inn. Check the well. See that it needs a
crank. Use the sword on the handle of the well.
Turn the crank-sword. Use the pitcher-tankard on the
barrel full of water.
Go back inside and give the pitcher of water to Bill
Bones.
He now wants brandy.
Cellar: Go down the cellar
behind the bar. Take the broom by the hatch of the coal chute.
Check the ceiling, barrels and rat trap. Take the
brandy on top of the box at left corner.
Listen to the talk above. A man talks to Bill Bones.
The ship Bill Bones came from is the Walrus. He stole a map. The other man
gave Bill a present from the whole crew and leaves.
Go upstairs and see Antoinette beside a fallen Bill
Bones.
Talk to Antoinette. Take the paper with black
spot. At the back, it states 4 hours. Learn that black spot means a curse
from the whole crew and they will follow through with the curse.
Bill Bones had a heart attack and tells them that
his one and only is a treasure map.
Find the treasure map: Look
close at Bill Bones. Right click on Bill Bones.
Left click on his neck or by his pocket and take the
key on his neck.
See a glass shard on the floor close to Bill.
Climb upstairs and enter the third room.
Open the chest with the key. Look at the contents of
the chest.
Look at the chest lid and see a seam.
Go downstairs and pick up the shard from the
floor.
Go back up to Bill Bones' room.
Use the shard on the seam of the chest lid and get a
treasure map.
Escape: Hear a sound from
downstairs.
Exit the room and see Pew, a blind old man enters the
inn. He wants Bill.
Jim tells Antoinette to sneak to the cellar. Follow
Antoinette and go to the cellar.
After their discussion and Antoinette's exit through
the coal chute, use the broom on the ceiling.
This is heard by the blind man and hits the
chandelier. He is knocked unconscious.
Go up the stairs and exit the inn. Squire Trelawney,
who is Antoinette's father and Dr. Livesey are there already. They arrested the
pirates.
Tell the men about the map. They studied the map
and decided to treasure hunt. They will go to Bristol to get a ship and crew.
Chapter II: Rough customs
Bristol
Alley: Squire Trelawney
gives Jim a letter to be delivered to Silver.
Look for Long John Silver:
Go to bottom screen and check the tavern sign on the
left: Geoffrey Trough.
Continue down and check the tavern sign on right:
Laughing Beer Barrel.
Spy Glass tavern: Enter Tavern
Alley at right.
See steps going down. Look at the sign holder
hanging above. There is no sign but a spy glass.
Go down the steps and enter the Spy Glass.
Talk to the woman guest and ask about Silver. Silver
is the innkeeper.
Talk to Israel Hands standing by the bar. He's
nasty.
Long John Silver has a peg leg. Hmm... Jim gives him
the letter.
He has 10 men already. He wants Jim to get 2 more
able bodied sailors.
Look for 2 more sailors:
Allesandro Della Rocca: Go
to bottom screen. Talk to Addo, the man by the barrel. Hokay.
Go up to the gambling table and see that the
Spaniard is constantly winning the dice game.
Look at Allesandro and Jim wonders if he's cheating.
Talk to Allesandro after watching them for a bit. Maybe he's playing with
loaded dice. Check the dice.
George Mary: Go left
of the bar and talk to the man-guest sitting by the table.
He mentions that George is looking for his
talisman and is at the quay.
Take the matchcord holder leaning on a chest
left of this man's table.
Look around town: Exit the
tavern.
Courtesan's die: See a
pushy sailor talking to a blonde courtesan.
Go down the alley and talk to the other courtesans.
Ask for the die.
They will give the die if Jim can get rid of the
pushy sailor hounding Celine.
Wanted posters:
Continue down harbour alley towards the quay.
Walk until the bulletin board. Read the wanted
poster.
Captain Flint:
Name: William Jonathan Flint.
Crime: Brutal raids on the ships
of English and Spanish crown.
Characteristics: Pirate leader and
Captain of the Walrus. Blood red pirate flag.
Last seen: Jamaican
waters.
Reward: 600 gold pieces.
Harbour quay:
Continue to the harbour-quay.
Go right and see your group by the ship
Hispaniola. Talk to them. Captain Smollett is the captain of the Hispaniola.
Continue to the left. Read the wanted poster right
of the townsman sitting beside a boat, axe and tar bucket with a hook.
The Phantom:
Name: Unknown.
Crime: Theft and destruction of
private property.
Characteristics: A tattoo on the lower
left arm of a coat of arms surrounded by a mermaid.
Last seen: Bristol Bakery.
Continue to the left and read the wanted poster
tacked over another poster left of the door and right of the fishmonger.
Cutlass Bill:
Name: William J. Butcher
Crime: Raids on Bristol, Montego
Bay and Nassau.
Characteristics: Long scar on right
cheek, eye patch.
Last seen: Tortuga.
Reward: 100 gold pieces.
George Mary: Talk to man at
right at the corner standing by the Sea Breeze sign.
Learn about the rumor concerning the treasure hunt
of the Hispaniola.
Mary won't go until he finds his talisman. He's
superstitious. The talisman is a fish with shiny green scales.
Take the iron ring hanging under the cage
with a skeleton.
Go down the stairs to the water's edge. Look at the
gleaming fish in the water. Ah...
Go back up and continue up the alley right of George
Mary.
Go up the stairs left of the guards and read the
wanted posters.
Crow's nest Bob:
Name: Robert O'Mally.
Crime: Cheating at illegal
gambling.
Characteristics: Notorious
Last seen: Dancing
Landlord Inn.
Reward: 50 gold pieces
Get the children's die: Enter the
alley.
Pirate test: Talk to Sean,
Davy and Liz. Learn that they will only talk to a real pirate. They have a
die.
Ask for the die and be given a pirate test.
Answer the pirate test based on the Wanted posters
seen all over the town. Check the notes above.
After passing the test, they want a memento.
Memento: Exit and then go
right - down the alley back to the quay.
Look close at the bucket beside the upturned boat. Take the hook
hanging on side of the tar bucket.
It overturns and pours tar on the cat. The now black
cat passes George Mary and he runs scared up the alley.
Go back to the kids and give them the hook. They
give the die.
Get the Courtesan's die:
Guards: Talk to the guards
and learn about the thief. The tattoo has the motto: Perir en mer.
Now that you talked to the guards about the Phantom,
go back to Tavern Alley at left.
Get rid of the pushy sailor: Talk
to the pushy sailor standing by Celine the courtesan.
After taunting the pushy sailor, see the tattoo on
his arm.
Go back to the guards at Harbour road and tell them
about the man with the tattoo.
Go back and talk to the 3 courtesans. Get the die.
Recruit Allesandro Della Rocca:
Go back to the Spy Glass Tavern and the gambling
table.
Look close at the gambling table.
In inventory, combine the 2 die together to get
dice.
Use the dice on Allesandro. Jim crawls under the
table and exchange the dice.
Watch what happens. Allesandro runs out of the tavern.
Follow him outside and down Harbour Alley.
See and talk to Allesandro by the cart and hay. One
down and one more to go.
Recruit George Mary:
Get a dip net: Go back to
the next alley at left where the guards stood before.
See a mirror on a net hanging by the door. George
Mary ran here after the black cat incident.
Untie the knot of the rope holding the mirror.
George runs off again. Take the net.
In inventory combine the ring from the cage with the
net. Then combine the iron ring with net with the matchcord holder from the
Spy Glass Inn to get a dip net.
Catch a fish: Go down the quay. Go
down the stairs.
Use the dip net on the gleaming fish in the water to
get gleaming fish talisman.
Look close at the talisman and see a drill on one
end of the fish.
Spy Glass Tavern: Give the
talisman to George Mary standing by Silver.
Talk to Silver now that you have recruited the last
2 sailors.
Chapter III: A storm is gathering
Dr. Livesey, Squire Trelawney and Jim talk. The
squire is naive.
Passenger area:
Go down the stairs from the upper deck. Go across to
the left and enter the passenger area - the door below Sailor Tom.
Jim's cabin: See that Jim's
cabin is ransacked. The map is gone.
Take the string from the floor.
Joyce's cabin: Go across
the hall and enter the other cabin. See that Joyce, Squire Trelawney's man is
seasick.
Look the medicine bottle on the side table. Exit the
room.
Talk to Israel Hands. He's been checking Jim's
cabin.
Find a cure for Joyce:
Upper
deck: Go outside and cross to
the right. Climb the stairs and talk to Doctor Livesey about Joyce. There is
no additional help here.
Galley: Go down the stairs
and enter the galley at left.
Talk to Silver completely. He will fix a pick me
soup for Joyce. But he needs the ship store's list, fresh meat, greens and
rum.
Get the items:
At the galley, go to bottom screen and pick up the
food scraps right of the boiling pot.
fo'c'sle (forecastle): Go
down to the fo'c'sle right of the exit.
Check the stores hatch on the floor and see that it
is locked.
Talk to Israel Hands.
Take the axe from the center post; left of
the stores hatch.
Talk to Allessandro by the wall and George who is under the
ventilation grill.
Take the pitcher on the floor in front of
Allesandro and George.
Greens: Look at the fresh
water barrel behind George. Take the water dipper hanging on the
barrel.
Use the water dipper on the water barrel. Get
dipper full of algae.
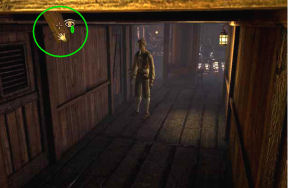
Continue to the left and be at a hallway. See a
stick with a nail hanging from the ceiling. Take the stick.
Use the ladder to climb up to the passenger area.
Climb the rigging: Exit to the
deck.
Take the bucket in front of Antoinette.
Talk to Antoinette about her outfit. She mentions
that she climbed the rigging. Agree to climb the rigging.
Go to the right by the upper deck where the Squire
is located.
Click on the rigging-mast at upper deck. Continue on
up.
Automatically get a cloth scrap. Look at the
horizon and see a storm coming.
Climb down and talk to Antoinette about your climb.
Enter Captain's cabin:
Continue to the left and see if you can enter the
Captain Smollett's cabin. Nah!
Talk to Captain Smollett about 'What he is doing'. Smollett comments about Sailor Dick.
Talk to Addo on the wheel. Go down and talk to
Sailor Tom.
Talk to Sailor Dick and find out what is he doing.
Easy job? What does he think of Smollett?
He stops talking when maneuvers are to be given. Jim
runs to the center and hides behind the crates.
When the order is: Hard a port; say
easy to starboard.
When the order is: Close-haul the weather sheet;
say Douse the lee sheet!
When the order is: Hoist the fores'l!; say
Hoist the tops'l!
Captain Smollett loses his temper and scolds Dick.
Search the Captain Cabin:
Enter Smollett's cabin.
Open the safe: Look at safe.
It needs a combination.
Check all the books in the room. Smollett has a
fascination for Port Royal.
Check the nautical chart on the table. See that
Port Royal's coordinates are 017/076.
Go back to the safe and enter 017 on top and 076
at bottom.
Turn the handle. See the stores list.
Copy the stores list: Go
to the left side of room and take roll of paper beside the globe.
Look close at nautical chart again. Take the
quill at left.
Then dip the quill on the inkwell at right.
In inventory combine the quill with ink
with roll of paper to get writing kit.
Go back to opened safe and use the writing kit on
stores list.
Exit the cabin.
Stores: Go back to the
galley. Give the stores list to Silver.
Silver gives the keys to the stores. Go to the fo'c'sle.
Use the key on the locked stores hatch. Go down to
stores.
Fresh meat: Go to the left
until a rat comes out.
Click on rat and Jim thinks it as a source of
fresh meat.
In inventory, combine string + stick + bucket +
food scraps = working rat trap.
Click the rat trap on rat to automatically get
rat.
Rum: Go the leftmost area
of stores and see rum barrels held by ropes.
Use the axe on the ropes holding the barrels
together.
Get the rum: Go up to the
fo'c'sle. Talk to George about his talisman.
Go to the still opened Smollett's cabin.
Look close at the nautical chart again.
Use the cloth scrap on the inkwell to get a black
spot. Curse for a superstitious person.
Go to the ventilation grate at the upper deck.
Look through the grate and see George.
Use the black spot on the ventilation grate. Go
back down and talk to George about the talisman.
George gives the talisman. Note that the
talisman has a drill for a nose.
Enter the storeroom. Go to the rum barrels at left
end.
Use the talisman on the rum barrel. Use the
pitcher on the rum barrel with hole to get pitcher of rum.
Joyce's soup: Go back to
Silver at the galley. Give him the rat, dipper with algae and pitcher of rum.
Exit and then come back and talk to Silver to get
soup.
Go to passenger area and give Joyce the soup. He
falls asleep. Jim wants cold water to revive Joyce.
Go to the fo'c'sle. Use the dipper on water barrel.
Jim falls in the barrel. Listen to the pirates and
their plan.
Storm is here!
Find the map:
Joyce: Go and talk to
Joyce. Earlier, Antoinette and Hands were quarrelling outside.
Antoinette: Exit the room and
talk to Antoinette. She runs out to the storm.
Save Antoinette:
Antoinette clings to edge of the ship.
Go to Antoinette:
Watch and wait for the waves at right to die down
before moving.
Go to the closest railing at right.
Watch and wait for the waves at right to die down
before moving.
Go to the boat at left.
Watch and wait for the waves at right to die down
before moving.
Go to the rail just above Black Dog, the pirate
waiting for Antoinette to fall off to the ocean.
Watch and wait for the waves at right to die down
before moving.
Move a bit higher and closer to stairs at railing.
Watch and wait for the waves at right to die down
before moving.
Climb the stairs. Automatically, Jim saves
Antoinette.
The plan: The group confers
in Smollett's cabin.
Chapter IV: Land ahoi
Treasure Island: See Silver,
George, Alessandro and Jim at the island.
An explosion occurs at the ship. Jim runs away.
Jim wants a way to signal the ship that he is fine.
Cemetery at Clearing:
Go right to the sunlight.
See 4 graves:
One eyed Joy - day 7;
Arthur Will Jones - day 4. It has 2 sabers tied to
the cross.
Four-knife 1 - say 2. It has hanging stickmen.
Trident Scott - day 6.
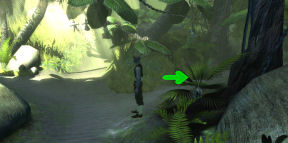
Go back to the path at left and continue to the
swamp.
Swamp:
Continue to the right. See a camp of sort. There's a
boat and a British flag.
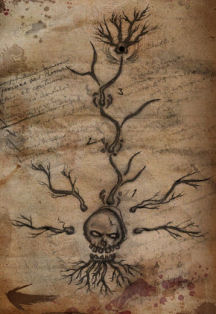
Take the flag. See a wall drawing behind it. Jim
copies it on his journal.
See something shiny on the dried fronds on the
ground. Pick it up.
Trap: It's a trap.
Move the cursor over the trap and see the hand
cursor find
a pouch. Take the pouch.
A bone was still holding the pouch. A sharp
shell is taken.
Check the pouch in inventory. Look close at it and
get a hammer.
Jim discarded the pouch but kept the leather
strap.
Use the leather strap on the root that's over the
hole.
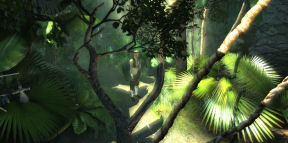
Jungle:
Go back to the cemetery clearing.
Go to the right side pass the 2 boulders and be at
the entrance to the jungle.
Enter jungle and see the path.
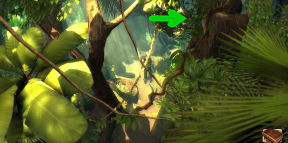
Go forward and see a man hiding behind the tree at
top right. Exit to jungle path.
Based on the graves seen at start of the jungle
path; use the stickmen hanging at start of each path as guidelines. (Thanks,
Mordack!)
Four Knife Roy - Day 2 -
Path with four stickman.
Arthur Will Jones the First
- Day 4 - Path with one stickman.
Trident Scott - Day 6 - Path
with three stickman.
One Eyed Joe - Day 7 - Path
with one stickman.
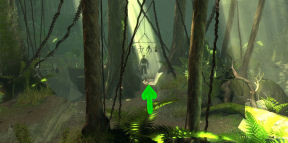
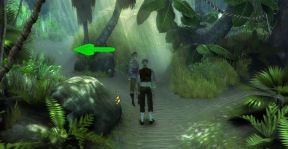
Go right to the crossroad. The path splits 3 ways.
Take the middle path with 4 hanging stickmen and sunlight. Exit to jungle
path.
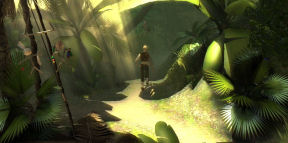
Go forward to the sunlight. Exit to jungle path.
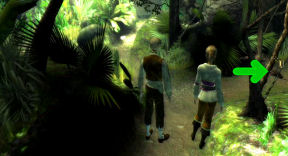
The path splits into 2. Take the right path with one
hanging stickman. Exit to jungle path.
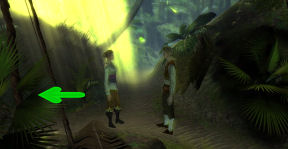
The path turns a sharp left in a dark area. Go left.
Jim saw something here. Exit to jungle path.
Move a bit forward and see that the path splits 3
ways. Take the middle path with 3 hanging stickmen. Exit to jungle path.
The path splits to 3 again but the right one is
hidden. Move a bit to the right to see the path. Take the right path with 1 hanging stickman. Exit to jungle path.
Continue to the end and see a fort.
Fort: Look around.
Some posts have fallen on the wall. See a hole
on the wall on the fence at left. It is a path to the jungle.
Blockhouse: Check the
blockhouse.
Entrance: See the door is
boarded.
Use the hammer on the board. The hammer handle
breaks.
In inventory combine the hammerhead and the bone
to make a provisional hammer.
Use the provisional hammer on the rest of the
boards.
Enter and look around.
Inside the house:
Check the cauldron and the stairs.
Pick up the piece of wood on the ground in
front of the cauldron.
In inventory combine the piece of wood and the
sharp shell to make a saw.
Cemetery: Exit the
blockhouse and the fort.
Be at the cemetery automatically. Use the saw on the rope holding
the sabers (crosspiece part). Take the sabers.
Stairs: Go back to the
fort via the jungle entrance. The going back and forth to the cemetery and
fort is now automatic.
Use the sabers on the stairs missing rungs. Climb up to the roof.
Roof: See the Hispaniola
out to sea. Use the British flag on the flagpole.
Reunion:
The captain, doctor and squire arrive. They said that Antoinette was captured by the
mutineers.
Watch the discussion.
Long John Silver came to parlay. He wants the map in
exchange for Antoinette.
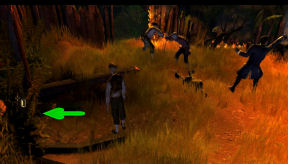
Chapter V: Hunter & Hunted
Jim wants to create a diversion so that he can
leave and try to rescue Antoinette.
Create diversion:
Go right of Dr. Livesey. Go under the ladder and
check Livesey's medical bag.
Take a paper bag and roll of bandages.
In inventory look close at the paper bag. Turn the
bag to see the other side.
The bag contains chemicals and procedure on
how to make flash bomb:
1. Thicken the chemicals to malleable dough:
Go to the right and take the flask of rum.
In inventory combine the chemicals with rum to
make chemical pulp.
2. In a vessel, roll the dough into small
balls: Go to the cauldron.
Use the chemical pulp on the cauldron to get
little balls.
3. Add gunpowder to balls: Get gunpowder
from the barrel at left.
Combine the little balls and gunpowder to get
gunpowder balls.
4. Fill the balls into shells:
Go to the table right of Dr. Livesey.
Take the coconut shells. In inventory
combine the gunpowder balls with coconut shells to get filled coconut
shells.
5. Firmly tie the shells together with rolls of
cloth: In inventory, combine the filled coconut balls with roll of
bandages to get coconut bombs.
Roof: Before you go up
the stairs, get some more gunpowder from the barrel at left.
Climb the stairs.
Take the small piece of wood with one end
burning from the thatched roof.
Light the cannon:
Place the gunpowder on the open end of the cannon.
Place the coconut bomb on the open end of the
cannon.
Use the small piece of wood with embers on one end
on the touch hole at the closed end of the cannon. Wow!
Leave roof. Outside the building, go left to the
wall that has posts on the ground. Exit through the hole on the wall.
Get back to the schooner:
Go right to the swamp.
Talk to the hiding crazy man. Meet the king of the
Island. He is Ben Gunn. He knows Silver.
Click on the boat. Let's trade. What
does he want... He wants cheese. Fetch him cheese.
Ride the boat.
Outside the schooner, hear Antoinette.
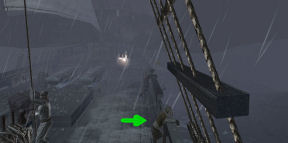
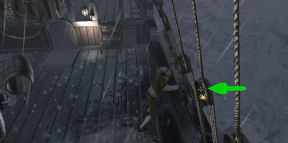
Go to the right side-bow of the schooner and climb
the anchor cable.
Free Antoinette:
Look around.
Hear something from the ventilation grate. Israel
Hands killed another man.
Take the rag from the ventilation grate.
See Mr. Joyce hanging on the mast.
Climb the stairs and enter Smollett's cabin. Jim
talks to Antoinette.
Livesey's cabin: Exit and
then go down to enter the passenger's cabin.
Enter Livesey's cabin at bottom right. Look
around.
Take the walking stick atop the books on
the floor.
Take cheese from the table at left.
Take the powder from the bunk bed.
Exit the passenger area.
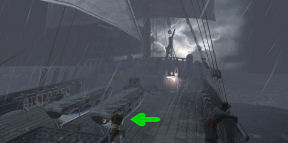
Set the schooner adrift:
On the deck, go to the right and look at the
anchor cable. The cable is thick and taut.
In inventory, combine the walking stick and the
rag.
Use the walking stick with rag on the
petroleum puddle on the deck right of the ventilation grate.
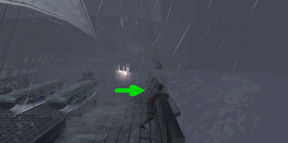
Go to the left end of the schooner and behind the
wheel.
Use the walking stick with soaked rag on
the open stern lamp to get a torch.
Go back to the anchor cable close to the galley.
Take the torch from inventory (even if he's
holding it) and use the torch on the anchor cable.
Fight Hands:
Hands holds a knife on Jim.
Keep talking until both characters move to the left.
Take the powder from inventory and use it on
Hands.
The sharks took care of Israel Hands.
Take the knife that fell on the deck.
Back to Treasure Island:
Go back to Antoinette and use the knife to cut her
bonds. Exit the room.
Meet Ben Gunn at the swamp. Jim gives him the cheese. He
leaves.
The fort is burned.
Treasure: Silver and his
men capture the 2. Silver has the map.
Chapter VI: Piaster Piaster
The pirates follow the map.
There is no treasure just a hole.
Watch what happens.
Select dialogue that would incite the men against
Silver.
A black spot is handed to Silver by Black Dog.
Livesey and the other men arrive.
Ben Gunn shows up.
Antoinette mentions what Ben said: Inca treasure
and cave.
Find the cave:
Go left. Save the game. Enter the jungle path.
Follow the wall drawing.
Take the left path out of 3 paths. Forward.
Take the left (bottom) path out of 2 paths.
Forward.
Take the right path out of 3 paths. Forward.
The entrance to the cave is found.
Flint's Treasure:
Watch what happens. The division of the treasure
is argued.
Silver's incites arguments.
Ben arrives.
Silver continues his comments.
Pick up the pistol. Use the pistol on the
stalactite above Livesey.
Livesey shoots Jim.
Long John Silver wants only the Eye of the Inca
Goddess.
The amulet given by Jim's mother saved his life.
Look close and then take the Inca Goddess from the
pot of treasure.
Use the Inca Goddess on Silver.
I kill you!
After the credits, see Long John Silver reveal the
secret of the Inca Goddess to his parrot, Flint.
This document may not be
distributed without express written permission of the author and the content
may not be altered in any way.
For Questions or Comments
on this Walkthrough,
Please write to:
MaGtRo
Copyright © 12/2009
MaGtRo
 GameBoomers
Walkthroughs and Solutions
GameBoomers
Walkthroughs and Solutions