Tale
of a Hero
by
Future Games
Walkthrough by
MaGtRo October 2010
Gameplay:
The main menu has new
game, load game, save game, options, quit and credits.
Options has details
and sound volume adjustments and subtitles and voiceover selections.
Left mouse button is
for actions while right mouse button is for information.
Double click hastens
move to next screen.
Right or left mouse click speeds up
dialogues.
There are 48 saved
game frames.
THE mONSTER
Olaf has been hired to
take care of the monster that lives in the cave. Olaf climbs down the rope to
the cave. The rope breaks and his 2 companions leave him to his fate.
Make an escape route.
Cave entrance:
Look around where Olaf
fell. Take the leather and rope from the ground. Olaf has a knife
in inventory.
Go left to the
boulder. The boulder blocks the entrance to the cave. Olaf wants to move it to
have an escape route. Try to move it; it's too heavy.
Examine the ground in
front of the boulder. It is soft clay and jagged.
Den:
Go right to the next
cave. Olaf sees the monster asleep at the right end of the cave and realizes
that it is a Dolsimian, a dangerous opponent rather than a mud monster the
villagers told Olaf.
Get wine: Look around.
Check the table at
right. Take the fork. Try to take the stone bowl but it makes a noise
that disturbs the monster's sleep.
Check the vase beside the minor cage at left. One vase is empty and the other
is corked.
Use the knife on the
cork (or the fork from the table). Olaf tasted it to know that it is filled with good wine.
Go left to the statue.
See that the statue is that of an unfinished dolsimian. Take the ladle
hanging from the scaffolding.
Take the pumpkin
on the ground beside the basket of stolen fruits.
Go right to the
lantern and take a stone.
Go back to the vase
with wine. Use the ladle on the wine and examine it in inventory. It is
leaking.
In inventory combine
the knife and pumpkin to get a pumpkin bowl.
Use pumpkin bowl on
the vase with wine. It is too big. Use the ladle on wine and then use the
ladle with wine with pumpkin bowl to get a bowl of wine.
Move the boulder:
Take the leather that
is on top of the small cage left of the vases.
Examine in close up the strong bar of the small cage
left of the vase.
Cut the 4
strings-attachments of the strong bar with the knife. Olaf ties the strings
automatically to make a long string. Take the strong bar.
Go back to the
boulder. Use the bowl of wine on the jagged earth in front of the boulder.
Olaf automatically makes 5 trips to get wine to soften the earth. The boulder moves. A
black smoke flies in.
Topple the boulder
completely using the bar or tie it with the rope and automatically pull.
The escape route is
clear and sunlight shines in the cave.
Take care of the
monster.
Learn how to take
care of the dolsimian: Go back to the den at
right and to the statue.
Olaf calls out to the
black smoke. Learn that the monster is named Nog. Smokey is a curse on Nog's
family for 5 generations. Learn that Nog's family are good stonemasons and Nog
is the most talented of them.
Nog's weak point is
sunlight. Smokey gives a plan using the leather above the entrance to the
cave.
Smokey laughs and
changes color.
Go back to den and
Olaf notices the crystal above Nog. Go back and talk to
Smokey about the crystal. Nog placed it there to stop Smokey. Hmm...
Go back to the cave
entrance at left. If the boulder is toppled, see the leather on the ceiling at
right.
Examine the leather on
the ceiling several times and Olaf wants to get closer.
Get the ladder:
Go back to the den and see the ladder beside the sleeping Nog. Try to take it
and Nog stirs.
Moths: Go left and talk to
Smokey-Stinky about light sleeper. Learn about the moths Smokey uses to suck
happiness from Nog. The moths are diverted to the lamps placed by Nog.
See a lamp held by the
statue. Use a stone on lamp to break it.
Use leather to cover
the lamp close to the statue and the one beside the table.
See the moths converge
on the crystal above Nog and the crystal is dimmed.
Talk to Smokey again.
Smokey works on Nog.
Go to Nog and take the
ladder. Olaf leaves the ladder by the statue but has a ladder icon in
inventory.
Prepare the trap:
Go left to the entrance room. Use the ladder on the leather in the ceiling.
Climb the ladder.
Examine the leather. See construction of branches around the leather and a
crack on the wall at left. Use the fork on the crack to get bent fork.
In inventory, combine
the bent fork and the string to get bent fork with string.
Use bent fork with
string on the leather and Olaf hooks it on the leather.
Watch what happens.
Nog is trapped between the 2 sunlights. Olaf chats with Nog.
Olaf talks to his
sweetheart, Alia.
Swamp and Pripogala
Someone is outside and
knocks on the door. Olaf doesn't wake up. A spell causes light and noise.
Olaf
wakes up and goes out. Talk to Pripogala. Dulevar, king's magician needs
Olaf's help. Giant Krugell, the ice giant and brother of the fire dragon
Arioch kidnapped the King's daughter Erea. Krugell wants revenge on King
Auglemius and Olaf's family for killing Arioch. Pripogala wants to talk to
Olaf in her shack at the swamp up north.
Go back inside the hut
and go to bed. Olaf thinks about his future.
Olaf's home:
Olaf sees the open door.
Look around the cottage. Check the pantry door on the floor. It is locked. There's a locked casket
at bottom left corner.
Exit the hut and look
around. Check the well, rooster, boat and barn. There's a wheel by the
barn and a pole by the right side of the hut.
Check the bench with a
basket on top. Alia left breakfast for Olaf. Read the message. Eat the contents
of the basket and get empty basket.
Exit the homestead.
Swamp:
Be at the Misty Valley
map. Go to the swamp. Look around. There is a sign-rune and
ivy-berry on the stone archway.
Go deeper in the swamp
and Olaf can't stand the smell. Get off the swamp.
Get something to help
with the swamp smell.
Inn:
Go to the inn. Look around outside. Check the well and the manger.
Enter the Inn. Look
around. See a mortar beside the counter and a catfish on top of the door to
kitchen.
Talk to Masek, the
innkeeper and Alia's father. Learn about the scent
and mask that Masek uses when he goes to the swamp.
Get the scent recipe.
Masek threw the mask away and it landed in the well.
Learn that sayside nuts
are found in the swamp. Alia locked the pantry door in order for Olaf to clean his
house.
Masek wants his sickle
sharpened. Take the sickle from the table on the left. Take the string
from the central post.
Prepare the scent and
get the mask.
Clean vessel filled with water: Go back to Olaf's home.
Check the bucket on top of the well and Olaf fills it with water.
Click the bucket of
water and then go back inside the cottage. Olaf comments using the pitcher on
the table for collecting ingredients. Take the pitcher.
Use the pitcher on the
bucket of water on the well outside and get pitcher filled with water.
Charcoal:
Go inside the cottage and take charcoal from under the pot on the cooking
area.
In inventory combine
charcoal and pitcher filled with water to get unfinished scent.
Artorian apples:
Herbarium:
Check the books on the wall and get a herbarium. Learn that Artorian
apples are called by peasant - meeshpon or toader. Olaf has some juice down in
the pantry.
Find the pantry key:
Clean the house by taking care of the dirty dishes on the table by left wall;
picking up the net on the chair by the door and taking the dirty clothes off the
chair at center of the room.
Get pantry key.
Use pantry key on pantry lock.
Go down to the pantry
and see Smokey. Talk to Smokey. Olaf will look for a job for Smokey.
Take Meeshpon juice
from top of the barrel. Take old bag from
right wall. Only the strap is not rotten.
In inventory combine
Meeshpon juice and unfinished scent.
Crushed sayside nuts:
Open the locked
casket:
Go upstairs and look
close at the locked casket at bottom left corner.
Check the lock.
Checked the cracked pitcher at right. Take the casket key under the
pitcher automatically.
Use the key on the lock.
Open the casket. Take the oil and the whetstone.
Take the fishing rod
at the corner behind the table with the cracked pitcher.
Use the whetstone on the
sickle in inventory to get sharpened sickle.
Get Sayside nuts:
Go to the swamp. Check the Sayside shrublet on the limb of the tree at right.
In inventory combine the
sharpened sickle with the pole. Olaf automatically takes the pole from the
cottage and ties the sickle on the pole with the string taken from the inn to
get pole with sickle.
Use pole with sickle on
the Sayside shrublet. Pick up the Sayside shrublet and Olaf takes the Sayside
nuts.
Go to the inn and use
the Sayside nuts on the mortar beside the inn's counter or Masek.
Combine the crushed
Sayside nuts with unfinished scent to get scent.
Mask:
Exit the inn.
Check the well and see
the mask hanging on a twig inside the well. Use the fishing rod on
the mask. It smells.
Enter the inn and give
the dirty mask to Masek.
Exit the inn. Then go
back inside and ask Masek about the mask.
Talk to Masek and he
asks a favor. Take the basket of food for Old Carrot right of door.
Go home and place the
basket of food on the bench.
Go back to the inn. Alia
is angry. Enter the inn and talk
to Masek. He gives the clean mask.
Find Pripogala.
Swamp:
Go to the swamp. Use the scent with the mask.
Go to deeper part of
swamp and automatically use the scented mask.
Crossroad:
Look around and see ruins and broken bridge.
Pripogala:
Go left and see a shack. See a stump on the roof of the shack.
Enter the shack and be
amazed. Pripogala made Olaf breathe better in the swamp.
Talk to Pripogala.
Learn about the ruins, Krugell, Water of Life and Mykorus Tercilius Magnus,
the seer.
Mykorus is buried close to a marker made up of
clay inside the stone circle. Olaf needs to get water of life to awaken the
dead Mykorus the seer.
Go to the table and
take the statuette from the guardian table that snarled.
Look around the
chamber. Take the tin from the floor beside the cauldron above heated
stone.
Water of Life and Mykorus
Find the Water of
Life.
Exit Pripogala's home.
Go right to crossroad. Take dried resin
from base of the tree at right.
Go right-east and see
a temple shrine that is in much better shape than others. It is
surrounded by thorny bushes.
Make a path through
thorny bushes: Go back home and see a broken flail returned
by Carroty. Read the note that is attached.
In inventory use the
knife on the old bag taken from the pantry to get strap.
Look close at the
broken flail. Use the strap to fix the flail.
Go back to the swamp
and the shrine surrounded by thorny bushes. Use the flail on the
thorny bushes.
Enter the shrine:
Go upstairs. Look around and see openings at the perimeter of the
floor. Inside the openings are jewels. At the center is another opening - it
is empty. Take the piece of walling from the floor.
Check the stone face
on the pedestal. Check to look close at the pedestal. See a statuette similar
to the one taken from Pripogala. Turn the statuette.
Place the statuette on
the slot at left. Turn the statuette and see that it doesn't turn.
Use oil taken from the
casket at home on the slot. Place the statuette back on the greased slot. Turn
the statuette.
See lightning flashes
from above and hits the central opening.
At the same time and
for a moment only, a tile at right side of the floor is highlighted.
Immediately click on that highlighted tile. Repeat
if the tile turns dark.
See a crack on the right top side of the tile. Use the knife on the
crack at top right side.
Take the crystal inside the hole. Place the crystal at
the hole at the center of the floor.
Turn the statuette on
the pedestal again. See lightning strike the crystal. Energy flows from
the crystal to the openings at the perimeter. A stair going down is exposed.
Shrine: Go down.
Look around and see 3 gargoyles on the edge of the empty basin.
Read the stone
plaque-table on the wall. Learn that you need to give offering to the goddess.
Check the statue of
the goddess with a begging hand. The other hand is broken and is on the floor.
Pull the begging hand
down and hear a hissing sound from panel at the side of the chair.
Repeat pulling down the hand to check the
panel. See that it is very thin to use the knife on.
Open the panel:
Take the stone hand from the floor.
Go upstairs and see
root on the ivies on the wall. Use the knife to get a root.
Exit the temple and go
to the crossroad. If you have not taken resin from the base of the tree at
right, do so now.
Go left to enter
Pripogala's shack.
In inventory place the
resin in the tin cup. Place the resin in the tin cup on the heated stone under
the cauldron to get melted resin.
Go back to the goddess
statue at the Temple of Water of Life. Look close at the
panel.
In inventory, dip the
hand in the melted resin. Use the hand with resin on the panel. Now you have a
handle on the panel.
Use the glued
hand-handle to pull the panel. See that the pipe has a hole. That is what made
the hissing sound.
Seal the hole and
get water flowing: In inventory use the knife on the
root to sharpen one end.
Use the sharpened
root on the melted resin and then use that root with resin on the
crack in the pipe. That seals the pipe.
Automatically pull
down the begging hand again and see water flow for a short time out of the
gargoyles' mouths.
Use the cartwheel
taken from home to weigh down the statue's begging hand.
That fills the basin
with water of life.
Use the empty pot on
the basin to get water of life.
Mykorus the Seer.
Find and revive
Mykorus: Exit the temple and go to the crossroad. Go
down to swamp borderline.
See the sign on the archway carved in
stone and covered in clay mentioned by Pripogala.
While standing behind
the archway, go left to the path and see Mykorus' grave with the spire
described by Pripogala.
Use the water of life
on the soil in the enclosure - grave of Mykorus. Oh my - he's a mushroom.
Get advice:
Talk to Mykorus completely. He would not give a reading even after reviving
him.
He wants peace. Learn
what caused the scar on his face - slugs.
Go back to the deeper
part of the swamp.
At the crossroad, see
teeny bark boats on the shoreline and click on slugs on the ground. Uh oh! The
slugs are going south towards Mykorus.
Go back to Mykorus and
tell him about the slugs. He asks for protection and in return he will give a reading.
Protection for
Mykorus: Olaf mentions his rooster as guard.
Go back home and take
the near catatonic rooster from the fence.
Bring the rooster to
Mykorus at his grave in the swamp. Okay, the rooster is not the best guard.
Go back home and down
the pantry cellar. Talk to Smokey and give him the promised job.
Follow Smokey back to
Mykorus at the swamp. See the Smokey-rooster take care of the slugs.
Impressive.
Mykorus' reading:
Mykorus reluctantly gives a prediction.
Krugell's icy breath
can cause snow storm and his magic club controls shape of ice. There are 11
artifacts that can be used against the titan. 6 already has malicious owner.
One possibility left, God's Breath. It has the probability of death in 7 out
of 10 cases.
Dulevar of Groeden
Kingdom has it but it was on Dragon Pride that sank. The ship is in a cliff in
an ocean; nearby is a temple built by water sprites.
Dragon Pride and
Mjorgin
Get a white catfish
scale.
Learn how to survive
underwater: Go back to Pripogala and talk to her about the
shipwreck.
God's breath is a
medallion that controls wind. Pripogala will look for the shipwreck but Olaf has to get
a white catfish scale to be able to survive underwater.
Go back home and look at
the books in the shelf. Take the Bestiary and read it.
Learn about Titans,
Children of the Earth and Animals of Magic.
Learn that after death
white catfish (Xoliantr-white sheathfish) looks like a plain catfish except for
a white scale on the tail. The scale has to be a gift from the fish to keep its
magic qualities.
Get the catfish:
Remember where we saw a catfish. Go to the inn and look close at the catfish
above the entryway to the kitchen. It has a white spot at the tail. Click on
white spot.
Talk to Masek about the
fish. Learn that Olaf's father caught and gave it to Masek. Masek doesn't want
to part with it because empty space above kitchen doors brings bad luck.
Give the stone hand
glued to the panel to Masek. After some fast talking, Masek agreed. Olaf takes
the catfish off the wall.
Get the scale:
Go to the temple-shrine in the swamp.
Go down and place the
catfish in the water of life.
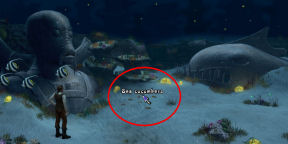
Olaf releases the
catfish in the water at the crossroad. The fish swims away before Olaf can ask
for the scale. Olaf checks his hand and sees that the catfish left the white
scale.
Underwater temple.
Go to Pripogala and talk
to her. She sends Olaf to a temple underwater. The portal stays open for 2 days.
Altar:
Go to the (?) altar at back wall of the temple.
Look close at the
display (fenestela) on a stand with 2 fishes.
Move (click) the wheel
at the base of the tablets. See a story illustrated in stone.
The titans and sea
people fought for the content-artifact of the casket. See the icons of the
titans and sea people.
2 important
representatives of both sides negotiated truce.
The 2 nations built the
temple and exhibited the artifact here.
The next tablet was
taken.
Take the key on
the last turn of the wheel.
Look at the display
stand on the right. It is empty.
Light:
Swim down and check the glowing stone at right of the floor of the temple. It
cannot be pulled out by hand.
Temple gate:
Go right and check the locked gate.
Look close at the panel
lock right of the door. Use the key taken from the altar on the hole of the
ornament.
The gate opens. Note the
scratches on the floor caused by the gate's closing.
Crossroad.
There is now a map in
inventory. Right click it to get a closer look. Right now the only place shown is the
temple.
Go to bottom screen (?).
Look around.
Weird creature:
Look close at the (?) stone structure at center of the crossroad. See a reddish
brown weird creature with pseudopods.
Stone formations:
Check the stone formation at back center of the crossroad. There is a
passageway at right part of the formation.
Casket:
Enter passageway. See a wooden casket. It is barely holding together.
Pick up the stone
on the seafloor behind Olaf. Look close at casket. Use the stone on the casket
and then on the lock.
Click to try and take
casket. Olaf will take it later when needed.
Go back to the temple
either by swimming or use of the map.
Place the casket on the
scratches on the floor by the gate.
Turn the key on the
ornament hole panel right of the entryway. Olaf closes and opens the gate. Hear
the cracking sound of the casket.
Look at broken casket.
Take the goblet.
See old sailor's
clothes. Click on clothes and take the coruscant (shiny) object under the
clothes. It is the sacred symbol of the sea god Sasamon.
Trench:
Go back to crossroad. Go
forward through the (?) path left of the stone formation and be at the trench.
See the shipwreck at
left. There are skeletons around the seafloor. The trench is ahead.
Put the damned souls
to rest: Go forward towards the shipwreck and be stopped by the
ghosts-damned souls of the sailors of Dragon Pride.
Use the sacred symbol
taken from the casket on any skeleton. Olaf exorcises the sailors.
Items:
Look around the sea floor.
Check the (?) latrine
at right. Take the gauntlet and remains of spyglass beside the
latrine. Click on the skull inside the hole of the latrine. I can also
imagine.
See and try to take a
cauldron buried in the sea floor close to the left stone formation.
Dragon Pride
shipwreck: Go to the shipwreck. The trench is now in the map.
See one soul not
exorcised. Talk to Captain Halden.
He was under orders
from King Auglemius. His bones were scattered by sharks and the exorcism works
only on skeletons.
A promise keeps him
here. Learn about Olaf's father, Halvard of Eagle Mountains. Learn about the
war between the king and his brother in law and subsequent banishment of
Halvard and his family. Only the King's daughter Erea spoke out for the
family.
Learn that God's
Breath was taken by the dragon that sank the ship. The Mjorgin, the water
dragon is down the trench.
His oath to the
Goddess of the Underworld is that they won't rest while the country is
threatened by enemy from the north. The enemy from north is Krugell.
Mjorgin's cave:
Go right and down to the trench.
Down at the bottom of
the trench, there are 2 paths: one up (down to trench) to the mirror and right
to Mjorgin's cave.
Go right and see a
window on the wall and right to corridor.
Look through the
window and see a snoring Mjorgin. See God's Breath on display on the right
side of the back wall.
Olaf wants to lure
Mjorgin out of his lair and get allies to help him fight the water dragon.
Remember the temple
tablets. The Titans were at war with the sea people.
Sea Creatures
Down to trench:
Go back out of the
cave. Go up to "down to trench".
Mirror:
See a mirror on the rock at bottom right. Try to take it and Olaf says he
can't hold it and swim.
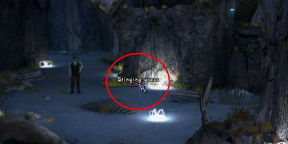
Weird grass:
Check the weird grass left of the light at center rock wall.
Something is in the
grass that wriggles. Try to take what is hidden there and find out that it
burns like fire.
Use the gauntlet taken
from the latrine above the trench on the stinging grass.
Get a case that
fell off the Dragon Pride. Check the case in inventory. Right click the case to
get pliers out of the case.
Go back to the cave and
then go up to the trench rim.
Massif:
Go to crossroad and then
right to a stone mountain-Massif.
Check the underwater
creepers on the base of the mountain.
Use the knife to get a
creeper-rope. There seems to be an opening behind the creepers.
Use the knife again on
the creepers to make an opening to the cave.
Enter the opening and
see that it is very dark inside. Go down the corridor and bump into something.
Get light:
Go back to the temple via swimming or map. Go to the glowing stone
at back wall.
Use the pliers taken
from the case hidden by the stinging grass to get glowing stone.
Go back to the opening
at base of massif.
Massif corridor:
Enter the opening and use the glowing stone. Olaf leaves it here to make a
light.
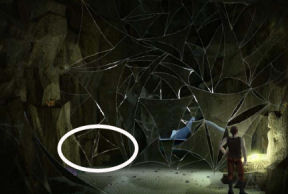
See strange web blocking
the way. Use the crawl-through at bottom left of the strange web.
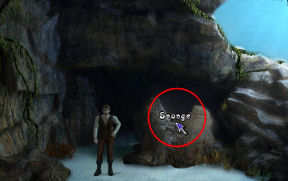
Go down the corridor and
be at the opening at other side of the massif.
See sponge on top of the
rock at center. Use knife to get sponge.
Nomas the whale and
Minikin the shy fish.
Go out at right. Go down the cliff.
Talk to Nomas the whale.
Learn about the Nautisans, the sea people that built the temple with the Titans.
Nomas will help Olaf
against Mjorgin but Nomas can't leave here because of Minikin, the small yellow
fish hiding under Nomas' flipper. Minikin has separation anxiety. Olaf says that
he will find a friend for Minikin.
Learn about Apidulas, Nautisan
warrior and Mjorgin's mortal enemy. Apidulas has a magic jewel that gives him
power.
Olaf tells Nomas about
a mirror for Minikin.
Statue's leg:
Go right screen and see
a giant statue's leg.
See a Twisted Oddity
that looks like script at center of the ocean floor.
Veliana, the Clam at
Statue's head:
Go right to the head of
the statue. Look at statue and Olaf calls it a Nix.
Talk to the clam that is
on the rock structure at left. After the screeching done by the clam, its mouth
cramps. Olaf says that he will try to help.
Crab at Statue's leg:
Go back down to the
statue's leg. Swim to the left and be stopped by a voice.
Talk to the crab. He
made the sign to alert about the clam - Beware of the babbling shell.
Before the crab answers
anything he wants food.
Find food for crab:
Go to crossroad (via map and then go
below the shipwreck) and look close at the rock structure at center of the ocean
floor that has the weird creature.
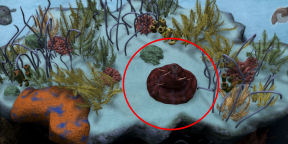
Weird creature:
See that the weird creature (spitlaughter) has 5 pseudopods. Click on the
correct order of pseudopods to get all of them retracted in the body. This is a
random puzzle.
The spitlaughter spits
out a nugget. Immediately take the nugget.
Next time you need a
nugget, just click on the spitlaughter and automatically get a nugget.
Flashfish:
Go back to the opening of the massif at right.
Pass through the
crawl-through. A flashfish jumps out of the hole at left, zaps Olaf and steals
the nugget.
Use the sponge taken
from the other opening of the massif on the hole.
Go back and
automatically take another nugget from the spitlaughter.
Go through the
crawl-through safely now that the flashfish-thief is plugged in the hole.
Crab:
Go to the crab at statue's leg area. Give the nugget-spitlaughter matter to the
crab.
Talk to the crab
completely. Learn the cure for the clam. Catch a flashfish and zap Veliana.
The sea cucumber by
nearby statue heads secretes adhesive when surprised. Learn about the temple
and loss of artifact.
Uncramp the cramped
clam.
2 Statues:
Go right to statue's head and then right again. See a bust of a Sea people and
a giant fish statue.
Now that the crab
mentioned about the sea cucumber; take a sea cucumber from the sea floor
between the 2 statues.
Catch a flashfish:
Go to the massif corridor with the strange web and the flashfish.
In inventory, combine
the sea cucumber and remains of the spyglass taken close to the latrine at the
top of the trench to get spyglass with lime.
Unclog the flashfish
hole on the wall to get back the sponge.
Use spyglass with lime
on the hole as replacement for the sponge.
Get another nugget from
the spitlaughter-weird creature at the crossroads.
Go back to the massif
corridor. Use the nugget on the spyglass with lime plugging the flashfish hole.
Olaf calls out to the
flashfish. Gotcha! Get a flashfish.
Help Veliana:
Go to Veliana the clam at the statue's head area.
Use the flashfish on
Veliana the clam. Talk to Veliana
completely. Learn that the old crab lived with Apidulas for a while.
The magic jewel is not a
precious stone but is a sorcerer that changed form. It is that old crab.
Crab:
Go to the statue's leg and look for the old crab. It is gone.
Get a friend for
Minikin:
Ruins:
Go right to statue's head and then right again to be at the 2 statues.
Go down to bottom screen
and see ruins. The area is now in the map.
Pick up the stone
block at middle of the floor between the ruins.
Go back to the 2 statues
at right screen.
Glowing field:
Go right of the 2 statues area and see a field of glowing plants.
Watch as one of the
seeds rises to the surface and explodes spreading the seeds.
Get a plant balloon:
Go down and see a plant up close. Look close at glowing plant.
Try to use the knife on
the stem of the plant but Olaf says it will shoot up to the surface at once.
Use the piece of creeper
taken from opening of the massif on the stem of the plant.
Use the cauldron taken
from the top of the trench by the shipwreck on the stem with creeper.
Use the stone block
taken from the ruins beside the 2 statues on the cauldron.
Use the knife to cut the
stem. Take the improvised underwater balloon.
Get the mirror:
Use the map and jump to shipwreck by trench.
Go down the trench and
the up path to the "down the trench".
Use the underwater
balloon on mirror to get hooked mirror. Click on hooked mirror to raise it up.
Take mirror.
Minikin's friend:
Go to Nomas and Minikin.
Give the mirror to Nomas.
See Minikin looking at itself on the mirror.
Apidulas
Find Apidulas.
Go to Veliana the clam
and ask where Apidulas is. Apidulas lives in a
tower above Nautisia.
Travel to tower:
Talk to Nomas and he brings Olaf to the tower of Apidulas.
The location is now in
the map.
Tower:
Knock on the tower door and no one answers. Go to the back of the
tower. Look through the window.
Octopus:
A frightened octopus comes out of the tuft of sea grass below the window and
goes to the rock-den at left.
Look at the den of
octopus. See that the octopus is hiding a strap with a clasp. Try to take the
strap. No dice.
Take the strap:
Use the sea cucumber on the tuft of sea grass under the window.
Go left to the back of
the tower and then come back. Look close at den of octopus again.
The hiding octopus is
stuck on the sea grass.
Take the strap from the
den of the octopus. Right click the strap in inventory and see that it is a
conch with headgear.
Eavesdrop:
Use the conch with headgear on the front door of the tower.
Overhear Apidulas
looking for his ear trumpet. Olaf needs to return the ear trumpet to Apidulas so
that he can hear his door knock.
Return Apidulas' ear
trumpet.
Place the trumpet
inside the tower: Go to the back of the tower twice.
See that the window
above has a crack on it. In inventory, combine the flashfish and the conch with
headgear.
Insert the flashfish
with ear trumpet through the crack in the window.
Place the sponge on the
hole to plug the crack.
Make the flashfish
swim to Apidulas: Use the map to go back to the temple or
shipwreck. Nomas brings Olaf to the cliffs.
Swim back to the get
nugget from the weird creature-spitlaughter at the crossroad.
Use the map to go back
to Apidulas' tower.
Use the nugget on the
door of Apidulas' tower. See Olaf insert the nugget under the door and calls the
flashfish.
Hear Apidulas chase and
catch the flashfish with the ear trumpet.
Apidulas:
Knock on door. Talk to
Apidulas completely. He exiled himself here away from what's left of his people.
Learn about the
animosity between the titans and nautisans. Learn about the loss of the
artifact, the Amulet of Wutglias and the war that resulted.
Apidulas agreed to help
if Olaf brings his jewel back. The jewel is Fenintair, the old crab and the
close friend of Apidulas.
Fenintair and
Minikin.
Use the map to go back
to the temple. Minikin and the mirror is not here. Nomas is worried.
Find a way to locate the crab and
Minikin:
Go right twice and talk
to the clam about Minikin. Learn about blue starfishes.
Talk to Nomas about the
blue starfishes. Blue starfishes show directions by changing colors. They can
find anything missing if they touch something or someone it is related to. They
can be found by green starfishes.
Nomas brings Olaf to the
Atoll caves. It is top left of the map.
Pick up ink emitter:
Look around.
See an odd creature
beside Olaf. Try to take the creature. It emits ink.
Go left and see
interesting stones on the ocean floor beside the hot spring. Try to take some.
It's hot.
Use the goblet-chalice
taken from the crate by the crossroad earlier on the red hot rocks.
Use the red hot rocks
on the odd creature-ink spitter. It unsticks itself and falls. Take the ink
spitter.
Search the caverns:
Go through the opening on the overhang of the cave. See green
starfishes on the floor.
Go left-deeper into
the cave and see a room full of glowing stems. It is very bright in there.
Use the ink spitter on
the glowing stems. When the room darkens, see a dark opening at bottom right
side.
Go through that opening
to another cave, out to sea and eventually be at a shore.
Blue starfishes:
See blue starfishes on the sand floor. Take a blue starfish. The first one has
some green spots on it.
Take another blue
starfish.
Swim back to the sea and
go left. The ebb tide has gone down leaving Olaf stranded on this side of the
cliff.
Swim back to the shore.
Olaf stays the night and speculates that blue starfishes are like butterflies
and that the green ones are still in the caterpillar to pupa stage.
The next morning, Olaf
sees the hull - remains of the blue starfish he got last night. Take
another blue starfish.
Click to go to the sea.
See the hatched blue starfish - it looks like a crawling butterfly. Olaf takes
the creature for Nomas.
Swim back to sea and go until Nomas.
Find Minikin.
Back at the cliffs, Olaf
touches the blue starfish on Nomas. Check the starfish and see that one arm
changed color.
Automatically, Nomas and
Olaf swim to where Minikin is supposed to be.
Outside the massif
opening, Nomas stays outside. Enter the opening and see the little yellow fish
behind the strange web. Study - right click the strange web and see that it is
made up of live organisms.
Go outside and talk to
Nomas.
Find Fenintair, the
old crab.
Nomas brings Olaf back
at the cliffs.
Go right twice to
Veliana, the clam. Use blue starfish on clam.
Go back to Nomas. Olaf
and Nomas swim to "where the blue starfish points".
Check the bunch of
big boulder at right. Go to place starfish points to.
Fenintair: Talk to magic jewel-crab.
Learn about the plant Veliana chews that speeds things up.
Learn that he left Apidulas and that Apidulas and Mjorgen were best friends first half of their
life. Their teacher was a kraken named Hedarius.
Olaf devised a plan. The
old crab sits on the arm of Apidulas and shoots the magic against his opponent.
Olaf tells the crab to release only weak magic. He also planned to get the God's
Breath while the 2 are fighting. Then when he has God's Breathe he will threaten
them and be the common enemy.
Olaf takes the
Fenintair-old crab
in his bag. Nomas delivers them to
Apidulas' tower.
Apidulas:
Knock on door and talk to Apidulas.
God's Breath
Get in Mjorgin's den.
Mjorgin's lair:
Ride Nomas to the cliffs.
Hear sounds. See
Apidulas and Mjorgin dueling at glowing field.
Go to Mjorgin's den by
using the map and jump to shipwreck by the trench.
Mirror:
Go down the trench and go up-north.
See the mirror here.
Click on the mirror to speculate that Mjorgin eats planktons
because he cannot hunt anymore.
Go back up and enter the
cave at right. Continue down the corridor and look around Mjorgin's lair.
Check the junk at bottom
left and take some gold junk.
Turtle:
Go right and see a turtle eating sea weed.
Understand the
turtle: Talk to the turtle and realize that she speaks so
slowly that she cannot be understood.
Remember what crab said
about clam and the speed herbs she eats.
Go to clam at statue
head area ((jump to ruins and go left). Take plants of speed
beside clam.
Go back to Mjorgin's
lair.
Check the sea weed the
turtle is eating. Check the dragon ship at right. Olaf faces the dragon ship and
the turtle chews more.
Then - as soon as the
turtle gets seaweed, place the plants of speed on the pile of sea weed beside
her.
Talk to turtle.
Pass the turtle:
Convince turtle that you are Mjorgin's friend.
She asks questions
about Mjorgin.
What does Mjorgin eat?
If you already saw the mirror outside the cave - answer planktons.
What is on Mjorgin's
flag? Remember the display-fenestela at the altar in the temple. Answer titan's
head with snake hairs.
Who was Mjorgin's
teacher? Remember the story told by Fenintair, the old crab. Answer Hedarius the
Titan.
The turtle believes that
you are Mjorgin's friend and you can now pass through.
Get God's Breath.
Get in Mjorgin's
treasury: Look around the slides, machine and glass door
of the treasury.
Look at the slides on
the floor. It is made out of tiles. Slider?
Click or try to move a
tile and see how a slider should be solved.
Look close at slides
again. Under the tiles are sprigs. Check the sprigs.
Weigh each of the sprigs
with one of the 4 pieces of gold junk taken from the pile of gold at Mjorgin's
lair outside.
Take the fragment off
the tile at top left. Press the button at top left. The glass door of the
treasury opens.
Mjorgin's treasury:
Look around. Check the exit and realize that the glass door closed.
Check the pedestal
bottom left. It is empty. God's Breath is not here and was taken by Mjorgin to
battle.
Check the golden lamp on
another pedestal. :)
Check the gold pile. Try
to take something.
Click on gold pile
second time and get the missing tablet from the display at the altar in
the temple.
Look at it and realize
that the artifact that went missing is a blue starfish. Remember what you
speculated about blue starfish, green starfish and the hatching.
Click on the gold pile
again and get a scepter with a diamond. Look close at scepter with
diamond in inventory. Use the knife on the diamond to remove it.
Use the diamond on the
window at left and Olaf cuts a hole on the window. Go through hole.
Stop the battle:
Use map to go to glowing field.
Talk to Apidulas. Use
the blue starfish on Apidulas. That's sad.
Go to the temple. Place
the blue starfish on the shrine-empty pyramidal display at right.
Exit the temple and talk
to Apidulas. He gives God's Breath and a crystal shell.
Go back inside the
temple and stand on the portal.
Misty Valley:
Be back in Pripogala's place. Talk to her.
Go back home and talk to
Alia.
Enter the hut and Olaf
automatically changes clothes. Talk to Alia again.
Go back to Pripogala.
She sends Olaf to Krugell's Ice Plains.
Learn about the Deves,
blue skinned people.
The warming potion
will keep Olaf warm from freezing breath.
Krugell
Check the village.
Look around the village.
There are 3 empty huts and one locked one.
Locked hut:
The locked one on the left has smoke coming out of the hut.
Look at the lock. It has
a small hole at the center. Take the shovel
at bottom left.
Manger:
Check the snowy bump beside the middle hut.
Use the shovel on the
snowy bump. Uncover a manger.
Look close at manger and
see salt crust. Use knife to scrape and then get salt.
Skull hill:
Go right and see a hill with a skull on top.
The way up is made up of
ice and cannot be climbed with no help.
There are 2 signs
planking the way up. Check the left sign with a bear on it and take the lamp
with no oil inside.
Ice Mountain:
Crevasse:
Go to back area towards the crevasse. Check the wreckage at
right. It is the outrigger of the ship.
Go inside the crevasse. Check the eyes peeking
out of hole at left. It is a snow cat with 4 kittens.
Small stone portal:
Go down to a stone portal with a symbol.
Lever:
Check the lever at left. It is frozen.
Use salt on the frozen
lever.
Look close at lever and
see that it can be moved forward, middle and back.
When the lever is pushed
back, the door opens.
Foyer:
Go inside.
Check the large door at
right. It must be Krugell's entrance. Check the chains seen
through the hole on the wall.
Little door:
Check the little door at center.
Check the red stain and
Olaf thinks it is blood sacrifice.
Check the slot at right.
A lever is missing.
Turn the knob and then
click on door. It is an elevator shaft
- dumbwaiter.
Take the pin off the
inside of the door. Close door and take the knob now. That lock looks
familiar.
Sick Deve woman:
Open locked hut:
Exit the room and crevasse. Go to the locked hut and look close.
Use the knob taken from
the little door on the lock. Turn the knob and enter the hut.
Inside the hut:
See a sick Deve woman in bed. Talk to the woman. She wants drink.
Look around. Take
a bowl from the table in foreground.
Use the knife on the fur
on right bed to get piece of fur.
Check the stove and the
coal scuttle beside the stove. The coal scuttle has dry animal droppings in it.
Use the piece of the fur on coal scuttle to get dry droppings.
Pantry:
Open the little door at below the exit.
See meat hanging. Use
knife to get meat and then use knife again on the fat at top part
of the meat.
Take fish from
bowl.
Water:
Exit the hut. Use bowl on the snow heap right of the door to the Deve's hut.
Go back inside the hut.
Wait a few seconds and the water in bowl will melt. Do not use the bowl of
snow on stove or the bowl will break.
Give the bowl of
water to sick woman. Yuck! She wants fire water.
Climb the hill to the
skull hut: Exit the hut and go to the skull. Olaf checks the
path going up between the 2 signs.
Go back and talk to the
sick woman about the ice path up to hut.
She says there are
crampons under bed. Check underneath each of
the 3 active beds to get crampons.
Exit and use crampons on
the path between the 2 signs.
Skull hut:
Look around.
See carvings on the
perimeter bones. Take the basket beside the perimeter bones.
Look at space behind
stairs. Move the fur with blue stripes.
Move the chipped bone
and take the box. Take the explosive crystals and the skin of brandy.
Information:
Go back to the Deve woman and give the brandy.
Learn about her wanting
to kill Krugell. The way to Krugell is pass small passage, large passage, labyrinth and
then Krugell.
Krugell says darkness is
coming. Krugell killed her son. She says the lever of the small door is in the
skull hut.
Check the aromatic
potion on the open bowl above her head. Ask Deve woman about the aromatic
potion. Take the kamimiki, hypnotic potion.
Light the lamp:
In inventory, right click the lamp and see it in close up.
Use fat on the slot on
the back of the lamp.
Use filled lamp on stove
to get burning lamp.
Get dumbwaiter lever:
Climb up to the skull hut. Go upstairs to the top level.
Check the bowl and get lever.
Find way to Krugell.
Get outrigger:
Go back to the crevasse.
Use the dry droppings on
the ice holding the outrigger. Light the dry droppings
with the burning lamp.
Take the outrigger.
Open large door:
Go inside the crevasse and to the open small stone portal.
Prop the open door of
the stone portal with the outrigger.
Look close at lever left
of the open door. Pull the lever to forward position.
Go inside to the foyer
area. See that the large door is open and the beginning of the maze.
Maze map:
We need more info about the maze.
Go back to the sick Deve
woman and ask about the maze.
She mentions about Reul
story. Reul is owl.
Go to skull hut and
click on carving on perimeter bone. Olaf reads about lost Deve and bear; and the
subsequent reunion of the bear with her cubs in the village.
Go through maze:
Using the story clue, go inside the crevasse.
Look close at the snow
cat's hole and try to stroke the snow cat. Olaf is scratched.
In inventory, combine
the hypnotic potion with the fish.
Give the fish with
hypnotic to the snow cat inside the hole.
Take the cat and
the kittens. Olaf puts the kitties in the basket.
Go inside the stone
portal - foyer.
Use the lever taken from
the skull hut on the slot right of the little door.
Place the basket of
kitties inside the dumbwaiter.
Close the door and pull
the lever to send the basket of kitties up to Krugell's lair.
Go to large door and
Olaf releases the cat.
See paw prints on the
snow. Follow the paw prints. Olaf automatically leaves marks to show his way
back.
Get to Krugell.
Barbs:
Go towards the staircase and Krugell. A sound alerted Krugell and he throws his
club.
Go forward again and a
barrier of barbs blocks the path. Check the runes of the club - Clubplusfive.
Try the knife on the
barbs.
Use the explosive
crystals on the barbs. Automatically, get 4 barbs.
Take the stone on
the ice floor at left.
Stone column:
Check the cube on top of the shelf at right. Click on that "way around" left of
the cube.
The stone column at
right is now activated. Look close at the stone column.
See veins on the column.
Click on an intersection of the veins and see 4 weak spots.
Use knife on the 4 weak
spots. 4 small cuts in ice are made.
Use the 4 barbs on the
small cuts in ice. Use the stone to hammer
in the 4 barbs.
Cube:
Climb up to the cube and way around. See that way around is blocked by barbs
also.
Check the penguin and
swordfishes.
Check the cube and Olaf
tries to push the cube.
Use an explosive crystal
on the space under the ice cube. The cube falls to the floor.
Take the cube.
Use the cube on the barbs.
Use explosive crystal on
the cube placed by the barbs. The cube flips over and smashes some barbs.
Push the cube to make a
path.
Confront Krugell:
Go upstairs and Olaf
automatically drinks the warming potion.
Talk to Krugell. He
blows cold air on Olaf and Olaf is encased in ice.
The ice covering Olaf
melts. Taunt Krugell.
Krugell blows more cold
air. Use God's Breath on the turbulent snow in front of Olaf.
The snow blows back to
Krugell and his legs are encased in ice.
Check the base of the
ice column right of Krugell. Note that it is hollow.
Note also that every
time Krugell growls, the ice stalactites above shake. They react to the sound.
Next time you encase Krugell in ice, use God's Breath
immediately on the opening at base of the hollow ice column right of Krugell.
The sound breaks off a stalactite. Note that there's a
crack beside the dropped stalactite.
When possible, use an explosive crystal
on that crack. Krugell falls to the
ground.
Princess Erea:
Go to the entryway on the left. Check the black mirror.
See the petrified princess. Click on the princess and Olaf does the traditional way of waking up
a princess.
Uh oh! The story twists.
Princess Erea makes Olaf
understand Krugell.
Krugell:
Talk to Krugell and learn what this is all about. Krugell was trying to destroy
the Vamorian Bond. The Vamorian Bond is a magic amulet that controls Titans.
Pripogala wants to
rebuild the city of Tor destroyed by the Titans. The Titans were slaves of the
rulers of Tor.
A plan is formed. She cannot use the portal within the area unless she
drops the amulet spelled by Erea. Outside the crevasse the protection on the
amulet is gone. The witch has to be trapped in the area.
Recover the Vamorian
Bond.
Prop on door:
Enter the elevator control room - mouth of the giant head.
Check the reflection in
the "monitor". Olaf remembers the outrigger prop on the door.
Check the 2 levers. Olaf
takes the basket from the dumbwaiter-elevator.
Talk to Krugell again.
He mentions another way to the stone door with the propped outrigger.
Exit through the secret
passage left of the stairs and be at the village.
Go to the crevasse and
the stone door. Go inside to
automatically take the outrigger and close the door.
Heated door:
Krugell closes the large door. Pripogala is trapped.
She starts to burn the
door. Use God's Breath on the heated door. The door needs continuous cooling and
Olaf makes a plan.
Heat the knife on the
door. Use the white hot knife on the ice floor in front of the door.
Use the outrigger on the
cut on the floor.
In inventory, use knife
on fur to get leather strips.
Use God's Breath on the
outrigger on the ice. Automatically tie God's Breath on the outrigger using the
strips.
Give the witch a
choice: Go back to Krugell by going to the village and clicking
on the secret passage (hut at bottom left).
Talk to Krugell about
the plan using the explosives.
Go to the room in the
mouth of the giant head.
In inventory, combine
the explosive crystal and the warming potion.
Use the explosive
pack down the elevator-dumbwaiter. Olaf says that the elevator is blocked.
Exit and go down the
hall. Take Krugell's club.
Place the club in the
dumbwaiter and automatically take the explosive pack out.
Talk to Krugell and get
him to make ice barbs with his club.
Go back in the mouth
elevator room and see that the club made a crevice in the dumbwaiter.
Take the club out of the
dumbwaiter. Use the explosive pack in the destroyed dumbwaiter.
Take the Vamorian
Bond: Go through the secret passage left of the stairs.
Go to crevasse and door.
Olaf takes the Gods Breath. Open door using the lever and enter the foyer.
See Pripogala's shoes
and clothes. Pick up the Vamorian Bond amulet.
Truces: Go back to Krugell
and the princess.
Learn what really killed the witch.
Talk to Krugell. Learn
how he and his brother were born. Learn also about the Deve's son. Krugell
promises not to be a threat anymore to the Greoden Empire thus releasing Captain Halden from his oath.
Go to the room upstairs
where the Princess was found. Take the crystal on the floor that will
protect Olaf from the cold weather.
Go downstairs to leave
Krugell.
Olaf says goodbye to the
witch.
This document may not be
distributed without express written permission of the author and the content may
not be altered in any way.
For Questions or Comments on
this Walkthrough,
Please write to:
MaGtRo
Copyright © 10/2010
MaGtRo
 GameBoomers
Walkthroughs and Solutions
GameBoomers
Walkthroughs and Solutions