Wanted: A Wild Western Adventure
Complete Walkthrough v1.0
by Gamehound
October 2004 |
|
Story: You play the role of Fenimore Fillmore. Your job is to fight John Starek and his henchmen from doing wrong to anymore of the farmers. Starek wants the farmers' land for his cattle, and he will stop at nothing to get it... including burning down the homes of the weak and innocent farmers.
Gameplay: Standard point-and-click interface. There are some mini-games which vary in skill from somewhat challenging to very difficult. Perseverance is the name of the game to get passed them. The Escape (Esc) key, or your Spacebar key, will bring up your main menu (to save, load a previous save, exit, etc). I highly recommend saving often (the save system appears to be limitless in quantity, so no worry there). Finally, your mouse controls the vast majority of the game. Both left and right clicks are used. Right click is your option changer on hot spots (use or look/speak), and left click selects the option you chose. During the shooting gallery, left click controls your left pistol, and right click controls your right pistol.
Tips!
1) Mouse speed. There is a rather difficult shooting gallery mini-game later on that is mandatory to beat. The developer set the default mouse speed, in the game, to medium. Fast mouse speed, during the shooting gallery game, means less accuracy (and easier) for you to pass the mini-game. I suggest setting this feature now and forget about it the entire game. Hit your escape key (Esc) or your spacebar key then select Settings. Move the mouse option to the very top (faster mouse movement in the game). This helps tremendously when attempting the shooting gallery. Hit your escape or spacebar key to exit the menu, and continue with your game. If you want the shooting-gallery game to be even more challenging, make the mouse speed slower (which will require a higher accuracy to beat each round).
2) Carrots. You get through the map, other than a couple of occasions when you ride a carriage and a wagon, on your horse. The horse, of course, needs fuel. Carrots fuel your trusty steed. There are 4 ways to obtain carrots. The Bannister's farm, the Alvin's farm, Jackson Market (of which cost money), and one other instance where you get 1 free carrot at Starek's house. To obtain carrots at either farm, you must fill a bucket of water, bring it back to the crops then water the crops with it. You do this repeatedly until carrots grow. I recommend picking up the bare essentials (Bannister's farm: gun holster, toy guns, hat, bucket, saddle and have at least 2 carrots for your horse... Alvin's farm: 2nd bucket which is found on the porch near the door) then come back to the Bannister's farm. At the Bannister's farm, the crops yield 5 carrots at a time. The Alvin's farm only yields 4 carrots at a time, you have to walk to and from the water supply farther than at the Bannister's, and you have to waste a rope (of which you cannot ever retrieve again, but not a mandatory item) to use their well. So, it is advantageous to collect the carrots at the Bannister's farm in those regards. The horse will require 1 carrot going to the Alvin's farm, and 1 more to return back to the Bannister's farm, so be certain to have at least two carrots before leaving the Bannister's farm. Once you are back at the Bannister's farm, having 2 buckets will help speed things up. Go to the water pump and fill up both buckets, bring them to the crops then dump them both out. While new carrots grow, go fill the buckets up again. Repeat as necessary. I suggest never having less than 10-15 carrots, in your inventory, at all times. I would also suggest that before you start the adventure that you stock up on at least 50 carrots; this amount should get you through the entire game without you having to get anymore carrots.
For those wanting a save bypass for the shooting gallery, or a save to bypass
having to accumulate carrots (at the beginning of the game), click here:
http://www.cheathappens.com/show_mc.asp?titleID=9931. Please read the
readme.txt files inside the files before using the saves. Have fun!
Final Note: This walkthrough does not find every item to be collected. In fact, there are 2 levers and 2 logs that can be collected. If you wish to locate them, you can do so, but they are not necessary to possess to complete the game.
Walkthrough:
BANNISTER'S FARM
FARM HOUSE
Right click on the rope (hanging on the bed rail) then left click on it to take it.
Take the gun holster from the coat rack beside the bed rail.
Walk over to the desk, open the drawer then take the toy guns (close the drawer after).
Open the bedroom door.
Take the apple on the cabinet (beside Stella Bannister).
Walk over to the fireplace then take the bellows (to the right of the fireplace).
Walk over to the desk (to the left of the fireplace), open the drawer then take the dollar (close the draw after).
Talk to Stella (exhaust all dialogue).
Take your hat (next to the door to Billy's room) then exit through the door with the window.
|
OUTSIDE
Note: Read the tip about carrots above. This walkthrough will not go through how to acquire carrots other than ones given free.
Walk over to the outhouse (structure with the gray tank above it) then take the bucket.
Walk into the open shed (between the outhouse and your horse).
Take the saddle on the rail, the rope and the saw (hanging on the wall).
Walk over to the sink (left side of the house if you are facing it).
Take Billy's sock in the clothes basket (on the ground).
Walk over to your horse (open the gate along the way).
Take the saddle, from your inventory, then use it on the horse.
Note: Feed the apple to the horse. Its bite mark, in the apple, will be needed for later in the game.
Feed a carrot to your horse then use your horse (right click then left click).
|
ALVIN JONES'S FARM
OUTSIDE
Walk up onto the porch then take the bucket next to the door.
Speak to Alma Jones (exhaust all dialogue).
FARM HOUSE
Walk into the house then speak to Joe Bannister (exhaust all dialogue).
Note: You will note that Alvin said the train from Abilene needs to be stopped, or more of Starek's henchmen will come. This is the reason why we do something later in the game (that may seem senseless then).
Open the table drawer (next to Alvin), take the dollar then close the drawer.
Open the table drawer (next to Joe), take the dollar then close the drawer.
Move towards the wall beside the stairs.
Open the closet then look at it.
Take the dollar on the top shelf, and the dollar on the bottom shelf (then close the closet doors).
Go upstairs then open the door.
UPSTAIRS
Take the basket beside the stairs (ladder).
Move the stairs (ladder) over to the window.
Note: We now have the option to go out the window, but there is nothing we can do out there for now.
Go into the bedroom.
Walk over to the dresser (with the mirror on top).
Open the top, right-hand drawer then take the dollar (close the drawer after).
Open the middle drawer then take the dollar (close the drawer after).
Open the bottom drawer then take the dollar (close the drawer after).
Go back downstairs, go outside then use your horse.
|
SCHOOL
OUTSIDE
Walk up to the deck surrounding the schoolhouse.
Go behind the schoolhouse (to the left) then take the lever leaning against the building.
Go inside the schoolhouse.
SCHOOLHOUSE
Note: Watch the cutscene of Starek and his henchmen. Floyd Random is the man Starek wants his niece, Rhiannon, to marry.
Take your hat (from the floor).
Take the toy guns (from the floor).
Walk over to the teacher's (Rhiannon's) desk.
Open the top, right-hand drawer, take the pen then close the drawer.
Open the middle drawer, take the dollar then close the drawer.
From here, open the drawer of the student's desk closest to the bookcase.
Look at the open desk, take the folding ruler then close the desk.
Go back outside then use your horse.
|
TOWN (STAREK CITY)
SHERIFF'S OFFICE
Speak to Sheriff Slocum (exhaust all dialogue).
Note: We haven't met Shorty yet, but we will once we leave the sheriff's office. Also, you will note, at the end of every conversation we have with the sheriff, throughout the game, the sheriff refers to your having to urinate (instead of leaving) when you say you have to go. Part of the humor of the game, I suppose. J
OUTSIDE
Walk around to the back of the sheriff's office.
Speak with Tom Postom through the open window (exhaust all dialogue).
Go out to the front of the sheriff's office then speak to Shorty (exhaust all dialogue).
Walk into the saloon.
SALOON
Note: Whiskers (one of Starek's henchmen, standing at the bar), and the stranger (seated at the table) are of no use to us now, but they will be later in the game.
Speak with the barman (exhaust all dialogue).
Go upstairs (purchase a 3 dollar bath from the barman).
Go upstairs then use the key, from your inventory, on the first door on the left.
BATHROOM
Take the bar of soap (on the bath tub with the rubber duck).
Go to the rear of the room then take the matches on the chair.
Go into the room (Doctor) opposite the bathroom (across the hall).
DOCTOR'S OFFICE
Speak with the doctor (exhaust all dialogue).
Try to take the portrait of Jesse James (on the doctor's desk).
Speak with the doctor again, and ask about the portrait (exhaust all dialogue).
Go through the door beside the diploma on the back wall.
DOCTOR'S ROOM
Note: Potential game glitch to note. You can open the closet and find nothing. Later, if you return here, you may find a dollar in the closet, but it cannot be collected.
Open the glass-door closet, beside the bed, take the dollar then close the door.
Take the doctor's (black) case on the bed.
Open the trunk (at the foot of the bed), look inside, take the dollar then close the lid.
Take the hotel key (to Room #4) on the table.
Go out the door (to the immediate right of the table).
Go into the door across the hall (Room #4).
ROOM #4
Open the drawer (of the dresser) on the right, take the dollar then close the drawer.
Open the drawer (of the nightstand to the right of the bed), take the dollar then close the drawer.
Open the closet (to the left of the trunk), take the dollar then close the closet doors.
Open the trunk, look inside, take the dollar then close the lid.
Take the cushion, on the chair (to the left of the dresser).
Go back downstairs, speak to the barman and purchase a bottle of Triple X Whiskey for 12 dollars.
Note: If you do not get the option to purchase the whiskey then you didn't exhaust all dialogue with the doctor upstairs. Go back and do so before you can purchase the whiskey.
Leave the saloon and go to Jackson's Store.
JACKSON'S STORE
Click on the Tyrolean harness (to the right of the front door) to buy it.
Buy the Tyrolean harness for 5 dollars.
Note: If you are following this walkthrough, we only have 14 dollars left. There are many more items we need to purchase, here, for later in the game. For now, we only need one other item, pliars.
Go to the rear of the store.
Buy the pliars (for 2 dollars) on the wall-mounted stand between the two doors.
Note: Other items for sale... Enter the clothing department (5 dollars), hydraulic jack (8 dollars), axe (4 dollars), climber's belt (7 dollars), launcher belt (12 dollars), mobile telegraph (8 dollars), 3 newspapers (The Nightly Moon - 7 dollars, The Evening Star - 6 dollars and The Morning Sun - 5 dollars), dynamite (requires a dynamite permit and an authorized bank check for 100 dollars) and farm fortification ammunition (requires a CISA credit card). Of everything left for sale, all but 4 items are mandatory to purchase to complete the game. The 4 items not mandatory to purchase are: the axe, the climber's belt, the Morning Sun newspaper and the Evening Star newspaper. I will explain what is in each of the newspapers later in the game, because they give us clues how to solve certain puzzles.
Leave the store then go to the train station.
TRAIN STATION
Speak to the telegraphist behind the window.
Note: You can send 3 telegrams. One to Aunt Filomena, one to the president and one to Sam the pianist. The telegram to the president will cost 4 dollars. The other 2 telegrams will cost 2 dollars each to send. The response from Aunt Filomena gives us 10 dollars back. The response from the president gives us 20 dollars back. The response from Sam the pianist gives us nothing, so don't send a telegram to Sam the pianist (at any point in the game). Send a telegram to the president for 4 dollars. We will come back later to send one to Aunto Filomena.
Send a telegram to the president asking for a grant.
Go into the door to the right of the telegraphist's window.
Try to take the lamp-post on the mantle.
Note: The last action was necessary to be able to view the table to the right of the fireplace.
Take the specs on the table (to the right of the fireplace).
Go to the back of the room then go out the door (to the left of the fireplace).
Take the log next to the chimney.
Take the fold-up wheelbarrow between the pile of coal and the crates.
Go speak with the telegraphist again, and get your 20 dollar grant from the president.
Send a telegram to Aunt Filomenaa for 2 dollars.
Go back to the saloon.
SALOON
Go upstairs to the doctor's office.
DOCTOR'S OFFICE
Speak with the doctor and begin the operation.
Take the portrait of Jesse James on the desk.
Go back downstairs then leave the saloon.
OUTSIDE
Go behind Jackson's Store.
Use the maintenance truck (handcar).
Click on the right-hand lever "uncharted track."
BRIDGE
Go down the hill (on the otherside of the maintenance truck).
Note: You will see tire tracks going down to the water, and another area to the right of the vegetated rock (at the far, right-hand side of the screen). The area to the right will not be used until later in the game.
Go down to the water.
Take the basket, from your inventory, then use it on the beach.
Go into the water.
Note: Time for an annoying game of skill. The object is to swat the trout into the basket on the beach. Keep yourself aligned with the basket at all times. When the trout swims by, click on it (but only when the cursor changes to a hand, or you will re-position yourself).
Swat the trout into the basket then take the basket.
Go back up to the maintenance truck, use it then click on the left-hand lever "uncharted track."
Take the rope in front of the shed.
Take the axe beside the rope.
Note: See now why we don't need to buy the axe from Jackson's Store (and the climber's belt shortly below)? J
Use the maintenance truck and click on the right-hand lever "to the town."
OUTSIDE
Take a rope, from your inventory, then use it on the pulley (above the large, wooden gate behind Jackson's Store).
Open the gate then go inside.
Take the rope (sitting on the table).
Take the climber's belt (black) on the pulled-out drawer.
Go back outside.
Note: You will notice the bull if you haven't already. It will sit there until we need use of it later in the game.
Go back to your horse then use it.
|
SCHOOL
OUTSIDE
Go inside the schoolyard then over to the girl swinging (to the right of the schoolhouse).
Speak to teh little girl (exhaust all dialogue).
Note: Alvin, Alma and Annie Jones. Cute.
Give the portrait of Jesse James to Annie.
Give Billy's sock, from your inventory, to the dog to smell.
Follow the dog to Billy & Tommy's hideout.
Take a rope, from your inventory, then use it on the hideout entrance.
Use the rope to climb up to the hideout.
Speak with Billy & Tommy (exhaust all dialogue).
Go into the schoolyard then go left of the schoolhouse.
Go inside the outhouse and retrieve your pistols.
Leave the outhouse, go back to your horse (and watch the carriage wreck).
Note: You see the kids run away while speaking to the maid.
Go to your horse then use it.
|
TOWN (STAREK CITY)
JACKSON'S STORE
Buy the hydraulic jack (8 dollars) sitting on the crates.
Go back to your horse then use it.
|
ALVIN JONES'S FARM
OUTSIDE
Note: You can go into the farm house and learn, from Alvin, that the pig only eats fish (but not mandatory to do).
Go into the caged shed connected to the pigsty.
Take the trout, from your inventory, then place it on the plate.
Shut the hatch down (above the pig) onto the pig to knock it out.
Take the trout back.
Go into the farm house.
FARM HOUSE
Go upstairs (and open the door).
Go up the stairs (ladder) beside the window.
Note: Move the stairs (ladder) over to the window if you haven't done so already.
Walk over to where the rope is fastened to the roof.
Note: If we hadn't knocked the pig out, we would slide down the rope, land on the pig then get bucked off and land in the water trough below.
Use the Tyrolean harness, from your inventory, on the rope.
Use the Tyrolean harness to slide down the rope.
Use the lever, from your inventory, on the wagon wheel.
Move your cursor (shown below) to the corner, and take your lever back.
Walk out of the pigsty then over to the wagon wheel.
Use the fold-up wheelbarrow on the wagon wheel.
Go to the area behind the water trough.
Take the log, from your inventory, then use it on the ACME logholder.
Take the saw, from your inventory, then use it on the log.
Take both halves of the cut log.
Go back to the fold-up wheelbarrow.
Take the fold-up wheelbarrow.
Note: Normally, we would ask Alma if we could take the wagon wheel, but she refuses. It isn't until we present her with a medical emergency that she finally agrees to let us borrow it. Because this dialogue isn't mandatory, I did not include it in this walkthrough.
|
SCHOOL
OUTSIDE
Take the hydraulic jack, from your inventory, then use it on the carridge.
Use the hydraulic jack to raise the carridge.
Use/take the fold-up wheelbarrow to place the wheel on the carridge.
Walk around to the otherside of the carridge then take the dirty jacket off of the doctor.
Use your horse.
|
BANNISTER'S FARM
OUTSIDE
Go inside the farm house.
FARM HOUSE
Speak to Stella (exhaust all dialogue).
Take your hat then go outside.
Note: If Stella doesn't exit, this is a glitch in the game. If she gets stuck, blocking the front door, access the door on the left side of her until you can go outside.
OUTSIDE
Take the cut log, from your inventory, then use it on the tree stump (white).
Take the axe, from your inventory, then use it on the cut log.
Pick up both halves of the split log.
Take the remaining cut log, from your inventory, then place it on the tree stump.
Take the axe, from your inventory, then us it on the cut log.
Pick up both halves of the split log.
Go over to the sink and talk to Stella (exhaust all dialogue).
Take the wet jacket from the clothesline.
Go back inside the farm house.
Note: You will notice something interesting from outside. The chimney is smoking, but the fireplace isn't lit yet.
FARM HOUSE
Use the split log, from your inventory, with the fireplace.
Use the matches, from your inventory, on the fireplace.
Use the bellows, from your inventory, on the fireplace.
Take the wet jacket, from your inventory, then place it on the stand (to the left of the fireplace).
Take the jacket when the bar turns gray (and no longer blue).
Go back outside.
OUTSIDE
Go to your horse then use it.
|
TOWN (STAREK CITY)
OUTSIDE
Go to the train station.
TRAIN STATION
Speak to the telegraphist, and receive the $10 from Aunt Filomena.
Go to the saloon.
SALOON
Speak to the stranger (seated at the table).
Speak to the barman (exhaust all dialogue).
Take a dollar, from your inventory, then give it to the barman.
Give the barman a $5 tip (minimum he will accept to introduce you to Willy).
Speak to Willy (the stranger at the table) again, and ask to buy the adulterated oil.
Note: If you are following this walkthrough, we only have 23 dollars. Normally, he charges a minimum of 25 dollars (if we had more money). For now, he will only charge 20 dollars if you choose: "I don't have more than ten."
Leave the saloon.
OUTSIDE
Go to the maintenance truck (behind Jackson's Store) then use it.
Click on the left-hand lever "uncharted track."
|
FAIRGROUND
Note: Time to play the infamous shooting-gallery game. There are 5 rounds to play (in order to get the Winchester rifle which is mandatory to complete the game). Round 1 requires 15 targets hit. Round 2, 20 targets. Round 3, 25 targets. Round 4, 30 targets. Round 5, 50 targets. It is quite difficult, if you are not used to playing first-person-shooter games, to beat round 4 (yet alone round 5). To bypass round 5, you can re-place the robot oil (near the orange machine) with the adulterated oil we just bought from Willy. This will make the robot shutdown, and lose automatically. Finally, if you do not beat the fairman's 5 rounds, in addition to you not receiving the rifle, he will not show up, later in the game, to play the Spicey Sarsparrilla Drinking Duel with you (which is also mandatory to completing the game).
Strategy: Read Tip #1 at the top of this walkthrough. Before speaking to the fairman, save your game. If you lose your dollar investment, load the save you just made. Red targets are the bad guys. Blue targets are the good guys. Shoot a blue target, and you automatically lose. The red targets, you will begin to notice, appear in a clockwise fashion. I assure you, how they popup is completely random (aside from the clockwise motion the game follows). Tip #1 (top of this walkthrough), and the clockwise recognition are the 2, best tips to passing this game successfully. Employing these tips still doesn't gaurantee victory; the game is still very difficult. Left mouse controls your left pistol, and right mouse controls your right pistol. I found it easiest to use the pistol in the direction you move. For example, if you move left, use your left pistol, etc. Also, I found it easier to keep both arms at equal length to help stabilize, so I placed my middle finger on my escape (Esc) key while I operated the mouse with my right. You do not benefit by getting more than the minimum for any of the rounds. Round 1 is the easiest, so I suggest that you get your 15 targets then continue playing through the remainder of the round, so you can be comfortable playing. For rounds 2 and 3, just get the minimum and relax your arms afterwards (20 for round 2 and 25 for round 3). Round 4, good luck; it is quite difficult. Finally, do not attempt this game if you have lost some of your concentration. You will need a fresh mind to successfully beat the game.
Take the adulterated oil, from your inventory, (only if you don't want to play against the robot in round #5) then use it with the can of robot oil on the ground (beside the orange machine).
Speak to the fairman (exhaust all dialogue).
Play the game, and beat all of the levels to get the Winchester 73 rifle.
|
TOWN (STAREK CITY)
OUTSIDE
Go to Jackson's Store.
JACKSON'S STORE
Go to the back of the store.
Open the door (to the left of where you found the pliars earlier).
Pay the 5 dollars to enter into the clothing department.
Go into the clothing department.
Go down the first flight of stairs.
Take the black (bowler) hat on the hat rack.
Note: There are stairs (steps of a ladder) going down to another level. Down there is a film developer (we will use later in the game), and a locked door (of which we never use in the game). For the time being, there is nothing for us to do down there.
Go back up to the main floor.
Leave the store, and go to your horse then use it.
|
SCHOOL
OUTSIDE
Go over to Livy, the maid.
Take the cushion, from your inventory, then give it to Livy.
Take the (black) case, from your inventory, then give it to Livy.
Take the specs, from your inventory, then give it to Livy.
Take the (black, bowler) hat, from your inventory, then give it to Livy.
Take the jacket, from your inventory, then give it to Livy.
|
STAREK'S RANCH
OUTSIDE
Take the lamp (lantern) from the bench.
Click to move to the stairs on the right-hand side of the ranch.
Open the door (far left side) atop the stairs.
Open the top, left-hand drawer, on the stove, look inside then take the dollar (close the drawer after).
Look at the desk behind Livy.
Open the right-hand drawer, look at the desk again then take the dollar (close the drawer after).
Open the left-hand drawer, look at the desk again then take the dollar (close the drawer after).
Take a carrot from the kitchen table.
Speak to Livy (exhaust all dialogue).
Take the book on Ancient Rome (on the kitchen table).
Speak to Livy again about the book.
Note: Livy will trade a sacred bone for the book. Well, we don't have one, but we do have a tooth.
Give the bloody tooth, from your inventory, to Livy.
Take the book on Ancient Rome (from the kitchen table).
Open the doors (bottom of the glass-doored closet ), look inside then take the dollar (close the doors after).
Open the glass, closet doors, look inside then take the dollar between the pitcher and the bowls (top shelf).
Move back 1 step, look at the open doors again then take the dollar behind the pot (close the doors after).
Go out the door (to the immediate left of the glass-doored closet).
OUTSIDE
Go down the steps then to the left (and back to Rhiannon's window).
Click on Rhiannon's window.
RHIANNON'S ROOM
Look at the red desk (next to the window).
Open the drawer beneath the the top drawer (on the right side), look at the desk, take the dollar then close the drawer.
Open the door below the drawer you just opened, look at the desk, take the dollar (close the door after).
Look to the left side of the desk, open the top drawer then take the dollar (close the drawer after).
Open the middle drawer then take the dollar (close the drawer after).
Walk passed the closed window (towards the desk in the corner of the room).
Take the book on the Renaissance (on the desk).
Open the closet (opposite side of the room) then take the dollar (close the closet doors after).
Move over toward the left-hand side of the fireplace.
Go out the door.
HALLWAY
Go down the hallway then go into the area on your right (Go to Entrance).
Take the book on Medieval History (on the table beneath the painting).
Go back into the hallway then go into the enclosure with the red drapes.
Open the door.
LIVY'S ROOM
Open the closet, look inside then take the dollar (close the closet doors after).
Open the top, right-hand drawer then take the dollar (close the drawer after).
Open the bottom drawer then take the dollar (close the drawer after).
Take the book on Prehistory (on the bed).
Leave the room.
HALLWAY
Note: You will see numerous paintings on the walls. You can click to view them, but there is no importance to any of the paintings.
Go down to the bottom floor.
FOYER
Click on the closet (desk) against the wall (opposite the side with the painting).
Open the top drawer then take the dollar (close the drawer after).
Note: The only doors open, in this area, are the 2 on the same wall as the desk we just opened.
Go into the room to the right of the desk.
STAREK'S DEN
Take the camera, on the chair, to the left of the fireplace.
Take the book on Ancient Greece on the chair next to the desk.
Go behind the desk, open the top drawer (left-hand side), look inside then take the dollar (close the drawer after).
Open the closet (left of the door), look inside then take the dollar on the bottom shelf.
Take 1 step back, look into the closet then take another dollar.
Take 1 step back, look into the closet then take final dollar (close the closet doors after).
Go back behind the desk, open the top drawer (right-hand side), look inside then take the dollar (close the drawer after).
Open the bottom drawer (right-hand side), look inside then take the dollar (close the drawer after).
Go through the door to the right of the fireplace.
LIBRARY
Go to the area to the right of the fireplace.
Click on the bookshelf to the right of the door.
Place the 5 books, from your inventory, into the bookcase, individually.
Use the bookshelf (right click then left click).
Note: The solution to this puzzle was found back at Jackson's Store in Starek City (town). The Evening Star newspaper (6 dollars) had an article about art history. It relayed the following sequence of topics: Prehistory, Egypt, Greece, Rome, Middle Ages, Renaissance and Modern Era.
Click on the books in the following order: Prehistoric, Egyptian, Greek, Roman, Medieval, Renacentist and Modern.
Go into the hidden passageway, take the lamp (lantern), from your inventory, then continue down the steps.
OUTSIDE
Use your horse.
|
TOWN (STAREK CITY)
OUTSIDE
Go into Jackson's Store.
JACKSON'S STORE
Go to the back of the store and buy a mobile telegraph (8 dollars).
Buy a launcher belt (12 dollars).
Go back to the counter, and buy the newspaper (The Nightly Moon) with the article about the escape from the Mexican jail (7 dollars).
Click on the newspaper in your inventory, to learn about the Baltimore poet (Edgar P. Allan).
Click on the newspaper again, in your inventory, to learn about a game (3 Skulls of the Toltecs).
Note: The other 2 newspapers are not needed to complete the game. The Evening Star (6 dollars) tells of the correct sequence to use for the library puzzle at Starek's ranch. The paper also tells of how to successfully rob a bank (take a picture of the banker, place it in front of the security camera then hold the bank up). The last article discusses Dr. Englehoffer (no clue to any puzzle in the game). The Morning Sun (5 dollars) tells of the ACME logholder & axe splitting. Also mentioned is how to blow up a bridge with dynamite and a Winchester rifle. The Nightly Moon newspaper is necessary to buy, because learning about the poet is a trigger to be able to send him a telegram later in the game.
Leave the store then go to the train station.
TRAIN STATION
Speak with the telegraphist, and send a telegram to Edgar P. Allan (2 dollars).
Leave the train station then go to the saloon.
SALOON
Speak to Whiskers (one of Starek's henchmen) standing at the bar, and play the Spicy Sarparrilla Duel with him.
Note: The object of this contest is to listen to all of Whiskers' questions & answers. Doing so will allow you to better defend yourself against 3 more opponents to come. You will have to lose until you can answer with a proper response. The correct responses are listed below, according to opponent. Do not leave a contest until you have heard all of the questions & answers the current opponent has to say. If you do not hear all of the available questions & answers, you will have to duel that individual again until you do. Each character has a line, you ask, that they cannot answer (which defeats them). The question the opponent cannot answer, and their corresponding answer, are listed last in the questions & answers below, in red. The questions & answers, in blue, are the correct replies to the last questions & answers, in red, that were not answered. So, for example, you would not ask Whiskers the question which ends in "shaking," until you have heard all of his other questions & answers.
|
OPPONENT 1: WHISKERS
| QUESTIONS |
ANSWERS |
|
I don't think you can manage all that. |
That's what you say, but your words leave me flat.
|
|
It looks to me like you're beaten already. |
That's just because you're feeling unsteady.
|
|
It appears that you haven't a thought in your head. |
That doesn't make sense, with you being brain dead.
|
|
I can see just how badly you're shaking. |
I would if you didn't look just like a fish.
|
Leave the saloon then come back in to find Fatty at the bar (challenge him to a drinking duel).
Note: If Whiskers is still at the bar, when you come back in, you did not listen to all of the questions & answers he had to say. If Fatty is there instead then you beat Whiskers. Whiskers left you with an unanswered questions, so be certain to ask Fatty that question as soon as possible.
|
OPPONENT 2: FATTY
| QUESTIONS |
ANSWERS |
|
Are you ready to tell me your very last wish? |
I would if you didn't look just like a fish.
|
|
I can see just how badly you're shaking. |
You're quite wrong! It's your legs that are quaking.
|
|
You should know this is not the right drink for a thug. |
But perfect for dealing with each kind of slug.
|
|
It appears that you haven't a thought in your head. |
That doesn't make sense, with you being brain dead.
|
|
It seems to me that you drink like a sissy. |
You'd know about that, now wouldn't you, missy?
|
|
They told me that you had a streak that was yellow. |
Tell me yours first, I can tell them you lied.
|
Note: If you leave the saloon, return and Fatty is still there then you did not beat him (i.e. listen to all of his questions & answers). If he is gone then you successfully defeated him.
Leave the saloon.
OUTSIDE
Go to the sheriff's office.
SHERIFF'S OFFICE
Speak to the sheriff (exhaust all dialogue).
OUTSIDE
Go to the train station.
TRAIN STATION
Speak with the telegraphist and get the telegram from Edgar P. Allan.
Go to the maintenance truck (behind Jackson's Store).
OUTSIDE
Use the maintenance truck then click on the lever "to the bridge."
BRIDGE
Take the climbing belt, from your inventory, then use it on the telephone pole across the train tracks.
Use the mobile phone, from your inventory, on the connection.
Send each of the 4 telegrams, individually.
Climb down the telephone pole.
Take the climbing belt from the base of the telephone pole.
Use the maintenance truck then click on the lever "to the town."
OUTSIDE
Go speak to the telegraphist, and get the telegram to deliver to Sheriff Slocum.
Go to the sheriff's office.
SHERIFF'S OFFICE
Give the telegram to the sheriff.
OUTSIDE
Walk around back to the sheriff's office.
Take the folding ruler, from your inventory, then give it to Tom (through the bars).
Go back to the front of the sheriff's office.
Look at the front door then use the iron key, from your inventory, on the door.
SHERIFF'S OFFICE
Open the glass cabinet (to the left of the front door), look inside then take the dollar (close the doors after).
Open the top drawer, below the gun rack, look inside then take the dollar (close the drawer after).
Open the middle drawer, look inside then take the red cape (close the drawer after).
Open the bottom drawer, look inside then take the dollar (close the drawer after).
Take the sheriff's appointment (hanging on the wall to the left of the gun rack).
Open the top, right-hand drawer of the sheriff's desk, look inside then take the dollar (close the drawer after).
Go to the desk to the right of the front door.
Open the top, right-hand drawer, look inside then take the dollar (close the drawer after).
Open the top, left-hand drawer, look inside then take the dollar (close the drawer after).
Leave the sheriff's office.
OUTSIDE
Walk around to the back of the sheriff's office.
Use the red cape on the bull.
Note: You can click on the newspaper, in your inventory, to describe what we just did to free Tom Postom.
Go to the train station.
TRAIN STATION
Speak with Sheriff Slocum (exhaust all dialogue).
Speak with the sheriff once more for another urination joke (prostate).
Go to the saloon.
SALOON
Speak with Willy at the table (exhaust all dialogue).
Go outside then go to Jackson's Store.
JACKSON'S STORE
Speak to the storekeeper (exhaust all dialogue).
Go back to the saloon.
SALOON
Speak with Willy (at the table), and buy a dynamite permit (select "I don't have more than ten").
Buy the dynamite permit (25 dollars).
Leave the saloon then go to the train station.
OUTSIDE
Use your horse.
|
ALVIN JONES'S FARM
OUTSIDE
Go inside the farm house.
FARM HOUSE
Speak to Joe Bannister about Tom.
Go upstairs then into the bedroom.
Open the closet then speak with Tom (exhaust all dialogue).
Take the pen, from your inventory, then give it to Tom.
Take the sheriff's appointment, from your inventory, then give it to Tom.
Take the TNT permit, from your inventory, then give it to Tom.
Open the closet doors again to get the forged TNT permit.
Close the closet doors, go downstairs then outside.
OUTSIDE
Use your horse.
|
TOWN (STAREK CITY)
OUTSIDE
Go to the saloon.
SALOON
Note: A ha! Our 3rd opponent has finally arrived. The fairman awaits.
Speak to the fairman, at the bar, and play the Spicy Sarsparrilla Duel with him.
OPPONENT 3: FAIRMAN
| QUESTIONS |
ANSWERS |
|
They told me that you had a streak that was yellow. |
You shouldn't take note, I'd just beaten the fellow.
|
|
You look very pale, will you give up the fight? |
If I look so pale, then you must be Snow White.
|
|
You'd know how to rhyme if you'd studied at school. |
If you can't do it, it proves you're a fool.
|
|
Do you want me to ask for a child's bib for you? |
While you're at it you could get your own rattle, too.
|
|
Tell me your name, I'll tell all how you died. |
You're quite wrong! It's your legs that are quaking.
|
Note: After you beat the fairman, you can leave the saloon and come back to see that the fairman has left, or you can directly go to Shorty and duel him last.
Go over to Shorty, sitting by the window, and speak with him (challenge him to a drinking duel).
OPPONENT 4: SHORTY
| QUESTIONS |
ANSWERS |
|
Can you keep rhyming, it's part of the rule? |
If you can't do it, it proves you're a fool.
|
|
I dare you to empty your glass on your head. |
That doesn't make sense, with you being brain dead.
|
|
You'll never know victory's such a sweet dish. |
I would if you didn't look just like a fish.
|
|
With a man like you I have nothing to fear. |
That's what you say, but your words leave me flat.
|
After you beat Shorty, go outside.
OUTSIDE
Note: You defeated Shorty, so he will no longer follow you around the town.
Walk into the bank.
BANK
Use the camera, from your inventory, on the banker.
Leave the bank then go to Jackson's Store.
JACKSON'S STORE
Go into the clothing department then down the stairs and the ladder (bottom floor).
Go over to the developing machine.
Use the photographic plate, from your inventory, on the developing machine.
Use the developing machine (right click then left click) to develop a picture of the bank.
Go back to the bank.
BANK
Speak to the banker, but only ask if he could turn the fans off.
Use your picture, from your inventory, on the security camera (on the wall) then go back to the banker's window.
When the banker returns, use your pistols, from your inventory, on the banker.
Go over to the door to the enclosed area of the bank.
Take the lever, from your inventory, then use it on the door.
Open the top, left-hand drawer of the desk (immediately behind the open door we came through) then take the CISA card (close the drawer after).
Open the top, right-hand drawer then take the check (close the drawer after).
Go over to the other desk, open the closet doors, look at the closet then take the dollar (close the closet doors after).
Leave the bank then go to Jackson's Store.
JACKSON'S STORE
Give the TNT permit, from your inventory, to the storekeeper.
Give the check, from your inventory, to the storekeeper.
Give the CISA card, from your inventory, to the storekeeper.
|
OUTSIDE OF TOWN
Note: After you return, with the wagon, to get the ammunition, you are ambushed on your way back to Alvin Jones's farm. As soon as Alvin hands you the lit dynamite, immediately save your game. If you die, in the upcomming shootout, you won't have to watch that lengthy cutscene again.
Strategy: There are 4 guys to shoot (multiple times each) then you throw the dynamite. You move with your left click, and fire with your right click. The first enemy is in the mine shaft (to the left of the wagon). After defeating him, continue moving between the rock and the crate until you go offscreen. Go up the hill a little and kill the 2nd enemy (Whiskers). Continue moving up the hill (to the right of the screen). Kill the 3rd enemy (behind the beam). Continue up the hill (to the left of the screen). The final enemy is at the top of the cliff (hiding behind a crate). Position yourself beside the plant (at the end of the hill you just walked up) then kill the enemy.
|
TOWN (STAREK CITY)
ALVIN JONES'S FARM
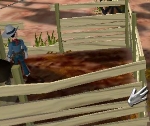
Walk up the path, so you are between the 2 trenches.
Take the Toltec foot from the trench in the foreground.
Speak to Joe Bannister (exhaust all dialogue).
Use your horse.
|
TOWN (STAREK CITY)
OUTSIDE
Use the maintenance truck (behind Jackson's Store).
Click on the lever "to the bridge."
BRIDGE
Go down the hill to the water.
Take the belt launcher, from your inventory, then use it on the bridge.
Take the dynamite, from your inventory, then use it on the bridge.
Walk up onto the beach then move to the area to the right of the vegetated rock (on the far, right-hand side of the screen).
Continue down the path until you are on a ledge.
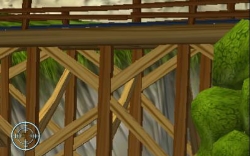
Take the Winchester rifle (from your inventory).
Shoot the bridge where the dynamite was placed (look below for the exact locale).
Go back up to the maintenance truck then use it.
OUTSIDE
Use the maintenance truck then click on the lever "to the bridge."
BRIDGE
Go down the hill to the water.
Talk to Sheriff Slocum (exhaust all dialogue).
Walk down to the beach then use the bitten apple, from your inventory, on the beach.
Use the maintenance truck.
OUTSIDE
Go behind the sheriff's office, and speak to Sheriff Slocum (exhaust all dialogue).
Take the Toltec foot, from your inventory, then use it on the muddy ground (to the left of the rocks).
Use your horse.
|
STAREK'S RANCH
OUTSIDE
Go into the drain hole.
Go up the stairs.
LIBRARY
Go through the door on the left.
FOYER
Go up to the 2nd floor.
HALLWAY
Follow the carpet to Rhiannon's room then go inside.
RHIANNON'S ROOM
Go out the open window.
OUTSIDE
Note: Save your game immediately. If you move to the side of the house (with the stairs), an animation will begin which takes you to the final battle with Starek and his henchmen.
Go to the side of the house (where the stairs are).
|
ALVIN JONES'S FARM
FINAL BATTLE...
Note: 6 vs. 6; even odds. The object here is to shoot the enemies then shoot the picture of someone on your team (at the bottom of the screen) to change to that individual. As that individual, you shoot at other enemies.
AS FENIMORE: Shoot the hand that appears on the blue, ACME crate. After, shoot Floyd's left hand, on the tree, beside the blue, ACME crates. Shoot Tom's picture (at the bottom of the screen).
AS TOM: Machine gun the crates until Whiskers is visible. Kill him as he runs towards you. Shoot Alvin's picture (at the bottom of the screen).
AS ALVIN: Shoot the tree (to the right of the tree in the foreground). Shoot Joe's picture (at the bottom of the screen).
AS JOE: Kill the guy hiding behind the tree Alvin just blew up. Shoot Rhiannon's picture (at the bottom of the screen).
AS RHIANNON: Blow up the tower. Shoot Alma's picture (at the bottom of the screen).
AS ALMA: Shoot at the base of the shattered tower to make it topple onto the final bad guy.
Watch the closing animation, and the outtakes afterwards.
THE END
Copyright Information:
This document may not be used without the expressed, written
consent of the author. Linking to this walkthrough (hosted by the
Gameboomers.com website) from within your webpage is in direct violation of
this copyright. Please link to the Gameboomers.com main walkthroughs webpage
instead. Also, altering the information, in any way, is this document is
forbidden.
© Gamehound, 2004
|
|