| Some people have had difficulty finding their way out of the book. Look for the word exit on the wall. It is to the far right, if you are facing Dian. Not a maze, you can get to it from any node. |  |
| Chapel Island | Rainbow Bridge | Hell Maze |
| Birdman | Spiders | Curtains |
| Brigid's Cross | China | 16 Items |
| Mayan Lands | Miniature World | Atlantis |
The opening movie shows you, Ten, climbing in the Himalayas. With the guidance of an eagle and some shooting stars, you find your way to the Atlantë, one of the flying ships of the Atlanteans. You are a descendant of Seth, and a carrier of Light, who saved the world from the forces of darkness after Creon, the Queen's Consort released the darkness which had long been imprisoned. Darkness is now under the watchful eye of the people of Shambhala, and, following a supernova, it appears that Light and Darkness are restless, and strive to be joined once again.
You arrive at Atlantë, perhaps hoping to fly, but the ship is dormant. Make your way below and have a look around. If you turn left, atop the barrel is a stone you can pick up. Take it and go into the next chamber. When you step in, the levitating Wiseman speaks and welcomes you.
| Always talk to everyone about everything. |
When you have exhausted the conversation with the Wiseman, you have learned who you are, the bearer of light, and that you will be looking for the exact place to use your Crystal for further journeys. It already contains one, says the Wiseman. (If you wish, you can take that one journey now, that the crystal contains. To do so, go above decks on the ship, and hold the crystal up toward the bow. See the lines turn red? Click. Wow! How about that? Click on Earth to return.) You are urged to remember the path you travel. Your ancestors prepared the way long ago and then broke it into six.
| Atlantis 2 is a large game. Please be prepared to take some notes, especially if you take a different path through the game. The individual sections of the game are fairly linear, but you may do the major segments in a different sequence than presented here. If you do that, some of the puzzles will have different solutions. You would need to refer to your own notes to solve them. |
Step forward once, toward the hammock. There are two more triangular stones. One is behind you on the floor, and the third one is in the far corner, under the hammock. Go closeup to the Planetarium and place one of the stones on it. I recommend using the stone from the floor behind you, the one with the simplest markings first. It will take you to Ireland.
You are "beamed up" and into the body of Brother Felim, a monk in Medieval Ireland. You bear the marks of the bringer of light on your palm. Suddenly, something happens to one of the monks outside, Brother Finbar. You go see him, and find him dazed, unable to speak. What in the world did he see to frighten him so? Have a look at the weeping head in the entryway, but don't click on it; it takes you back to the Atlantë. Go back to the Abbot and talk with him about Finbar and the head. Then return to work on your manuscripts. Pick up a brush from the container on top, and move close-up to the page. Paint on the center, and voilà, you are really getting into your work now! Not to worry, this is not a maze (that comes later, darn it!)
In the book, turn R,F, hard L. Talk to the blue man about everything. He is Dian, physician and silversmith. You will need the hand. Talk to the King, Nuada. You will need the sword. Exit the book. The Abbot is gone when you come out of the book. You can find him sitting in front of one of the huts near the well. While you are out there, visit the other open huts and pick up the ewer (water pitcher) and go to the weeping face to fill it.
| Some people have had difficulty finding their way out of the book. Look for the word exit on the wall. It is to the far right, if you are facing Dian. Not a maze, you can get to it from any node. | |
Have you visited King Ailill's grave? it's an open grave, a very old style, and not very common any more. His skull is on display there, but vandals have broken it and distributed five pieces. You must find them. Here they are, in no particular order.
For the one atop
the cross in the chapel, find the hay-fork in the garden behind
Finbar, climb the ladder and look down the hole in the roof to
dislodge the skull piece. Then go inside to find it on the floor
near the altar.
For the piece behind
the bird near the well, you must drive the fox out of his lair.
To find the fox, start at Finbar. R, F, right-fork, and right-fork
again.
While you are at the
beehive, just down the hill from the grave, watch the flock of
bees by following them all the way around clockwise. Not
necessary to do this, just to appreciate an amazing bit of
programming. Keep going around the island perimeter to find the
sheep. (F4 from the fox's lair; forward a couple more nodes takes
you back to the garden.)
You can put the five
pieces in the skull at any time, and in any order. When they are
all in place, Ailill comes to life after 1000 years. He cannot
talk at first. "Uuuugh." Sort of like me, when I've
overslept. If you give him water, he is refreshed and can speak.
He tells of a Force, a horse, and a stone. What's all that about?
And he wants a knife. Let's go find him a knife.
When you exit the grave, if you go straight out, there is a stone with a cross on it. If instead, you go around the back of this stone, there is a horse and some Druid marks. The horse is a hot-spot, but nothing happens yet.
Maybe the Abbot can help. (If he's no help, then you haven't peeked around the west side of the chapel. How'd I know it's west? because the shadow must be on the north side. This is Ireland, and in the Northern latitudes.) Anyway, once you go around the side of the chapel to see the Druid markings on the stone wall, Brother Abbot will talk about them. Then, since you are so clever, he gives you a key. Don't travel far, the chest it opens is right here, down and to the right. Take the knife and the parchment.
Talk to the Abbot about the trees on the parchment. Ask about them from left to right. Notice that he gives you details about three of the trees. The Ash, the Oak, and the Elderberry were once standing close to the stone or the chapel. Note their Druid symbols. (Four to the right, two to the left, five tilted)
Then, since Ailill wants the knife, take it to him. Talk to him about the horse, and himself. He tells you how he died, and that Aine put a curse on him, (It's Gaelic, pronounced Oh'nya, "it's nice to've known ya") but he won't tell you why. Must've been something really bad. Show him the knife. He places a Gaelic blessing on the knife. Go to the Druid marks on the Chapel wall.
Clicking outside the marks, on the right or left, changes the position of the marks. Clicking in the center, just above the lowest mark, erases one mark. So do this: The top set must match the Oak image. Put the marks on the left, and erase the bottom three, leaving two pointing left. The middle set must match the Elderberry. Make them all centered and slanting downward to the right. The bottom set must be all erased. Delete them from the bottom up. Then, the spiral emblem will now open the wall, giving you access to the stick. Have you found the stone horse yet? The Standing Stone is outside Ailill's grave, with a cross on one side, and the horse on the other. If you have trouble finding it, start at the exit from the grave. Go L, F1, R, F1, R.
Use the stick on the stone horse to release him. Now your problem is to catch the horse. From the Stone, turn right, F1, Turn left, F2, turn right toward the beehives and wait to see the horse coming. When he pauses, you can pick him up. (If you follow the horse or miss picking him up, he will go back into the stone and you need to release him again.)
Turn around to your left and take the stone horse to the beach where the short pilings are, and place him in the water. He becomes real. Click on him, and he will take you to another island.
|
The reason for creating a saved game is so you can experiment with the puzzle, and then return to the same configuration. This puzzle randomizes itself as you work on it, making it nearly impossible to repeat anything. When you save a game write down the time and a brief description. Saved games can only be identified by the time-stamp.
CAUTION: If you are deaf, or tone-deaf, or "musically challenged", you will need a helper or a saved game. I can provide the saved game, as long as you are using the same sequence: Ireland first, then Maya, followed by China.
Go find the birdman sitting on a branch. Click on him and you get to ask him about three subjects: himself, the horse, and Ailill. He chirps a song. He wants you to repeat his song back to him. You have five songs to choose from. To listen to the different songs, just pass the cursor over the choices, without clicking and without hovering.
The big challenge with this puzzle is recognizing when you've answered right. You need to hear the difference between the "right" and "wrong" responses from the Birdman. That's the hard part. The response he gives when you are incorrect ends with a shrill, hawk-like tone, and the response for a good answer starts with a beep and ends more songlike. Both responses are very short, and they come immediately after you make your choice, making it difficult to hear them at all. The whole key to getting through this puzzle is learning these two short sounds. If the birdman gives you the "good" sound, you are finished with that conversation segment. Don't ask about it again. If you get it right, and ask the same question again, he gives you a new song, and you must find the new right answer.
I suggest you learn a couple of the songs that are easier to pick out, and stick with one question-block until he whistles a song you have learned and are sure you can identify. Then, having gotten it right, don't go back to that question again. You only need to get each topic correct, once.
| I believe there are more than five different birdsongs, possibly ten or more, and the game randomly picks five of these to use. Another possibility is that the songs are created out of a selection of beginnings, middles, and ends. Anyway, I'm sure there are more than five. To many people they will all sound alike. Here's a suggestion to help sort them out: Some of the songs are short; about half the length of the others. They will sound very much alike at the start, but try to listen only for the difference at the end. Listen for the last note, which may be double or single, or rising or falling. Do the same thing with the longer songs; listen to just the opening and closing notes to pick out the differences. |
| You just have to see this anomaly! I was replaying the birdman puzzle several times in order to best describe it, when I tried to cut short the cutscene after he comes crashing down from the tree by pressing esc. The result was two birdmen, one on the ground and one in the tree simultaneously, and you could react with both of them! The standing one would speak, the the one in the tree would only whistle. I didn't fake that picture, honest! It's a captured screen. | 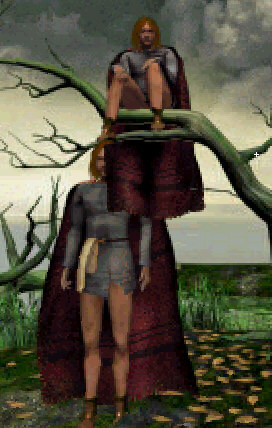 |
Don't forget to turn the music volume back up. |
So, when you get the three right answers, the birdman flies (?) down and talks to you. Be sure to exhaust the whole conversation, even after he gives you a divining-rod, to help locate the underground spring. Take some time to enjoy the ambience. You can follow the raven as it flies from tree to tree, and if you poke around the shoreline, there are green frogs hopping here and there. Go to the center of the island to find the hotspot, and use the stick there. The well appears and you can go down. Head right on down. The electric creature is scary. He can't really hurt you but he can prevent you from reaching the crystal at the bottom. Aha! it's the Glass Tower which contains Nuada's silver hand. Exit the well once you have looked at the "glass tower." (The frogs and raven seem to be gone, now that you've altered the landscape.) Talk to the birdman about the well and the electric eel.
Before you leave the island, let's drag out that crystal and see if we can match the pattern on it with something nearby. Try going back to the well and step once toward the big tree. If you cannot find the right place, Click Here to see it. Hold the crystal up against it and see how the lines turn red. Click and go for an unexpected ride! You will need to do the same thing at each of the three worlds, and finally back at the ship. Come back to earth, go to your trusty steed and return to Chapel Island. Clippity-Clop, Splish-Splash and all that.
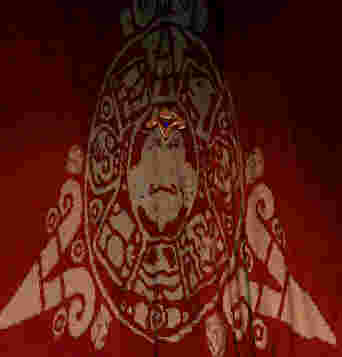
Go to your work table and use the brush on Nuada, on the right side of the manuscript, painting his sword. Use the brush again in the center area to enter the painting, and converse with Nuada. Take his sword. (For a little fun, attack Bres with the sword. You "die", but come right back to life.) (You could have done this earlier, when you were at the book the first time; it doesn't matter.) Talk to Dian about Fintan and his daughter until he understands why she is a statue. Exit the book and go talk with Ailill. Ask him about the birdman/poet, and about Airmid. Now you need to find a way to revive Aine. Maybe it's time for Brother Liam, the Abbot to help again. Ask him about the sun, and he gives you Brigid's Cross, but he doesn't know what it's for. Ask him about the cross, and it reminds him of the sun, spinning across the sky. Put it on the tapestry. Aine will appear and you can talk to her. If you start at the top, you find out she's just a little cranky after being dead 500 years. Post-Mummified-Syndrome, maybe?
| There are several hotspots on the tapestry. Only one will set the sun spinning across the sky. Here is a closeup of the right place. |  |
It would seem appropriate to visit Airmid again, since Aine promised we'd get our wish. Go to the manuscript and enter, to talk with Airmid. After the opening automatic conversation, ask her about everything. When you speak of the snake and she wants the salmon, exit the book. Turn back towards the book, and paint on Airmid, on the left side. The salmon appears. Re-enter, speak with her about the snake, and she gives you the Salmon Amulet which will protect you underwater. Go to Birdman Island, down the well, and use the Amulet at the bottom. When the electric snake tries to attack, his efforts are reflected, discouraging him. You can pick up the Glass Tower and return to the book. Go to Dian and speak with him. Give him the Glass Tower, and he places a Gaelic (curse? blessing?) on it, to make it more fragile. Then you can break it with Nuada's sword. Take the silver hand. Give the hand to Nuada works like the salmon, reflecting his powers. Bres is gone, and you are finished with this quest. Exit the book. When you go out of the chapel, an automatic scene unfolds. Take careful notice when the Abbot finds the fallen waistcoat of Bres and hands you a triangular stone. Away we go then; take care not to catch your cassock in the campfire, and kick up your heels a bit. It's the last chance you have to relax for quite a while.
You will return to the Atlantë. There is nothing new to be learned from the guru, so place the triangular stone with the pointy markings (not the new one) in the Planetarium, just to the left of the Ireland stone. You will be transported to the Mayan lands, after changing to disk two.
Look around if you like, take in the landscape, and notice that the supernova is also present here as it was in Ireland. Then, facing the way you started, go forward twice, turn left and climb the pyramid, two flights, all the way to the top. Looking left, is a sacrificial altar. Look closely at the star pattern inscribed on it for a clue to a later puzzle. In the other direction is a carved obelisk. Go to it and take the Obsidian Foot from the base. Don't click on the fire-pot to the right, unless you want to return to the Atlantë for some reason. Enjoy the condor flying around. Climb down the opening to enter the interior of the pyramid. At the foot of the stairs, you are facing an unlighted wall, but you can look either way into the tunnels. This is a square tunnel, and you can go all the way around to return to this point. Go right, toward the lamp, then left to the next corner and look right. You can see carvings on the wall. It's a lesson in counting. (If you've been to RAMA, or played TimeLapse, you've done this before; you know what to do.) Figure out what the lines and dots mean. Studying the marks, it appears that the dots are units, and the lines are fives. The figures below the columns confirm this. You can see how to write the numbers from one to five.
Turn around and go down the next branch of the tunnel. Halfway, you can see a staircase and a Mayan man standing on your right. Clicking on him yields a clue: "The Jaguar's number is the Bat's multiplied by itself." Not much help yet, since we need to learn the Bat's number. For now, continue going around the tunnel. Turn the next corner, go to the end of that arm, and look right. Now you are facing the carvings you could first see by looking left after coming down the stairs. We learn more about counting. The first picture represents 19. (Three 5's and 4 units). The next column teaches that the next tier up is 20. The third column shows 21. (One 20 and one unit). Now we know how to count and revalue the tiers.
Hang a right and go forward twice to the next carvings. Here is a puzzle, but we haven't been given the problem yet. The bat number is what we need, and it's not in here. Exit the pyramid and go to the other pyramid, and climb up the side facing the same way we climbed this one. Go in there and talk with the high priest and the king's brother. Then turn around and go into the next door and speak with the priestess. She gives you some clean bandages to take to the king. Talk to the king, his daughter, and the Wise One about everything. Exit to the princess. The king gives you back the bandages. She tries the sacrifice to make Quetzalcoatl appear, but only Tezcatlipoca puts in a brief appearance. Talk to the princess about everything, starting with the final subjects and working your way toward the jaguar topic. When she offers to send you to Xibalba, say yes. (Disc 4 is called for. Unfortunately, you must be disc jockey for this chapter. Keep disc 2 handy, you'll need it back in just a minute.)
During the initial conversation with the bat you can observe the bat's number - the dots on his left wing. You can proceed with most of the other duties and puzzles in Xibalba at this time, but you will need both Obsidian Feet in order to finish, and the other one is back in the first pyramid. Let's go there now, by clicking on the bat's pedestal. Disc 2. The bat came with us, and hangs near the priestess. Go to the other pyramid. Down the stairs to the puzzle we found before. You saw the bat's number: three. This is the jaguar puzzle, so the number is the bat's number multiplied by itself. 3 x 3 = 9. To make nine, put a five-bar on the bottom, and four unit-balls on the next row. When you have solved this puzzle, the guard at the stairs will let you descend. This level is a little more maze-like, there is one dead-end and one L-shaped crossover, but you can't really get lost. Much. You descended into a central chamber with two exits. Go either way until you come to the next guard around the far side of the square. (Look slightly left and right at each node, or you might not see him.) He tells you the Snakes number is the Jaguar's number multiplied by itself. Therefore, 9 x 9 = 81. Four twenties and one unit should do it. Let's go find that puzzle. Facing the guard, turn completely around and enter the passage. At the corner, look left for another counting lesson: 38, 39 and 40. To go directly to the puzzle from facing the guard, turn right, F, L to the corner. Solve the Snake puzzle thus: four balls in the second tableau (4 x 20 = 80) and one unit ball in the bottom. The guard lets you descend to the lowest level. Walk forward, and push the switch on the left-hand wall.
Enter the Crocodile's chamber. He won't hurt you, he's made of stone. Find the puzzle at the base of the croc's stand. Nobody gave us a clue for his number, but since the others were all squares of the previous number, let's try 81 x 81 = 6561. Wow! how to make such a big number? We'll have to go a tableau higher. Let's see what the units and bars are worth. The bottom tableau still represents ones and fives, and four fives make a twenty, that's where the second level unit value comes from. The balls are twenty and the bars are five times that. So if five twenty-units make a hundred-bar, then the value of one ball for the third plateau, is 400, and 5 x 400 = 2000 for the value of the third-level bars. To get 6000, put three 2000-bars in the third level, along with one 400-ball. That leaves us with 161 to go. Second level, a 100-bar and 3 twenties. One unit-ball in the bottom should finish things off. You can take the Obsidian Foot from the crocodile's open mouth and use it in the depression in the wall, along with the other Obsidian Foot you picked up on the roof. The passage opens. Take both Obsidian Feet with you before you leave. Go back to the other pyramid and click on the Bat to return to the jungle.
| The Rainbow Bridge comes first. It's not activated until you have talked with the bat about it. Until it's solved, we cannot cross the river. From facing the bat, turn around and walk towards the forest and find the weedy-looking spot on the ground. Click on it for a close-up. You see a 3x3 matrix. You are able to swap pieces by picking one up and placing it in another location. You can also rotate them by right-clicking. Draw a quick 3x3 grid on paper and label as follows: A-B-C across the top, and 1-2-3 down the side. Here's the puzzle as it starts: |  |
To solve the puzzle, the object is to get the little man standing in C3 to complete a route back to his starting point, building a bridge as he goes. Each time he passes one of the color blotches, it forms part of the bridge. The color sequence is familiar, more or less. The traditional spectrum is six colors: red-orange-yellow-green-blue-violet-indigo. We will build it in reverse. C3 is in the right place already, don't move that one.
If you just can't figure it out, do this: First the swaps: A3-B3; A2-C2; B2-A3; A1-A2; B1-C1. Then do the rotations by right-clicking. One click: A1 and B2. Two clicks: B1 and C2. Three clicks: A3 and C1. Then click on the little man and away he goes! (If you goof up and don't get it solved the first time, press esc. The puzzle will be reset to its original state when you enter.)
Now you are across the river and able to use the dugout canoe. Don't go anywhere in the boat just yet. Turn towards the shore and step out. We will be looking for seven stars.
Do
yourself a favor and
|
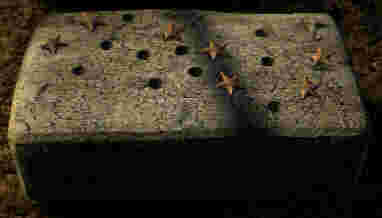
Here's a wonderful map of the jungle by Nebula. Thank you so much, Nebula! (Use your browser's back button, not the "Back" hyperlink to return to this walkthrough.) After completing the bridge, you land on the far shore, at the purple spot on the map. Use the map to help find the seven stars, and go to the X-spot to use them. The stars are all on the ground. Look straight down. Some are in shadows and hard to see. Start by going to the right. Work your way around counter-clockwise to the dead-end at the top of the map, then through the middle, getting to the dead-end at the bottom last. Go the X spot on the map. Solve the Star Puzzle Thus:
When you solve the constellation puzzle, a statue rises up from the jungle floor. Try talking to it. You get an echo. Place an Obsidian Foot in the niche at the bottom. The statue speaks, but it is garbled. Place the other Obsidian Foot in the small obelisk on the opposite side of the clearing. The Jaguar god Tezcatlipoca awakens. Isn't he gorgeous? Talk to him about everything and he allows you to consult Quetzalcoatl, the feathered serpent. Quetz need two skulls to produce chulel, and he gives you a feather for protection. Oh-oh . . . protection from what? Yikes!! Now we need protection?
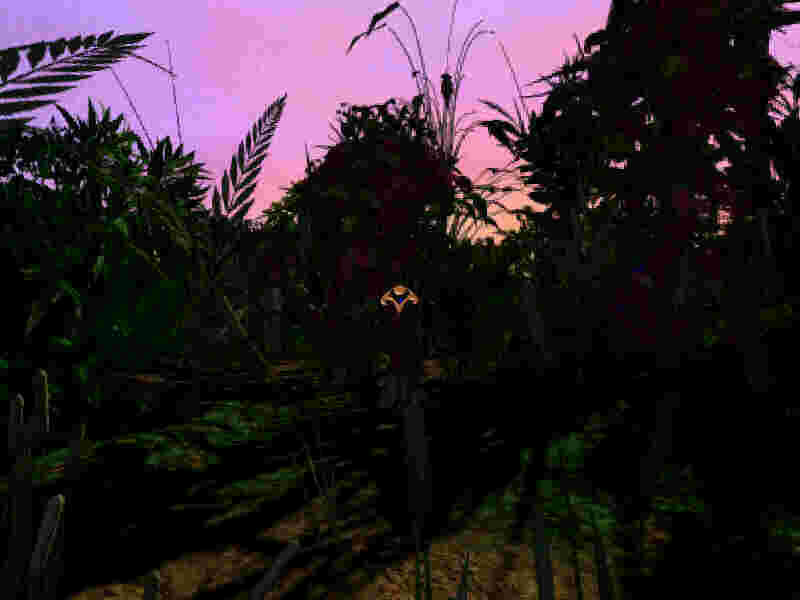
Can't find your way back to the boat? Look for this scene.Find the great big warty mushroom and go past it to the two large brown trees. Turn right to get see the view shown here. Step into the boat, and go left around the island, six nodes. Exit to the right, on the mainland. Enter the jungle, and you come to a spider-web the size of a trampoline. Eeek! |
 |
Go around the large tree to the right and climb into the web. You need to start at the edge of the web, with the broken spot just on your right. Take one step forward toward the spider to get its attention, and turn around returning to the edge. The spider follows you, but she is not very fast. It's a good thing, because this web is sticky. Turn left, one node along the edge, then left toward the center. Go to the caterpillar and pick it up, and keep going straight across the web to the other side and jump off.
| Navigating on the webs is difficult. It seems "sticky" because there is a delay before you can move again. Recommended procedure: Click along with the rhythm of the music. After a count of eight (or four, depending on how you perceive the beat,) you will be able to proceed. It's about four or five seconds, and there is nothing you can do about it, and the spiders won't catch you providing you step along when you are able. Relax. Don't get panicky, just be prompt and accurate. |
Now go up the right-hand tree again and start at the same spot as before, with the broken section on your right. Do the same thing, step toward the spider and return to the edge, once left, (counterclockwise) then once toward the center. Now the difference: turn right and go all the way around the web counterclockwise on the second row in from the edge until you get to the broken section again. Back to the edge, and forward three times. Now both spiders are on the perimeter, and you can get to the center, pick up the butterfly, turn around, and go back to the same side and once more counterclockwise to exit. (This is the hardest part of the whole game. If you made it through the two-spiders, you are truly a game-master!!) To see a map of the correct path through the two-spider web Click Here. Sunshine gets credit for this beautiful graphic. Thank you for the map, Sunshine!
OptionalGo back to the boat and enter the river. Turn right, again keeping the island on your left. Forward three times, and exit right to the mainland. Go in and feed your two prizes to the Toad. He gives you two clues: "The Jaguar answers the call of the stars." And "Does Smoking Mirror and His Mirror have their feet?" In case we didn't know to bring the Obsidian Feet with us, we would have to return to the first pyramid to get them. Go back to the boat, enter the river and go left three nodes to return to the spider web. Apparently the designers wanted us to discover the hungry toad, first of all, then outsmart the spiders to get the insect-prizes, then re-visit the Toad, in order to find out what to do with the stars and obsidian pieces. I have opted to rearrange the sequences. Saves about an hour of traveling. |
Last spider: This time you must go around and up the left-hand tree to place yourself just left of the broken section. Look right, and place the feather on the far side of the broken section. It turns into an orange dot. Some kind of spider-munchie, I guess. Go stand on it and watch Big Mama Spider until she starts to come up that side of the broken section. Then, step back to where you started on the other side of the gap, and head for the center of the web. picking up the sword. When you see the sword in your possession, just turn around and let her approach, and whack the spider with the sword, stunning her long enough for you to get to the center and pick up the skulls that Quetzalcoatl wants. Exit the web on the far side as before. Be sure to walk towards the edge-node that isn't blocked by support-threads or you can't jump off in time. Go to the boat, step into the river, and look left. Proceed clockwise around the island. (Remember you were on the mainland; which surrounds the island.) and return to the jungle island. Be careful; after five nodes forward, as you are adjacent to the Bat-landing, there are three hotspots: left takes you to the bat; center takes you downstream; right takes you to the island-landing.
Give the skulls to
Quetzalcoatl, and he gives you his chulel. (Don't be squeamish)
Go to the bat. Talk to him if you like, and return to the land of
the living to give your king his chulel. If you didn't take time
to explore all around the first time you were here, do so. It's
well worth the look. Go down the steps behind where you arrive,
and see the sights. There's nothing to actually do here, but
there are some people and things to see, including another
pyramid. The creators of this world took a lot of time doing it,
and the least we can do is appreciate their efforts. Before
you climb up the King's pyramid steps, turn around and face
the green tree. Hold your crystal to match the etching
on it to the pattern of the tree, so the lines turn red.
Click here to see what you
are looking for. Fly me to the Moon again. Return to
earth, and now go see the king. You have saved the world again.
Time to return to the Atlantë and use the third triangular stone
to visit China.
You see yourself entering the body of Wei Yulan, a visiting researcher. (Do not ring the gong unless you want to return to the Atlantë for some reason.) If you try to exit the main gate, your way is blocked by the shadow of a large warrior. Talk to Wu Tao-Shih, the old master. Turn around and go back up the steps, take one step toward the entrance, and turn right, then left around the corner. Forward once after turning the corner, and look behind you. Speak with Sung Tao-Shih. Then enter the building, and go into the first room on the left. Talk to the Abbot until you have the whole story, and he suggests you talk to Master Wu. (You must have attempted to exit via the gate to trigger this conversation.) Wu tells you to meet him in the room of the turtle, which is inside the closed door on the right. Go in and talk with him. He gives you a medallion and a turtle. Ask him about both objects. He tells you that the turtle walks toward the mountain, with the plain at his back, the pagoda on his right, and the river on his left. The red symbol is the mountain. Rotate the ring (click once on the left rim) until the mountain is on the far side, and place the turtle in the water. Then, go to the place you must be standing to begin. You must start in the corner, diagonally opposite where Wu is standing. Tell Wu you are ready, and he guides you, giving directions vis-à-vis the turtle and its symbolic directions.
| He tells you the turtle is facing the mountain, with the plain at his back, the pagoda at his right, and the river at his left. Click Here to download a saved game at the Turtle's Journey, completed. |
Take one step in the appropriate direction each time he tells you, until you have reached the house of the Tiger. Then, two steps toward the red wall and it opens. Love that unfolding effect! Go inside.
Open the chest-within-chest until you find the magic wand. Go to the other end of the magic pool, and light the four incense-burners starting with red, and going clockwise. You will breathe the incense and shrink, making it possible to enter the magic world. Go in, as far as you can, (toward the bridge) and pick up five statues and a money-bag. Return to the real world, and step off the ivory platform to become large again. You need to place the five statues in their proper work environments. The Woodsman goes in the forest, the Water-carrier in the river, the Blacksmith in the volcano, the Shepherdess in the field, and the Cook in the kitchen. The money bag goes in the center. Then walk toward the magic bridge to shrink. Talk to each person. They are of one mind: they will give you something if you pay them. Fair is fair. Give them each a coin in exchange for a medallion. The medallions represent stone, metal, water, wood and fire. In the process, they give you clues to the riddle, so you can figure out the sequence to put the discs. Go the lift-bridge control where you found the statues, and place the medallions on the pegs in the above-mentioned order. The bridge lowers halfway. Then, according to the riddles "later" clues, place them in this new order: water, fire, metal, wood, stone. Cross the bridge and go to the golden doors. (This is the place to activate your crystal - To see the correct view, click here. If you want to wait until you are leaving, or until the end of the game, it's okay.) Important: click on the hunter so the arrow points at him, not at the fox. Go through the golden doors and enter the dragon. (No, not the movie with Bruce Lee)
To get the dragon going, you need to find the key, which is a magic pearl. Look at the dragon-cloud device on the wall. To start, click on the dragon, then to raise all the small clouds, click on the large clouds in this sequence: left, right, right, left, right. Take the pearl and go into the cockpit (?) and place the pearl in the spot next to the door. Enjoy the marvelous sequence as the team fires up the dragon. I sure hope the guy up front knows how to drive! You arrive at Master Tan's house. Go the front door and enter. Ooops! Guess it's not that easy. After all, a guy who has not had a visitor in 375 years is bound to have a state-of-the-art security system. How to get in? Go around to the right to see if he has another door. No such luck. Try the front door again. Keep doing that until Tan Yun appears. He is fairly cordial, but he invites you to go to hell anyway. (Talk to him about everything.) The side door is there now, and you can go in.
Talk to the fellow just inside the door. I'm sure he used to work for the Motor Vehicle Department. Probably still does, in fact. Take the blank form and go looking for the Department of Pre-Approvals. (Whoops, sorry - that's another game.) If you want, you can go back outside and talk with Tan. It's optional, but you will learn what the characters inside are all about.
We need to find the Chinese girl. (She won't be there if you left the arrow pointing at the fox; she was a fox in real life, and she and her cubs didn't survive. If this is the case, you will have to back-track to the golden doors and turn the arrow toward the hunter, sparing her life.) She is grateful and gives you a fan. The fan shows three emblems, which are randomized from game to game. I needed to find a blue horse, an orange dragon (looks like a cooked turkey) and an orange tiger; yet another time a blue dragon, a blue leopard, and the same blue dragon again. Another walkthrough reports needing the blue horse, a blue dragon and the orange dragon; yet another reports needing still a different combination, so it could be any three out of a possible six. There's no map of this maze - it's not really a difficult maze, just a pain-in-the-butt maze. Oh well, this is Hell after all. It's not supposed to be pleasant.
Three of the form-stampers are upside down - standing on the ceiling! you need to find the steps that allow you to turn over and walk on the ceiling. I do believe the same characters always use the same stamps, so here's a description: Blue dragon -- Boss Hogg in a yellow slicker. Blue (entire) horse -- upside-down rabbit in red silk. Blue head of leopard -- upside down horse (right next to stairs.) Orange horse (head only) -- purple rat. Orange Dragon-- dog in blue & red. Orange (entire) tiger -- upside-down old goat in purple. Get the mushroom from the grumpy guy at the door. Glad to be done with those Spirits whizzing around?
Go to Master Tan and give him the mushroom. You get the magic lantern in return. Ride the dragon back and exit this area through the Golden Doors. Just after stepping through the doors, look right and use your crystal to match its pattern so the lines turn red as before. To see the correct view, click here. That is, if you didn't do it on the way in. You get to see still more of the journey. Retrace your steps back to the turtle room and exit. Use the Serpent Lantern on the Shadow. Enjoy the destruction of the shadow demon. Master Wu gives you your third stone and you return to the Atlantë.
Now, the crystal that you activated at the three worlds has the original pattern on it. Go up on deck and look toward the bow of the flyer to match that pattern. End up at the moon again, but this time we have options other than just returning. Turn around and look toward the sun, and there is a new direction to go. Do it! Then look a little to the right and go again. (Don't turn around and go backwards, always take the easiest route forward.) You pass through the solar atmosphere (put on your hot-suit, will you?) and whiz past Jupiter and Saturn. They apparently haven't heard about the cost of fuel out here. Go through the Asteroid Belt. Then the nebula, to the planet obscured by asteroids, the sun from a distance, and finally back to earth.
Do
yourself a favor and
|
Go to the Planetarium and place your three remaining triangular stones in the appropriate spots. They should be ordered from left to right in your inventory as you received them, so start at the 12 o'clock position and put in the ornate Irish stone, followed by the ornate (pointy) Mayan stone, and finally the Chinese (dragon) one. Now use your completed crystal in the center.
You will drop down into Lotus-Land, where you are confined by six curtains. The object here is to click on all six curtains in the same order you placed the stones. The simple" ones first, Ireland, Maya, China, followed by the "ornate" versions. Be careful, the curtains are not in sequence. You have to look for each one.
 |
 |
 |
 |
 |
 |
After selecting the six curtains, you are transported up to Shambhala. Have a look around. No supernova here. Step off your floating island to the pond. Huh? Talk about fish out of water! Oh well, I'm sure there's an explanation. Go left toward the apple tree, and keep going that way until you meet Rhea, the Earth Goddess.
| You might want to save your game before talking with Rhea - she gives you a lengthy story that helps you understand not only what you have been doing here, but also what Seth accomplished in "Atlantis: the Lost Tales." She explains the Power, the Light and Dark, and the fate that befell former peoples. It's a complicated tale, and you may wish to replay it. |
Talk with Rhea about Shambhala, then yourself, then everything else. Go back around the pond the way you came; at the apple tree, there are two paths. Go right. You will enter the "circular path." Visiting 16 familiar sites, you will pick up 16 objects and learn some very enigmatic clues from seven characters. You may enter the cycle at any point, and after 16 visits, will return to where you were. Since each site has two exits, you may travel in either direction. If you use an exit and it takes you back to where you just were, go back and use the other way out. Here are the places and the objects they contain. The puzzle-pyramid, pitcher; Hell, sword; Chinese Abbot's room, hand; in the book, grasshopper; Bat's landing; salmon; Tan Yun's yard, star; altar in chapel, pearl; jungle frog, mushroom; dragon cockpit, chulel; Ailill's grave, fan; jungle monuments, stone medallion; ivory shrink-plate, stick; sitting at manuscript, feather (note three exits here); king's pyramid, brush; birdman island, lantern. The second exit at Ailill's grave can be hard to find - look just above his head.
Talk to each character you encounter and you will hear the following clues:
- The thing you seek contains nothing. You talked to no gods in that place.
The object wasn't paid for.
There's nothing for sale in the place you seek.
- It's not something you exchanged. No long-gone queen awaited you there.
- No god offered it to you. Nobody lives there forever.
- It was not made for a king.
No green circles are seen there.
- No clouds hide it; No creatures fly there
- It's not something you might often use. It's not a place to talk to kings.
It wasn't made to strike with.
There are no stairs nearby.
- It's not a creature; No birds fall to the ground there
This is pretty obscure stuff - the idea is to eliminate objects or locations from your consideration. "It's not a creature" for example, helps you cross off the turtle, salmon and grasshopper. "No birds fall to the ground there" eliminates the lantern because it's at the birdman's island. And so on. There is only one object that does not get crossed off your list, either directly by a clue, or by its location: the star.
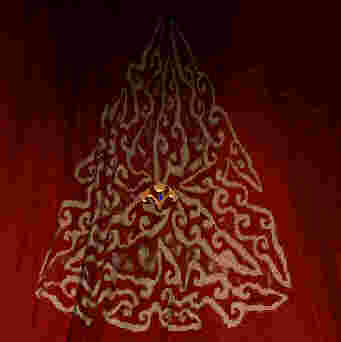
| And there is only one place you can click on that does not result in taking you to a location you have already seen: the window above you at the manuscript table. | 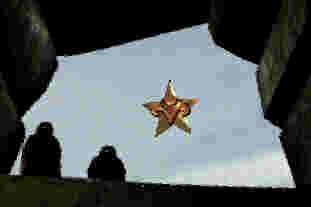 |
You arrive on the bottom of the ocean near Atlantis. Go forward until you find the entrance to Atlantis. Upon entering, turn right and F1 to find a crystal. Pick it up and take it with you. Go left, pass the dark pillar, and toward the wall with circular paintings. Look right to see the octopus.
Do
yourself a favor and
|
The octopus pushes
you back with one tentacle at a time. If you place the crystal at
the base of the active tentacle, it lights up, and you can sever
the active tentacle. It takes some fairly aggressive clicking,
because the time is short, and the hotspot is small. I recommend
saving right after cutting off each tentacle so you don't lose
your progress. Do the biggest tentacles first. After cutting off
enough tentacles, a short cutscene shows you absorbing the
octopus's energy (swallowing its ink? Blecch! Absorbing the Dark,
actually) and traveling back to the Atlantë. Guru-san gives you
a final crystal. It takes you to space again. As before, from the
Earth-Moon node, go toward the sun. Right, close to the sun, and
past Jupiter, Saturn and others to the asteroids. Choose the
brighter of the two exits. Next choice: bright blue star with
rays. Then the bright hole in the red field. Get it? always the
brightest, since we are the bearer of light. Wind up in Eden for
the closing movie. It's a little Adam-and-Eve-ish, but does make
an effective closing to this segment of the story, leaving the
idea of a sequel (three-quel?) intact. Be sure to sit through ALL
the credits for another short movie at the very end. You get to
see Tezcatlipoca.