DETECTIVE HAYSEED
THE CLONING MADNESS
WALKTHROUGH BY SAFC
WARNING
PLEASED BE ADVISED
The game should be 18+ because of the use of some language, the mention of drug use, and some people may be offended by some of the content.
The controls are standard mouse left and right click. At the start of the game is a small tutorial; just follow the prompts showing on the screen. There is also an in-game hints option which you can either leave on or switch off. Use the spacebar to highlight all places/items to use/investigate. There are seven save slots; the first is an Auto Save - this slot can saved over if needed. The other six are for manual saves; these can be overwritten as you progress through the game. The game also includes a walkthrough, but I found it a bit vague in parts, hence my version of the walkthrough.
ACT 1
The Police Station
Click on drawers and Francis gets a gun, police badge, cell keys and bottle opener. Take the knife from the dart board and axe from the wall; also check the coffee machine and read the instruction label on the machine. Leave the office and speak to Simon; then search the homeless man to obtain matches. Click on payphone to obtain coin.
Enter the Major's office, speak with him and then take car keys from the board on the right; then read the leaflet on the wall about the Luxury Hotel, The Rosy Future. Leave his office and you will see Simon lying handcuffed on the floor. Speak with him and pick up the sunglasses and ball and chain. In the Inventory use the axe with the sunglasses to obtain arm/temple of glasses; use this on Simon to release him. He will then give you a key and tells you to drop by the Laboratory sometime.
Search the green bin top right and retrieve a cup and a banana skin. Leave the Police Station and you will see a youth standing next to a bin; if you speak to him, he will steal your police badge from you (you will be able to get that back later). I didn’t speak to him – this does not affect the game. Check the bin, then use the handcuffs on the bin and you will arrest Coppafeel.
Back in the police station, you will see Coppafeel behind bars, Francis goes to brag about his arrest to the Major and the Major gives Francis a case. Take the file, cigarette packet and meal from the Major's desk. Go back to your office and read the file, then start to question Coppafeel. Speak to him until he mentions a coffee; place the cup in the opening and put the coin in the slot to obtain a cup of coffee; give this to Coppafeel and listen to what he says. Leave your office and go top right to the Laboratory; speak with Simon and he will give you a magnifying glass and a bag of plaster. Leave the Police Station and click on the car - this will bring up the map.
SCENE OF THE FIRE
Click on the Scene of the Fire. Francis checks the piece of wood and finds the necklace with a strange emblem on it. Speak to the fireman and show him your police badge. Go to the right and take the scissors from the bush and the handkerchief just to the left behind the seated man. Go back and left down past the fireman; try to enter the gate and the dog comes out. In the Inventory open the meal bag to get the sausage; throw the sausage to the dog, but it still will not let you enter. Return to the fireman and speak with him. He will give you a first aid kit; open it in the Inventory and you will get the laxative, tweezers and sticking plaster. Get in the car and go back to the Police Station and to the Major's office and pick up another meal bag. Return to the gate with the dog; in the Inventory open the meal bag to obtain another sausage and click this on the laxative. Give this to the dog; you can now access the house. Once inside, you will see the curtains blow and knock over the lamp setting fire to the table. Check the refrigerator and pick up the bottle of vodka; use this on the fire; go back to the refrigerator and pick up the bottle of beer. In the Inventory use the bottle opener on the beer, then the beer on the fire; you can now check out the rest of the room. Check the drawers to obtain the adrenalin and cleaning compound; pick up the overturned stool, check the wardrobe and the marks on the floor by the wardrobe. Go over to the curtains by the door; click on them to reveal the toilet (yuck) and click on the cistern; then use the stool on it to obtain the key. Go over to the wardrobe and use the key. A mannequin falls out; you can now move the wardrobe where you see a cloth sticking up from the floorboards. The owner of the flat comes into the room. After a short conversation, go over to the cloth and use the tweezers on it and obtain some photos. Go back to the owner and use photos on him and he will exchange the photos to get a picture of the arsonists. Continue speaking to the owner until the dialogue repeats itself In the Inventory use the pack of cigarettes on him and he will give you the location of the Hydbridarium. Return to the car, click on it to bring up the map and go to the police station and to the Major's office. Speak to him and obtain some money; leave the police station and go to the Institution
HYBRIDARIUM
On arrival you see two piles of hay. In the Inventory use the handkerchief with the magnifying glass, then use the magnifying glass on the pile of hay on the right side of the car. Francis will hide until the woman comes out with a fire extinguisher; he can then enter the Institution. He picks up the branch (top right by the door). Francis tries the door but it's locked. Check out the scaffolding and notice a bucket; use the ball and chain on the bucket and then click on the rope to the left. Find Francis on the top of the scaffolding outside the window; look in the window; then throw the banana skin and the money through the window. The doctor slips and is unconscious. Francis enters the room and sees someone connected to a machine which must be turned off. Use the cloth on the switch on the right side of the Machine; you will see the Doctor lying on the floor. There are two syringes on the chair top left; pick them up. There are three Clones in the cells and a person strapped to the bed. Speak to all of them and then search the Doctor to find a device; use this on them and they will speak in riddles. (I found this bit confusing - old age thing.) The answer is 21, 100, 8, 55. Go to the bookcase and click on the books with the numbers 21, 100, 8, 55 - this will open the secret room. In the cellar you will see a Blue Clone chained to the wall and a cabinet on the wall; use the knife on the cabinet to get a hose. Attach this to the faucet; Francis turns it on only to find it is leaking. Turn it off and use the sticking plaster on the hose; turn on the faucet and use the hose on the Blue Clone; listen to the Blue Clone and return to the room with the other Clones. In the Inventory use the empty syringe with the adrenalin; use this on the Doctor when he refuses to talk. Use your gun on him and he gives you the location of the Side Street Boys. Go back to your car and click on it to open the map and go to Circus.
CIRCUS
Francis enters the tent and speaks to the tamer, telling her he wants to arrest Duckster, but she states she does not know him. Leave the tent and read the left hand side sign, go back inside and talk to the tamer again and she wants to see the arrest warrant. Go back to the car and go back to the Police Station and to the Major's office to obtain the warrant; go back to the tamer and show her the warrant. He then shows her his gun, but she still will not give up Duckster unless Francis carries out 3 tasks. Francis leaves the tent and goes to the clown caravan. He picks up the log and takes the axe, then enters and takes the jug from the shelf on the left and he leaves. In the Inventory he uses the axe with the log to obtain a splinter; go over to the cages on the left and use the splinter on the wheel of the left cage then use the jug on the water. Go back into the caravan and look at the parrot and the bowl, then use the Jug on the bowl. While the parrot is drinking, pluck a feather from it; use the feather on the clown's foot to wake him; speak to him and exhaust all conversation. Then use the vodka on him; he will then give you the key to the caravan. Go back to the tent and the tamer wants you to identify Duckster by the feet sticking out from the curtain. Go back to the scene of the fire; go to the left and find a duck print. Go back to the fireman; speak to him and obtain bucket of water. In the Inventory use the knife with the bag of plaster. Use the plaster with the bucket of water and use this on the duck print; pick up duck print and go back to the Circus. Enter the tent and use the duck print with the middle set of duck feet. The third task is a kiss from the tamer. Go back to the Police Station and ask all questions of Duckster – End of Act 1
ACT II
This starts with a call from the Town Hall stating a bomb has been placed in Cloneburg Castle. Go to the Laboratory and speak to Simon to get bullets for your gun; then go to the other Office on the far left and speak to the guy and he will give you a riddle. The answer is 802 pages; enter this number on the calculator and he gives you the manual for pyrotechnics. Leave and go the the Major's office and look at the map; this will give you the location of the Cloneburg Castle. Leave the Police Station and click on the Cloneburg Castle.
CASTLE
At the Castle look at the sign, then at the drawbridge; in the Inventory load the gun with the bullets and shoot at the drawbridge. Look the window at the right and use the magnifying glass on it; click on the chewing gum and you will automatically take it. Look at the window again to get the crank; look at the protrusion on the right side of the wall and use the crank. It's bent and does not work, so in the Inventory
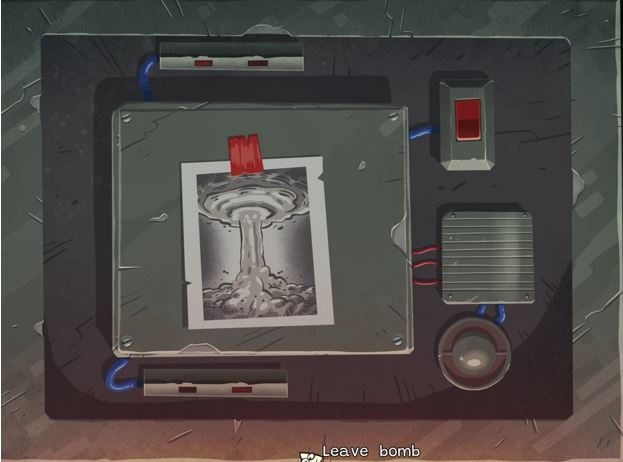
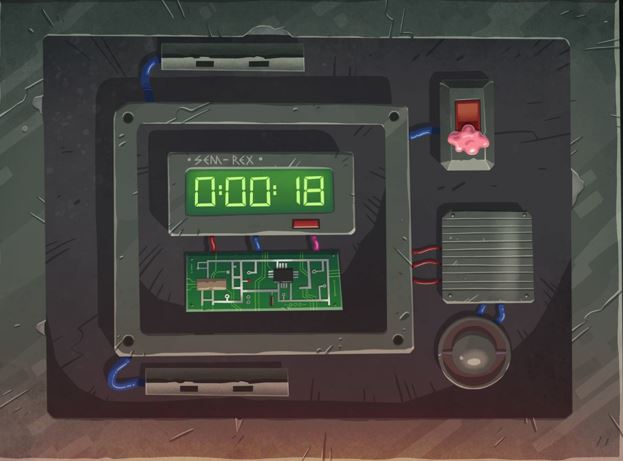
use the axe with the crank to straighten it; then use it on the pulley and the gate opens. Enter the Castle and check the first door on the right. Pick up the torch from the wall between the two doors, then go through the second door on the right. Look at the container and get the gun powder; check the cannon and the floor plan, then speak to Napoleon fully. Use the gun powder on the cannon, then the torch; the cannon fires and you will get the screw driver and splitter. Leave the room and go to the second door on the left - this is the lecture hall. Move the blackboard and look at the stain; pick up the chalk and the sponge. Check the window, the pool of blood and the smashed cabinet. Francis mentions the Clonoscope; use the sponge on the pool of blood. Leave the room and go to the first room on the left. Pick up the keychain airplane model from behind Hitler. In the Inventory you will find a key next to the model airplane. Use this on the cabinet on the left wall; look inside and get a cup, toothbrush and deodorant. Leave the room and go back to the lecture hall. In the Inventory use the cleaning compound with the toothbrush on the stain. Francis eventually says Caesar and Mona Lisa. Leave the room and speak with Napoleon fully. Go to the room with Hitler in and take the small tank of gas from under the shower; leave the room and use the tank of gas on the first door on the right. Then use the gun on the tank of gas. Enter and take the strip of wire hanging from the flag pole; go right and you will find the bomb. Click on it and then use the stethoscope on each of the circles and Francis automatically enters the numbers; use the wire on the top and bottom contacts on the right side of the bomb. Francis can now slide open the front of the bomb
Click on the top and bottom sensors; then use the deodorant on them. Click on the red button; Francis says its clicked back on. Use the chewing gum on it; now use the screw driver on all four screws and click on the case. You will now see a timer and three wires below - these must be cut in the right order. RED, PURPLE, then BLUE. Press the Red button under the timer.
Go back and speak to Hitler on all subjects and he will tell you to try the 4 Aces bar at the North Dock. (this will now show on your map) Go there.
NORTH DOCKS
Talk to the rapper sitting on the stairs, then cross over to the electricity cabinet on the other side of the road. Use the wrench to open the box, then click on the lever to turn on the power. It breaks and Francis gets a broken lever. Board the trolley and travel to meet Al Capone; speak with him but he just mumbles. Pick up rusty saw. Go back to go to the Bar on the left. You will see a dust bin; use the branch on it to retrieve smelly sock. Knock on the door; Francis says that the ventilator is so loud no one can hear him. Use the broken lever on the vent. Knock on the door and a head looks out from the hatch in the door; Francis talks to him, but the man refuses him entry. Go back and speak to the rapper again. Go back and talk to Al Capone, then go back to the Bar and knock on the door; when the guy leaves, use the smelly sock on the Door. Enter the bar and speak to the guy playing the slot machine; then go to the bar and buy a drink. Go back to the guy and give him the drink; go back to the bar another two times to get a drink to give to guy, he collapses after the third drink. Go back to the Police Station and hit the payphone to obtain coin; return to the bar and play the slot machine to win money. Pick up the suitcase; in the Inventory use the knife on it to get deck of cards, super-secret underwear and a key to the WC Casino. Francis uses the key to unlock the door and enter the Casino
SECRET CASINO
Pick up the sheep hook (it looks like an axe) on the left of the room; Francis uses the sheep hook on the window with the camera, then speaks with Bernie (the guy in the pink suit). Ask about Caesar, then ask to join the game; Francis plays cards and loses. He accuses Bernie (McDoff) of cheating three times. McDoff stands up and Francis sees the fake aces on the chair. Francis destroys them, but keeps losing so he goes back to the Police Station to speak with the Major. (Before you enter his office, get coin from the phone as you will need this to win more money from the slot machine to play cards with.) Speak with the Major and he will give Francis fake kings; Francis uses them with the deck of cards. Go back to the bar use the coin in the slot machine to win more money; go back into the Casino and ask to join the game again. Use the deck of cards on Bernie; Francis wins and takes everything from the Mafia. They tell him that Caesar borrowed money from them and Francis can find him in the Rock Bar.
THE ROCK BAR
Leave the bar and go top right to be outside of the Rock Bar; pick up the brick and empty bottle. Look at the signs, then speak with the Gorilla. Ask all questions, then click through the song titles until the Gorilla starts to sing and Francis also sings; you can now enter the bar. Once inside, unplug the speaker lead in front of the stage to stop the music. Speak with Michael on the stage and ask all questions. He will tell you about the pinto drink (you will need pineapple juice, tequila, ouzo and ice) and you will also get an autograph. Leave the stage and read the beverage card on the left side of the bar. Try to speak to the Punk; go behind the bar and click on the shelf with drinks. In the close up, pick up the glass and click it on pineapple juice, tequila, ouzo and the ice bucket; click on the ice bucket a second time to obtain an ice cube. Go back to the punk and use the ice cube on him; this wakes him up. Use the pinto drink on him and he starts to sing. Francis says he needs to go to the aircraft scrap yard. Plug in the speaker lead and leave the bar and go back to the car; click on it and Francis will say that he hasn’t enough Gas. Go back to the Rock Bar and click on the motor bike (Chopper); then click on the fuel pipe (Hose). Use the bottle on the hose to get gas. Return to the car and use the bottle on the car. (Go back and fill the bottle again for later use.) You can now click on the car and leave for the scrap yard
AIRCRAFT SCRAP YARD
At the scrap yard use the space bar to highlight areas you need to check. First click on the scarecrow to obtain a can and some string; then click on the bush behind the scarecrow to obtain some giggle grass. Click on the pile of gravel to obtain some gravel, then go over to the bush with the red berries on and get rose hips. In the Inventory combine the gravel with the can to make a rattle; next use the rose hips with the string to make a necklace. Next use the scissors on the bush and Francis finds a hole in the fence; enter the scrap yard through the fence. Francis sees three hippies; speak to the man and ask all questions; then give him the giggle grass. Give the woman with the baby the tin can (rattle) and finally the necklace to the second woman. Pick up the box next to the man (Mr. Clean washing powder) and take the towel off the line behind the Hippies. Go back to the car and select Cloneberg on the map. Enter the castle and go to the room with Hitler in and speak with him. He says he has no paint. In the Inventory use the sponge with blood on the cup, then the chalk on the cup to get pink paint. Give this to Hitler and he paints a picture of Caesar. Go back to the scrap yard and show the picture of Caesar to the Hippie. He will point the way to Caesar. Use the towel in the barrel, then go left and you will arrive in front of an Aircraft. Read the sign on the side. Try the door to the aircraft and Francis hears Caesar inside. Use the brick from the Inventory to break the window; pick up the shard of glass that falls to the ground. Enter the aircraft and Francis sees Caesar. Click on the stool then use the shard of glass on the rope and use the wet towel on Caesar. Francis arrests Caesar and takes him back to the Police Station where he is interrogated. Show Caesar the sponge with blood, then the locket. After the dialogue leave the room and go to the Laboratory and speak with Simon. He tells him about the letters and Francis has to go to the Beach. This is the end of Act II
ACT III
PARADISO
Francis goes to the beach (via the map) and he speaks to Pamela; she asks him to oil her back. Ask all questions; pick up the rock, top left of Pamela, and the clam to the right of the jetty. Go to the boat and use the rock on the locker; search the locker and get harpoon (it looks more like a handgun, LOL!). Look at the lifebuoy to see the B initial; pull the cord to the left to scare off the seagull. It drops a ring; click on it to pick it up. Use the rusty saw on the wire of the main crane and a net drops down - pick it up. Leave the boat and check on the sign on the side of the boat. Go to the jetty and use the net on the sea to catch a crab. Go to the right and up to get to Lara’s house (you will see a coconut up a tree which you will need later). Try to enter but she won’t let you; use the crab on the entrance and she starts to scream. You can now enter. You will see Lara on the table; look at the corkscrew and pick it up. In the Inventory click on the corkscrew to get the cork; use the cork on Lara to stop her screaming; click on the glass to get the strawberry. In the Inventory use the knife with the clam to get the pearl; use this with the ring to get ring with pearl. Leave the house and go straight down to get to Esmerelda’s house. Use the cleaning compound on the glass to the right of Esmerelda; use the use the strawberry on her. Ask all questions. Esmerelda will give Francis a key to the mailbox; go to the mailbox and use the key and get part of the letter. Pick up the golf clubs and divining rod from the ground. Leave and go bottom right to be at the Marylyn Monroe twin's house. Pick up the bottle of rye from the table; in the Inventory use the corkscrew on the bottle of rye and then use the bottle of rye on the rooster to get manure. Go to the flower bed and use the manure on the plants; then use the branch on the flower bed to find spring. The plant blooms and Francis picks the flower. Speak to the girls, give the autograph to Marylyn 1 and the pearl ring to Marylyn 2 to get a further two parts of the letter. Go back to Lara's house. In the Inventory use the underwear with the harpoon, then click on the golf bag to get golf clubs; select the six Iron and then use the harpoon on the coconut. Enter the house and take the cork out of Lara's mouth. After she finishes her demands, give her the flower and she will give you another part of the letter. Leave and go to the Beach; use the coconut on Pamela and she gives you the final part of the Letter. In the Inventory click a piece of the letter onto another piece; do this with all the other pieces to get a full letter. Francis says that there is something he can’t read. Go back to Lara's house and use the letter with the kettle and Francis reads it. Leave the Beach and select the DNA Factory on the Map.
DNA FACTORY
On arrival, click on the DNA Factory and Francis says how do I get in? Press the space bar to highlight all places to check. Click on the vulture, then the camel in the distance. Use the gun to shoot the camel and the vulture flies off. You can now check the skeleton. Francis reads the name tag; go over to the Cactus and click on the hole. Francis is asked for his identification and he repeats what was on the name tag. He is told he can enter. Click on the thorn to the left of the hole and Francis finds himself in the Laboratory. Francis sees the Professor and he is repeating the word RUM over and over. Francis goes to the bookcase behind the Professor and finds a book, but looking through it finds that the recipe for RUM is missing. Francis returns to the Police Station and goes to the top left and tries to speak to Ollie North. Francis loses his temper. Leave and go and talk to Simon in the Laboratory on the bottom left and he gives the incantion. Go back to Ollie North and use the incantion on him and he gives you the recipe for rum. Return to the DNA Factory. You will have to repeat the entry procedure again; once back in the Laboratory read the Recipe for Rum. Click on the chemical shelf behind the Professor. Take the Glass from the Inventory and use in on the chemical shelf; get glass of rum. Use it on the funnel on the machine; pick up the rag lying on the floor under the machine. Go over to the lever on the left and use it; sparks start to fly between the two horns. In the Inventory use the rag with the bottle of gas, then use the rag on the sparks to get burning rag. Go over to the Bunsen burner and use the rag on it; an alarm sounds and the force field holding the Professor is disabled. Speak to the Professor and ask all questions. The Professor mentions Barbie Land; leave, get in the car and click on the airport on the Map.
BARBIE LAND
At the airport go left and Francis speak to the pilot, but he refuses to take Francis to Barbie Land. Use the tranquilizer from the Inventory on the pilot's coffee; search the pilot to get flying manual. Read this in the Inventory. Go left to the airplane and click on the panel to start the engine; then click on the propeller. Francis climbs in the plane and is off to Barbie Land. Speak to Ken's head and after the dialogue has finished, take the batteries from the head, pick up the dog and in the Inventory use the batteries on the dog. Speak with the old man and ask all questions. In the Inventory use the handkerchief with the dog, then use the dog on the window on the right. Francis follows and finds Claudia. Francis speaks with Claudia and she asks to be untied. Use the dog on the ropes. Francis and Claudia escape in an air balloon
THE END!
Well, guys, this is my first attempt at a walkthrough! Hopefully I have not missed anything, but if I have, you can always PM me and I will help you out - SAFC