Sherlock Holmes 7: Crimes & Punishments
By frogwares studios
Walkthrough by MaGtRo September 2014
Gameplay: This is a
combination keyboard and mouse adventure game.
The main menu has continue, cases, new game, options,
load
and exit.
Play more, contact us and credits are at bottom left of the page.
New game will change the cases automatically
from first case to last during gameplay.
Cases: After you have played
the whole game linearly - if you want to play
individual games: scroll
using the arrow to see the cases in the game. Click on "play game" to
choose the case you want to play independently. Scroll using the arrow
to see the cases in the game: The Fate of Black Peter, Riddle on the Rails, Blood
Bath, The Abbey Grange Affair, The Kew Gardens Drama and A Half Moon
Walk.
Options have video, audio, gameplay and how to
play.
Video
has resolution, fullscreen, vsync, shadows, post process, gamma, textures quality,
details quality and antialiasing selections.
Audio has adjustments for master, voice, music, effects and ambient
volumes.
Gameplay has selections for mouse
sensitivity, left and right sticks sensitivity, invert camera Y and X
and subtitles.
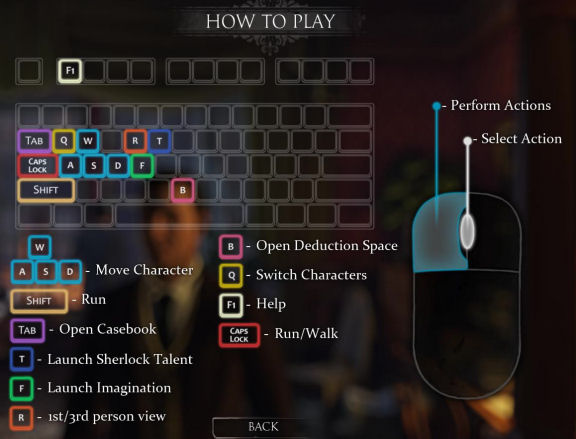
How to play can be accessed using the F1 key.
It shows the keyboard keys used in game manipulations.
ESC key exits to main menu.
Casebook: Tab key accesses the casebook (book icon).
The tab key also toggles back to game screen.
Casebook has tabs
with icons at top of the book for: tasks,
map, evidences, documents, dialogs, trophies, messages, character portraits
and deduction.
Task shows the aim of the next set of actions
needed to progress in the game.
Map shows the different locations that you can
jump to.
Evidences are items or information obtained to
be used in the game. Some evidence has special tooltip that shows that
they need further investigation.
Documents are records (newspaper, researched
information, letters, etc...) that are evidence or clues in the game.
Dialogs are logs of the conversations in the
game. They might contain clues.
Chronicles shows the conclusion of cases done.
Souvenirs shows what Holmes has taken from
other solved cases.
Echoes are messages or other documents that
came about from the choice in previous cases.
Character portraits are summaries of an
observation of a person.
Deduction are correlations of collected
evidence and observations.
Saves: The game autosaves
when the game is closed and at certain checkpoints in the game.
Use the "continue" to open were you left in the game. Load screen
shows the autosaves.
The saved game folder is located in My documents -
My games - Sherlock Holmes Crimes and Punishments - SH7Game folder.
Alert icons: An eye icon when seen during gameplay denotes an
action or evidence is close by.
Press the T key to find a clue that is not
otherwise seen - Sherlock Talent.
A star icon when seen during gameplay denotes that
a clue is obtained.
Task has a black check mark in orange icon.
Italicized texts in the walkthrough are clues-evidences, deductions and
conclusions.
|
Deduction icons:
Deduction alerts are seen as neurons - brain
cell icons.
Deduction space icon that is a cell
only indicates that some of your clues can form an important
deduction and improve your progress in the investigation.
Deduction space icon that is a cell
with number indicates a new clue.
Deduction space icon that is a cell
with an exclamation point indicates that you have found
sufficient clues to accuse one of the suspects.
Using the neuron deduction chart:
Click on B key and see text clues floating in screen.
CORRELATION OF
CLUES - EVIDENCE:
Text clue - Click on a clue and select another
supporting clue to
get a correlation. See the explanations at bottom of screen.
Correlation - Blue text shows
correlation while red text shows that the clues do not match.
The correlation is now a small cell with exclamation point.

ANALYSIS:
Cells - Click on the correlation
which is now a neuron to read a description.
Blue cell is a possible correct
analysis. Red coloring means they do not match.
Cell with 2 colors means there are 2 possible
analysis.
Press the space bar to go back one level as
needed.
Select an analyzed cell with 2 colors - Click on the single
2 - colored
cell and select the analysis of choice (shown by 2 frames with
descriptions).

DEDUCTION:
Large white cell - When there are enough
correlated analysis; a deduction is automatically formed (can be single
cell
or 2 if bi-colored).


CONCLUSION:
Brown cell - When there are sufficient
deduction obtained; a
final
conclusion (brown cell) is reached.

|
|
Cylinder lock puzzle guide:
The aim of the puzzle is to align
the lines in all layers - tubes of the cylinder lock.
There are lines on each tube layer of the
cylinder.
The scroll wheel switches tube layer of the
cylinder.
Left click-turn rotates selected layer of
the cylinder.
Right click-turn rotates all the layers.
-
Check all the square openings
by rotating all layers - tubes or the top layers.
-
Note the lines on top layer
and position other lines on different layers accordingly.
-
Some layers might need to be
slid in or locked into another tube in that layer.
-
Some layers might need to be
moved left or right to position that layer with lines of
another layer.
-
Work the solution by layers.
-
Rotate the tube layers to see how
long the lines are. This will clue in to which line it
should be aligned to.
-
There is a skip for all these
puzzles.
|
THE FATE OF BLACK PETER
221B Baker Street:
Relieve boredom: Watson
reading in his room hears gunshots and rushes to the sitting room.
See a blindfolded Sherlock Holmes firing his
pistol and using vases as his targets.
Watson crouches behind the small table in front of
fireplace.
Take cover. Go forward to the sofa.
Go behind the dining room table.
Go around and forward to Holmes by the window.
New case: Holmes listens to
sounds coming from the stairs outside the apartment and deduces that
Lestrade is here.
Inspector Lestrade walks in. He wants to try the
blindfolded target shooting.
He has a new case for Holmes. It is about the
murder of Peter Carey also known as Black Peter.
Black Peter Carey is 50 years old born in 1845. He
retired in 1884 with a small fortune obtained from seal and whale hunting
around Scandinavia. He bought and lived for 6 years in a property called
Woodsman's Lee near Forest Row in Sussex. He died there yesterday.
Inspector Lestrade has to go back to the Yard. The
Merry Men robbed a powder reserve. Doctor Watson has to see patient. Holmes
will go alone to Woodman's Lee to meet Lestrade.
Select a suit to wear and join Lestrade at Woodman's
Lee:
Go to Holmes' bedroom.
Change clothes: Open the
wardrobe. Select the outfit you want Holmes to wear. Use the arrow framing
the outfit description.
Some outfits are locked and are inappropriate
under the circumstance.
You can go out to the living room and look around
or talk to Mrs. Hudson.
Telescope: Look through
the telescope and meet Holmes new neighbor across the street - Danny the
Anvil.
Travel: Use the map to go
to Woodman's Lee.
Talk to witness about last night:
Go to Lestrade standing beside Mrs. Carey right of the
house.
Talk to Mrs. Carey:
Click to select the dialogue.
At 2 AM, Mrs. Carey heard a scream. Peter screams when he is drunk and stays
in the cabin.
She saw that the door was open at 7 AM. She finally went in
the cabin at 10 AM and found him murdered.
They don't get many visitors here.
Profile of
Mrs. Carey: Click on the character icon and check the physical
features of Mrs. Carey and items around her.
Press A key to move down. Press D key
to go back up and use ESC key to exit close up. Press space bar to skip the
puzzle.
The circle turns dark blue on areas to be checked.
Click on the cameo.
Click on the cross of the Catholic rosary she
has on her wrist.
Click on the bird on the cover of the diary - ornate book.
There is a crested tit on the cover
of the diary.
Click on the gardening gloves.
Click on the birdhouse on the table.
Read Judith Carey's character portrait in the
casebook.
Interrogate Mrs. Carey:
Talk to Mrs. Carey again about meeting her husband in Plymouth.
Q Key: Immediately click on Q key when it appears to
continue the interrogation. Select the topic that corroborate the discussion to
continue the investigation.
Select pilgrimage. Learn that the
couple met at Plymouth after her pilgrimage to Spain.
Enter the cabin:
Go down the stone steps by the tool shed close to
the constable to go to the cabin.
Garden: Look at the well
kept garden left or right of the stone path.
Talk to Lestrade.
Door: Try to open the
locked door. Lestrade locked it yesterday.
Lestrade notices something while trying to unlock
the door. Someone tried to force the door open.
Scratches: Go to the
door.
Use the T key
(eye icon) of your keyboard
to see clues or evidence that are not easily seen. Examine the door.
Examine the scratches on the door. The scratches
are fresh.
Window: Examine the
window behind the constable.
Inspect the crime scene at Woodman's Lee.
Examine the body of Peter Carey:
Enter the cabin and look around.
Murder Victim: Examine
the body of Peter Carey.
Examine Peter Carey's face.
Examine Peter Carey's clothes - left side of
his head. He is fully dressed and might know his murderer.
Examine the pierced chest. The force of the
blow is immense for the weapon to penetrate his body.
Examine the harpoon. It is a whaling harpoon.
Peter Carey's body was impaled to the wall
with a harpoon.
Read character portrait in the
casebook.
Pool of blood: Examine
the pool of blood on his pants to move to the blood on the floor.
Knife: Take the sea knife.
The blade shows no sign of use.
Examine the handle to note the plain and solid
handle.
Examine the blade.
Notebook: Take notebook from the pool of blood.
Examine the J.H.N. inscription on the cover of
the notebook.
Examine the blood at bottom right corner of the
notebook cover. A leather notebook is stained with blood, which indicates that it was dropped into the
pool of blood after the murder.
Open the notebook. Examine the abbreviations
written in the notebook.
Look around the cabin:
Table: Look close at
table left of door.
Examine the 2 dirty glasses. Someone drank from it
recently.
Examine the bottle of rum.
Tobacco pouch: Take the tobacco
pouch.
Initials: Click on P.C.
initials. The pouch is made from seal skin and
the initials are crudely burned into it.
Tobacco: Rotate the pouch. Open the flap.
Rotate the pouch to see the tobacco inside.
Examine the tobacco.
Recreate the ship:
Reconstruct the ship to help Holmes remember.
See
lines of a ship and outline of pipe and tobacco leaf.
Rotate (right click-hold-move) to put
together the ship lines. Release the mouse button when the lines-parts
are combined.
Turn the ship to face left. Combine the sails and body of the ship first.
Left click to select and then left click-hold
move the tobacco leaf and the smoking pipe to combine parts (end pieces) of the ship
to the main body.
There is a skip button.
It has coarse tobacco, quite strong and very
popular among sailors.

Ship's nameplate: Examine the
ship's nameplate - Sea Unicorn left of dead Peter Carey. It is the name of the ship Peter Carey
commanded.
Harpoon rack: Check the
harpoon rack above the chest on long back wall. The murder weapon must have been taken from
this rack.
Wooden chest: Open the wooden
chest left of the net. Examine the chest contents.
Take Peter Carey's boots. It is size 8.
Examine the navigation tools.
Ship's log: Check the shelves
left of the harpoon rack. It has the ship logs from the Sea Unicorn from 1878-1884.
Shelf: Examine the
shelf right of the door. Examine the sperm whale tooth.
Press T key to see suspicious empty space -
outline in the dust. A small box or chest must have been taken from here.
Map: Examine the map
right of door. Examine the route from Dundee at bottom left to Hammerfest at
top.
Look around outside:
Footprints: Walk the path
close to the constable searching the garden. See footprints on the ground in front of the
constable.
Press T key to see the stone path and footprints.
Use Carey's boots on the footprints. Drag down the
boots. The boots do not match the footprints.
Mrs. Carey: Go back to Mrs.
Carey and talk to her.
Peter Carey had given up smoking a long time
ago, but he might still have kept the pouch.
Judith Carey says that her husband took care of the garden himself.
There had been a tin box in the cabin, not much
larger than a book.
Task - Deduction:
Open deduction using the B key.
Select - click on a floating text clue and select
a correlating clue. See the description of the clues at bottom of screen.
If correlated; it will be blue; erroneous
correlation is in red.
Break in attempts + notebook = An ambush must be
made tonight to see if the break-in attempt will be repeated.
Organize an ambush with Lestrade:
Talk to Lestrade. They plan to hide and wait for
another break in by the suspect. He would have better tools now.
Go to the right side of the cabin close to cement
wall and then to the
back of the cabin.
Click on the back window - perfect hiding place.
An intruder enters the cabin. Lestrade and his men
apprehend the intruder.
Go around to the front and enter the cabin. Lestrade arrests John Hopley Neligan.
Examine John Hopley Neligan's belongings:
Holmes arrives at Scotland Yard.
Talk to the
constable behind the counter. John Neligan is in the interrogation room and his belongings are
in the evidence room.
Evidence room: Go the
hallway at left and enter the first door at right.
Examine Neligan's belongings on the table.
Take the ring. Examine the inscription
inside the ring - from R Dawson to my friend and partner, 1883.
Rotate to view all the inscription.
Examine the handkerchief. It has initials
J.H.N.
Examine the pocket knife.
Open the notebook. Examine the abbreviations.
A notebook with a blood stain on its cover, indicating that it was
dropped into the pool of blood after the murder. It belongs to Neligan.
Interrogate John Hopley Neligan at Scotland Yard.
Interrogation room: Exit
the room and go through the grilled gate at end of hallway. Enter the door
at left.
Talk to Neligan: Neligan
believes that explaining about the abbreviations will make things worse.
When shown the bloody knife, Neligan states that
he didn't kill anyone.
When asked about the ring - press the Q key to ask
about the ring's engraving.
Profile of
Neligan: Press the character icon to examine Neligan closer.
Check the hat. Neligan wears a shabby cap.
Check the neck. Neligan has thin neck.
Check the stitches at left shoulders. There's
a patch on his coat.
Check the coat sleeves by shoulder. The coat
is made of expensive
fabric.
Check the coat's buttons. The coat has elaborate buttons.
Check the coat's sleeves by wrist. The coat
has short
sleeves and not fit Neligan.
Check the hand. The hands and fingers have callus.
Check the other hand. The hand has scars.
Read character portrait in the
casebook.
Interrogate Neligan: Ask
about the ring's owner.
Press the Q key. Select Father's jacket as
corroborating evidence. Holmes
explains his deductions.
What is John Neligan's role in all that?
Newspapers: Jump to Baker
Street.
Go to the archives framing the fireplace. To the
left are research books and documents on sciences or other cultural
sources. Right of fireplace are newspapers.
Go to the newspaper right of fireplace. Search Dawson, 1883.
Read about Dawson and Neligan bankrupt.
A newspaper article describes Dawson and
Neligan Investment Fund, following its bankruptcy and Joshua Neligan's
disappearance.
Learn that Joshua Neligan disappeared and was last
seen aboard his yacht preparing for departure to Norway.
Press E key to continue.
Neligan: Go back to
Scotland Yard and interrogate Neligan again.
Learn that Joshua Neligan, John's father set sail
for Hammerfest in Norway. He left a list of securities that he was taking to
John's mother.
Task - Deduction:
Open the floating deduction (B key).
Swift actions + Pinned to the wall = experiment
required.
Ask Watson to help with preparations for a "harpoon throwing
experiment."
Jump back to
Baker Street and talk to Watson about whaling. Wonderful!
Talk to Toby by window.
Examine the ship's log.
Log: Jump to Woodsman's
Lee. Go to the cabin.
Check the shelf for the 1883 ship's log.
See the list of the crew of the Sea
Unicorn. Read the log for June, July and August.
Click on the missing - torn pages for August and take the
piece of the Canadian Pacific Railway stock certificate - CPR.
The pages for August 1883 had been torn from
the Sea Unicorn's logs.
Map: Review the map right
of the doorway. See Carey's whaling route. Hmm...
Find a harpoon for the experiment:
Take a harpoon from the rack on the wall.
Join Watson at the White chapel butchers.
Jump to Whitechapel butchers. Talk to Watson.
Click-hold left mouse button to move the sighting
arrows.
Aim on the X on the pig's carcass. When the moving
line is at center of the white bar, click
to throw the harpoon.
The aim is to hit the X and pierce the carcass.
The puzzle is forgiving; the white bar increases in size after several
attempts. :)
Experiments proved that a similar result with a
harpoon can only be achieved with extraordinary strength and/or hard
training.
Watson is left to pay the bill.


Investigate suspect: John Hopley Neligan:
Jump to Scotland Yard and go to evidence room.
Look at Neligan's belongings.
Compare the certificate with the notebook. Click on the
CPR in the notebook.
A stub of bond certificates found in the cabin
proves that certificates for the companies listed in Neligan's notebook had
once been there.

Go to Interrogation room.
Ask Neligan about break in. Immediately press Q
key to ask about bond certificate as corroborating evidence.
Neligan learned that the certificates were being
sold by Peter Carey at the London market.
Deduction:
To get different endings: There
is no need to go back to a saved game to get different endings.
Go back to the deductions tab or press the B key. Open the correlations
and change the choices.
Open the deduction page (B key).
Neligan is guilty:
Break in attempts + Neligan's notebook =
Retrieving the notebook.
The break-in attempts were made in order to
recover the notebook that had been lying in a pool of the victim's blood.
This proves the guilt of the person who made these attempts.
Check the other clues by pressing the space bar.
Missing tin box + missing papers = Stolen valuable
papers.
Valuable bond certificates were kept inside
the stolen tin box.
Retrieving notebook + Stolen valuable papers =
Neligan's motive.
John Neligan could have been caught stealing
the bond certificates. This might have been a motive for him to murder Peter
Carey.
Check the other clues by pressing the space bar.
Strength requirement + pinned to wall = Lucky
throw.
There is a remote possibility that an unskilled
and untrained man could manage to pin Peter Carey to the wall with a
harpoon.
Conclusion: Neligan
is guilty.
John Hopley Neligan murdered Peter Carey. This
is proven by his dishonesty and the fact that he was at the scene of the
murder.
Moral choice: Condemn
or Absolve John Neligan or continue investigation.
Select your decision and see Holmes explain it to
Lestrade.
Note - Choose one of
the moral choices to see an ending for this conclusion.
Confirm this moral choice.
After seeing what happened after this moral choice - click on "replay
ending" to see
another ending.
Do NOT accept this
decision.
Absolve Neligan: Holmes
says that it was self-defense. Lestrade says that it saved Neligan's neck.
Neligan says he's innocent.
John Neligan is a victim of circumstance. His
childhood was overshadowed by the loss of his father. He always dreamed of a
reunion, to find out what had happened. He made a poor decision and so fell
into trouble.
Condemn Neligan: Lestrade
says it's all over for Neligan. Neligan says he's innocent.
John Hopley Neligan has been found guilty of
the murder of Peter Carey. He must be punished by the law for this desperate
crime.
Neligan's innocence: Change the deductions.
Open the deduction board. See conclusion by
pressing C key. Change the selections on the bi-colored cells.
Break in attempts + missing papers = Looking for
papers.
Neligan was looking for his father's papers
inside Black Peter's cabin. It explains his presence at the scene of the
murder.
Missing tin box + missing papers = Stolen valuable
papers.
A number of the bond certificates with which
Neligan's father disappeared were in Peter Carey's cabin.
Looking for papers + Stolen valuable papers =
Neligan's Innocence.
John Neligan is a victim of circumstance. He
does not fit the portrait of the murderer either by physical or
psychological description.
Strength requirement + pinned to wall = Feat of
Strength.
It requires a much greater strength than that
of the average man, to be able to pierce a man's chest with a harpoon all
the way through to the wall. A degree of skill would most likely be
necessary. Two men in co-operation might achieve the same result.
Ask Wiggins to find the crew of
the Sea Unicorn.
Go back to Baker Street. Holmes tells Watson that
the Secret Police Division of Baker Street do better in getting assistance than
Scotland Yard detectives.
Go to the window. Call Wiggins.
Holmes gives Wiggins the list of the sailors
(trigger for constable).
Meet Inspector Lestrade at Scotland Yard:
A constable informs Holmes that Lestrade wants to
talk to him.
Jump to Scotland Yard. Talk to Lestrade by the
counter.
The police caught a suspicious man at Woodsman's
Lee - Liam Hurtley. He was writing a letter when caught.
Examine the belongings of Liam Hurtley.
Examine the belongings:
Go to evidence room and examine Liam Hurtley's belongings.
Take Hurtley's boots. They are size 9.5.
Examine the pen. Examine the stained letter.
The stain can be removed.
Talk to
Hurtley: Go to the jail cell. Talk to Liam Hurtley and
he will be brought to the interrogation room.
Hurtley does not want to answer any questions.
Profile of
Hurtley: Click on the icon to check Hurtley.
Click on scar on neck. He has an old scar.
Click on handkerchief in coat pocket. He has a
handkerchief with crested tit.
Click on bottom of pants. See plant remains.
Click on hands. He has gardener's hands.
Read character portrait in the
casebook.
What is Liam Hurtey trying to hide?
Letter: Jump to
Baker Street. Go to the analysis table.
Recover Hurtley's letter.
Prepare reagent: Make a
reagent that will remove fresh ink.
Mix reagents in a certain order based on the
paper rules to get a clear reagent.
Read the paper with condition - recipe.
Condition 1. All 7 reagents should be
used.
Condition 2. Orange reagent should be the third one
in order after the blue reagent.
Condition 3. Colorless reagent should be added
after the orange reagent.
Pour reagents in flask in this order: Blue + Green + Blue + Orange + Colorless +
Orange + Colorless. Done!
Use the swab on the stained letter.


Read Liam Hurtley's letter.
I did as you asked and hid them well... but I
beg you to reconsider... ...ion. I sw... ...and... ... remember our vows! I
have done nothing dishonorable for which you... ...me.
Footprints: Jump to
Woodsman's Lee.
Go to the footprints left of the path on the way
to the cabin and across the wheelbarrow.
Examine Hurtley's boots. Drag down Hurtley's boots
on footprint to see that they match exactly.
Interrogate new suspect Liam Hurtley:
Go back to Scotland Yard.
Talk to
Hurtley: Go to the jail cell. Talk to Liam Hurtley
again and
he will be brought to the interrogation room.
What where you doing in Woodsman's Lee?
Press Q key and select Hurtley's boots match.
Talk to Hurtley again about Presence in Woodsman's
Lee. Press Q key and select Gardener as corroborating
evidence. Hurtley went to Woodsman's Lee to get his tools.
What did you hide? Press Q key and select Hurtley's letter.
Investigate suspect: Liam Hurtley.
Tool shed: Go to
Woodsman's Lee.
Check the door of the tool shed behind Mrs. Carey. It is
locked.
Mrs. Judith Carey: Talk to Mrs. Carey.
She denies knowing a Liam Hurtley. Mrs. Carey gives the key to
the shed.
Search the tool shed:
Planks: Open the shed
door with small key and enter.
Use the T key. See ill fitting planks on the
floor. Examine and open ill fitting planks.
Take the small wooden box.
Unlock the wooden box:
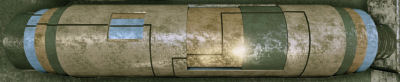
Review the lock puzzle guide at top of walkthrough page.
See a cylinder lock made up of 3 layers of tubes.
The aim of the puzzle is to connect all the
lines on different layers of the cylinder lock.
- Rotate all (right click-turn) to see where
the lines are located.
- There are square openings to see other layer
beneath the top one. Note the lines of the inner layers.
- Connect the lines at the 2 inner layers seen at
both ends. Select the layer to turn using the switch (scroll wheel) and
then left click (rotate single ring).

- Connect the lines on the top layer of the
cylinder. Select
top layer and then left click to rotate.
- Turn to connect all of the lines.


Bunch of letters: Take the letters inside the box. Read
Judith
Carey's letter content.
Liam my dear, You have been so good to me all
the time that I have known you. I cannot describe these feelings, but I
suppose that they are sinful and no good can come from them. I fear what
might happen. I fear going against God. I thank you for...
Judith Carey: Talk to
Mrs. Carey.
Press Q key and then select romantic
correspondence as corroborating evidence.
Holmes returns the letters to Judith.
Judith Carey's confession: Judith Carey begins to cry and says that she
cannot forgive Hurtley for what he has done.
Deduction:
Liam Hurtley is guilty:
This deduction is if Neligan's innocence is
deduced. Change some of the evidences from previous conclusion.
Liam Hurtley's footprints + No gardener = Unexplained
presence.
Liam Hurtley's boots match the footprints at
Woodman's Lee exactly.
Press space bar to see other evidence.
Judith Carey's letter + Judith's confession =
Desperate jealousy.
Liam Hurtley loved Judith Carey so
desperately, that his jealousy could have provoked him into committing murder.
Jealous gardener + Unexplained presence =
Hurtley's motive.
Liam Hurtley's relationship with Judith Carey
gives him a motive for killing Peter Carey.
Strength requirement + pinned to wall = Lucky
throw.
Hurtley's Motive + Lucky Throw = Hurtley is
guilty.
Conclusion: Hurtley
is guilty.
Liam Hurtley murdered Peter Carey. The motive
was jealousy and his love for Carey's wife.
Moral choice: Condemn
or Absolve Liam Hurtley.
Select your decision and see Holmes explain it to
Lestrade.
Note - Choose one of
the moral choices to see an ending for this conclusion.
Confirm moral choice.
After seeing what happened after this moral choice - click on "replay
ending" to see
another ending.
Do NOT accept this
decision.
Condemn Hurtley - Hurtley is accused by Holmes.
Hurtley says he's innocent.
Liam Hurtley has been found guilty of the
murder of Peter Carey. He must be punished by the law in all its rigour.
Absolve Hurtley - Holmes states that after
inviting Hurtley for drinks, Carey attacked Hurtley. It was self defense.
Lestrade says it saved Hurtley's neck. Hurtley says he's innocent.
Liam Hurtley's mind was clouded by his love for
Judith Carey, Peter's wife. This murder was a crime of passion, under
emotional duress. Nevertheless, he must answer to the law for what he has
done.
Continue the investigation.
Liam Hurtley's innocence:
This deduction is obtained if Neligan's innocence
is deduced. Change some of the evidences from previous conclusion.
Hurtley's footprints + No gardener = Unexplained
presence.
Liam Hurtley's boots match the footprints at
Woodman's Lee, thus proving that he was there. Judith Carey denies that he
was their gardener.
Liam Hurtley's letter + Judith Carey's confession
= Harmless flirting.
It has been confirmed that Liam Hurtley was
flirting with Peter Carey's wife.
Harmless flirting + Unexplained presence =
Hurtley's innocence.
Hurtley's presence at Woodman's Lee on the
night of the murder is explained by his affection toward Judith Carey and
the fact that he worked there as a gardener.
Two murderers:
This deduction is obtained if Neligan's motive
(not innocence) is deduced and Feat of Strength in harpoon
throwing clue is selected.
Change some of the evidences from previous conclusion.
Hurtley and Neligan are both guilty as shown on
their respective deductions above.
Neligan Guilty + Hurtley Guilty = Possible
conspiracy.
Both Neligan and Hurtley are lying, therefore
they might be working together.
Hurtley's motive + Neligan's motive = Possible
conspiracy.
Strength requirement + Pinned to wall = Feat of
Strength
Possible conspiracy + Feat of strength = Two
murderers.
Conclusion: Two
Murderers.
Moral decision: Select
Neligan as initiator or Hurtley as initiator or decide later.
Select your choice and see Holmes explain it to
Lestrade.
Note - Choose one of
the moral choices to see an ending for this conclusion.
Confirm moral choice.
After seeing what happened after this moral choice - click on "replay
ending" to see
another ending.
Do NOT accept this
decision.
Neligan as initiator: Neligan
and Hurtley do not know each other. Hurtley says that Neligan threatened
him. Hurtley confesses.
Liam Hurtley and John Neligan are guilty of a
heinous, premeditated crime. Let them be punished by the law. Neligan was
the initiator, and Hurtley his accomplice.
Hurtley as initiator: Neligan
and Hurtley do not know each other. Hurtley says that Neligan threatened
him. Neligan insists he's innocent.
Liam Hurtley and John Neligan are guilty of a
heinous, premeditated crime. Let them be punished by the law. Hurtley was
the initiator. Poor Neligan was just following his lead.
Check if Wiggins has found any crew members yet.
Go back to Baker Street. Wiggins located the
sailors of Sea Unicorn.
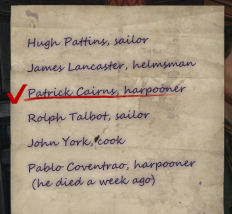
See the crew list.
Click on Pablo Coventrao - has initials P.C. and a harpooner died a
week ago.
Select Patrick Cairns. He's a harpooner and has
initials P.C. like on the tobacco pouch.
Holmes asks Wiggins to find out information
about Cairns.
Sometime later, Wiggins returns and gives his
report.
Patrick Cairns
lives nearby in a dump of a room. He is always at
the Sea Witch pub, where he arm-wrestles for money and drink.
Task - Deduction:
Press B key.
Patrick Cairns + Peter Carey a non smoker = Check
Patrick Cairns.
If the pouch belongs to Cairns, it indicates his
presence in the crime scene, but it must still be proven.
Disguise yourself as a sailor and find Cairns at the
Sea Witch pub.
Disguise as a sailor: Go
to Holmes bedroom.
Open wardrobe. Select the sailor outfit.
Press B key to get selection on dressing table.
Select the hair-hat, glasses and facial hair of your choice.
Sea Witch pub: Jump to
Sea Witch pub.
Go to the back area and talk to Patrick Cairns.
Arm wrestle: Note Cairns facial expression to see what
he plans to do.
Cairns will not talk until you defeat him in
arm wrestling twice. 10 shillings per bout.
Left click-tap continuously to push. Right click to hold
and gain stamina.
Left click-tap to slowly bring his arm down
while watching the stamina.
If stamina goes down partway the circle - release
or hold
left click to get stamina back to top.
Continue to tap - get stamina until you win the
bout.
Space bar skips the puzzle. Win 2 bouts and
then talk to Cairns
Talk to Patrick Cairns:
Holmes buys drinks to get Cairns talking. Cairns says that he is poor and no
job.
Learn about Black Peter. Learn that in 1883, a
little craft that has been blown north. They found a man that is not a
sailor alone on his boat. His crew must have left him.
The man had only a tin box as baggage and had
talks with Black Peter. During the second night that unknown man disappeared
and the crew was too scared of Black Peter to ask.
Patrick Cairns told the story of how, in August
1883, he had observed Peter Carey throwing a man overboard. The man had been
saved from the sea only the previous night. The man was obviously Joshua
Neligan.
Peter Carey was trying to conceal the murder of
John Neligan's father.
Profile of
Patrick Cairns:
Click on character icon.
Click on earring. He wears gold earring.
Click on his left sleeves. But he wears cheap clothes.
Click on his left bare forearm. He has strong hands.
Click on fingers. He has smokers' yellow nails.
Click on anchor tattoo on other arm. He has sailor's
tattoo.
Read character portrait in the
casebook.
Plant the pouch into Cairns pocket and determine if
the pouch is his.
Stand by-behind Cairns' chair and see the coat
hanging on chair.
Click on Cairns coat pocket to see a close-up of his coat
pocket on the back of the chair.
Drag down the tobacco pouch to slide down the pocket.
Talk to Cairns again. Ask for tobacco.
Cairns finds the pouch that he thought was lost in his pocket. Cairns says
it is his.
Holmes gave Cairns a tip about a planned
expedition of Captain Ahab of The Pequod. Ahab might be needing a harpooner.
Deduction:
Patrick Cairns' pouch + Patrick Cairns = Pouch
proves visit or Pouch proves Guilt.
Pouch Proves Visit - Cairns has confirmed that the
pouch belongs to him. This means that he was at the scene of the murder, but
does not necessarily prove that he is the murderer.
Pouch Proves Guilt - Cairns has confirmed that the
pouch belongs to him. This means that he was at the scene of the murder, and
thus proves his guilt.
Cairns is guilty:
If Neligan's and Hurtley's deductions have them
proven innocent, do deduction on Cairns.
Feat of strength + Pouch proves guilt + stolen
valuable papers = Cairns is guilty.
Conclusion: Cairns is
guilty.
Moral choice: Condemn or
absolve Patrick Cairns.
Select your choice and see Holmes explain it to
Lestrade.
Condemn
Cairns: Patrick Cairns is a cold blooded murderer. He has been
found guilty of the murder of Peter Carey, and must be punished.
The next day, Patrick Cairns arrives at Baker Street expecting
to meet Capt. Ahab.
Lestrade arrests Cairns. Cairns resists arrest by
punching Lestrade. Ow!
Fight Cairns: Holmes spars with Cairns. Place red circle on
Cairns face. Click when the red circle is within the faint circle that is on
Cairns face.
Press the W key when W icon appears.
Lestrade wants the event between them.
Achievement obtained - Bruiser. Beat Cairns in a
fight.
Absolve Cairns: Patrick Cairns killed
Peter Carey, but the murder was not premeditated. It was in self-defence
against an armed and irrational drunken sailor.
The next day, Patrick Cairns arrives at Baker Street expecting
to meet Capt. Ahab.
Cairns after confronted by Holmes gives his
version of what happened. It was self defense.
Holmes asks him to return the certificate, but to
keep some for his exile. He can come back after several years.
Sometime later, Holmes explains to Lestrade that it was Pablo Coventrao the dead harpooner of the Sea Unicorn that is the murderer.
Sometime later, Neligan arrives to thank Holmes for clearing his
name. Holmes gives him the certificates.
Summary:
See the summary of the case.
Clues found: 16
Conclusion and moral choice done are shown.
Use the space bar to see if the clues are all
found. If green colored conclusion is seen, the conclusion is the best one
in the game.
Replay ending will bring the game back before the
moral choice.
Accept decision? If you accept the decision, you
cannot go back to replay this game and will proceed to next game.
Achievement obtained - Aye, aye Captain! Finished
Black Peter Case.
RIDDLE ON THE RAILS
Holmes is packing his books for a vacation. He is
wearing his farmer's outfit. Doctor Watson expounds on the good it will do
Holmes to be in the country. They are visiting a bee lover.
Mycroft, Sherlock's brother who works for the
government walks in. Mycroft wants Sherlock to help them - him in stopping the Merry
Men, a band of idealistic terrorist. The Merry Men are a threat to the country.
Mycroft held the train to wait for Watson and
Sherlock and he knows that Sherlock is going to Staffordshire.
Talk to Toby by the window.
Previous case - The Fate of Black Peter:
Open the casebook.
Chronicle: If you finished
the case, see the personality ranking. It depends on your moral choice.
Trophy: Harpoon that was used
to kill Black Peter.
Echoes - messages: The
messages seen here depends on the moral choices and conclusion selected that
closes the
previous game.
Check to see if there is mail on the mantle of the
fireplace.
If John Hopley Neligan is absolved, get a message
from Neligan's mother.
Mr. Holmes, I know you were leading the
investigation of the murder of "Black Peter. Please accept my deepest
gratitude for your humanity by your greatly shortening the sentence of my
dear son, John Hopley Neligan. He is innocent, I do assure you. He merely
appeared in the wrong place at the wrong time. But, thanks to you, he shall
soon be released! Yours sincerely, Mrs. Sarah Neligan.
If John Hopley Neligan is condemned, get a message
from Neligan's mother.
Mr. Holmes, we may not be acquainted, but
that is of little importance. I shall always remember you as the man who
arrested my darling son, John Hopley Neligan. He had already suffered so
much from the loss of his father, but you dared to put him in prison for the
murder of 'Black Peter'? A murder he never committed? How could you be so
misguided and cruel? My son is an innocent victim, and I shall do anything
to prove it. I shall hire the best lawyers in the country! Mrs. Sarah
Neligan.
If Liam Hurtley is absolved, get a message from
Judith Carey.
I am so grateful that a great detective
such as yourself could also possess such a kind heart. Thank you for your
decision regarding Liam Hurtley, a dear friend of mine, and the murderer of
my husband, Peter Carey. I am sure that Mr. Hurtley had no other choice; he
killed accidentally and clearly in self-defence. You have my deepest
appreciation, from the bottom of my heart. Yours sincerely, Mrs. Judith
Carey.
If Liam Hurtley is condemned, get a newspaper
account.
The High Court of Justice yesterday
convicted Liam Hurtley to 30 years of imprisonment for the murder of Peter
Carey (also known as Black Peter). Despite the numerous pleas of 'not
guilty', and the lack of evidence as put forth by Hurtley's lawyer, the
jurors agreed on a severe punishment. This decision was due to the charge
being brought by Mr. Sherlock Holmes, the great detective who led the murder
investigation.
If Peter Cairns is condemned, get a newspaper
account.
The grotesque murder of the former
Captain Peter Carey (known in private as 'Black Peter'), has been resolved!
The evidence that Scotland Yard received from a trustworthy source was more
than sufficient to conclude that the murderer of Peter Carey was Patrick
Cairns, one of Carey's former harpooners. In fact, the dangerous criminal
was caught single-handedly by brave Inspector Lestrade in a hand-to-hand
fight. Patrick Cairns is now sentenced to death.
If Peter Cairns is absolved, get a newspaper
account.
The grotesque murder of the former
Captain Peter Carey (known in private as 'Black Peter') has been resolved!
The evidence that Scotland Yard received from a trustworthy source was more
than sufficient to conclude that the murderer of Peter Carey was Pablo
Coventrao, one of Carey's former harpooners. However, lawful justice could
not be awarded - Coventrao was found dead of natural causes, possibly from
his remorse at committing such a terrible crime.
Vacation:
Go to the door and exit. Holmes will call the cab.
One week later, Holmes and Dr. Watson wait for the train while
standing at the foggy Evesham Station. The train is seen but there is no sound.
The train disappears.
Holmes and Watson examines the rails. It's too
dark and foggy to see anything.
Inspect the rails where the train vanished:
The next morning, Holmes and Watson are back at
Evesham Station.
Archives - Carriage: The carriage
that Holmes and Watson came in will bring them to the map during gameplay.
At the back of the carriage is the portable archives that Holmes brought with him.
Land by rails: Enter the
station's waiting room. Go through the other door
to be at the rail side of the station.
Walk the rails to the left - the way to Doncaster until
the end of the stone wall at right side of rails and Evesham stone marker.
Press the F key to see a reenactment of the ghost
train. Watson says that this is where the train disappeared.
Press the T key to see hidden clues.
Examine the railway sleepers and empty bottle.
Examine ground near rails. There are no tracks of
footprints on the ground.
Examine the rails. There are no signs whatsoever.
This makes Holmes smile. The mystery appears very promising.
The train simply vanished. There are no traces
at the place where it was last seen. The train vanished with all its passengers and
staff on board.
Evesham station - Find more information about the
vanished train:
Station
master Everett: Go back to
the station and talk to the station master fixing a bicycle.
Portrait of the Evesham station master:
Examine his hair. He has gray hair.
Examine the badge on his coat. He is awarded
an honorary badge.
Examine the sleeves. It has spots of earth.
Examine finger. He wears a wedding ring. He is married.
Read character portrait in the
casebook.
Talk to station master. The train composition is
in his office. There is a map at the hall.
Ticket office: Enter the door
around the corner at right end of the station.
Look around outside the office and then enter the
office at right hallway.
Check the office table to:
- Read the message to all station -
telegram that states that Mr. Robinson is at Bridlington Station.
- Read the Train composition. The train
has locomotive, coal car, first class car, postal wagon, special wagon
(ordered by Mr. Robinson) and
second class car.
Check the telegraph at back wall.
More info: Talk to the
station master again. Special coach or wagon reserved by a special person is
attached to the train. The one that disappeared was on high security. It has
no windows, with iron walls and locked.
The vanished train was carrying a special wagon
ordered by Mr. Robinson. It could contain something very important.
Locate a map of the surrounding area:
Left Luggage room: Enter the door
behind the station master. Look around at the postal bags.
Map at Waiting Hall: Enter the
waiting hall. Take the railway map at left wall.
Warehouse: Enter the
adjacent door
left of hall. Examine the junk pile on table. See that bell and spare parts
are stored here. Examine other spare parts in the room.
Examine Evesham railway branch:
Go across the rail tracks at right to the fenced in area.
Open the gate - door.
Remains of building: Go to the
space beside the missing tracks and see a roof of a cabin. A cabin was
disassembled in great haste.
Wagon tracks: Go to the
path going to the right. Press the T key. Examine the multiple traces on the ground.
Examine the heavy vehicle tracks: The
vehicle must have been heavy because the tracks are deep.
Take the size of the tracks: Click the measuring
tape from top track to the bottom track to measure the space in between.
The tracks are 6 feet 7 inches. The tracks are
fresh and made by large truck loaded with material.
Check the gate at end of the road. Examine the
road that leads to the town of Evesham.

Station
master: Go back to
the station master and talk to him.
Learn that the he got a message from Bridlington
station about the train being delayed because of an issue with the
passengers.
Bridlington station, a suburban railway station
can be reached by a cab.
The warehouse that was disassembled was burgled
overnight 2 weeks ago. It stores standby rails and some railway parts.
The storage warehouse near Evesham station was
ransacked. It contained spare sections of railway track.
Map: Open the map and see
that the broken down shed and the location of the missing train is drawn
there.
Bridlington Station - Retrieve information about
passengers that were present at the night train:
Select Bridlington in the map. Enter the waiting hall
through the door at left.
Angry passenger:
Examine the man standing by the ticket window.
Portrait of the angry passenger:
Check the coat. He wears work clothes.
Check the coat pocket. There is a cheap ticket
there.
Check the hand. He wears a ring, married.
Check the other hand. The hand has rough skin.
Read character portrait in the
casebook.
Talk to the man. He wants a refund on his
ticket.
Learn that the ticket inspector forced the
passengers out at this station stating that their tickets are not valid.
Learn that they were forced off the train except
for the rich looking ones. The rich are foreigners - Spanish looking toffs.
Mr. Thomas Robinson: Talk
to the rich passenger by fireplace. He doesn't feel like talking at the
moment.
Portrait of Robinson:
Check the cowboy hat. It is an Australian hat.
Check vest. He wears expensive clothes.
Check hand. He wears a heavy gold ring.
Check the shoes. He wears fancy alligator
shoes.
Read character portrait in the
casebook.
Find out what the special wagon was carrying:
Talk to Mr. Robinson again.
Learn that the special wagon carries his machine
that produce electricity.
Robinson has already potential customers and he
was with the director's board on the train. The director's board is of the
Chilean Barcazas company. It is a South American company.
Robinson was forced off the train by the
Bridlington station master. The station master got a telegram stating that Robinson was to
meet a Mr. Bromsby at the waiting room of the station. The Chileans
continued with the train to London. Robinson threatens to sue the station
master.
All passengers were removed from the train
except for the directors of the Chilean Barcazas company. They were the only
passengers on the train after Bridlington station.
Ticket office: Enter the
ticket office marked private.
Telegraph machine:
Press the T key. Examine the gap on the floor. Take the document.
Pick it up and see that it is the prototype insurance
policy. The prototype is insured for 15 thousand pounds and organized by
Mr. Robinson.
Mr. Robinson's prototype, carried inside the
special wagon, was under high insurance. The prototype seems to be a
revolutionary model.
Bridlington station master:
Talk to Station master Bertram. Note that
he quotes train regulations.
There were 2 passengers that complained about the
train.
Portrait of Bridlington station master:
Check the eyes. He is young.
Check the tie. He wears clean clothes.
Check the manual in his coat pocket. He
carries the station master instructions.
Check the hand. He has ink smudges.
Read character portrait in the
casebook.
When asked how long he worked here, press the Q
key - select rookie station master as corroborating fact.
The station master scolded the rude ticket inspector.
Learn that he got a strange message from the Chesterfield
station master that is incomprehensible. He gives the Chesterfield telegram.
Read the garbled telegram.
The Chesterfield
Station Master reported by telegraph the arrival and departure of the
vanished train.
Learn more about Mr. Robinson:
Mr. Thomas Robinson: Talk to Mr.
Robinson at the waiting hall about the insurance.
Robinson lost the insurance paper when he wanted
to send a message but was refused by the station master.
Mr. Robinson has a grip sack with him. Holmes
smoothly maneuver the station master to place the grip sack in the luggage room.
Left Luggage room: Go to
the platform side of the station. Go right and enter the next room. Check
the mailbags.
Examine
Thomas Robinson's luggage: Look close at the
luggage at left.
Match the lines on the tubes layers. There
are 4 layers in this cylinder.
Match the outer light gold with the inner
green.
Then match the inner gold with the green and
outer layer.
Next turn the inner silver to match the other
lines.

Bundle of contracts: Read
the contracts.
Read
the papers and click - underline the words "exclusive sales contract" and "Mr.
Robinson" on each contract.
Robinson got prepayment from 4
different companies for his machine.
Mr. Robinson wished to sell his
missing prototype to many customers. He had received numerous
pre-payments for signing multiple contracts.
Warehouse: Check the next
room at the station. Look around.
Chesterfield Station:
Travel to Chesterfield station.
Check the door left of the ticket office -
it is locked.
Enter the ticket office area. Examine the waste
bin on left wall by bench. It is full of empty bottles.
Check the fishing
advertisement left of the scale.
Telegraph: Enter the
ticket office.
Examine the Morse code alphabet on the telegraph
table. It looks like the station master doesn't know Morse code.
Station
master: Talk to the drunken station master.
He doesn't know if a passenger left the train here
last night because he didn't leave his office to check the train that
passed through.
Portrait of the Chesterfield station master:
Check his red nose.
Check his coat. He wears clean clothes.
Check his ring finger. He is married.
Check the alcohol flask just under the hand.
Check the coat pocket that has fishing line.
Read character portrait in the
casebook.
Talk to him about the strange message he sent. He
says he remembers the train quite clearly.
Press the Q key and select binge drinking from the answer list.
The Station Master at Chesterfield does not
take his job very seriously. He seems untrustworthy.
Chesterfield station should be carefully examined:
Left Luggage room: Exit to
the platform side of station. Check the locked left luggage door.
Open the lock: There
are 3 layers to this lock.
Turn to see 2 large squares.
Match the top layer with the lines of the
second inner cylinder.
Turn to look for unmatched lines in squares.
Match the second layer with lines of third
inner layer.
The room is a mess.


Instruments: Examine the
instruments. They are used recently and muddy.
Press the T key. Check the floor and see huge
scratches. Examine the traces. Mailbags were dragged
here recently.
Sack: Move the sacks by the
door. See expensive French wine and Scotch whiskey. They must have been taken
from mailed parcels.
Warehouse: Enter next door.
See a handcar base.
Holmes emphasizes that they saw only headlights
and heard the whistle but didn't see the train itself.
A dismantled handcar with spare parts scattered
around it was found at Chesterfield station.
Task - deduction:
Spare parts of handcar + no traces of train = Fake
train experiment.
The dismantled handcar seems connected to our
mystery. Reconstruct the handcar to see if it imitate the vanished train.
Fake train experiment:
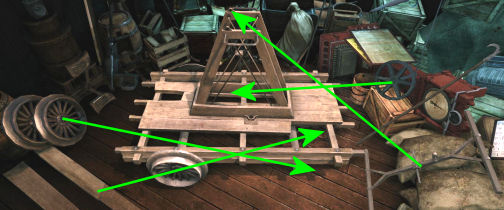
Reconstruct
handcar: Examine the handcar. Place the parts to complete the
handcar.
Take a wheel from left and place it on right
bar at wooden base of platform.
Take the small gear from right and use at
center - small gear housing.
Take hand mechanism at right and place at top
of central structure.
Take the wooden board from bottom of
screen use on gap on wooden base.
Rotate the platform truck to see the other
side.
Place the wheel from left on wooden base of
handcar.
Take the brakes by stove and attach it to the
brake joint
between the wheels.

Finish the fake train:
See the handcar on rail tracks. Our train requires only a headlight and a steam
whistle.
Press the F key and see a ghost train and the
handcar.
Go to the warehouse. Take the long pole at right.
Go to the stove. Examine the train spare parts
right of stove.
Take the steam whistle on top of barrel.
Take headlight with dynamo machine.
Take fire extinguisher from table by window.
Evidence required: Go back to handcar on train tracks.
Press the F key.
Place the long pole, connect headlight and install
steam whistle.
Attach the fire extinguisher to make the steam
whistle.
Press the F key.
- Push the handcar lever.
- Pump pressure of the fire extinguisher.
- Blow the Train steam whistle.
The replica of the train that vanished is
created. The train at Evesham was faked by somebody.
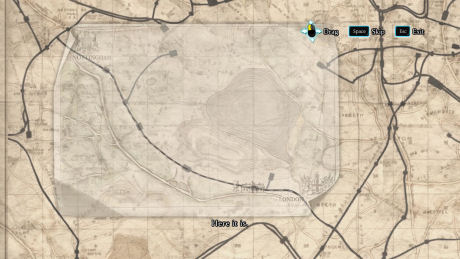
Search archives:
Archived map: Get a detailed map of the area to see where to
find the real train.
Go to the front part of the train station via the
waiting room or the path by the fence.
Go to the portable archives at back of the coach. Search old map.
Combine the 2 maps:
Move the small map to the middle left edge of
the archived map.
Match the roads in white, black
lines for railroad and the shape of the lake in blue above the Evesham
station.
There is a railway switch between Bridlington
and Chesterfield and one by the station that is between Evesham and
Chesterfield.
Station
master: Talk to the station master again at the
office.
Learn that the instruments are dirty because
workers that level the edge of the railway used them. They worked to prevent
water from coming too close to the rails. The station master does not know
this men. The workers gave him strong drink and they were not English.
Examine the side railway branch that begins at the
railway switch:
Jump to railway switch between Bridlington and
Chesterfield seen in the map.
Rail switch: Go to the
rail switch with red flag
by post at other side of the main rail track.
Examine the switch and see that the rail tracks can
be turned to the left. It is rusted but still works.
Signpost:
Go to the curved rail tracks at corner.
Examine the signpost that shows the way to the
mines.
Press the F key. See the reenactment of a train
that is redirected to the mines.
Examine Mines to find out if it is possible to hide
a train here:
Jump to mines in the map. Look around. The mines are well
maintained.
Fallen sign: Examine the
fallen sign at left by the corner of the road.
Fix the information board.
Take board on the ground and place it on the
information
board.
Holmes borrows Watson's hankie. I haven't
the faintest idea.
Use-click-hold the hankie to wipe the dirt off the board. This is WEA Coal
Company
Vehicle traces: Go forward.
Examine the vehicle tracks by the fallen wooden
beam. A lightly loaded vehicle came this way.
Take measurement. Use the tape from one
track to the other. It measures 4 feet and 8 inches.
The traces at the mines are fresh made by a
small truck with a base of around 4 feet 8 inches.
Examine the wooden beam. A small vehicle carrying wooden beams went down
this way.
Missing rails: Go
forward. The big mine has collapsed; the entryway is
blocked by rubble.
There is an old railway leading to the mines, but part
of it is missing.
Press the T key
and see the empty place.
Examine the removed screws. The rails have been
removed.
Collapsed mine: Go to the rubble
at mine entrance.
Press the T key. See collapsed mine, pile of
stones and a paper package.
The mines
are collapsed and cannot be accessed.
Examine the strange box: Examine the strange package - box.
Examine the box paper.
It is stiff and dry; used for a specific purpose.
Pull aside the paper cover.
Place cursor on top left comer of the
folded end and open box by
dragging the paper to the right.
See sawdust inside. Holmes asks Watson to
shoot at the box.
Right click to aim the sight of the revolver.
While it is aimed (box on top of the
sight of the revolver); left click to shoot. It's dynamite.
Somebody used dynamite to collapse the
mines.
Mine guards' office: Climb
to the 2 buildings left of collapsed mine. Enter the left hut.
Open the strange box:
Examine the metal box on the floor.
There
are 5 layers to this cylinder.
The easiest way for me is to match the lines
at the ends. Some layers (like the green one) have 2 lines at the end; select the right
one based on square holes at center.
Read the new security instructions. It mentions
that the Barcazas Company is granted free access to the mine and that
the Caracal consortium are now under the "no trespassing" rule.
Perhaps Mycroft can help.

Other structures: Check the other building and the locked mine
entrance behind the guards' office.
Use telegraph to discover more about WEA Coal Company:
Train station: Go to
any train station and use the telegraph at the
ticket office.
Contact Mycroft: After a
while, get a
reply from Mycroft.
Read WEA Coal Company document.
The 2 companies
want to buy
the WEA mines. The Mexican Caracal had an initial deal but the Chilean Barcazas Company
managed to snatch the concluding deal aided by their influential
connections.
Doncaster Station:
Use the map and jump to Doncaster the station
between Chesterfield and Evesham. Look around.
Waiting Hall: Enter the waiting
hall.
Mysterious Man: See an anxious
foreign man leave the hall.
Examine the cigar stub that the anxious man dropped
under the far bench on the right.
Take the cigar stub. Sniff the cigar
stub.
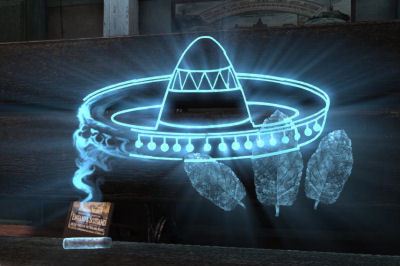
Construct the picture:
Help Holmes combine his association in one picture.
See a picture that is broken in parts. Rotate and put together the parts.
Start with turning the Mexican hat to the
other side. Move the tobacco leaves to the right and see that smoke
stays on the left.
Then form or join the lines of the sombrero.
Adjust - lower the large piece of the hat with the
cigar smoke.
Adjust the sombrero part attached to the mint leaves.
The cigar has a slightly peppermint smell. It
is a Ricardo Turrent. A rather expensive Mexican cigar.
Ashtray: Press the T key.
Check the ashtray at end of the benches by the ticket office. There's
lot of ash and cigar stubs.
Examine the cigar stub. It is similar to the
one thrown by the mysterious foreigner. Holmes says that there are
several days of stubs here. So the man has been here waiting for a while. He
is not a traveler or bum.
A suspicious Mexican individual has been
present at Doncaster station for the past few days.
Take the piece of burnt paper. Read the text
of the burned paper. It highlights the conflict between the
Mexicans and the Chileans.
Click on the ashtray several times to note the
conflict between the Mexicans and Chileans.
Ticket office: Enter the ticket
office through side aisle at right and look around.
Check the office table. Examine the horse racing magazines.
Take and examine the horse
race betting tickets under the magazines. Turn the ticket and check the back to see that the sums
are
impressive.
Examine the side railway branch that leads to the quarry at the station located
between Chesterfield and Evesham:
Flooded field: Exit to
the platform by the rail.
Watson points out the flooded field across the
station. Holmes says it needs to be checked.
Flooded area: Go across the platform to the area with 2 red
flags. See the red warning flags.
See the flooded quarry. The quarry near
Doncaster station is flooded.
Rail switch: Go right on the
rail tracks. See the tracks branch to the right.
Move the rail switch with the flag. The switch is
rusted but it still works.
Quarry: Follow the track branch
that leads to the quarry.
Examine the rails that are old and rusted but
still usable.
Examine the end of the rails. It ends here.
There is an old railway at Doncaster that leads to the quarry. It is flooded
and missing a section of rail.

Look around Doncaster Station:
Go back to Doncaster Station.
Left Luggage room:
Enter the
Left Luggage room pass the waiting room. Check the mailbags.
Station master bag: Examine the station master bag hanging on right
wall.
Take and read the letter to Doncaster station
master's wife. The station master writes to wife that he
will have money in the next few days to pay for the mortgage on the house.
Take and read the lawyer's letter. The station master
Edward Duff promises to honor his debts. The Station Master at Doncaster
received money
recently.
He assured his lawyer and his ex-wife that he
would be sending them money and bought horse racing tickets despite the fact
he can ill afford them.
Warehouse: Enter the open door
by the station master. Look around.
See a lighted coal stove at left corner. Examine
the teapot on stove.
Doncaster station master:
Talk to the station master sitting at the corner
of the station's platform.
Portrait of Doncaster station master:
Check his melancholy eyes.
Check the button on coat. There's a missing button.
Check his coat pocket. He does not have a
watch.
Check his hand. It has mark of ring.
Read character portrait in the
casebook.
Talk to station master. He doesn't know about the
flooded area that is supposed to be a quarry.
He doesn't know because he's only been here
recently. He asked to be transferred here 4 months ago. Life is cheaper
here.
No passengers came down from train. He reported
the passage of the train as usual.
The Doncaster Station Master reported by
telegraph the arrival and departure of the vanished train.
Ask about gambling man. Press the Q key. Select
horse racing tickets as supporting evidence.
Ask about the Mexican. The station master denies knowing one.
Find the man who was smoking cigars in Doncaster's
waiting hall:
Holmes notes the grudge between the Mexicans and
Chileans. Holmes tells Watson that they need to talk to the Mysterious
Mexican at the waiting room.
Waiting room: Enter the
waiting hall. See the mysterious man. The foreigner was going to run away again but
Holmes calls him.
The foreigner says he's a Chilean. He just arrived
from South America.
Portrait of the foreigner:
Examine the skin by eyes and cheek. He has
wrinkles.
Check his bowtie. He has smart clothes.
Check his coat to see that he has strong
build.
Check his hand with the expensive cigar.
Check the hand and see that he practices
martial arts.
Read character portrait in the
casebook.
Holmes thinks he's Mexican. Press the Q key and
select Mexican cigar as supporting clue.
He is waiting here for the recovery of his friends. He doesn't want to give the name of his company or his own name.
Deductions:
The train is in the collapsed mines:
Change some of the evidences from previous conclusion.
Chesterfield telegram + Station
master of Chesterfield is untrustworthy = Missed Chesterfield.
The train never passed through Chesterfield
station: the station master was drunk and his testimony seems unreliable. He
could have sent the report without witnessing the train.
Rails to mine + Stolen rail tracks = Road
into mines.
Somebody stole the rails to temporarily cover the
missing section of the railway into the mines.
Mines are collapsed + Mines are blasted =
Concealment.
The mines were collapsed to hide the train;
dynamite was used after the train was moved inside.
Missed Chesterfield + Road into mines +
Concealment = Inside mines
The train is sealed underneath the collapsed
mines.
Robinson is a swindler:
Continue the above The train is in the
collapsed mines deduction.
Train vanished with people + Chilean stayed on
train = Accident.
The Chileans' stay on the train was just a
coincidence: the train conductor overlooked them.
Doncaster station master received money + Doncaster
station master's telegram = Missed Doncaster station.
The train never passed through Doncaster station:
the station master lied and sent a false report. Perhaps he was bribed with
the money he desperately needed.
Fake train + Spare parts of handcar = Vanished
earlier.
The train never reached Evesham. It disappeared
earlier, and was faked by somebody using a handcar and spare train parts
from Chesterfield station.
Prototype has many customers + Special wagon =
Robinson's motive.
Loss of prototype will bring a lot of easy money to Mr.
Robinson, thanks to the insurance and multiple fraudulent exclusive
contracts.
Inside mines + Missed Doncaster station + Accident + Robinson's motive
+ Vanished earlier = Robinson is a swindler.
Conclusion: Robinson
is a swindler.
Mr. Robinson is a financial swindler. With the
aid of his minions he sealed the train and his fake machine underneath the
collapsed mines to make a fortune from multiple contracts and the insurance
claim.
Moral Choice: Choose
Blind Justice or Political game or continue investigation.
Note - Choose one of
the moral choices to see an ending for this conclusion.
Confirm moral choice.
After seeing what happened after this moral choice - click on "replay
ending" to see
another ending.
Do NOT accept this
decision.
Blind justice = Thomas Robinson is a
guileful man who would not hesitate to sacrifice lives for his own personal
gain. Contact Lestrade and allow the police to perform their loud and swift
justice, before he plans a new swindle.
Holmes discusses his intentions with Watson.
Holmes prefers the expediency (without political intervention) of the arrest
by the police. He will inform Lestrade. Holmes confronts Robinson at Bridlington station.
Political game = Robinson is a swindler,
but he is a famous man of influence. Direct confrontation is inadvisable; it
would be preferable to accept Mycroft's 'political' means of resolving the
situation, even at the expense of justice.
Holmes discusses his intentions with Watson.
Holmes decided to let Mycroft handle Robinson and his minions. Holmes
confronts Robinson at Bridlington station.
Theft of the prototype:
Prototype has insurance + Special wagon = Robinson
is a victim.
The loss of the machine is a disaster for Mr.
Robinson. Even though he planned this fraud, he has lost far more than he
could gain – the insurance will not cover the total cost of the prototype.
Train vanished with people + Chilean stayed on
train = Chilean were left.
The directors of the Chilean Barcazas company were
intentionally left on the train. The controller removed all passengers from
the train except for the Chileans.
WEA Coal and Chileans + Mexicans vs Chileans = No
grudge.
The Mexicans held no grudge against the Chileans.
Business is business, after all
Robinson is a victim + Chilean were left + No
Grudge = Theft.
The Chileans made the train “vanish” in order to
steal the prototype from Mr. Robinson.
Chileans stole the prototype.
Continue with the Theft and Inside mines
deductions seen above. Change some of the evidences from previous conclusion.
Fake train + Spare parts of handcar = Vanished
earlier.
The train never reached Evesham. It disappeared
earlier, and was faked by somebody using a handcar and spare train parts
from Chesterfield station.
Doncaster station master received money + Doncaster
station master's telegram = Missed Doncaster station.
Flooded quarry + Old railway to quarry = Cannot be
sunk.
Inside mines + Missed Doncaster + Theft + Vanished
earlier = Chileans stole the prototype.
Conclusion: Chileans
stole the prototype.
The Chileans stole the prototype, and sealed the
train underneath the collapsed mines to hide their crime.
Moral choice: Blind
Justice or Political game or continue investigation.
Note - Choose one of
the moral choices to see an ending for this conclusion.
Confirm moral choice.
After seeing what happened after this moral choice - click on "replay
ending" to see
another ending.
Do NOT accept this
decision.
Blind Justice: The Chileans stole the
prototype, and sealed the train underneath the collapsed mines to hide their
crime. The decision was made to contact Lestrade, and allow the police to
perform their loud and swift justice even at the risk of international
conflict.
Political game: The Chileans stole the prototype, and
sealed the train underneath the collapsed mines to hide their crime. The
decision was made to give Mycroft the chance to resolve the conflict, even
though it might be protracted and turned to his own advantage.
Mexican trap:
Change some of the evidences from previous conclusion.
Suspicious Mexican at Doncaster + WEA Coal and
Chileans = Mexicans are angry.
The Mexican Caracal company held a grudge against
the Chilean Barcazas group, as the Chileans were favoured for purchasing the
WEA Coal mines, despite the Mexicans' preliminary sales contract.
Train vanished with people + Chilean stayed on
train = Chilean were left.
The directors of the Chilean Barcazas company
were intentionally left on the train. The controller removed all passengers
from the train except for the Chileans.
Chilean were left + Mexicans are angry = Mexican
Trap.
The Mexicans organised the Chileans' stay on the
train. That is why the controller removed all of the passengers except for
the Chileans.
Mexicans sealed in the Chileans:
Inside mines + Missed Doncaster + Mexican trap +
Vanished earlier = Mexicans sealed in the Chileans.
Conclusion:
Mexicans sealed in the Chileans.
It was carefully planned murder. The Mexicans
killed the Chileans, and sealed the train underneath the collapsed mines to
hide their crime.
Moral choice: Blind
Justice or Political game or continue investigation.
Note - Choose one of
the moral choices to see an ending for this conclusion.
Confirm moral choice.
After seeing what happened after this moral choice - click on "replay
ending" to see
another ending.
Do NOT accept this
decision.
Blind Justice: It was carefully planned
murder. The Mexicans killed the Chileans, and sealed the train underneath
the collapsed mines to hide their crime. The Mexicans' inhumanity towards
the Chileans cost many lives, so the decision was made to act quickly.
Lestrade will be informed.
See what happened when Holmes lays the trap below
at "Trap the culprits".
Political game: It was carefully planned murder. The
Mexicans killed the Chileans, and sealed the train underneath the collapsed
mines to hide their crime. A criminal organisation such as this cannot be
confronted directly. It requires a delicate approach. The decision was made
to give Mycroft the chance to resolve the conflict.
See what happened when Holmes lays the trap below
at "Trap the culprits".
Trap the culprits:
Holmes traps the station master by buying
tickets to get back to London. Holmes says that one of the victims
escaped and is going to be questioned by the police. The victim is in
serious condition.
Watson hides with gun drawn at the corner of the
station.
The station master talks with the Mexican at the
platform.
Holmes arrives on the hand car and
arrests them.
The Mexican pulls his gun and thinks that the
station master double crossed him.
Immediately click on the red circle over the hand
with the gun or if you want - the face of the Mexican.
If you miss, he will kill the station master and
points his gun at Holmes. Click on his hand or face when he points his gun
on Holmes.
If you hit his hand, Watson is lauded by Holmes on
his shooting and asks for lessons. If the head is hit, the Mexican dies.
Achievement obtained: Sharpshooter. Disarm Mexican
by shooting the gun from his hand.
Inspect the beach around the lake:
Check the map and see that it is modified with the
flooded quarry and the beach. Go to the beach.
Examine the heavy vehicle traces: Look
around.
At the crossroad of the main road and the side
street to beach, look down and study the heavy vehicle traces.
The tracks are made by a carriage.
Examine the stone embedded on the tracks at
the bottom. The carriage is heavy to press the stone into the ground.
Examine the deep tracks at top and bottom.
Take size. Measure using the measuring tape the distance between the 2
deep tracks. It is 6 feet 7 inches. A heavily loaded carriage passed
through here.
These tracks are relatively fresh and similar to
those at Evesham. Special transport was
used to carry something very heavy to the lake.

Examine the beach advertising for lake cruises by the fence at
right of the side road.
Examine the recently abandoned gypsy caravan at
other side of road.
Examine the refuse behind the caravan. The place
is abandoned fairly recently.
Examine the lake:
Go to the edge of the lake. See that the water level of the lake is
lowered. The lake flooded the quarry. The dam was probably breached.
Press the T key and look around.
See refuse left on the sand.
Examine the metal label at coastline.
Take the metal label and see Las Zarpas
inscription on the metal.
Archives - Las Zarpas: Go
to the back of Holmes' carriage.
Search Las Zarpas on portable archives. Use the top right arrow to see the
books at right cabinet door - Encyclopedias.
Scroll the subject matter at top to Technology.
Read about Las Zarpas
- Barge transportation. Learn that the Las Zarpas barges are leaders in
heavy goods transportation. They belong to the Mexican Consortium Caracal Company,
who cover shipping, electricity services and mining. Press E key to
enter the info.
Deductions:
Train has been sunk:
Change some of the evidences from previous conclusion.
Chesterfield telegram + Station
master of Chesterfield is untrustworthy = Passed Chesterfield Station.
The train passed through Chesterfield station,
despite our being unsure if the station master sent the report.
Flooded quarry + Old railway to quarry = Could be
sunk.
The train could have been sunk in the flooded
quarry at Doncaster station.
Old railway to quarry + Stolen rail tracks =
Railway to quarry.
Somebody stole the rails to temporarily cover
the missing section of the old railway to the flooded quarry.
Special transport + Mexican barges = Barges
The Mexicans had recently utilised barges at the
lake; probably to transport something very heavy.
Passed Chesterfield + railway to quarry + could be
sunk + barges = Has been sunk.
The train has been sunk in the quarry.
Mexicans drowned Chileans:
Do the Has been sunk deduction above first. Change
some of the evidences from previous conclusion.
Mines are collapsed + Mines are blasted =
Sabotage.
The mines were collapsed with dynamite; somebody
wanted to close them intentionally.
Has been sunk + Sabotage + Missed Doncaster +
Mexican trap + Vanished earlier = Mexicans drowned the Chileans.
Conclusion: Mexicans
drowned the Chileans.
It was carefully planned murder. The Mexicans
killed the Chileans, and sank the train in a flooded quarry to hide their
crime.
Moral choice: Blind
Justice or Political game or continue investigation.
Blind Justice: It was
carefully planned murder. The Mexicans killed the Chileans, and sank the
train to hide their crime. The dam breach was played to their advantage -
they used their own barges to keep the train on the run for a few seconds
and then sank it in the flooded quarry. The railway tracks were removed to
hide the crime. The Mexicans' inhumanity towards the Chileans cost many
lives, so the decision was made to act quickly. Lestrade will be informed.
See what happened when Holmes lays the trap at "Trap the culprits".
Political game: It was
carefully planned murder. The Mexicans killed the Chileans, and sank the
train to hide their crime. The dam breach was played to their advantage -
they used their own barges to keep the train on the run for a few seconds
and then sank it in the flooded quarry. The railway tracks were removed to
hide the crime. A criminal organisation such as this cannot be confronted
directly. It requires a delicate approach. The decision was made to give
Mycroft the chance to resolve the conflict.
See what happened when Holmes lays the trap at "Trap the culprits".
Summary:
See the summary of the case.
Clues found: 23
Conclusion and moral choice done are shown.
Use the space bar to see if the clues are all
found. If green colored conclusion is seen, the conclusion is the best one
in the game.
Replay ending will bring the game back before
moral choice.
Accept decision? If you accept the decision, you
cannot go back to replay this game and will proceed to next game.
Achievement obtained - Off the rails! Finish Train
case.
BLOOD BATH
221B Baker Street:
Deadly experiment:
Watson sees Holmes in agony on the couch. Holmes feels deathly.
Examine forehead to check temperature.
Temperature seems normal.
Examine pupil. It is dilated.
Examine wrist to measure heart rate.
Count the pulse by clicking whenever a spike
is seen at center of the graph. Holmes has weak pulse.
Achievement obtained; Child's play if 25 mini
games and puzzles are finished without skipping.
Watson says that Holmes is dying and needs to be at
the hospital.
Holmes wants the antidote. Watson gives the
antidote. Holmes took hemlock and datura.
New case: Inspector
Lestrade is announced by Mrs. Hudson.
Lestrade is overwhelmed by cases. They found 2
tied up
naked men stranded in a rowboat at the Thames. The Merry Men signed the RMS Oceanic
banner found in the boat. The 2 banker chaps are sons of White Star Line
owners that built the Oceanic. There are rumours of corruption.
Lestrade will work on that case and wants Holmes to investigate a crime with
no murder weapon at the Roman baths in Strand Lane.
Previous case - Riddle on the Rails:
Open the casebook.
Chronicle: If you finished
the case, see the personality ranking. It depends on your moral choice. The
conclusion and moral choice done are seen.
Trophy: Train whistle from
the handcar.
Echoes - messages: The
messages seen here depend on the moral choices and conclusion selected that
closed the
previous cases.
Check to see if there is mail on the mantle of the
fireplace.
If Mr. Thomas Robinson was arrested by Lestrade as
a swindler; get a message from Mycroft.
Sherlock, dear brother, you have made the most terrible mistake once again. Are
you quite aware of who exactly Mr. Thomas Robinson is? Well, I shall tell you:
not only is he a well-
known inventor and a valued member of society, but he is also an official
government negotiator for technical development. And now that he is in prison we
shall have to find another inventor! Take a look at what you have done... I
believe that you are blinded by so-called 'justice' above all things. Yours,
Mycroft.
If Mr. Thomas Robinson was arrested by Mycroft as a
swindler; see a newspaper account.
The technical progress of the British Empire is now an example to the
international community! Three days ago, our own famous inventor, Mr. Thomas
Robinson, presented a prototype of his most recent invention: the 'Autonomous
Electricity Generator'. It caused an incredible furore! It is another
confirmation of the fact that our Empire has produced so very many eminent
people. In other news: a train has mysteriously disappeared en route to Evesham
railway station...
If the Mexicans are arrested for the murder of the
Chileans and the case was given to Mycroft; see a newspaper report.
The power of the Empire is growing stronger, day by day! As of
yesterday, the Mexican consortium Caracal began serving the cause of the British
Empire. This arrangement is undeniably profitable for London and England
overall, and is a great achievement for our exceptional diplomatic and political
community! In other news: a train has mysteriously disappeared en route to
Evesham railway station...
If the Mexicans are arrested for the murder of the
Chileans and the case was given to Lestrade; get a message from Mycroft.
Sherlock, dear brother, you have made the most terrible mistake once again. Are
you quite aware of the fact that the Empire is at the brink of international
conflict? How could you pass this incredibly sensitive case to those
feather-brained Scotland Yard Bobbies? Very well, yes, they caught the
criminals, but have you not read the newspapers? The great fuss that has risen
around it? They are generalising all Mexicans! And as you may know, the Empire
has arrangements with a great many varied and loyal Mexican enterprises. You
should think about that. Yours, Mycroft.
Join Lestrade at the Strand Lane Baths.
Travel to Roman Baths using the map.
Lestrade states that Sir Rodney Bentcliffe was
murdered.
The men with the victim in the steam room are: Sir
Gregory Pitkin the manager of the bath, Garrow from the city council and Blinkhorn
an archeologist.
There is no murder weapon and the witnesses were
locked in while the murder occurred. They can't get out until the police
arrived.
Mr. Phillips called the police.
Search the crime scene at the Strand Line Baths.
Talk to Alan Phillips:
Alan Phillips is sitting on the desk. He arrived here at 6:30 and opened the
baths.
Learn that the brazier was lit yesterday. The men had a meeting at 9AM.
The men has been in the steam room for 20 minutes when he heard shouting. He
couldn't open the door and he called for the police.
The
first to arrive was Sir Gregory Pitkin; followed by Sir Rodney, Blinkhorn and Garrow
was the last.
Profile of
Phillips: Click on character icon to get a closeup.
Click on eye wrinkles.
Check the hair above the ear. He is clean cut
and lives alone.
Check the collar of shirt. He wears a starched
collar and is fastidious.
Check the shiny buttons of his coat.
Click on the Manchester City coat of arms on
the coat.
Click on telegram in coat pocket. The telegram
was sent today.
Click on hand - neat hands.
Read character portrait in the
casebook.
Apodytarium - changing room:
Go to the door marked Apodytarium, the changing room and Sudatorium, the
steam room near Lestrade.
Look around and examine the 3 sets of folded
clothes around the room.
Check the champagne bucket at right side of the
room.
A bottle of Champagne and an ice bucket was
found inside the changing room. We don't yet know who brought it.
Rotate to see the inside of the bucket.
Examine the melted ice.
Examine the wine label.
Examine the cork. The bottle is not opened.
Sudatorium - steam room:
Enter the door to the steam heated room.
Sir Rodney Bentcliffe:
See the body of the victim. Examine the victim's body.
Examine the face. Examine the wound on the
eye. The right eye was pierced once reaching the brain and caused instant
death.
Examine the blood on the body. The wound
should not bleed much but the blood pool is quite large.
Examine the right hand. Examine the dirt
under the fingernails. Holmes took a sample.
Examine ring finger. The victim was wearing
a ring.
Examine the wrist. The death is very recent
30-60 minutes ago.
Automatically pull back. The Constable has
removed the body.
Examine the pool of blood under the victim.
Examine the blood. Holmes took a blood
sample.
Press T key. Take the key in the pool
of blood.
Brazier: Go to the
brazier at back of room. Search the ashes. It is too hot and there's
a melted metal on it.
Glasses: Examine the
glasses on the rim of the brazier.
Examine the crack on one lens. The other thick
glass lens
shows the owner has myopia.
Steam switch: Go to left
wall and examine a steam switch.
Read the builder's plate above the switch G.
Newell & Sons from Seattle, WA.
Use the steam switch handle. See the room fill
with steam and can't see few feet away.
Press T key to see the switch. Turn the handle to off position to remove the
steam.
Garrow: Talk to Garrow, the man
at left. Examine the blood on towel. It is blood traces wiped on the towel.
Pitkin: Talk to Pitkin.
Blinkhorn: Talk to
Blinkhorn. They all do not want to talk.
Grid: Examine the grid on
the post at end of the walls. The grid is not removable.
Other events and locations at Strand Line Baths:
Go outside to the circular room.
Release the suspects: Lestrade
talks to Holmes. Lestrade wants to release the suspects. No
objections.
Phillips: Talk to
Phillips. There is only one key and Phillips left it on his desk. It
disappeared.
Ask about leave work and immediately press the Q
key. Select morning telegram as supporting information.
Phillips admits that he sent a telegram to
Manchester (based on coat of arms). He was gone for 20 minutes when he left
at 7:20 AM.
Phillips does not know about the champagne.
Sir Rodney Bentcliffe's office:
Enter the frigidarium door by the constable.
Enter the door at right with a nameplate. Look around.
Work table: Examine the
table beside the door. Take the tongs at left end. Examine the archeological
tools.
Desk: Examine the
desk.
Take and read the Rodney draft letter
about a press conference at the Strand Line Baths. Learn about his work
in Egypt, 1893. His sponsor is Lord Blackmore.
Take the Daily Mirror newspaper that
has article about Sir Rodney.
Take The Times newspaper that has article
about the Sir Rodney reopening the Strand Roman Baths.
Photo Negatives: Go
to the shelves left of door.
Examine the box at middle shelf. It has photo
negatives from Assouan 1888.
Examine the lid to open the box. Examine the
slot of missing plate.
Examine the white glass plate at second from right side
slot. It's an Egyptian statue.
Frigidarium - cold pool room:
Exit to hallway and go around the corner at right to the frigidarium.
A rock slide blocks the entry to the cold room.
Examine the fallen blocks. It can be removed if the investigation calls for
it.
Brazier: Go back to the
brazier at the steam room.
Use the tongs to search the ashes.
Click-hold the tongs on the smelted metal and move it to bottom right
edge of the brazier.
Belongings of the witnesses and the victim are in
Scotland Yard ready to be examined.
Jump to Scotland Yard. Go to the evidence room
first door at right at the hallway left of the constable counter.
Pitkin's belongings:
Examine the silk handkerchief with embroidered red lion and initials.
Examine the gold trimmed fountain pen and Sir
Gregory Pitkin's visiting card.
Garrow's belongings: Examine the bloody towel.
Examine the phial of drug. Watson says it
is St. John's Wort. Watson says that it can cause rashes and hallucination.
Garrow is under strong medication for
melancholia.
Blinkhorn's belongings:
Take Sir Gregory Pitkin's letter.
Pitkin is not happy with Blinkhorn's work and gave
him 2 months to finalize his frigidarium work.
Examine the simple pencil.
Bentcliffe's belongings:
Examine the belongings at right.
Examine the ring. Click on the ring break
to learn that it had been repaired badly with silver. Examine the old
Egyptian symbol of the very old ring.
Examine the old coin. Rotate it using the
right click-hold of the mouse. It is an old coin with dirt.
Take the hand drawn map.
Examine Sir Rodney's notebook. See torn pages
inside the notebook. The drawing on the left shows a column and statues.
Use the pencil and move it around the blank
page at right to see the writing.
Use Watson's clean handkerchief to spread the
graphite.
Read the message. Today, I almost found it,
this date will go down in history.
A constable catches Holmes tampering with the
evidence. He mentions that the autopsy is done.
According to Sir Rodney’s notes, he was
about to make a remarkable discovery.


Sir Rodney's body is ready for examination.
Autopsy report: Read the
report from the coroner about Sir Rodney's autopsy.
Sir Rodney's autopsy:
Exit the evidence room and enter the second door right side of hallway. Go
downstairs.
Examine the victim's body on the autopsy table.
Examine the wound on the head. The wound was
made with a peculiarly curved and sharp weapon.
Examine the chest scar. There were traces of
fungus possibly contracted from Egyptian tombs.
Examine the stomach scar.
Move to the right arm to rotate the body.
Examine the bruised back and bruised shoulders. Light bruises caused by rope. Sir Rodney was
descended somewhere
using a rope.
Analyze evidence at Baker Street.
Jump to Baker Street.
Toby: Talk to Toby on the
couch. LOL.
Newspaper: Go to the
newspaper archives right of fireplace.
Research Bentcliffe - 1893. Scroll to 1893.
Select Bentcliffe's mummy. Read about the
mummy with enucleated eye in strange position. She is called Desperate
Mummy. Symbols found in the tomb are common with Mithraic Mysteries.
Analysis table: Go to
analysis table left of the windows.
Analyze dirt: Examine the
dirt sample from the nails of the victim.
Focus the lens using the mouse scroll wheel.
Move the cursor to examine selenite, pyrite and
white clay particles. It is white clay.
Location: Examine the
Geology of the London Basin.
See that #8 is where white London clay is located.
Move cursor to circle #8 on map. It is near St.
Albans.


Analyze blood: Examine blood sample slide.
Focus the lens using the scroll button of the
mouse.
Take the pipette from holder at right and use it on the peroxide
bottle.
Drop peroxide on 3 areas of the blood. The
blood around the victim was highly diluted with water.
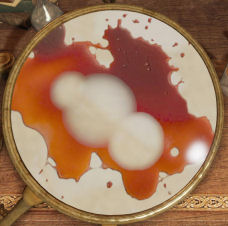
Analyze metal: Examine
the metal sample.
It might be silver. To compare, Holmes place a
silver coin beside it.
Take pipette and use it in the acid at top left.
Drop acid on silver coin. See a reddish spot.
Drop acid on metal piece. See a similar reddish
spot.
It is silver; Britannia silver quality. Britannia silver was found melted in the brazier.

Suspects at Scotland Yard are ready for interrogation.
Jump to Scotland Yard. Go to the jail cell and interrogate the witnesses.
Percival Blinkhorn: Talk
to Mr. Blinkhorn to automatically have him in the interrogation room.
He is an archeologist specializing in Roman
periods. He convinced Sir Rodney about his work, enough for Sir Rodney to
come here.
Blinkhorn did not see anything. He heard Garrow
covered with blood shout and they tried to all exit. He had an argument with
Sir Rodney yesterday about participation in London Archeologist Congress.
The ring is the Assouan ring that Sir Rodney brought back from Egypt.
Garrow has been acting strange lately; hears
voices and has visions.
Everyone has noticed that Garrow has been
acting very strangely and complaining of frightening hallucinations.
Click on Q key when asked about work progress.
Select Pitkin letter for corroborating clue. Blinkhorn says that since Sir Rodney arrived, Pitkin
has calmed down.
Blinkhorn does not know about the silver in the
brazier or the champagne.
Sir Rodney's arrival saved the archaeological
research at the Baths.
Profile of
Blinkhorn: Click on the character icon.
Check the focused and attentive eyes.
Check his shirt. It has rusty bracers and is
shabby workwear. He is not wealthy.
Check the shirt sleeve. It has dirt from recent
earthwork.
Click on calloused hand.
Read character portrait in the
casebook.
Sir Gregory Pitkin: Talk to
Pitkin to automatically have him in the interrogation room.
Pitkin does not like Sir Rodney but his work leads
to success for the baths.
The steam test this morning worked well.
Pitkin thinks that Sir Rodney is working at
another place than the baths.
Click on Q key to ask about work progress. Select
Pitkin letter to Blinkhorn.
Sir Gregory wanted to fire Blinkhorn in order to
stop the excavation of the Roman Baths, so that he might open them to the
public.
Pitkin thinks Garrow is a parasite but not sure if
he's a murderer.
He doesn't know about the silver and thinks Rodney
brought the champagne.
Profile of
Pitkin: Click on character icon.
Check the edge of his left eyebrow - eye. He
has an arrogant look.
Click on mouth shape that showed disdain.
Check the signet ring on finger. He has
aristocratic roots.
Check the gold chain on his cashmere waistcoat. He is
man of wealth.
Read character portrait in the
casebook.
Pitkin wanted to fire Blinkhorn to end the baths restoration and open them
to the public.
Tristram Garrow: Talk to
Garrow to automatically have him in the interrogation room.
Garrow is a Councillor of the District chamber.
He is not feeling well and recalls the victim's
eye.
Garrow says he saw the knife flying in the air. It
is a knife shining like gold.
Sir Rodney was secretive. Sir Rodney left Thursday
and when he came back showed wet Roman coins to Garrow.
Sir Rodney was lying to everyone about his
work. He was working alone, and secretly.
Garrow wants the cursed ring destroyed. Garrow
worked on it in the workshop.
The old coin is from third century.
Holmes gave Garrow his drug.
Garrow says the silver didn't help; the power was
too strong.
Garrow did not bring the champagne.
Garrow’s glasses were broken by heat, the
brazier was very hot.
Profile of
Garrow: Click on the character icon.
Click on his perspiring forehead.
Click on beard. He is badly shaven.
Check his eyes. He has eye bags.
Check his sleeves. He wears dirty clothes.
Check the Hamsa hand; a protective amulet
hanging on his vest. He is superstitious.
Read character portrait in the
casebook.
Task - Deduction:
Rodney's lie + Stolen notes = Mortal Secret.
Why would Sir Rodney hide something? Could Sir
Rodney's discovery be the motive of the crime?
The last expedition: Find where Sir Rodney was days before his murder
and uncover this precious secret of his.
Search the excavation site:
Combine the 2 maps: Go back to
Baker Street. Go to the
map on the wall left of the door.
Examine-look close and see the map taken from Sir
Rodney's belongings.
Drag the map to the lower right part of the map -
Prospect Rd, River Ver and Hopwell.
Click-hold-move the paper to the matching lines of
the map.
Overlay the paper to match and then click. Holmes
calls to Watson to pack his bag.

St. Alban's dig site: Jump to St.
Albans in the map. Holmes and Watson arrive in a carriage.
Read the restricted sign and learn that the archeological
field is closed until further notice.
Enter through the gate right of the sign.
Archeological discovery hut - Domum Hadriano:
Examine the door left opened.
Enter the hut that has a sign Domum Hadriano -
Hadrian's Home.
Look around at the pottery, shards and other items
found at the site.
Desk: Examine the desk.
Study the map on the wall. It shows the map of an old Roman city.
Take the document about the hidden temple or
Mithras.
Learn that Mithras temples hide under the temples
of other deities like Juno or Neptune.
Work table by door:
Examine the desk by door.
Take the cubes.
Take the report - Tauroctomy knife
states that the knife used in tauroctomy - killing the bull
is a curved sacrificial blade. A golden knife is the key to the Mithraic
mysteries. The golden knife carries a curse that will spill the blood of the
unworthy.
Take the Mithraic Mysteries. Learn about the 7 grades of initiation and meeting
in underground temples. The iconic scenes of Mithras show him born from a
rock and slaughtering a bull.
Shelf:
Go to the shelf on the wall at right and take the Curses and beliefs document.
Learn that to ward themselves from the evil eye,
Romans would melt valuables in the fire - like silver or tin.
Look around outside close to the hut.
Area 1 - Triclinium:
Go across and down the ramp. Look around.
Examine the fresco under the ramp. Examine the Cyclop helping Vulcan at the forge.
Examine Vulcan the god of fire and metal
working.
Climb the steps left of the cyclop.
Area 2 - Pits:
Go left from the steps and forward to the pits. See rope on top of
a crate.
Examine the pit at right. Automatically pull up
archeological tools. Take the trowel.
Area 3 - Arch of Hadrian:
Go through the Arch and through the walkway.
Area 4 - Tablinium:
Go forward; go a bit to the right and down the
ramp to be at the ground level below the walkways.
Go forward to the end of the dug passage.
Press the T key to see something on the wall at
end of passage.
Examine the wall. The wall was covered by mud
recently.
Use the trowel on the wall.
Scrape the dried mud off by left
click-hold-move. It is the picture drawn in Sir Rodney's notebook.
Click on the word Frigidarium at top right. It
is the one in London. Holmes needs to visit this place.

Area 5 - Temple:
Go back up the ramp. Go left and forward to the
broken columns area.
Look around. See a box of hooks.
Check the 4 statues. Examine Neptune with his
trident and Minerva with her helmet.
Examine the bull statue.
Archeological discovery hut - Arturus Domum:
Go to the hut by the water. Examine the door. It
was left opened. Someone must have left in a hurry.
Enter the hut and look around.
Check the shelves. Take the document -
Bentcliffe power from top shelf. Sir Rodney reports to his mentor
Lord Blackmore about problems with Pitkin and about a major archeological artifact that he
is about to discover.
Take the document from the lower shelf -
Gastraphetes. Ice freezing and ancient Greek crossbow - Gastraphetes
are mentioned.
Check the other table. See a dismounted device or
an ancient Greek crossbow and a schematic of how the gastraphetes are used.
They are used with hooks and ropes.
Bridge: Go to the bridge
platform right of the hut.
Examine the map board. See the map of the the old
Roman city and the drawing of the usage of a gastraphete.
Look across the water and see 2 ruined bridge
pillars.

Scotland Yard:
Go to Scotland Yard and interrogate the suspects.
Blinkhorn: Learn that
they are hoping to find the Golden Knife at the baths.
Pitkin: Learn that Sir
Rodney believes that the Golden Knife is at the baths.
Garrow: Sir Rodney
believes that he is the worthy one to get the Golden Knife. Garrow has
visions of golden knife, the mummy...
Rodney Bentcliffe left leads that points to the Frigidarium.
Travel to Roman baths. Phillips says they cleared
the way to the Frigidarium.
Enter the door by the constable.
Sir Rodney's workshop: Enter the
workshop at right and go to the table left of the desk.
See a document on top of a perforated metal plate.
Take and read Bentcliffe's research.
This metal plate – besides its archaeological interest – appears to be a
part of something larger. At the present moment I am unable to determine
exactly what that might be.
Examine and rotate the plate. Take the
perforated metal plate.
Frigidarium: Go to the
door at end of the hallway. Enter and look around.
See the cold pool
surrounded by columns and statues. This is the drawing seen in Sir Rodney's
book and the fresco at the archeological site.
Statues:
Look at the statues and note that there are 5 visible statues. One is
missing.
Column icons: Check the
bases of the columns around the pool and see that some of the flagstones have icons that can be
pushed in-out.
From hallway by entryway and going left and around:
spider, helmet, ship, one eyed face, wreath, scorpion, caduceus, trident and
jug.
Flagstones of note: When
the flagstones are pushed in; see that 3 of them have hidden symbols. The rest do
not have anything remarkable.
Press the 3 icons seen at St. Albans dig site that have
the hidden symbols (in any order):
one eyed face of Cyclops, helmet (worn by Minerva) and trident (held by
Neptune).
See that these 3 flagstones have their respective
statues in the pool by the columns.
Connect the statues:
Sherlock needs imagination - press the F key.
See
lines of the symbols seen when the flagstones are pushed in.
Combine all 3 statues' elements to find their
secret.
Click on the lines on the base of a statue to
select it. Move around to rotate the lines connected to that statue.
Click again to release the lines. Form connecting
lines.
The formed line is pointing to the bust.


Bust: Go to the bust
close to Neptune statue. Look close at the
highlighted bust and examine the bust.
Rotate the bust and the secret entrance right of
the main door to Frigidarium opens.
Search tunnels:
Enter the secret entryway right of the main door that is now open. Climb
down the hole via rope.
Tunnel: Examine the bag
of crude salt at right corner.
Examine the
ground by the salt. Take the lamp.
Take the ice cream maker-box and the
broken glass plate.
Salt and ice buckets were stored in the tunnels
under the Frigidarium.
Frescoes: Go to the next room.
Check the frescoes in the tunnel. Examine the
middle fresco.
It is of Mithras the god wearing an Anatolian
costume and Phrygian cap
killing the bull.
Examine and study the next fresco. It is a ladder
or hierarchy. Get the Seven Grades of Initiation document.
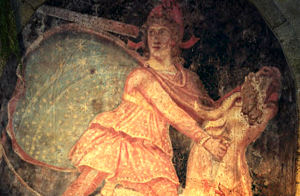
Catacomb: Look around the
next room.
Right front brushwood pillar:
Go to the right front corner and examine the freestanding pillar.
See a perforated plate at the back of the
alcove. Use the brushwood.
See an animal
head-bull shadow made by the brushwood fire on the floor.
Continue to the right side-wall of the room. See
mummified bodies on the niches.
Skeleton: Check the
skeleton on the floor by the niches.
Examine the dead man face. It has broken orbit and
died the same way as Sir Rodney.
Examine the shoes. He was a tomb raider from
medieval time and so was
punished.
Right back brushwood pillar:
Go to the right back corner (close to skeleton).
Examine pillar. See a perforated plate at the back. Use the brushwood.
The shadow made by the brushwood light
on floor is a face - Mithras.
Left
front brushwood pillar: Go to the left front corner.
Examine pillar. See a perforated plate at the back. Use the brushwood.
See a trident shadow
made by the brushwood fire on the floor.
Left back brushwood pillar:
The pillar has collapsed. There's a mummy beside the collapsed pillar.
A plate should have made a shadow when the brushwood on
the pillar is lit.
Reconstruct the shadow made by the
collapsed column.
Examine the collapsed pillar. Press the F
key to see a reconstruction if the pillar is standing.
Use the perforated plate taken from Sir
Rodney's office on the
opening of the reconstruction.
A shadow of a bridge is seen on the floor.

Shadow on the floor:
Check the shadow on the floor now that all 4 pillars are examined.
They are: face; the reconstructed shadow is a
bridge, bull and trident.
It shows the way to Mithras - after the trident,
bull and bridge.
Last room: Go to next
room. Examine the shovel and the fallen blocks.
Find the missing weapon used to kill Sir Rodney.
Jump back to Baker Street. Go to the analysis
table.
Mould: Put the cubes
together so that it forms a mould.
There are 3 layers of cubes. The reddish cube of
the middle layer is the starting cube.
Left click to select and toggle-click again to
deselect a cube.
Right click-hold-turn to rotate the selected cube.
Deselect all and the click-hold-turn to see the
sides of the cubes.
Q key-click-hold-turn does a vertical rotation.
This enables to see the top or bottom of the cubes.
1. Move the cubes to the correct layer first.
Select the cube and then click on another cube to interchange them.
Do a vertical rotation by press-hold the Q key and
then use the arrow to right-click-hold-move at the same time.
- The top layer has flat (no grooves) on the top.
- The bottom layer does not have grooves at the
bottom of the cube.
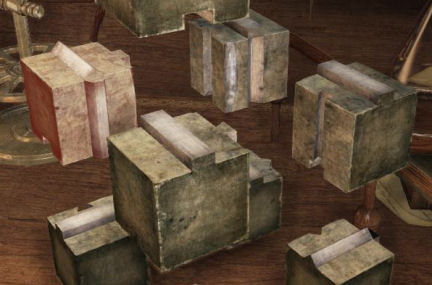

2. Position the cubes correctly by matching the
shapes of the grooves/raised parts.
- Arrange the middle cubes first. The reddish cube
of the middle layer is the starting cube.
- Turn the cube (left click to select and then
right click to turn) so that the outer-non grooves dies are outside.
- Examine the shape of the raised part/groove on
top and bottom of the cube.
- Match those shapes with another cube.
- Position that cube next to the matching cube.
- Check the positioning by pressing the W key.


3. Do the bottom and then the top layers.
- Once the middle cubes can join together, work on
the bottom layer.
- Arrange the blank walls to the outside.
- Check the groove of the middle layer to see
which match the ones on top of the bottom layer.
- Check the side grooves/raised part on the sides.
- Do the top after the middle and bottom cubes can
combine.
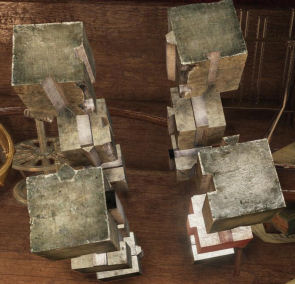
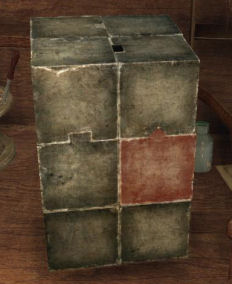
Make a plaster cast:
Examine the sauce pan to learn that you need half
glass of water is enough for the plaster.
Take the flask of water and pour on the plaster in
the sauce pan. Mix using the spoon.
Take saucepan and pour on the cast.
Take the mould and open it.
Take the plaster cast of the knife. Examine the
cast.
The mould found in St Albans was created to copy the Golden Knife of
Mithras. Its shape fits the pattern of the murder weapon.

Photography development:
Put together the broken glass plate found at the
tunnel. Click-hold-drop the pieces together.
Holmes asks Watson to process the glass
plate. Holmes develops the film.
Wipe the film clean.
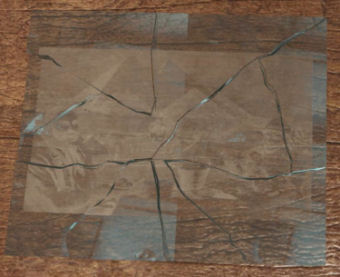
Ice making photo:
Examine the pyramids. It is the pyramids of Gizeh.
Examine the inscription - They made ice cream in
the desert.
Examine Rodney Bentcliffe with the hat.
Examine the ice cream in Sir Rodney's hands.
Examine the bucket of ice.
Examine the salt.
Examine another archeologist and the ice cream he
is holding.
A glass plate negative of Sir Rodney eating
ice-cream in front of the pyramids. It reveals how to make ice-cream by
mixing salt and crushed ice. It was destroyed.

Task - Deductions:
Open deduction by pressing B key.
Glass plate negative + Salt and Ice = Ice Trial
Someone was experimenting with the Roman method
of ice production.
Strange wound + The Mould form = Moulded weapon
The mould was used to create the murder weapon.
Ice trial + Moulded weapon = Create an ice knife.
Check if an ice knife can be created with the
materials found.
Inside Brazier + Broken glasses = Possible silver
weapon.
An item of silver has been recently melted in
the brazier.
Possible silver weapon + moulded weapon = Create a
silver knife
Check if we can create a silver knife with the
materials found.
The cast can be used to create an ice reproduction of
the Golden knife.
Ice experiment: Go to
analysis table and do ice experiment.
Examine mould and learn to pour water in it.
Take water and pour in mould.
Use ice pick on ice and add to the mould bucket.
Add salt to lower the temperature.
To solidify the water inside the mould, the
temperature needs to be minus 20 degrees.
Watch the thermometer. Once the = equals sign is
seen immediately; add ice or salt.
Time the crushing of ice ahead of the = sign on
the thermometer. The addition of crushed ice is automatic.
Take the salt ahead and ready to be added when the
= sign appears.
When minus 20 is reached; take the mould and open it.
Examine the ice dagger.
We can create an ice weapon with the clues found at the crime scene.


The cast can be used to create a silver reproduction
of the Golden knife.
Silver experiment:
Go to analysis table and do silver experiment.
Take the silver piece and place it in the sauce
pan.
Activate the gas burner.
Take saucepan with melted silver and pour it in
the mould.
Take the mould and open it.
Take the cast - silver knife and examine it.
We can create a silver weapon with the clues found at the crime scene.
Deduction:
Strange wound + very liquid blood = Unexplained
clue.
The presence of water in the blood is an
unexplained clue. It must be somehow linked to the murder process.
Champagne + Ice weapon = Possible Ice weapon.
This ice weapon was initially created and
preserved in the ice of the champagne bucket.
Unexplained clue + Possible ice weapon = Method: Ice Knife.
The murderer hid the weapon inside the ice
bucket with Champagne. After the attack, the knife was left to melt, so
causing the excess of water in the blood pool.
Strange wound + very liquid blood = Steam
moisture.
The presence of water is due to the humid
atmosphere caused by the steam.
Inside brazier + Silver knife = Possible Silver
weapon.
The silver weapon was used and then destroyed in
the brazier after the crime.
Steam moisture + Possible Silver weapon = Method:
Silver Knife
The murderer hid the weapon in the clouded steam
room. He then placed the knife in the brazier in order to destroy it, which
resulted in the melted silver that we found.
Find the way to Mithraeum.
The hidden Mithraeum lies at excavation site at St.
Albans. The bridge pier seems to hold a secret.
Travel to St. Albans.
Location of Mithras:
Stand by Neptune with the trident. Then go to the bull. See that a line can
be formed to the left broken pillar of the bridge that is in the water.
Bridge: Go to the platform close to the water. Look at the
map.
Look across the water and examine bridge. See 3
rings on the small rocky island.
Examine all 3 rings and Holmes says he needs to
find a way to get there (trigger).
See there are ropes tied to the railing of the
platform.
Cross the bridge:
Rope: Go back to area 2 -
the Pits. Take the rope from top of crate between the pits.
Hook: Go back to area 5 -
Temple. Take a hook from the box at the broken columns.
Gastraphete: Go back to the
hut left of bridge.

Reconstruct the gastraphete:
Examine the gastraphete - crossbow
on the table.
Take and place the handle to one end of the
bar.
Take and place the shutter on other end.
Take and place mechanism housing at center of bar.
Rotate the partly made gastraphete to see the
bow rabbet.
Take and place bow at the bow rabbet.
Take the gastraphete.
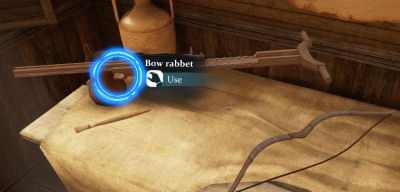

Fire the rope: Go back to
the bridge and look at the rings on the island.
See that the rings are perfect targets. Fire the
rope on all 3 rings.
Click to get a close-up of the rings. Click again
to fire. Center the ring on the target.
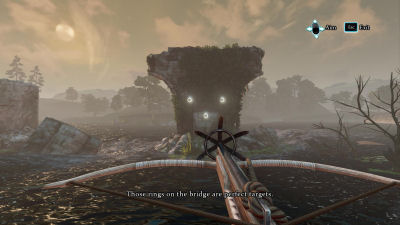
Cross the rope bridge:
Tightrope to the island.
Left click to make a step. See a white arrow to go
forward. See left or right arrows when you
lean one side or the other.
Immediately press the A for left arrow seen or D key
for right arrow seen until
you reach the other side. Space bar skips the puzzle.
Search the Mithras:
Maze: Holmes and unseen Watson climb down the rope into an
underground hallway.
Look around and see the rope hanging from above.
Go forward and right to the start of the maze.
Remember that the Mithraic initiates go through 7
grades to get to the temple. Recall the fresco with the 7 degrees of
initiation or hierarchy or the 7 Grades of Initiation document.

Go
down the stairs to be in a hexagonal room.
Note that the arch Holmes came out of has a diadem icon. There are 4 other archways with icons above the
entryway.
Select - enter the entryway that has the symbol
for that level seen on the hierarchy document.
First exit: Go
through the 2 snakes on a staff-caduceus archway. Go forward, right
down the stairs and left until the light. Be in another room with 3 other entryways.
|
 |
 |
|
Caduceus |
Diadem |
Second exit: Go
through the diadem archway. Go forward. Climb the steps at right.
Be in another hexagonal room. The 3 entryways are
blocked by grate gates.
Rock scale puzzle:
The table at the center has rock-scale puzzle.
The aim is to balance the 3 wooden scales with
the colored rocks around it.
Place the rocks on the wooden scales until the
3 are lowered evenly.
Left pan - red; middle pan - large white and
small green, right pan - large black and small brown.
The gates rise.

After gates: Go through
the helmet (middle) archway. Go downstairs, then left-downstairs and
be in another room.
Go through the thunderbolt archway. Go down
the stairs, right, go left and then up another set of stairs.
Go through the sickle moon with morning star archway at
right. Go forward, right, up another stairs and left to the next room.
Go through Helios crown archway across where you came out of. Go forward, right, left, left and
right midway of the hallway.
Go through the Phyrgian cap archway.
Go forward, left midway this hallway and up the long stairs to the temple.
|
 |
 |
 |
 |
 |
|
Helmet |
Thunderbolt |
Sickle moon
and
morning star |
Helios crown |
Phrygian cap |
The Golden Knife might lie somewhere in the Mithraeum
- Mithras Temple:
Watson is seen now. Look around. Go to the altar beyond a short
hallway.
Altar: Go forward. See the statue of Mithras holding the golden knife
and doing a tauroctomy on the bull.
Look down at the steps and see a broken lamp. Sir
Rodney was never here. The murderer left the lamp.
Open the gate to Mithras altar:
Press the Q key to change characters.
There are 2 open gates at outer ring.
While standing at center of temple and facing
the the altar, go through the open gate at right and be at outer ring of the temple. See a lever on the wall
and a closed gate at left.
Climb the stairs at right and see a closed gate
midway that has steps leading up to the exit. There are 2 levers on each
wall.
Continue downstairs to the right and see another closed gate
around the outer ring.
Holmes: Get Holmes through
the gate.
Go back to the lever left of the steps.
Activate the lever on the wall. This opens the
gate at other side of the stairs.
Watson: Change to
Watson and enter
the gate right of the steps. Go through the now opened outer ring gate going right.
Activate the lever on the wall. This opens the
gate by Holmes - left outer ring hallway.
Holmes: Get Holmes to
deactivate the lever he is holding and enter the now opened gate at
left.
See 3 levers on the wall. Activate the right lever. This opens the gate
right of Watson.
Watson: Deactivate the lever
Watson is holding and this will close the gate by Holmes.
Go through the now opened gate at right. See 2 levers on wall.
Activate the left lever which opens the gate
by Holmes.
Holmes: Deactivate the right
lever to lock Watson in his cell.
Exit to the center of temple.
Watson: Deactivate the left
lever.
Activate the right lever to open the gate to
the Mithras altar.
Holmes: Enter the Mithras
altar.
Take the golden dagger. A pillar rises to
block the
exit down the maze.
The mythical Golden Knife was lying under the excavating site. It is a huge
discovery but not by Sir Rodney's!
Achievement obtained: Raider of the Tombs.
Retrieve the Golden Knife from the ancient temple of Mithras.
Exit the temple:
Holmes: Get Holmes to go to
the outer ring by lever left of steps.
Watson: Deactivate the right
lever to close the gate to the Mithras altar.
Activate the left lever to open the gate by
Holmes.
Holmes: Enter the opened
gate at left and be at the 3 levers.
Activate the right lever to open Watson's left
gate.
Watson: Deactivate left
lever to lock Holmes in.
Exit to the now opened gate at left. Activate lever to open Holmes' gate.
Holmes: Deactivate right
lever.
Activate middle lever to open the gate left of
Watson.
Watson: Deactivate the lever
and then exit at left.
Climb up to the top of the stairs-platform.
Holmes: Deactivate middle
lever.
Activate left lever to open the gate by Watson
at top of stairs.
Watson: Enter the now open
gate at top of stairs.
Activate the lever at right while facing the
long stairs. This opens Holmes' gate.
Holmes: Deactivate the left
lever locking Watson behind the gate.
Exit and go to the gate at top of stairs where
Watson is located.
Watson: Deactivate the right
lever. Activate the left lever to open the gate.
Holmes: Enter and climb the
stairs to exit the Temple of Mithras.
Watson: Deactivate
the left lever. Go and join Holmes at top of stairs.
Deduction - Sir Rodney Bentcliffe was killed but who hold the
weapon?
Golden knife + Stolen notes = Valuable secret
Sir Rodney's secret was an important discovery: a
metaphorical bomb! He could use it as a powerful means of annihilating
anyone who stood in his way, that he alone might take the fame and the
glory.
Pitkin is innocent:
Pitkin's complaints = Effective arrival = Pitkin's
hopes.
Pitkin expects to receive much of value from
Sir Rodney's research. The work will increase the Baths' renown and
popularity.
Garrow is innocent:
Garrow's behaviour + Garrow drugs = Garrow's weakness
Garrow is melancholic. He is a victim of
overmedication, hence the hallucinations and unpredictable behaviour. His
state has been worsened by the shock of Sir Rodney's death.
Blinkhorn is innocent:
Pitkin's fight + Effective arrival = Blinkhorn's
interest.
Blinkhorn's work was saved by the arrival of Sir Rodney. He was thankful for
the possibility of their working together, and the chance of learning from
him.
Murder weapon: Select the
murder weapon of your choice from previous deduction: ice knife or silver
knife.
Pitkin is the murderer (murder weapon of
your choice):
Blinkhorn and Garrow should be innocent.
Golden knife + Stolen notes = Valuable secret.
Sir Rodney's secret was an important discovery: a
metaphorical bomb! He could use it as a powerful means of annihilating
anyone who stood in his way, that he alone might take the fame and the
glory.
Pitkin's complaint + Effective arrival = Pitkin's
worries.
Pitkin feels rather uncomfortable postponing
the public opening of the Roman Baths because of Sir Rodney. He was angry
because of this.
Pitkin's Worries + Valuable secret = Motive: Stop Takeover
Even if Pitkin is the owner of the Baths, he
will surely lose them, for this major discovery will change everything. It
will turn the Baths into a permanent excavation site to preserve the
research. It will never achieve the commercial status that Pitkin desires.
Conclusion: Pitkin is the murderer
(murder weapon of your choice).
He killed Sir Rodney to conceal their
discovery; the only way to save the Roman Baths from the upcoming
excavations. He intended to start his own business.
- He used an ice-made reproduction of the
Golden Knife of Mithras.
- He used a silver reproduction of the Golden
Knife of Mithras.
Moral choice: Condemn, Absolve or Continue the
investigation
Note - Choose one of
the moral choices to see an ending for this conclusion.
Confirm moral choice.
After seeing what happened after this moral choice - click on "replay
ending" to see
another ending.
Do NOT accept this
decision.
Condemn Pitkin: Pitkin was
humiliated by Sir Rodney, and so devised a plan to first eliminate him and
then open the Baths for business.
- He melted silver coins to create a silver
reproduction of the Golden Knife of Mithras, murdered Bentcliffe and then
threw the knife in a brazier. He believed that the mystery of the murder
would attract the public and bring him, as the owner, a great deal of money.
- He used a handmade ice-maker to create an
ice-made reproduction of the Golden Knife of Mithras, carried it to the
steam room in an ice-bucket with Champagne and then, after the murder,
dropped the knife onto the floor, allowing it to dissolve into water. He
believed that the mystery of the murder would attract the public and bring
him, as the owner, a great deal of money."
Pitkin denies the accusation.
Absolve Pitkin:
Pitkin was the legitimate owner of the Baths, and Sir Rodney was about to
take over the rights. Pitkin attempted to resolve the conflict, but he did
not have the power to succeed.
- So he
melted silver coins to create a silver reproduction of the Golden Knife of
Mithras, murdered Bentcliffe and then threw the knife in a brazier. If
Bentcliffe had accepted the compromise, Pitkin would not have killed him.
- So he used a handmade ice-maker to
create an ice-made reproduction of the Golden Knife of Mithras, carried it
to the steam room in an ice-bucket with Champagne and then, after the
murder, dropped the knife onto the floor, allowing it to dissolve into
water. If Bentcliffe had accepted the compromise, Pitkin would not have
killed him.
Pitkin denies the accusation.
Replay moral choice to see other endings.
Garrow is the murderer (murder weapon of
your choice):
Blinkhorn and Pitkin should be innocent.
Golden knife + Stolen notes = Valuable secret
Garrow's behaviour + Garrow's drug = Garrow's illness
Garrow is tortured by his obsession with the
Mithras curse. He has been driven insane, a condition worsened by the
medication he is taking.
Garrow's illness + Valuable secret = Motive:
Paranoia
Garrow's suffering was too great. After Sir
Rodney's grand discovery, Garrow lived in fear of the Mithras curse and so
developed heightened feelings of paranoia.
Conclusion: Garrow is the
murderer (murder weapon of your choice).
He killed Sir Rodney in a fit of obsession due
to his intense nervous state. The only way to ease his suffering was to
perform a ritual killing.
- He used a silver reproduction of the Golden
Knife of Mithras.
- He used an ice-made reproduction of the
Golden Knife of Mithras.
Moral decision: Condemn,
Absolve or Continue the investigation.
Note - Choose one of
the moral choices to see an ending for this conclusion.
Confirm moral choice.
After seeing what happened after this moral choice - click on "replay
ending" to see
another ending.
Do NOT accept this
decision.
Condemn Garrow :
- Garrow
killed Bentcliffe because of his mental state -- he is either a psychopath
or he is suffering from schizophrenia. The only way to ease his suffering
was to perform a ritual killing. He melted silver coins to create a silver
reproduction of the Golden Knife of Mithras and then threw it in a brazier.
We are unable to determine if his actions were deliberately manipulative or
due to genuine illness. He needs to be put away for life.
- Garrow killed Sir Rodney in a fit of
obsession due to his intense nervous state. He used a handmade ice-maker to
create an ice-made reproduction of the Golden Knife of Mithras, carried it
to the steam room in an ice-bucket with Champagne and then, after the
murder, dropped the knife onto the floor, allowing it to dissolve into
water. We are unable to determine if his actions were deliberately
manipulative or due to genuine illness. He needs to be put away for life.
Garrow is surprised that he killed Bentcliffe.
Holmes was not fooled by Garrow's act.
Absolve Garrow :
- Garrow killed Bentcliffe because of his mental
state. The only way to ease his suffering was to perform a ritual killing.
He melted silver coins to create a silver reproduction of the Golden Knife
of Mithras and then threw it in a brazier. Garrow needs suitable treatment
at a mental institution. He cannot be held responsible for his crime as he
was under the strong psychotropic effect of St. John's Wort.
- Garrow killed Bentcliffe because of his mental
state. The only way to ease his suffering was to perform a ritual killing.
He used a handmade ice-maker to create an ice-made reproduction of the
Golden Knife of Mithras, carried it to the steam room in an ice-bucket with
Champagne and then, after the murder, dropped the knife onto the floor,
allowing it to dissolve into water. Garrow needs suitable treatment at a
mental institution. He cannot be held responsible for his crime as he was
under the strong psychotropic effect of St. John's Wort.
Garrow is surprised that he killed Bentcliffe. Dr.
Watson will take care of Garrow's treatment.
Replay moral choice to see other endings.
Blinkhorn is the murderer (murder weapon of
your choice):
Pitkin and Garrow should be innocent.
Golden knife + Stolen notes = Valuable secret
Pitkin's fight + Effective arrival = Blinkhorn's humiliation
Blinkhorn's work was saved by the arrival of Sir Rodney, but at a high cost
to his morale.
Blinkhorn's humiliation + Valuable secret =
Motive: Vengeance
Blinkhorn is a deserving specialist who is aware that he is about to be cast
aside over a major discovery. He will lose his chance of a lifetime.
Conclusion:
Blinkhorn is the murderer
(murder weapon of your choice).
- He killed Sir Rodney to avenge an abuse of power. The death would be to
his financial benefit and would allow him to emerge as a luminary in his
field. He used a silver reproduction of the Golden Knife of Mithras.
- He killed Sir Rodney to avenge an abuse of power. The death would be to
his financial benefit and would allow him to emerge as a luminary in his
field. He used an ice-made reproduction of the Golden Knife of Mithras.
Moral decision: Condemn,
Absolve or Continue the investigation.
Condemn
Blinkhorn :
- Blinkhorn knew of Bentcliffe's intention to take all of the credit for the
discovery of the Golden Knife. He devised a cunning plan that would not only
eliminate his rival but would award him the fame of discovery. He melted
silver coins to create a silver reproduction of the Golden Knife of Mithras,
murdered Bentcliffe and then threw the knife in a brazier. The rope is a
fitting punishment.
- Blinkhorn knew of Bentcliffe's intention to take all of the credit for the
discovery of the Golden Knife. He devised a cunning plan that would not only
eliminate his rival but would award him the fame of discovery. He used a
handmade ice-maker to create an ice-made reproduction of the Golden Knife of
Mithras, carried it to the steam room in an ice-bucket with Champagne and
then, after the murder, dropped the knife onto the floor, allowing it to
dissolve into water. The rope is a fitting punishment.
Blinkhorn is in leg cuffs. He denies the accusation. Holmes shows him the
golden knife of Mithras.
Absolve
Blinkhorn
:
- The Golden Knife of Mithras was the result of his life's work, and the
credit for it was about to be stolen by Bentcliffe. Sir Rodney's powerful
connections and dominant will would have destroyed Blinkhorn if he had tried
to resist. He melted silver coins to create a silver reproduction of the
Golden Knife of Mithras, murdered Bentcliffe and then threw the knife in a
brazier. If Blinkhorn had been given the opportunity to claim true ownership
of his discovery, he would not have killed Bentcliffe.
- The Golden Knife of Mithras was the result of his life's work, and
the credit for it was about to be stolen by Bentcliffe. Sir Rodney's
powerful connections and dominant will would have destroyed Blinkhorn if he
had tried to resist. He used a handmade ice-maker to create an ice-made
reproduction of the Golden Knife of Mithras, carried it to the steam room in
an ice-bucket with Champagne and then, after the murder, dropped the knife
onto the floor, allowing it to dissolve into water. If Blinkhorn had been
given the opportunity to claim true ownership of his discovery, he would not
have killed Bentcliffe.
Holmes shows the golden knife to Blinkhorn and told him he knows that
Blinkhorn found the knife. Holmes is also impressed with the usage of the
ghost knife. Blinkhorn denies the accusation. Holmes will uphold the truth
of Blinkhorn's discovery and follow his career.
Replay moral choice to see other endings.
Summary:
See the summary of the case.
Clues found: 18
Conclusion and moral choice done are shown.
Use the space bar to see if the clues are all
found.
Selection for replay case and replay moral choice
are seen.
Accept decision?
Achievement obtained: Blood and Ice. Finish
Blood Bath case.
THE ABBEY GRANGE AFFAIR
221B Baker Street:
Sherlock Holmes wakes up Doctor John Watson.
Holmes informs Watson about a letter sent by Inspector Lestrade.
Read Lestrade's letter: Talk to Toby the
dog on the floor beside Holmes.
Go to the table left of door.
Examine the letter.
Examine the address and the wax seal - E.B.
Right click-hold-turn the letter. Examine the Brackenstall coat of arms.
Read Inspector's letter that is
automatically placed in the Documents.
Inspector Lestrade wants assistance in a case at
Abbey Grange. He mentions that he released the lady.
Previous case - Blood Bath:
Open the casebook.
Chronicle: If you finished
the case, see the personality ranking. It depends on your moral choice. The
conclusion and moral choice done are seen.
Trophy: Silver knife A silver
cast of the Mithras ritual knife.
Echoes - messages: The
messages seen here depend on the moral choices and conclusion selected that
closed the
previous cases.
Check to see if there is mail on the mantle of the
fireplace.
If Blinkhorn was absolved, get a letter from Blinkhorn.
Mr. Holmes, Today is the very first time that I have been allowed to write a
single letter – and you are the first person whom I would wish to address. I
repent all that I have done, but at the same time I find myself grateful for
your uncovering the truth. It has given me an enormous life lesson! I also thank
you for
my conditional sentence, for soon I may be able to live a fulfilling life once
again, and not be condemned by society. Yours sincerely, Percival Blinkhorn.
If Blinkhorn was condemned, read the newspaper.
A colossal scandal in high society! The well- known and remarkable archaeologist,
the pride of our nation, Sir Rodney Bentcliffe, has been found
murdered! The crime took place at the Roman Baths in Strand Lane: the location
of the archaeologist's most recent research. But what is most truly shocking is
that the murder of Sir Rodney was at the hand of his former friend and partner,
Percival Blinkhorn. The death sentence is the only possible punishment for this
breed of villain.
Meet Lestrade at Abbey Grange.
Click on-jump to
Abbey Grange.
Holmes and Watson travel to Abbey Grange.
Foyer of Abbey Grange:
Inspector Lestrade meets them at the foyer.
Lestrade says that the case is already solved.
Lady Brackenstall has reported that the Lewisham
gang of burglars - the three Randalls (father and 2 sons) stole the silver
service. Sir Eustace Brackenstall was murdered.
There were witnesses who
identified the criminals: the notorious Randall gang.
The Lady was assaulted and is now with the maid
Theresa Wright in the morning room.
Watson goes to the dining room to examine the body
of Lord Brackenstall.
Look around at the portraits of the Lords of the
manor. If all the portraits are examined, Holmes will make a comment.
Talk to witness about last night.
Morning room:
Enter the morning room through the double doors at
left.
Talk to Lady Brackenstall:
Lady Brackenstall informs Holmes that she is in a not happy
marriage for a year.
Talk to Lady Brackenstall. At half past ten, Lord Brackenstall went to bed. Lady Brackenstall at around 11 PM went to get a
candle at the dining room and saw an elderly man and 2 others through the French
window. She was tied up at the dining room. Lord
Brackenstall arrived and fought with the men. The elder man struck
Brackenstall with the poker.
The silver from sideboard are missing.
Profile of Lady Brackenstall:
Click on the character icon inside the circle.
Click on fresh bruise under eye.
Click on her right pale cheek.
Click on the Kangaroo and Emu golden brooch on
her collar.
Click on her blouse. She wears elegant dress.
Click on her right hand with old bruises.
Click on her wedding ring - Wedding ring.
Read character portrait in the
casebook.
Interrogate Lady Brackenstall:
Talk to her again about her marriage.
Lady Brackenstall says that Lord Brackenstall has
dark moods.
Press Q key. Ask about old bruises. Sir Eustace was out of
control and is a drunkard.
Sir Eustace Brackenstall assaulted his wife one
week ago.
Talk to Theresa Wright the maid:
Talk to the maid.
While at her bedroom window, she saw 3 men in
moonlight outside by the gate.
Profile of Theresa:
Click on the character icon.
Click on her eyes and see middle age wrinkles.
Click her working hands.
Click on handkerchief with vinegar.
Click on coffee stain on apron.
Read character portrait in the
casebook.
Inspect the room where Lady Brackenstall is resting.
Table: Examine the table
left of door.
Read the newspaper on the table. Read the article
about the Randall gang's burglary.
There is an article about the Randall gang in
the newspaper. It describes their recent break-in at an estate close to the
Abbey Grange.
The description given by Lady Brackenstall
is identical to the one in the newspaper.
The Randalls gang
is well known in Abbey Grange, due to a recent burglary which was
reported in the newspaper.
Writing desk: Go to the
back of the room and examine the writing desk.
Check the portrait of Lady Brackenstall and
Theresa. It shows them at a port.
Turn the portrait. Move the fasteners and remove
the backing board. Read the writing to learn that the photograph was taken
in Adelaide in 1893 before boarding the "Rock of Gibraltar".
Lady Brackenstall arrived in England from
Australia, and married Sir Eustace Brackenstall shortly thereafter.
Scratches: Press the T key to see
scratches under the picture right of the writing table.
Click on the picture. Use the mouse wheel to
select the action to be done on the painting. Move the picture. See a safe.
Safe: It is Sir Eustace's
safe. Talk to Lady Brackenstall about the safe. She doesn't know the
combination.
Open the safe: The dial will
vibrate when the correct number is place under the arrow at top.
Left click to validate the entry. A key is to
rotate left. D key is to rotate right. Space bar skips the puzzle and ESC
key exits.
Press D or A to get the red line under 15. Left click
to validate. The handle turns.
Press D or A to get the red line under 5. Left click to
validate. The handle turns.
Press D or A to get the red line under 17. Left click
to validate. The handle turns.

Examine the contents of the safe:
Read the medical report. Sir Eustace is
suffering from liver cirrhosis and pancreatitis.
Check the paper money and coins.
Inspect the crime scene in the dining room.
Exit the room and go to the dining room.
Dr. Watson: Talk to Dr. Watson.
Learn that Sir Eustace's death is instant and he was facing his attacker when he received the blow to
the head.
Body: Look close at the
body by the fireplace.
The dead body of Sir Eustace Brackenstall, with a fractured skull.
Examine the head wound.
Examine the poker beside the head.
Automatically pull back. A bent poker stained with
blood.
Examine the stick-cane beside the body.
Examine the feet. Sir Eustace is barefoot.
Examine the fireplace grate. Sir Eustace might
have hit his head on the fireplace grate.
Blood on the side of the
fireplace grate. Automatically pull back.
Bell rope: While standing
in front of the fireplace; see the eye icon. Press T key.
Click on the shortened piece of rope of the bell
rope hanging from ceiling left of the fireplace. The rope was cut by someone taller than Holmes.
The bell rope was torn or cut at a height of
approximately 6'6”
Glasses on the table:
Examine the glasses on the dining room table.
Check the wine bottle and the decanter.
Examine all 3 glasses.
A glass with some wine
and a large amount of beeswing.
Two glasses with traces of
decanted wine, but without beeswing.
Chair: Check the solitary
chair at back of room.
Take the piece of rope used to tie Lady
Brackenstall. It was handled by the criminal.
Holmes takes the rope so that
Toby can follow the scent.
Knotted rope. The bell
rope on the chair was tied with a sailor's knot.
Examine the chair.
Sideboard: Go to the
sideboard left of window.
Examine the candlestick. It is valuable but
not taken.
Examine the expensive bottles of wine.
Examine the empty wine bottle slot-shelves.
Examine the empty silverware box.
Automatically pull back.
An empty silverware box; the content was
stolen.
Door: Check the door left
of the sideboard. The intruder did not go to the bedroom.
Collect Toby from Baker Street and follow the scent trail.
Collect Toby: Use the map
to travel to Baker Street.
Go to the window and take Toby, the best nose in
the British Empire.
Use the map to go back to Abbey Grange. See Toby
with Holmes.
Scent trail (as Toby): See the
smoky scent trail that Toby has to follow.
You can change characters by pressing the Q key
and select the icon seen at top right.
Dining room: Follow the smoky scent trail.
Go to the French doors. Call Sherlock.
Automatically the French doors are opened.
Exit and go towards the fountain.
Shed: Go around the fountain and take the path to the
shed to catch the scent again.
Go to the shed and sniff. Holmes will note the
shed.
Well:
Continue as Toby and follow the scent trail.
Go across the grassy area. Go to the fountain and then right to the well. Sniff to call Holmes.
Wall: Continue to follow
the scent around the well to the wall. Sniff to call Holmes.
Check the suspicious places found by Toby in the
garden.
The intruder did a circuitous route before
leaving.
Wall: Automatically change to Sherlock.
Examine the wall (hotspot is at Toby's eye level).
Shed: Go to and enter the
shed.
Take the hook under the window.
Examine the bags. Some of the seed bags were
recently moved.
Examine the tool box and empty suitcase on the
shelf. Automatically be outside.
Well: Go back to the
well. Examine the well.
Open the well. Look inside the well.
See a glittering object at the bottom of the well.
Retrieve and examine the glittering object from well.
Take the bucket hanging from the chain.
Examine the chain. Attach the hook taken from shed on the chain.
Use the windlass to drop the hook.
Package: Open the package
taken from well. See silverware.
Take a fork and rotate it. Click on the Brackenstall
coat of arms.
The stolen silverware was found in the well.
Questions and reports:
Inspector Lestrade: Go
back to the foyer and talk to Lestrade.
Talk to Lestrade about the medical report and the silverware.
Sir Eustace had a severe drinking problem.
Once, he set Lady Brackenstall's dog on fire. Another time, he threw a
decanter at Theresa.
Lady Brackenstall: Go to the
morning room.
Talk to her again about the 3 glasses on the
table. She says the burglars drunk the wine.
Talk to Lady Brackenstall about the silverwares.
Theresa: Talk to the maid about
the medical report and the silverware. Learn that Lady Brackenstall does not have friends
here.
Lady Brackenstall seldom went out after arriving in England. It was
commonly known that she had no social life nor any close friends.
Deduction:
press
the B key to start the deduction.
Randalls
are guilty:
Randalls are well known + criminals identified
= Randall Gang.
The testimonies and evidence match and
point to the Randall gang.
Silverware found + criminals identified =
Robbery is the motive.
Robbery is confirmed as the motive for the
crime. The criminals may have plans to return for the silverware that
they dumped.
Two glasses + Glass with beeswing = Three
people.
There were three people drinking wine out of these glasses.
One of the three probably prefers wine with beeswing.
Bent poker + dead body = Poker blow.
The death of Sir Eustace could have been from
the poker blow.
Conclusion: Randalls are guilty.
Sir Eustace was murdered
by the Randall gang. Robbery is confirmed as motive of the crime.
Moral choices are: Glory to Lestrade; Trump the police or Continue investigation.
Note - Choose one of
the moral choices to see an ending for this conclusion.
Confirm moral choice.
After seeing what happened after this moral choice - click on "replay
ending" to see
another ending.
Do NOT accept this
decision.
Glory to Lestrade: Sir Eustace was murdered by the
Randall gang. Robbery is confirmed as the motive of the crime and proved by
the testimony of Lady Brackenstall. The case appeared to be too simple for
you. You have decided to take the opportunity to give all of the credit to
your friend, Lestrade.
Trump the police: Sir
Eustace was murdered by the Randall gang. Robbery is confirmed as the motive
of the crime and proved by the testimony of Lady Brackenstall. The speed
with which you resolved this thorny problem is indicative of genius. You
have decided to take all the glory for resolving this case.
Replay moral choice to see other endings.
After seeing the
above conclusion's moral endings; go back to the deduction screen and
change the choices to get another conclusion.
Click on an evidence
and select the deduction of choice shown below.
Domestic accident:
Change some of the evidences from previous conclusion.
Randalls are well known + criminals identified
= Randalls blamed.
The robbery was faked and the whole story invented
in order to blame Sir Eustace's death on the Randalls.
Silverware found + criminals identified =
Imitated robbery.
The robbery could have been imitated to explain Sir
Eustace's death. The silverware was not supposed to be found.
Two glasses + Glass with beeswing = Two
people.
There were two people drinking wine out of these glasses. The
remaining glass with the beeswing consisted solely of the dregs from the
other two glasses.
Fireplace grate + dead body = Deadly accident.
The death of Sir Eustace could have been due to his accidentally
striking his head on a fireplace grate.
From Australia + No personal life = No
acquaintance in London.
Lady Brackenstall married Sir Eustace shortly
after arriving in England, and remained at home during that time. There
is little possibility that she or her maid are acquainted with anyone in
the country.
Violent behaviour + Inspector's tale = Domestic
violence.
Sir Eustace was violent towards his wife.
Conclusion: Domestic
accident.
The death of Sir Eustace was an accident caused by struggle
with his wife. There was a mitigating circumstance - legitimate self
defense.
Moral choices
are: Absolve Lady Brackenstall; Condemn Lady
Brackenstall or Continue investigation.
Note - Choose one of
the moral choices to see an ending for this conclusion.
Confirm moral choice.
After seeing what happened after this moral choice - click on "replay
ending" to see
another ending.
Do NOT accept this
decision.
Absolve Lady Brackenstall:
The death of Sir Eustace was an accident
caused by a struggle with his wife. The lie of Lady Brackenstall and her
maid was compromised. There was a mitigating circumstance - legitimate self-defence.
You will allow them to go free, without revealing the truth to Lestrade.
Condemn Lady Brackenstall:
The death of Sir Eustace was an accident caused by a struggle with his
wife. Lady Brackenstall and her maid killed Sir Eustace, and covered their
crime in an effort to deceive the detectives. They deserve to be treated as
criminals. You have decided to place them behind bars.
Replay moral choice to see other endings.
Murderous visitor:
Randalls are well known + criminals identified
= Randalls blamed.
Silverware found + criminals identified =
Imitated robbery.
Violent behaviour + Inspector's tale = Domestic
violence.
Change the selection as
below to get another deduction.
Two glasses + Glass with beeswing = Two
people.
There were two people drinking wine out of these
glasses. The remaining glass with the beeswing consisted solely of the dregs
from the other two glasses.
Bent poker + dead body = Poker blow.
The
death of Sir Eustace could have been due to a poker blow.
From Australia + No personal life = Acquainted
with a sailor.
Lady is acquainted with someone from the Rock of
Gibraltar.
Murderous visitor. Sir Eustace was murdered by the one person who was
visiting that night. It was he who tied up Lady Brackenstall. He is tall
and strong.
Examine the rope:
Go back to Baker
Street.
Cut: Go to Holmes'
analysis table left of the window. Examine the rope.
Examine the end of the rope to see that it was
smoothly cut.
Tool to do the cut: Take
the scissors. Cut the bell rope at loop at top right. The fibers from this
cut appears to be different.
Take the cutters left of table. Cut the bell rope
at loop at top right. The fibers from this cut appears to be different.
Take the knife from the round holder. Make a cut. It matches
the original cut.
The bell rope was not torn, but cut with a
knife as sharp as the type which sailors use.
Task - deduction:
Knotted rope + Sharp knife = Sailor
background.
The rope was cut once with a sharp knife, and tied
quickly in sailor's knots. That could indicate that the intruder had a
sailor's background.
Acquainted with a sailor + sailor background +
domestic violence = Look for sailor.
The person who was visiting that night was probably a sailor.
Search the archives for possible sailor suspects:
Find out the company that runs the Rock of
Gibraltar: Look close at the newspaper right of the fireplace.
Use photograph. Cycle the year to 1893. Select
Rock of Gibraltar arrival.
Read the newspaper article - The Strand about the
Rock of Gibraltar's arrival and Miss Mary Fraser.
Lady Is acquainted with someone from the Rock
of Gibraltar.
Secret police division of Baker Street:
Holmes wants to find the crew of the Rock of Gibraltar. He needs to talk to Wiggins and his crew.
Go to the window and call Wiggins. Wiggins is
given the task of getting the ship's crew list and their present employment.
3 hours later, Wiggins returns with the register.
He cannot return it since it is too risky.
Examine the register:
Open the register on the desk.
See the list of the Senior Officers of the
Rock of Gibraltar on the left. At right are the list of the officers
and their schedule (ship and time).
The murder occurred in November 7th, 1894.
Click on the name at right page list if similar names are seen
on both papers. The left list will be crossed out on the left page list if that name is at
sea during the murder.
Click on another page to see another list.
The captain of Bass Rock - Jack Crocker will
depart on the 10th and is still London. He is the only one that is
around the time of the murder.
Captain Crocker is the only sailor who was
aboard the Rock of Gibraltar with Lady Brackenstall and her maid and who
is currently in London.

Call Crocker to confront him.
Talk to Wiggins. Holmes asks Wiggins to bring
Captain Crocker here.
Talk to Captain Crocker:
Talk to Crocker about Lady Brackenstall. Because of erroneous newspaper
report, Crocker came to find out what
Holmes knew.
Profile of Captain Crocker: Check
Crocker's features.
Click on his eyes. Clear look - honest and
courageous.
Click on his left shoulder. He has strong build.
Click on the sea knife on his belt.
Click on his right hand. It has newspaper ink.
Click on his right foot with clean boots.
Read character portrait in the
casebook.
Interrogate Crocker:
Ask about tying Lady Brackenstall up.
Immediately
press Q key and then select the topic that is most relevant to continue the
investigation - rope with sailor's knots.
Crocker has an alibi.
Captain Crocker knows
Lady Brackenstall, but he may be lying about his occupation on the night of
the murder.
Deduction:
Captain Crocker was aboard the Sharp on the night
of the murder. He was not afraid to confront me; he had a confident
demeanour.
Captain
crocker is the murderer:
Captain Crocker + Crocker statement = Crocker's Involvement.
Crocker is lying. His involvement
is clear. He appeared as soon as he heard that I was looking for him, thus
signalling his guilt.
Conclusion: The Captain is
the killer.
Sir Eustace was murdered by one person who was
visiting that night. There was mitigating circumstance - he was defending
the lady. The murderer is tall and agile and most likely a high ranking
sailor.
Moral choice: Choose Arrest or
Absolve Captain Crocker. The choice is yours.
Arrest Captain Crocker:
Sir Eustace was murdered by Captain Jack Crocker, who was visiting Lady
Brackenstall that night. They staged it as a robbery by the Randall gang.
Crocker used his sea knife to cut the bell rope to tie the lady, and then
hid the silverware in the well. He committed a violent crime for which he
deserves a condign punishment.
Absolve Captain Crocker:
Sir Eustace was murdered by Captain Jack Crocker, who was visiting Lady
Brackenstall that night. They staged it as a robbery by the Randall gang.
Crocker used his sea knife to cut the bell rope to tie the lady, and then
hid the silverware in the well. Jack Crocker defended a woman against a
violent and dipsomaniacal man. You have decided to keep it a secret.
Confront Crocker with the conclusion:
Holmes asks Wiggins again to call Crocker.
Talk to Crocker. Both decisions - arrest or
absolve result in Crocker
pulling out a gun.
Prevent suicide: You can stop the suicide by taking the gun away
from him.
See a white and a red circle. Move the red circle
inside the white circle.
The aim is to merge
the circles together. Continuously tap the left mouse button.
As soon as the circles are merged; a "W" is seen
on the screen. Immediately press and hold the W key and Holmes takes the gun away.
If you absolved Crocker, Watson and Holmes become
judge and jury for Crocker's guilt. Holmes advises Crocker to come back
after a year to meet his lady love. Homes tells Lestrade that 3 thugs (not
the Randalls) are the murderers.
If you arrest Crocker, Crocker and the
letter-confession he wrote are given to Lestrade.
Achievement obtained: Herrings, Captain! Save
Crocker from committing suicide.
Summary:
See the summary of the case.
Clues found: 16
Conclusion and moral choice done are shown.
Use the space bar to see if the clues are all
found.
Selection for replay case and replay moral choice
are seen.
Accept decision?
Note - Choose one of
the moral choices to see an ending for this conclusion.
Confirm moral choice.
After seeing what happened after this moral choice - click on "replay
ending" to see
another ending.
Do NOT accept this
decision until you are sure. This will exit the game.
Achievement obtained: Vox populi, vox Dei.
Finish Abbey Grange case.
THE KEW GARDENS DRAMA
The room is filled with bees. Watson swats at the
bees. Holmes says that they
can have honey the whole year round. Holmes needs to go to the Kew Gardens to
investigate a plant theft.
Previous case - Abbey Grange Drama:
Open the casebook.
Chronicle: If you finished
the case, see the personality ranking. It depends on your moral choice. The
conclusion and moral choice done are seen.
Trophy: Silver fork with Coat
of Arms.
Echoes - messages: The
messages seen here depend on the moral choices and conclusions selected that
closed the
previous cases.
Check to see if there is mail on the mantle of the
fireplace.
If Captain Crocker is absolved, get a letter from
Lady Brakenstall.
Dear Mr. Holmes, I have finally
found the courage to write you a letter. I can scarcely find the words to
express my gratitude for your kindness. On that terrible day, I believed my
life to be ruined – but at the same time, I realised there to be one person
in the world who truly loved me and who I loved in return. His name we both
know – he is Captain Jack Crocker. His love has given me true reason to
live. Even if we cannot be together in the end, none of this could have
happened without you, Mr. Holmes. Yours sincerely, Mary Brackenstall.
If Lady Brackenstall is absolved, get a letter
from Lady Brakenstall.
Dear Mr. Holmes, I have finally found the courage to write
you a letter. I can scarcely find the words to express my gratitude for your
kindness. On that terrible day, I believed my life to be ruined – but at the
same time, I felt released. Released from the humiliation and the violence,
from the constraints that were killing me. And soon I shall marry a man who
loves me dearly, although his identity I wish to keep a secret. None of this
could have happened without you, Mr. Holmes. Yours sincerely, Mary
Brackenstall.
If Captain Crocker is condemned, get a letter from Inspector Lestrade.
Mr. Holmes, I am writing to inform
you that the affair at the Abbey Grange, which took place almost half a year
ago now, still resonates deeply in high society and remains a subject of
much gossip. This case's romantic background has attracted many suitors who
show willing to shelter and take pity on Lady Brackenstall. But to this
date, she still serves her sentence with her maid Theresa, and has rejected
all offers of help. To be truthful, I suspect that the true motivation of
these suitors may well be related to Sir Eustace's title and money. What do
you think, Mr. Holmes? Sincerely yours, Inspector Lestrade.
If Lady Brackenstall is condemned, read the newspaper.
A shocking affair at the Abbey Grange that took place on
November 7th, 1894 is still a subject of interest and rumour. Yesterday, a
man of wealth by the name of Sir Joseph Cook officially expressed his
willing to assist in shortening the sentence of Lady Brackenstall and her
maid, in exchange for the Lady's hand and heart. He does not seem perturbed
by her background, and only takes pity on her circumstance. High society is
greatly concerned regarding Sir Joseph's decision. In fact, even should the
Lady accept, the marriage may not be permitted to go ahead.
Kew Gardens:
Jump to Kew Gardens in the map.
Martyn Hamish: See
Martyn, the Deputy Director of Kew Gardens berating Albert Dunne. Martyn
orders Albert to accompany Sherlock where the stolen plants were
displayed.
Albert Dunne: Albert shows the
"Plants from the East and the Land of the Rising Sun" empty display.
Learn that Albert's father Montague Dunne, the
Director of Kew Garden suffered a heart attack and was found dead by the
Colonial Collection 2 days ago.
Stolen plants: Check the
display left of the stands to get a list of stolen plants.
Exhibit: Check the signs
and empty stands of the stolen plants exhibit.
Waterlily garden: Look around.
Examine the tree that is close to the door at right if the stand is on your
back. It came from Louisiana.
Examine the place where Montague Dunne's died:
Go to the opposite side of the pond by the open
door. Look around.
Examine the blood and broken sign on the edge of
the water lily pond.
Look down on the floor and examine the broken pot.
Press the T key to see more evidence:
Examine the dirt on the
floor by the broken pot. Examine the dirt on the side of the shelf.
Check the broken pot on top shelf.
Check the floor to see footprints.
Examine the
thin black tracks and the large black tracks. It looks like someone
staggered here.
Examine the door of the Colonial Collection room.
While still in T key view:
Examine the damaged panel. The door was
smashed
at shoulder height.
Examine the handle. It was recently changed.
Examine the broken esconson at other side of the
door frame. It was breached by the handle.
Visualize Montague Dunne's death:
Stand inside the Colonial Collection room close to the door. Press the F key to deduce what
happened.
See 3 Dunne figures. Click on a figure and
select-click again the number of that figure in the deduced sequence of
events.
The Dunne figure inside the Colonial Collection
room breaking the door is #1,
The figure by the plant shelves knocking over the
pot is #2.
The figure by the pond falling on the fence
is #3.
Press the Q key to see the sequence in motion. Murder or accident?
Montague Dunne was trapped in the Colonial
Collection room. He forced the door, and died in the Waterlily Greenhouse.
Examine the Colonial Collection:
Enter the Colonial Collection room.
Look around.
Note that half of the greenhouse is absent and
extremely clean.
Examine the Colonial room parameter board by the
door. There is a moisture and light control in the room.
Press the T key while on the empty part of the
room.
Examine the detergent cleaned floor.
Examine the perfectly clean window panes.
Stone - Examine and take the stone
chip below the windows. The stone chip is a result of a heavy blow.
Rotate the stone
to see the break point of the stone. It is marble.
Examine the ventilation grid above Sherlock. Open
and close the ventilation cover.
Check the plant displays at other side of the
room.
Someone cleaned and emptied out only a part of
the Colonial Collection. This is suspicious – perhaps it was intended to
conceal certain evidence
Task - deduction:
Press the B key.
Emptied colonial collection + Dunne was trapped =
Perform autopsy.
Perform autopsy on Montague Dunne:
Jump to Scotland Yard. Holmes asked Lestrade to
bring Dunne's body here.
Talk to the policeman on duty. Lestrade is not at
Scotland Yard at the moment.
Evidence room: Go to the
hallway at left. Enter the first door at right.
Examine Dunne's belongings. Check the expensive
watch and pen. Read the calling card. Dunne is a member of the London Crest
Club.
Read the letter to Mr. Wayne showing that
Dunne wants the exhibition poster to have his name only.
Go to the adjacent room. Go downstairs to the
morgue.
Examine the body:
Examine the face. Examine the forehead.
Check the eyes and nose and mouth. He smells of
flowers.
Examine the chest, skin of right arm-hand and skin
of left arm-hand.
Autopsy: Dr. Watson
performs the autopsy.
Examine the heart. Check the heart vessels. Rotate
and examine the heart tissue. No signs of pathology.
Examine the lungs. Check the lung consistency. The
lungs are congested and edematous. Rotate the lungs to see the damaged place
at bottom right. There are damaged tissue and spores of unknown pant.
Examine the stomach. Check the stomach tissue.
Rotate the stomach and examine the stomach consistency.
Examine the liver. Check the liver consistency.
The liver is enlarged maybe due to alcohol. Rotate the liver to examine the
liver tissue.
Montague Dunne died from plant poisoning. It is
murder.
Montague Dunne inhaled a virulent vegetal
poison that was intended to kill him.
The challenge is mine. It is time now to open
the doors.
Gather information on Montague Dunne:

Go back to Kew Gardens.
Map of Kew Gardens: Go to
the map information stand close to the first building beside Martyn-gate.
Click on each location to familiarize yourself.
Director's office's key: See that the first building at top left
of the map is the
director's office. Check
the door and see that it is locked.
Martyn Hamish: Talk to Martyn.
Martyn
doesn't know why the Colonial Collection room is half empty. Martyn does not
have good relations with Dunne.
Learn that Montague Dunne is a member of the smart
set and had an eye for the ladies.
Learn that Albert
has the locked greenhouses keys.
Martyn Hamish hated Montague Dunne – a man who
he believed did little work but received all the praise for the success of
Kew Gardens.
Profile of Martyn Hamish:
Check the myopic, inexpensive
glasses.
Check the dirty shirt collar.
Check the gardener's hands.
Check the other hand and see that he is not married.
Read character portrait in the
casebook.
Albert Dunne: Enter the
greenhouse through door at right.
Talk to Albert Dunne.
Miss White should be
here today and will be at the Seed House.
Albert works here part time. He studies Botany at
the university. It is not good at it but can be a good manager.
Albert doesn't know why the Colonial Collection
room is half empty.
Albert doesn't have good relations with his father
and he forced Albert to work here. Now, Albert changed his mind and is
willing to work here.
After the death of his father, Albert now feels
a responsibility to manage Kew Gardens.
Learn that Martyn was never Deputy Director and he
hated Dunne. Get the locked door keys except for the cloakroom.
Profile of Albert Dunne:
Check the red eyes due to tears.
Check the bandaged chin due to shaving cut.
Click on very clean hand.
Read character portrait in the casebook
Go to the wood rack left of door. Check Albert's
housekeeping tasks ordered by Martyn. Hmm...
Exit the greenhouse using the opposite door.
Inspect Dunne's Office:
Use
the key on the green door of the left building. Look around.
Director's safe: Open the safe
by right wall.
Look close at dial. See buttons. The aim of
the puzzle is to raise all the buttons by turning left or right in
specific numbers.
Starting with the arrow at top blank space:
Turn left to raise 2 buttons.
Turn right to raise 2 buttons.
Turn left to raise 3 buttons.
Turn right to raise 3 buttons.
Turn left to raise 5 buttons.
Turn right to raise 5 buttons. The safe is
opened.

Letters: Read
the personal loan letter on bottom shelf. Learn about the debt of Miss
White to Dunne. Dunne paid for her apartment, schooling and clothes and
jewelry.
Read the letter of complaint of the Divine
Syndicate at middle shelf. Dunne has taken some of their sisters
(plants) for display at Kew Gardens. A case of June 14 1889 is
also mentioned.
Read the Lawyer's help letter at top shelf.
It is a message to the lawyer to answer the Divine Syndicate's
complaints and mentions the case of June 14 1889.
Look around: Examine the
photo on the cabinet. It is a photo of Martyn's father Reynold and
Montague Dunne.
Director's desk: Look
close at Director's desk. Examine the newspapers. It mentions Kew
Garden's success in producing a new variety of barley. A conference
is to be given by Martyn.
Read the break up letter on the desk. Dunne
fired Margaret White from Kew Gardens.
Montague Dunne wanted to fire Miss White.
Check the French champagne and wine on the
table by window. Exit the room.
Inspect the lab:
Laboratory: Enter the
right green door. Look around. Examine the experiment table at right.
Phonograph: Examine the
phonograph at left table.
Take a cylinder at left and click it on the
phonograph. Turn the handle at right side of the machine.
Use cylinder 821 is a study reported by Martyn Hamish. Cylinder 245 is a study reported by Miss White.
Cupboard: Examine the Chemistry
cupboard. See many chemicals.
University book: Check
the university book on the fireplace mantle. Turn the book.
See that it is Albert Dunne's
book on his repeat year at University of Cambridge.
Lab table: Go to the 2 desks
at center of room.
While standing in front of the desk close to
fireplace, press the T key.
Look close at the wet bottle base trace on the desk.
Examine the drops just below that circle. Examine the drops on the floor.
Someone carried the bottle.
Examine the gold dust right of the microscope.
Gold is not affected by a lot of chemicals and might be good in experiments.
Sherlock says there is a smell and needs a good
nose.
Protective equipment: Examine
the cabinet by the window. See that there are 2 protective equipment. Click
on the middle empty space - one suit is missing.
Examine the mask and protective cloth
Inspect the cloakroom:
Go to the door at right. It is locked. Albert
didn't give them the keys to the cloakroom. It doesn't matter.
Unlock the door: Review
the lock puzzle guide at top of walkthrough page.
See a
cylinder with 2 slide in-notched rings on top of the main tube. The slide in
rings also have holes on them. The main layer is colored green.
There are lines on each slide in-notched rings and the main
center layer.
The scroll wheel switches to select the layer
or tube.
Left click-turn rotates selected tube layer.
Right click-turn rotates all the layers of the
cylinder.
The aim of the puzzle is to connect all the
lines of the different tube layers.
- Rotate all (right click-turn) to see where
the lines are located.
- Align the small yellow piece on the hole
of the left notched ring.
- Move-turn the right notched ring to align
to the lines and fit the left notched ring.
- Change to inner green layer. Turn to fit lines.
- Change to silver layer under the green one
and match the lines.
- Rotate all the rings-tubes to check the
lines.
If done correctly, the lines will light up.
Open.


Martyn Hamish' locker: Open
and search Martyn's locker.
Check the organic chemistry book and botanical
magazine at left. Martyn wrote some of the articles and studied chemistry.
Take and read the letter from Martyn's ambitions to be the
Director.
Martyn Hamish is eager to become the new
Director of Kew Gardens. He believes he is deserving of the role, and is
hopeful of assuming the reputation his father once held there.
Examine the photo of a young Martyn and his
father. Click on the inscription at the back of the photograph.
Albert Dunne's locker:
Open and search Albert's locker.
See a miniature ship. Examine the naval
architecture books.
Take and read the refusal letter from the Royal Naval
College and learn that his father blocked his admission.
Press the T key and examine the photo between the
books at left. It
shows a young woman (Miss White) and Albert in front of the University.
Miss White's locker: Open
the locker right of door.
Read the letter to her family that is at left cubicle.
Miss White asked her parents for money.
Examine the Master in Chemistry diploma.
Open the jewelry box at right. See expensive
jewelry.
The money that Montague Dunne regularly gave to
Miss White far exceeded the needs of a student.
Examine the handbag. Rotate the handbag to take
and read
the family's reply letter. Her parents are upset at Margaret.
Miss White's family refused to assist her
financially with her studies. They disliked Montague Dunne, believing him to
be a libertine. Albert Dunne had promised to continue his family's
support.
Read the Albert's letter to Miss White
right of the jewelry box. Albert is willing to help Miss White financially.
Inspect the Nursery:
Go to the next building through the door at left.
Enter the Nursery building. Look around at the
seedlings.
Martyn's desk: Examine the open glass cabinet by the windows. See
poster and certificate on the side. They are of Martyn's exhibit and winning a competition.
Examine Martyn's desk. See the empty glass case,
Martyn's book and thesis he wrote.
Window: Examine the handle of the window
above Martyn's desk.
See the Colonial Collection room across the path.
Examine the ventilation vent above the desk.
Go to the other cabinet at left end and see
certificate and Masters Degree of Martyn.
Hallway: Go to left end
and go through the door. Be at
the hallway that is at middle of building.
Statue: Examine the trash
bin at the corner. See a bust.
Examine the name plate at the base to see that it is a
bust of Montague Dunne.
Rotate the bust. See the broken part on the hair
part of the bust.
Fit the marble piece from the Colonial room on the
broken part. Here it is!
Go through the other door and exit the building.
Meet Miss White:
Miss White: Go through the
door and be at the
Seed House, the last building.
Talk to Margaret White. Learn that she has never
been to the Colonial Collection room. She says Dunne is her spiritual
father.
Albert gave her a set of keys to the gardens. It
is only temporary.
Profile of Miss White:
Check her neck. She wears expensive perfume.
Check the hand and see pink tracks that show old
malnutrition - pellagra.
Check her fingers. She is unmarried.
Read character portrait in the
casebook.
Inspect the Seed House:
Albert Dunne's desk: Go to the
desk by the window. Use the handle of the window and see that the Colonial Collection
room is not in view.
Examine the desk. Examine the Navigation book.
See the study book with a low
grade. The good
quality gloves are new and never used.
There is a ventilation shaft above the desk.
Exit through the back door of the building.
Inspect the back area of Kew Gardens:
Water tank and Ventilation Engine:
Go back to the area behind the Seed House.
Enter the enclosure. Examine the water tank and
the ventilation engine.
Exit. You can orient yourself by checking the map
on the stand by the walkway.
Trash burning: There is
something burning. Go to the far corner of the garden. See trash being burned. Look close.
Examine piece
of plant, door handle from Colonial room, burned broom, picture frame and gas
mask.
Rotate the gas mask to see inside and note the
singed mark.
Press the T key to see the broken pot under the
burned beam. Rotate the
broken pot to see the label at the base of the pot. It is the symbol of the
Divine Syndicate.
Inspect the Dry Tropics area of the greenhouse:
Enter the greenhouse through door by the burning
trash. Look around the storage area.
Enter the Dry Tropics area.
Examine the pot on the trolley. Check the base of the pot to see that it has
an S symbol, it is not Kew Garden's.
Look around Dry Tropics.
Other areas: Go through
and look around Water Garden area and then the Palm House.
Fetch Toby to track the mysterious substance from
lab:
Use the map to go Baker Street.
See Watson on the telescope watching the new
neighbor. LOL.
Take and then talk to Toby. Go
to Kew Gardens.
At the lab, Holmes told Toby to search. Get Toby to follow the scent-smoky trail.
Toby finds the secret place behind the bushes in
front of the greenhouse. Sniff and Toby digs the soil.
Take the hidden bottle - chemical solution.
There is still some chemical left and a small caterpillar in the bottle.
Bring Toby back to Baker Street. He needs his rest
after a good job.
Check the archives:
Encyclopedias: Archive
right of Holmes' bedroom.
Search Rare Plants, Botany:
Use stolen plant list. Scroll to Botany. Select Exotic Plants Vol.4
Poisonous.
Learn that 3 of the stolen plants are harmful to
humans under specific conditions. Florem diabolica reacts to aggression and
releases deadly spores. Press E key to enter the information.
Left archive:
Go to the bookcase left of the fireplace -
Research.
Search for the symbol of the broken plant pot: Use broken plant
pot. Scroll to Marks and Symbols.
Select The Divine Syndicate. Learn that the symbol is that of the Divine
Scholastic Syndicate. The members of the Syndicate worship Trewan, the
god-king.
Press E key to enter the information.
S Symbol: Use symbol of the
exhibition pot. Scroll to Marks and Symbols. Select London Garden Supplies.
Learn that the S symbol is from a commercial
garden supplier - Seymour's Garden.
Right archive: Go to the
bookcase right of fireplace - Newspapers.
Divine Syndicate: Use
Divine Syndicate.
Scroll to 1889. Select Scandal at Divine Syndicate Club.
Learn that the leaders of this organization is
being investigated for corruption. The organization has highly placed
friends.
Holmes found the address of the Divine
Syndicate.
Check the hidden bottle found by Toby:
Analyze unknown liquid: Go to Sherlock's lab table. Analyze
unknown liquid.
Examine the unknown liquid in the bottle.
Take the pipette at right. Use the pipette on
bottle. Click the filled pipette on test tubes in rack. Automatically fill
both test tube.
Physical test:
Take a filled test tube:
- Examine it - colorless water based liquid.
- Inhale it -
strong floral aroma.
- Taste it - (ugh) bitter taste. It is an organic
compound.
Heat the test tube. Activate the burner. Take test
tube with particles.
Chemical test:
Watson gives the Wagner's reagent.
Use the pipette on Wagner's reagent and
add it to the test tube with liquid.
Examine the unknown liquid with Wagner's reagent.
It has red sediments.
It is an alkaloid and needs gold dust to make
it stable; most probably a fertilizer.
Get Deadly plant information in documents.
See the 3 plants that are lethal to humans. The deadly plants need the
special fertilizer, natural stimulation and nutrition. Use
caterpillars as stimulation.
Some of the plants that were stolen from the
exhibition can prove fatal to humans.
Find out what The Divine Syndicate is concealing:
Jump to the Divine Syndicate.
Green Grand Mystic: Talk to
the Guru - Green Grand Mystic doing his Tai Chi exercise in the sand.
To show the Green Grand Mystic that Sherlock is
ready, press the Q key and select Trewan, the God King.
Green Grand Mystic gives the key to the
temple.
The Green Grand Mystic urges Sherlock to take some
fertilizer - raw sap that is by the entrance.
The presence of pots at Kew Gardens are just
coincidence. They would not hesitate to scavenge their refuse.
Examine the Green Grand Mystic:
Check the neck and see dragon tattoo.
Check the hand to see fingertip calluses.
Check the left hand and see chemical
practices.
Read the Guru's portrait in documents.
Garden: Look around in
the garden. Go down the steps and go left. Then right under the tree trunks
to look around the beautiful garden.
Continue around the path and see the large bell.
Pots: Go to the bench
near the steps to the entrance of the temple.
Press T key and look close at the 2 broken pots on
the ground at
left side of the porch. Then check the covered pots behind the bench.
Check the label at base of the pot to see that
they are from Kew Gardens.
Temple: Use the key given by the Green Grand Mystic on
temple door.
Look around. Examine the poster on right wall to
see the list of benefactors.
Drugs table: Go to the other
side of the room and examine the drug table under the windows framed by
ivies.
Take a spoon of the raw sap. It is excellent
quality of cocaine.
Try to talk to the adept in front of the statue of
Trewan.
Examine Trewan.
Find caterpillars and alkaloid:
Plant room: Enter the
room right of the drug table.
Caterpillars: Examine the
cage with caterpillars across from door. Open both doors of the cage.
Sherlock takes the caterpillars raised as food for certain plants.
Other cages: Open and
examine the plants in the other cages. Close the door of the cages.
Open the flower cage at far end of room. Take the
3 deadly plants: Dionea Carnivorus, Florem
Diabolica and Carlina Inebriare from the cages.
Den and lab: Go to the
other side of the main temple. Enter the door right of the adept.
Unlock the door:
Review the lock puzzle guide at top of walkthrough
page.
The top tube is made up of 3 rings. There is a stationary notched ring at center
of the tube and 2 notched rings both ends.
The left ring is notched at one end only. Move
the left notched ring off the middle stationary one.
Match the left notched ring to the lines
middle stationary one.
The right ring is also notched at one end.
Move the right notched ring off the middle one.
Match the right notched ring to the lines of
the middle one.
Match the lines of the joined notched rings to
the gray top tube under it. Then match the lines of the silver one under
the other rings.


Enter the den. Look around see a plate for smoking
opium.
Go to the lab. Examine the Chemistry cupboard. Take
the bottle of alkaloid.
Check the lab table for experiments and opium balls
across the table. Exit the
temple.
It appears that the deadly plants, the alkaloid
and the caterpillars are somehow connected.
Find the stolen plants of the last exhibition at
Kew Gardens:
Green Grand Mystic: Go back
and talk to
the Green Grand Mystic again.
Ask about Kew Gardens. Press Q key and select the
appropriate clue - Kew Gardens symbol.
5 days ago, they stole the plants at Kew Gardens.
Dunne borrowed from them for his exhibition and didn't return them. They did
not find the 3 that were taken from them. So
they took the other plants in the exhibit.
The Green Grand Mystic told us that when they
stole the plants from Kew Gardens, they were unable to locate three.
Three days before Montague Dunne died, “The
Divine Syndicate” stole all of the plants from the Kew Gardens exhibition,
claiming that a number of these belonged to them.
Deduction:
Open the deduction screen.
Deadly Syndicate are the killers:
Poisoning + Deadly plants stolen = Theft and
murder.
The killers may be those who stole the exotic
plants (including the deadly species) from the last exhibition at Kew
Gardens.
Divine Syndicate thieves + Deadly plants stolen =
Sect stole everything.
The Divine Syndicate stole all plants from
exhibition. They
could have used it in order to murder Mr. Montague Dunne.
Conclusion: The Divine
Syndicate killed
Dunne.
The Divine Syndicate planned the death of
Montague Dunne. They had been involved in a dispute with Dunne over the
stolen plants.
Moral choice: Bait
the Green Grand Mystic, shelter the Green Grand Mystic or continue
investigation.
Bait the Green Grand Mystic:
Sherlock and Watson trick the Green Grand Mystic to going to Scotland Yard
to retrieve his plants.
Lure the Green Grand Mystic to Scotland Yard.
That is the only way to deal with a dangerous criminal who organised the
exotic plants theft and murdered Montague Dunne in cold-blooded revenge.
The Divine Syndicate planned the death of
Montague Dunne. They had been involved in a dispute with Dunne over the
stolen plants. They stole the
deadly plants after the murder to cover their crime. With the help of our
bait, the police at Scotland Yard will arrest the Green Grand Mystic and his
sect
Shelter the Green Grand Mystic:
Sherlock and Watson try to trick the Green Grand Mystic to going to
a hospital. Since the Green Grand Mystic refuses to go (and has hands that
shows he's a martial arts expert) and he has influential friends; they talk it over.
Watson will write a recommendation and Holmes will help with his reputation.
Shelter the Green Grand Mystic in an asylum,
without notifying Scotland Yard. His opium addiction has affected his
sanity, and he needs to be treated accordingly."
The Divine Syndicate planned the death of Montague Dunne. They had been
involved in a dispute with Dunne over the stolen plants. They stole the
deadly plants after the murder to cover their crime. The Green Grand
Mystic's opium addiction has affected his sanity, and he needs to be treated
accordingly.
Replay moral
choice to see other endings.
Task - deduction:
Click the B key.
Poisoning + suspicious ingredient = Set up the
experiment.
Set up the alkaloid from a chemical laboratory and
the caterpillars and perform the experiment with the deadly plants.
Find the plant that was used to kill Montague Dunne:
Go back to Baker Street. Watson does his Tai Chi
exercise after seeing the Guru. :D
Experiment with the deadly plants:
Holmes advises Watson to wear a mask.
Use alkaloid on all 3 plants.
Take the alkaloid and pour it to all 3 plants.
Carlina inebriae, the thorny plant becomes inactive.
Dionaea carnivorus becomes inactive.
Florem diabolica, the spore plant opens up.
Use the caterpillar on all 3 plants: Take the caterpillar and place
them on the plants.
Carlina inebriae shows defensive mechanism.
Dionaea carnivorus grabs the caterpillar on the thorny plant. The thorny
plant shoots its thorns.
Dionaea carnivorus eats the caterpillar.
Florem diabolica closes when the thorny plant
grabs the caterpillar that is on it. It also releases a small
puff of smoke.
Find the Florem diabolica's secret:
Swap the plants so that the Carlina inebriae the thorny plant is at the
center and the Dionaea carnivorus and Florem diabolica are at sides.
Use alkaloid on Florem diabolica the sporeplant to open it.
Use caterpillar on Carlina inebriae the thorny plant
that should be in the middle.
Dionaea carnivorus tries to take the caterpillar on
thorny plant. The thorny plant becomes defensive; stimulating the Sporeplant to release
toxic gas and spores.
It was a complex process to prepare the deadly
plants. The plant combination had to be placed close by the victim and
triggered at the precise moment.

Talk to the employees:
Go back to Kew Gardens. Talk to the 3 employees.
Martyn Hamish:
Talk to Martyn who is still watering the plants.
Interrogate Martyn again. Learn more about Albert
and Miss White.
Albert was humiliated by his father in a
presentation. Miss White has great talent for botany but is naive about
Montague Dunne.
Ask about connection to Kew Gardens. Press Q key
and select Martyn's photograph with father. Learn about his father who expanded
Kew Gardens but Dunne took the credit.
He has never heard about the Divine Syndicate.
Ask about the bust. Press the Q key and select fragment
from statue. The
statue was in the Colonial Collection room before.
About his activity, learn that at 9:30 AM the day of the incident,
Dunne and Martyn talked to Albert.
Martyn was at the nursery until 10:30 when he saw
Dunne was not okay.
Margaret White:
Go to the Seed
House. Go through the walkway door between the greenhouse and the work
buildings at left. The Seed house is the last building on the left.
Talk to Miss White. She doesn't know about the Divine Syndicate.
She saw Montague Dunne at
around 9:10. Dunne then went to talk with Martyn.
She was at the lab until 10:40 AM recording her
thesis.
She had a chat with Martyn at 10 AM. She recorded
her thesis on cylinder 320.
Check recording 320: Go
to the lab and take phonograph recording 320 from the open cabinet right of
fireplace.
Use it it on the phonograph to verify that Miss
White was here recording as she mentioned.
Albert Dunne:
Go to the
greenhouse and talk to Albert.
Learn that he was at the Seed House that
morning.
At 9:40, Martyn and Dunne went to the backyard.
At 9:50, Dunne went to the Dry Tropics room while Martyn came back to Albert.
At 10:10 Martyn came back from Mary.
Later Martyn told him his father was not feeling
well.
He doesn't know about the Divine Syndicate.
Ask about Navy. Press the Q key and select
Albert's hopes.
Montague Dunne thwarted his son's dream of
joining the Royal Navy. Albert was humiliated by his father on many
occasions, most recently the last exhibition at Kew Gardens.
Deduction:
Open the deduction screen.
Albert Dunne is the killer:
The Divine Syndicate and others should be
innocent. Change some of the previous deductions.
Divine Syndicate thieves + Deadly plants stolen =
Partial Theft.
The Divine Syndicate stole all but the deadly
plants from the exhibition.
Poisoning + Deadly plants stolen = Theft and
murder.
Those who stole the exotic plants from the last
exhibition of Kew Gardens maybe the killers.
Missing deadly plants + Deadly precision = Sect is
not involved.
Someone stole the deadly plants before The
Divine Syndicate were able to.
Deadly precision + White's studies = White's lack of experience
The knowledge Miss White acquired at the
university might not be enough to guarantee the correct reaction of the
deadly plants.
Albert's humiliation + Albert's ambition =
Albert's motive.
Albert had a motive to kill his father,
Montague Dunne. Dunne had thwarted Albert's dream of joining the Royal Navy.
By killing his father, Albert could have his revenge and eventually succeed
in his father's place as the director of Kew Gardens
Deadly precision + Albert's ambition = Albert
studies.
Albert has biological knowledge to stimulate the
deadly plants.
Sect is not involved + Albert's motive + Albert's
studies = Albert killed M. Dunne.
Conclusion: Albert Dunne
killed Montague Dunn.
Albert killed his own father, Montague Dunne.
Dunne had humiliated his son repeatedly, obstructing his dreams and breaking
his spirit.
Moral choice: Condemn
Albert Dunne, absolve Albert Dunne live or continue investigation.
Condemn Albert Dunne: Albert is
in interrogation room and arrested by Lestrade.
Albert Dunne killed his own father. Citing
years of humiliation, and a deep frustration at his father's dissuading him
from joining the Navy, you conclude that Albert is a cold-blooded murderer
who should be placed behind bars.
Absolve Albert Dunne:
At Baker Street, Holmes and Watson decide to let Albert free because of his humiliation.
Officially Montague Dunne died of a heart attack.
Albert Dunne was humiliated by his father, who
crushed any dreams he had of entering the Navy. The murder was a desperate
act intended to free Albert from the tyranny. Now he can go free, but he
must live with his conscience
Replay moral
choice to see other endings.
Miss Margaret White is the murderer:
The Divine Syndicate and others should be
innocent. Change some of the previous deductions.
Divine Syndicate thieves + Deadly plants stolen =
Partial theft.
The Divine Syndicate stole all but the deadly
plants from the exhibition
Missing deadly plants + Deadly precision = Sect is
not involved.
Someone stole the deadly plants before The
Divine Syndicate were able to.
Deadly precision + Albert's ambition = Albert lack
of experience.
Albert is not very good at botany. It is
doubtful that he could have learned how the plants might release their
deadly spores
White's studies + Deadly precision = White's knowledge.
White has biological knowledge to stimulate the
deadly plants.
White's expulsion + White and Dunne = White and
Dunne's disagreement.
Miss White and Mr. Dunne had a recent
disagreement. Montague Dunne was planning to release Miss White from her
position at Kew Gardens
White and Dunne + Miss White's family =
White's situation.
Margaret White's studies and social situation were
completely dependent upon Montague Dunne's wealth.
Sect is not involved + Disagreement + White's
situation + White's knowledge = White killed Dunne.
Conclusion: Margaret White killed
Dunne.
Margaret White killed Montague Dunne. Her
professional ambition and personal situation had been damaged by the
break-up with Dunne.
Moral choice: Arrest Miss White, be treated by a
doctor or decide
later.
Condemn Miss White: Miss White
denies killing Dunn in the Interrogation room.
Miss White is a dangerous woman, very capable of
carrying out an elaborate murder.
When she realised that she was unable to make any further monetary gain
from Montague Dunne, she advanced her affections to Albert, his son. The
judge will take little pity on her
Absolve Miss White: Holmes
decides to let Miss White go and states that Dunn died of a heart attack.
Miss White is a desperate woman, a victim of
society. When Dunne cast her aside, her life stopped; she killed him in pure
desperation. She will escape the rope, but her future is bleak.
Replay moral
choice to see other endings.
Stimulate the deadly plants in the Colonial
collection:
Everyone has gone home. Automatically be at the Colonial Collection room.
Visualize Montague Dunne's poisoning:
Stand inside the Colonial Collection room. Press the F key to deduce what
happened.
See 3 Dunne figures. Activate a figure and
select the number of that figure in the deduced sequence of
events.
Press the space bar, if you need to change the
sequence.
The Dunne figure inhaling the spore and toppling
the bust is #1.
The figure escaping the room is #2.
Press the Q key to see the sequence in motion.
Caterpillars: Go to
ventilation grid at the empty area of the room. Open the ventilation cover.
Place the caterpillar inside the ventilation. The
cover is automatically closed.
Start the ventilation stimulation
experiment:
Press the T key and see the ventilation system glowing.
Go to the garden area behind the Seed House. Go left from Colonial
Collection room, through Dry Tropics and to the backyard.
Go to the ventilation engine left of the water
tower.
Start the ventilation engine.
Turn the transmission dial at right to up
position
or off.
Press the left power button.
Press the yellow starter button to get the
engine started.
Turn the transmission dial to down position or on.
Ventilation system is working.
Press the T key again and follow the glowing
ventilation shaft.
Stimulate the deadly plants by dropping the
caterpillars:
Albert's desk: Go to
the Seed House. Open the window above Albert's desk. The Colonial room
cannot be seen from here.
Turn right to the control lever on the wall.
Activate the fan above the desk.
Martyn's desk: Go to
Nursery building. Open the handle of the window above Martyn's desk.
From this window the Colonial room is seen.
Turn left to the control lever on the wall.
Activate the fan above the desk.
Automatically be at the Colonial room. See that
the vent is open and the caterpillars have been dropped on poor Watson.
Albert and Martyn's vents are both needed to be
activated to get the ventilation vent to open.
Only Martyn's window has a view of the Colonial
room.
The plant stimulation caused by the caterpillar
fall could be performed only from Martyn's workplace: the one location where
it would be possible to see Montague Dunne in the Colonial Collection room.
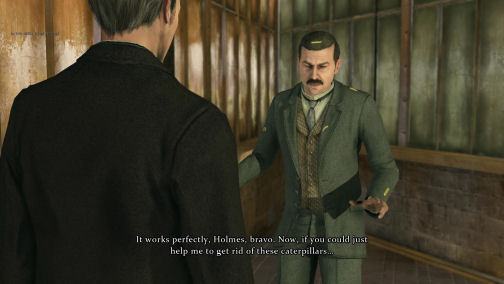
Find Montague Dunne's killer:
Martyn Hamisch is the killer:
Change some of the previous deductions. Miss
White, Albert and the Divine Syndicate should not be the killers.
Deadly precision + Albert's ambition = Albert lack
of experience.
Deadly precision + White's studies = White's lack of experience
Missing deadly plants + Deadly precision = Sect is
not involved.
Someone stole the deadly plants before The
Divine Syndicate were able to.
Poisoning + Deadly plants stolen = Theft and
murder.
Those who stole the exotic plants from the last
exhibition of Kew Gardens maybe the killers.
Poisoning + Dunne was trapped = Mr. Dunne was
poisoned.
After
being trapped in the Colonial Collection room by the killer, Dunne was
poisoned by inhaling a violent vegetal poison.
Ventilation used + Deadly precision = Martyn
Hamish opportunity.
Martyn Hamish had the opportunity to stimulate
the deadly plants in the Colonial Collection room. As a biologist, he would
have understood the technicality of how to do this.
The new director + Martyn's anger = Martyn's
motive.
Martyn Hamish had a motive: he believed that he
and his father's lives had been ruined by Dunne, who had taken the credit
for all of their work. Hamish wished to take over the directorship of Kew
Gardens, but he knew that would not be possible with Dunne still alive.
Sect is not involved + Martyn's motive + Martin Hamish's opportunity + Mr. Dunne was poisoned =
Hamish is guilty.
Martyn had the opportunity to steal the plants of
the Divine Syndicate and cause flowering from his work place the day Dunne
was inspecting. When Dunne entered the Colonial Collection room, Martyn
locked the room.
Conclusion: Martyn
Hamish is guilty.
Martyn Hamish could be the killer. He had the
opportunity to steal The Divine Syndicate's plants and stimulate them from
his workplace, directly after he had locked Montague Dunne inside the
Colonial Collection room.
Task: Effect the arrest
of Martyn Hamish.
Contact Lestrade in order to get Martyn arrested:
Go to Scotland Yard. Talk to the policeman.
Got to Lestrade's office and tell him about Martyn.
Join Lestrade at Kew Gardens:
Holmes and Watson arrive at Kew Gardens to be met
by Lestrade. No need to hurry.
Enter the greenhouse. See Martyn hanging at the
Palm room.
Examine Martyn Hamish's body:
Sherlock asks that Martyn's body be brought down
to be examined.
Examine the neck. See the mark of strangulation.
Take and read Martyn's regret letter.
Martyn Hamish admitted to murdering Montague
Dunne in his suicide note.
Examine Martyn's feet. The left shoe is unique. It is indicative of club foot.
The worn-down double heel of his left shoe
reveals that Martyn Hamish suffered from a club foot and tibial torsion.
Deduction:
Hamish's confession + club foot = Hamish acted
alone?
Martyn Hamish was unable to run due to the
tibial torsion on his club foot. Therefore we should find out if he had
sufficient time to lock the door of the Colonial Collection room and
activate the ventilation system. Did he have an accomplice?
Talk to Lestrade: Discuss with
Lestrade the possible impact of new clues found on the body of Martyn
Hamish.
Make a time line of the events on the day of the
crime:

Start the timeline:
Click-hold-drop the pictures at the right time-column. Place the picture
based on who reported it clued by the color of the frame and nail.
Press S key to see the map. See the map and the
characters.
While at the map, press the W key to play the events based on the
timeline placement.
At 10:20, the Colonial Collection room was locked.
Martyn Hamish might not have had enough time to do it all by himself. It
would have been difficult to stimulate the deadly spores and lock the door
in just 10 minutes without being observed.
Albert was alone in the Seed House after
Montague Dunne had entered the Large Glasshouse. Since Dunne showed signs of
poisoning at 10:20, Albert had approximately 10 minutes to act without being
observed.
Miss White stayed alone in the laboratory after speaking with Martyn.
Since Montague Dunne showed signs of poisoning at 10:20, White had
approximately 20 minutes to act without being observed.

Open the deduction screen.
There is no accomplice:
Hamish's timeline + Albert's timeline = Albert is
not involved.
Martyn Hamish and Albert are not accomplices.
It is unlikely that Albert would have had the opportunity, and ten minutes
would have not been enough to lock the door of the Colonial Collection room.
Hamish's timeline + White's timeline = White is
not involved.
Martyn Hamish and Miss White are not
accomplices. It is unlikely that White would have had the opportunity, and
twenty minutes would have not been enough to lock the door of the Colonial
Collection room.
Albert is not involved + White is not involved +
Hamish is guilty = Hamish did it alone.
Conclusion: Hamish did it
alone.
Martyn Hamish committed the murder alone. He
loathed Montague Dunne because of his treatment of Hamish's father. Hamish
had enough time to lock Dunne in and activate the ventilation fan from his
work place.
Moral choice:
Let the police dismiss the case, announce that you have brilliantly solved
the case or decide later.
Glory to Lestrade: Holmes talks to Lestrade and
regrets pushing a man to suicide. Holmes thanks Lestrade for his discretion.
Martyn Hamish committed the murder alone. He
loathed Montague Dunne because of his treatment of Hamish's father. Hamish
had enough time to lock Dunne in and activate the ventilation fan from his
work place. He took his revenge – but at the cost of his own life. Scotland
Yard will wrap up this case and will receive all the glory.
Trump the police: Holmes talks to Lestrade and is
proud that he solved the case. Holmes thanks Lestrade for his discretion.
Martyn Hamish committed the murder alone. He
loathed Montague Dunne because of his treatment of Hamish's father. Hamish
had enough time to lock Dunne in and activate the ventilation fan from his
work place. He got what he deserved. You will announce that you have solved
the case quite brilliantly, without the aid of Scotland Yard.
Replay moral choice.
Albert is the accomplice:
Miss White is not an accomplice.
Martyn's timeline + Albert's timeline = Albert
had time.
Albert was Martyn Hamish's accomplice. Ten
minutes would have been enough for him to follow Montague Dunne and lock the
door, in order that Martyn might activate the ventilation system.
Conclusion: Albert
is an accomplice.
Albert was Martyn Hamish's accomplice in killing
Montague Dunne. Humiliated repeatedly by his father and denied his dreams,
Albert resolved to aid and abet the murderer.
Moral decision:
Condemn Albert Dunne, Absolve Albert Dunne or Continue investigation.
Endings: Replay moral
choice to see other endings.
Condemn Albert Dunne: Lestrade
arrests Albert at the interrogation room. Albert denies the crime and says
he doesn't know botany.
Albert Dunne killed his own father in
collaboration with Hamish. Citing years of humiliation, and a deep
frustration at his father's dissuading him from joining the Navy. He was the
one who locked the door of the Colonial Collection room directly after
Hamish released the caterpillars. He did not hesitate to sacrifice Hamish to
try to cover himself. You have concluded that Albert is a cold- blooded
murderer who should be placed behind bars.
Absolve Albert Dunne:
At Baker Street, Holmes says that they will report that Hamish worked alone.
Albert Dunne was humiliated by his father, who
crushed the dreams he had of entering the Navy. He was the one who locked
the door of the Colonial Collection room directly after Hamish released the
caterpillars. The murder planned with Hamish was a desperate act to free
himself from the tyranny. Now he can go free, but he must live with his
conscience.
Replay moral choice.
Miss White is the accomplice:
Albert is not an accomplice.
Martyn's timeline + White's timeline = White had
time.
Miss White had twenty minutes; it would have
been enough to trap Montague Dunne. She could have locked the door and
alerted Martyn Hamish to activate the ventilation system
Conclusion: White is an
accomplice.
Margaret White was Martyn Hamish's accomplice
in killing Montague Dunne. Her professional ambition and personal situation
had been damaged by the break-up with Dunne.
Moral decision: Arrest Miss
White, be treated by a doctor or decide later.
Endings: Replay moral
choice to see other endings.
Condemn Miss White: At the
Divine Syndicate grounds, Holmes waits for Miss White. He asks Watson to
wait behind Miss White. Miss White holds a bottle of poison. Try to prevent
her suicide.
Miss White is a dangerous woman, very capable
of carrying out an elaborate murder. When she realised that she was unable
to make any further monetary gain from Montague Dunne, she advanced her
affections to Albert, his son. She was the one who locked the door of the
Colonial Collection room directly after Hamish released the caterpillars,
and then pushed Martyn Hamish to his suicide only to cover herself. She got
what she deserved.
Absolve Miss White: At the Divine
Syndicate grounds, Holmes waits for Miss White. He asks Watson to wait
behind Miss White. Miss White holds a bottle of poison. Try to prevent her
suicide.
Miss White is a desperate woman, a victim of
society. When Dunne cast her aside, her life stopped; she killed him in pure
desperation with the help of Martyn Hamish - she was the one who locked the
door of the Colonial Collection room directly after Hamish released the
caterpillars. She did not deserve such a terrible fate.
Replay moral choice.
Prevent suicide: You can stop the suicide by taking the
poison away
from Miss White.
A "W" is seen
on the screen. Immediately press the W key before the white line
makes a complete circle.
Press the W key whenever it appears. Holmes moves
forward towards Miss White.
When the blue circle appears; move it on her hand with the
poison and then immediately click to get Watson to slap the bottle away.
Achievement obtained: Suicide is Not an Option!
Prevent Miss White from suicide.
Summary:
See the summary of the case.
Clues found: 22
Conclusion and moral choice done are shown.
Use the space bar to see if the clues are all
found.
Selection for replay case and replay moral choice
are seen.
Accept decision?
Note - Choose any of
the moral choice to see different ending for this conclusion.
After seeing the
ending of this moral choice - click on "replay moral choice" to see
another ending.
Do NOT accept this
decision until you are sure. This will exit the game.
Achievement obtained: A Deadly Flower. Finish Kew
Gardens case.
A HALF MOON WALK
Holmes notifies Watson that they are invited to
annual dinner hosted by the Baker Street Irregulars. Watson is appalled by
the menu.
Mrs. Hudson opens the door for Wiggins.
Wiggin's brother Leighton is in jail for killing 2
men. He is in Scotland Yard now. Wiggins asks Holmes' help because the
coppers will not look further for the real murderer.
Previous case - The Kew Garden Drama:
Open the casebook.
Chronicle: If you finished
the case, see the personality ranking. It depends on your moral choice. The
conclusion and moral choice done are seen.
Trophy: Deadly plant from Kew
Gardens.
Echoes - messages: The
messages seen here depend on the moral choices and conclusions selected that
closed the
previous cases.
Check to see if there is mail on the mantle of the
fireplace.
If Albert Dunne is condemned; get a letter from Mrs. Barbara Dunne.
Mr. Holmes, No matter how famous a detective you may be, I
must warn you - you have made a mistake in arresting my only and beloved
son, Albert! And for what? For the murder of my husband! Everyone knows that
he died of a heart attack. What is this fairy tale you have invented, of a
poisonous plant? Are you insane? You have no idea of my influence! I will
crush you! Mrs. Barbara Dunne.
If Albert Dunne is absolved; get a letter from
Miss White.
Dear Mr. Holmes, I am writing to you in admiration of your
deductive talents! You quite brilliantly uncovered the truth behind
the terrible murder that took place here at Kew Gardens. I cannot believe
that it was Mr. Hamish… it is so terrible to realise we were working with a
murderer! Nevertheless, despite how sinister this place has become, we are
managing it together with Albert, and I am now able to continue my studies.
Thank you so much for your remarkable work. Yours sincerely, Margaret White.
If Margaret White is absolved; get a letter from Albert Dunne.
Dear Mr. Holmes, I am writing to express my appreciation for
your striking at the truth of this horrible case. At first, I could not even
imagine how Miss Margaret White, such an exceptional and beautiful woman,
could plan and commit such a dreadful murder with that fellow Hamish. How
angry I was! But when I attempted to put myself in her shoes, I began to
understand. As talented and beautiful a lady as Miss White was, she
evidently could not complete her studies without money – while my father was
living his high life, deficient in human sympathy. Thank you for your
kindness towards her. She is no longer here, and already I miss her. Yours
sincerely, Albert Dunne.
If Margaret White is condemned; read the newspaper account.
Sensation! An exotic method of murder - The arsenal of our
present-day criminals may soon be refilled with poisonous plants! A young
and beautiful woman, in collaboration with her colleague at Kew Gardens,
planned the terrible murder of their director, Mr. Montague Dunne. Only one
detective was capable of uncovering the truth behind a tragedy that was
initially believed to be a simple heart attack. That detective's name is
Sherlock Holmes.
Interrogate Leighton and examine his belongings at
Scotland Yard:
Go to Scotland Yard. Talk to Inspector Lestrade
about Leighton Chapman.
It is night and Lestrade is surprised to see Holmes.
Leighton was arrested with a revolver in his possession.
Exit Lestrade's office. Go right and enter the evidence room
at far left of the hallway.
Murder weapon: Examine
Leighton's belongings on the tray. Examine the Webley revolver on the tray.
Examine the cylinder. The shells were not removed
from the cylinder.
Rotate the revolver and look at it from top view.
Open the barrel catch. 2
empty shells out of 6 are seen. There were 2 shots fired.
Leighton was holding a revolver with two fired
cartridges when he was caught after the crime in Half Moon Street.
Examine the rolled cigarettes and the watch.
Leighton Chapman had nothing of any value in
his possession when he was caught by the police directly after the crime.
Talk to Leighton: Exit
the room and go to the jail cell at end of the hallway. Leighton is brought
to the interrogation room.
Talk
to Leighton Chapman. Leighton became forthcoming upon learning
that it is Sherlock Holmes, his brother's friend.
Click on "story".
Leighton says that he entered Half Moon
Street bumping into a constable. He saw 2 people lying on the ground and a
third person leaning on the body farthest from him. The man dashed away and
escaped through Whitechapel Street upon seeing Leighton.
Leighton checked the first body. Blood was
pumping out of the stomach. The other was shot in the forehead dead. The second man had a gun in his hand and Leighton
took it.
Leighton turned the corner and was momentarily blinded by a flash.
Then
he was caught by the police when he run forward half blinded.
The silhouette of the third man looks like an average man.
Leighton didn't hear the footsteps of the man as he was running away.
Leighton Chapman stated that he saw a person
leaning over a dead body just as he entered the scene. Leighton took a gun
from the body and set off in pursuit of the man, but he was blinded by a
flash of bright light.
Click on profile picture.
Profile of Leighton Chapman:
Check his deep facial scar. Leighton has
occasional fights and grew up on the streets.
Check his black eye - cheek. He resisted arrest; had
recent beating and is hotheaded.
Check his fancy scarf. Leighton has a cushy
job as office clerk.
Check his hand lying on table. See the
Westgate tattoo. He committed a crime.
Read character portrait in the
casebook.
Investigate the crime scene and talk to the witnesses
at Half Moon Street.
Jump to Half Moon Street.
Enter through the arched alleyway left of Holmes.
Turn the corner to see the crime scene.
Constable Marrow:
Constable Marrow greets Holmes and Watson. The constable knows Holmes from
the Ripper case.
The victims are Brian Vercotti, a known ruffian and Kenneth Butler,
a jeweler.
Ryan Turner, Polly Powell and himself are witnesses.
Marrow while standing north side of Half Moon
Street., he saw
Butler and Vercotti slowly enter the street. Later, the fireworks started.
Leighton then entered the street. He heard a woman
cry out and police whistles at other side of the street.
He entered the street and saw the 2 bodies. He
reached Whitechapel Street and saw Leighton in the hands of the constables.
Marrow did not hear any shots because of the
fireworks.
He had a lamp that lit the street. Marrow saw Turner's opened
window. No one was there and it was dark in the room.
Constable Marrow paid attention to Mr. Turner's
window while he was running past the dead bodies. He did not observe anyone
next to the window - it was dark there.
Examine the victims:
Brian Vercotti:
Examine the body at right. Look close at the body.
Examine the stomach wound. The bullet hit the
stomach.
Examine the hand near the wound. He tried to
stop the bleeding; he didn't
die instantly.
Examine the other hand. See Westgate prison tattoo.
Chapman and Vercotti both has the prison tattoo.
Examine the head. His face is contorted; he
suffered before he died.
Kenneth Butler: Examine
the other body.
Press the T key. Take the piece of wood
on the crack between the stones. Rotate and examine the piece of wood.
It is quite new.
Examine the head. Butler was hit in the
head and didn't have a chance.
Examine the left pocket. Examine and take the key.
Brian Vercotti and Kenneth Butler were both
found shot in the dark and narrow Half Moon Street, which is located
between Great Alie and Whitechapel High Street.
Talk to the other witnesses:
Ryan Turner: Talk to
the elderly man standing by the lit entryway of the flat at the
corner.
Ask about his testimony.
Turner was already in bed when the fireworks
started. He heard 2 gunshots. He grabbed his lamp and rushed to window.
He saw 2 bodies and a man with a gun standing by the closer one.
He didn't see anyone else.
The shots sounded different from each other;
the second shot was louder than the first one.
He stayed close to the window
until the policemen arrived.
Mr. Turner heard two different, consecutive
shots - the second shot was louder than the first.
Mr. Turner stated that he remained near his
window until Leighton was caught by the police, who came from the
direction of Whitechapel High Street.
Profile of Ryan Turner:
Check the medal on his vest. The medal is from
the Crimean War; he is a war veteran.
Check the arm leaning on the wall. Turner
requires support because of weak leg and limps.
Check his vest. It is missing buttons.
Read character portrait in the
casebook.
Polly Powell: Go to
the other end of the street.
Check the mirror on a cart across the street.
Talk to the flower vendor. Polly saw a
man with a gun run out of Half Moon Street. He was covered in blood.
She screamed the man was caught by 2 constables.
She is not sure about the gunshots because of
the fireworks.
No one else left Half Moon Street.
Leighton Chapman is the only person who was
seen entering Half Moon Street after Brian Vercotti and Kenneth Butler.
He was seen standing over the dead bodies and escaping the crime scene
shortly afterwards.
Leighton Chapman: Go to
Scotland Yard and talk to Leighton.
When asked about why follow the criminal, Leighton
said he was just being brave and stupid.
Press the Q
key. Select Westgate prisoners as supporting evidence.
Learn that Vercotti and Leighton went to prison
for street robbery when they were young. In prison, they both joined one of
the fraternities. They lost contact and continued on with different paths in
their life. He heard no news about Vercotti for around 2 years.
Brian Vercotti is an old acquaintance of
Leighton Chapman. They were both imprisoned for robbery while still young
men, but their paths diverged after their release.
Deduction:
Leighton Chapman committed double murder
because of personal motive:
Different shots + Leighton's revolver = Firing
position.
Turner could hear the contrast between 2 fired shots,
as they
were made from different points in Half Moon Street.
Two victims + Leighton's revolver = Double murder.
Butler and Vercotti were victims of double murder
carried out by one person.
Lootless + old acquaintance = Personal
motive.
The crime by Leighton could have had a
personal motive.
Leighton's statements + common statements =
Imaginary man.
The person whom Leighton describes in his
statement is a figment of his own imagination created to vindicate himself.
Common statement + Leighton's revolver =
Compelling evidence.
The witness
testimonies and the crime weapon clearly point to one possible culprit:
Leighton Chapman.
Conclusion: Double murder
because of personal motive.
Leighton
Chapman committed double murder at Half Moon Street. An old and mutual enmity between Leighton Chapman and Brian Vercotti
was the motive for this crime.
Moral choice: Mr. Holmes, you promised to
save him.
Absolve Chapman.
Leighton Chapman committed murder with a personal motive. You have decided
to imprison him. His sentence will be shortened due to the fact that he is
still a young albeit foolish and impressionable man, and his younger brother
Wiggins would be left completely alone.
Condemn Chapman.
Leighton Chapman is a vicious murderer who
killed his old acquaintance over a long-standing grudge. You have decided to
severely punish him for his crime by imprisoning him for life.
Continue Investigation.
Task - deduction:
Press B key.
Dark window + Turner's view = Conflicting
statements.
Turner's statement that he remained at the window
of his flat until the police arrived. This is in conflict with the statement made
by Constable Marrow. The Constable said that he didn't see anyone in the
window.
Exit deduction and continue the investigation.
Talk to Mr. Turner and check the view from his flat:
Half Moon Street: Marrow
and Turner made conflicting statements. Go back to Half Moon Street.
Marrow and Wiggins: Wiggins while waiting for
Holmes is confronted by Marrow.
Turner: Talk to Ryan Turner
about the contradicting statements.
Press the Q key and select
Turner's contradiction as supporting evidence.
Flat: Holmes is brought
to Turner's flat. Look around.
Window: Open the window. Examine
Butler's body and Vercotti's body.
Turner has perfect view of the scene and can definitely see Leighton with Butler's
body.
Kitchen table: Examine
the kitchen table with the sharp knife.
Press the T key and see sweepings. Examine the
shredded papers in 3 places. The knife was used to cut paper.
Fireplace: Examine the
fireplace. It was tended over an hour ago.
Press the T key and note ashes. Examine the burnt paper.
Examine the page. Rotate to examine the page in
the back. The paper was thrown in fire just a short while ago.
Book shelf and walking stick:
Turn right and examine the book shelf at right wall.
Examine the books. The books are in a mess.
Examine the walking stick below the book shelf.
Examine the broken end. It was recently broken.
Attach the broken end and see that the piece of wood
taken beside Butler's body fits the end of the walking stick. A perfect
match!
Bedroom: Check Turner's bed.
Reenact the sequence of events from when
Turner is awakened by gunshots:
Press the F key. See Turner's silhouettes with
possible numbers above them.
Left click to activate the sequence.
Click on a silhouette and number them in consecutive order based on
garnered clues and statements. Click again to cycle the numbers.
Click the "got up from bed" silhouette in bedroom and
number it 1.
Click the "opened the window and look down" silhouette by
window and number it 2.
Go down to the street. Click the "approached
the body; took something and broke the
stick" silhouette by Butler's body and number it 3.
Go back to the flat. Click the "placed the
broken stick and took something" silhouette by book shelves and number it 4.
Click the "cut papers with knife" silhouette by
kitchen table and number it 5.
Click the "threw something in fire" silhouette by
fireplace and number it 6.
Press the Q key to watch the sequence. Use
space bar to redo the sequence if needed.
Find the book Turner used:
Examine the book shelf.
Press the T key and see fat rings on book.
Examine the Moby Dick book. Take the bracelet.
Examine the 2 ram's heads at ends of Greek
bracelet.
Turner: Talk to Mr.
Turner.
When asked about the pace of getting to window,
press Q key. Select Turner's limp as corroborating evidence.
When asked about whole truth - his statements, press Q key.
Select antique bracelet as corroborating evidence.
Investigate the bracelet and find out how it got to
Half Moon Street:
Go back to Baker Street.
Encyclopedia Archives: Go
to the wall right of Holmes' bedroom door.
Search for bracelet. Check the Encyclopedia. At Art and
Architecture, select Antique Art of British Museum.
Read about the Five Rams of Mytilene. It is a
part of the Hellenistic Treasures Collection. There are 5 heads of mountain
rams on a bracelet, necklac and a ring - each made of pure gold. The
collection has been missing from the museum since 1885. Press E key to enter the info.
The collection of Hellenistic Treasures was
stolen from the British Museum in 1885. It has not been found since then and
is considered to be lost.
Newspaper Archives: Go to the
archives right of the fireplace.
Use article about antiques. Scroll
to 1885.
Read Hellenistic antiques stolen. Learn that
the Hellenistic Treasures were stolen
while being transported from British Museum to Glasfurd Fine Art Exhibition.
Kenneth Butler, a pawn shop owner informed Scotland Yard that a man later
named Vincent Foley tried to sell him a collection of artworks. Foley was
identified by the driver of the cab that transported the collection. Foley
was imprisoned and the lost treasure are still to be found.
Holmes wants to visit Butler's pawn shop.
Pawn Shop: Jump to
Kenneth Butler's pawn shop.
Go forward and around the corner. Examine the
pawn shop at right end of street.
Use key to open the lock of the door with key taken from
Butler's pocket.
Find interesting items: Enter and
look around.
Look close at shelves at left. Examine the
crampons at bottom shelf.
Go behind the counter. Examine the shelves behind
the counter.
Examine the flare pistol from
bottom shelf.
Find Butler - Vercotti - Five Rams collection
connection: Examine the counter.
Open the left drawer. Take the necklace.
Examine and rotate the necklace. Click on the ram's
heads. It belongs to the collection that Butler got from Foley.
Take and read Brian Vercotti's letter. The letter is
from Vercotti acting as middleman to sell the Greek jewelry.
The ring is the only part of the collection
missing.
Open the right drawer. Examine the accounting book
- ledger.
Kenneth Butler took a bracelet and possibly a
ring from the ancient jewel set, the Five Rams of Mytilene. He was arranging
a deal with Brian Vercotti that was to be discussed at Half Moon Street.
Deduction:
Leighton Chapman committed double murder
because of robbery:
Press the B key and do another deduction.
Butler's jewels + Two victims = Burglary
Motive.
See the motive changed to robbery.
The search for the missing Hellenistic
Treasures could be the motive for the crime that was committed in Half Moon
Street. Mr. Turner picked up the bracelet directly after the murder, but the
ring is still missing.
Conclusion: Double murder
because of robbery.
Leighton Chapman committed a double murder at
Half Moon Street. His motive was the theft of ancient and valuable
treasures. The last piece of the Five Rams of Mytilene - the ring with
the ram head – still remains lost.
Moral choice:
Absolve Chapman. Leighton
Chapman committed murder with a burglary motive. You have decided to
imprison him. His sentence will be shortened due to the fact that he is
still a young albeit foolish and impressionable man, and his younger brother
Wiggins would be left completely alone.
Condemn Chapman.
Leighton Chapman is a vicious murderer who committed his crime to obtain
valuable jewels. You have decided to severely punish him by imprisoning him
for life.
Continue Investigation.
Task - deduction:
Open deduction again using the B key.
Open the Firing position (with bicolored cell)
conclusion. Select Simultaneous shots clue.
These caused 2 previous conclusion to be red - in
error. Reenact shooting at Half Moon Street.
Examine the dead bodies and perform re-enactment:
Go back to Half Moon Street.
See Marrow and
Wiggins have another confrontation.
Reenactment: Press the F key to launch Imagination.
Press the F key and see the
silhouette of Vercotti and Butler.
One of the victims fired his gun twice. Find
out who:
Vercotti's shot: Click on Vercotti
to select gunman and see him fire his gun twice at Butler.
Go to the wall behind Butler. Examine the wall.
Too high.
Take the pole with hook on the wall by
Vercotti.
Use pole with lantern on wall. Move the lantern on
the wall until automatically pull back and Holmes says - Nothing interesting
here. There are no
marks on the wall.
Talk to Wiggins.
Butler's shot: Go back to
the bodies. Press F key.
Click on Butler to select gunman and see him fire
his gun twice at Vercotti.
Go to the wall behind Vercotti and use pole with lantern.
Examine the wall.
See a bullet impact at top right area. There was a third shot fired.
(Butler fired twice hitting Vercotti and one on wall. The third shot was
fired at Butler.)
A bullet hole found in a wall at Half Moon
Street proves the event of a third shot. It was fired simultaneously with
one of the known shots, and from a different gun that was not retrieved at
the crime scene.
Task - deduction:
Open deduction by pressing the B key.
Third shot + Leighton's statements = Disappearing
man.
Leighton's statement about a man in a jacket seems
reasonable now that the second weapon that fired the third shot is missing.
Reconstruct Marrow pursuit with lamp:
Talk to Constable Marrow. Holmes will play hide
and seek with Marrow.
As Constable Marrow, walk Half Moon Street and look for Holmes
hiding in the dark. This will be done 3 times.
- Find Holmes hiding at very dark end of the first
alley pass the alley where the bodies are on the ground. I can see you
very well, Mr. Holmes!
- Find Holmes in a recess on left wall of the
first alley before turning to where the bodies are located. Here you are
Mr. Holmes!
- Turn the corner by Turner's doorway and find Holmes standing behind
the broken crates on left wall. It wasn't difficult to find you at all!
No-one could hide in the shadows of Half Moon,
as a single run through this narrow street with a lamp would reveal its
every corner.
Task - deduction:
Open deduction by pressing the B key.
Corners in sight + Leighton's statements = Up the
walls.
If we can assume that there was one more person
in Half Moon Street at the time of the crime, then there was no way forward
or back for his escape – only up.
Let us re-enact the action - recreate the
fireworks described by Leighton and attempt to climb the wall.
Find the flare gun to emulate the fireworks
flashlights and tools for climbing the wall:
Pawn Shop: Jump to
Kenneth Butler's pawn shop.
Go forward and around the corner. Enter the
pawn shop at right end of street.
Get the interesting items.
Take the crampons and ice axe from the
bottom shelf at left upon entering.
Take the flare gun from the shelf behind
the counter.
Reconstruct blinding reflection; hide from witnesses
and escape Half Moon Street.
Imitate the fireworks and determine the method of
escape:
Go back to Half Moon Street.
Constable Marrow and Wiggins are at it again.
Talk to Constable Marrow about the disappearance
from street.
Holmes will stand at end of street and wait for
Marrow and Watson to come and then fire the flare gun. Catch me if you can!
Find the best place to hide
Press the
F key to start the reconstruction.
See 3 silhouettes of men climbing the walls. Click
on the nearest man on the right or on the right wall. Holmes approves the site to climb the walls
on.
Climb the walls: See that Holmes climbed the wall using the
crampons.
Follow the directions seen on the screen.
Immediately press
the key stated (either D or A key) then release.
Then continuously click on left mouse key until the
outer white circle becomes smaller and merges with the red circle at center.
Continue until Holmes climbs the
wall to the top and Watson looks for him.
Watson and Marrow could not see Holmes.
Holmes says the mystery man did not use crampons
or tools to climb the wall.
Follow the trace of the criminal and inspect the attic
of the building:
Find the escape route:
Marrow shows Holmes the door that accesses the top of the building.
Enter the building. Automatically be at the attic
of the building.
Go to the broken window at far left.
Examine the glass shards on the floor.
Examine the broken window. Examine the broken
window in close up. It is wide enough to allow
entry for a man Holmes' size.
Examine the pocket of the torn jacket hooked under the broken
window. It is empty.
Press the T key. The jacket is shabby. Take the black
threads on the torn jacket.
A thick black hair found on the torn jacket.
This jacket belonged to a man who nimbly escaped from the crime scene.
Examine the broken window in close-up.
Holmes concluded that this is the escape area.
The man whom Leighton Chapman saw managed to
hide from other witnesses and escape Half Moon Street by climbing the wall
of a building and entering its attic.
Examine the black threads found on the torn jacket:
Jump to Baker Street. Go to Holmes' analysis
table.
Examine
the thread: Examine the black thread on the stand.
Focus the lens using the middle scroll key.
Examine the black threads again. It is not a thread but hair and it is not
human.
Holmes asks Watson for his horse hair brush.
Ouch! Holmes takes a sample of Watson's hair.
Examine the 3 hairs: horse hair, human hair and
unknown hair. The unknown hair is from an animal larger than a horse.
Deduction:
Press
B key.
Leighton is innocent:
Third shot + Two victims = Crossfire.
Kenneth Butler and Brian Vercotti died as a result
of crossfire, with each of them holding a gun. One of the gun is now missing.
Open the firing position cell and change the
conclusion. Different shots + Leighton's revolver =
Simultaneous shots
Turner could hear the contrast between 2 fired
shots
because 3 shots were made. Two guns fired simultaneously, while a third single shot was
fired directly afterwards.
Wall climber + Leighton's statements = Leighton's
innocence.
Leighton Chapman's statement about a man in a jacket
who participated in the shooting was proven to be true.
Two victims + Butler's jewels = Burglary motive.
The search for the Hellenistic Treasures could
be the motive for the crime. Mr. Turner picked up the bracelet after the
murder, but the ring is still missing.
Wall climber + Exotic animal hair = Circus acrobat.
(This removes the imaginary man conclusion.)
The man who vanished from Half Moon Street could be a circus acrobat; as he managed to
scale a 30 foot high
wall in a matter of seconds. A hair from a big exotic animal was
found in his discarded jacket.
Task - deduction:
Circus acrobat + simultaneous shots + burglary
motive + crossfire + Leighton's innocence = Vanishing act.
The person who was seen only by Leighton Chapman,
escaped the crime scene by climbing the wall - he was a skilful acrobat. The
criminal took a gun from one of the dead bodies.
Request Wiggins' assistance in locating the right
circus:
Pet Toby by the window. LOL.
Achievement obtained: Dog-fancier. Interact
with Toby in every case.
Wiggins: Go to the window and call Wiggins. He's not here;
he is at Half Moon Street.
Jump to Half Moon Street. Marrow tells Wiggins to
go home.
Talk to Wiggins standing at the corner. Holmes asks
Wiggins to look for a circus that has large animals.
The next morning, Wiggins reports to Holmes. He
shows a circus poster featuring The Marvelous Dancing Elephant.
Examine the picture of the elephant and the name
Duval Bros Circus. Holmes says that is just what they
are looking for.
Disguise yourself to enter the circus:
Duval Bros. Circus: Travel to
the circus.
Holmes is prevented from entering the compound by
the circus guard. Holmes inquires about looking for new people.
Learn that they are looking for artistic
lockpicker. Holmes does not look like one of those.
Baker Street: Go back to Baker
Street
by clicking on the gates behind Holmes and be at the map.
Go to Holmes' bedroom and open the wardrobe.
Select an appropriate outfit for an artistic
lockpicker. I selected the bandit outfit with
shabby cap and facial hair but no glasses.
If appropriate, Watson will not recognize Holmes.
Duval Bros. Circus: Travel to
the circus.
Talk to the guard. Holmes-Nigel is now allowed to talk
to the boss Charles Foley.
Explore the circus and become acquainted with Charles
Foley:
Barrels: Climb the stairs
and enter the main building. Open the door.
See and over hear a man Simon Beckett check wet
barrels. He told Charles Foley that they will pick up the supplies at
midnight.
They leave the main tent.
Examine the barrels.
Examine the crack at bottom of the front barrel.
Examine the paint on top. There is a spot that is
intentionally painted out.
Press T key. See a crest on top of the barrel. It
is that of The Honorable Artillery Company. It could be gunpowder.
Hit the crack at bottom of the barrel. Black
powder pours out. Holmes confirms that it is gunpowder.
Check the other barrels and note that they are
arranged in clusters; like brought here in a hurry.
Printing press: Examine the
printing press at right side of the exit to back of tent.
Examine the poster on the press. Examine the picture
of a contemporary man wearing a Robin Hood hat and then the slogan - Rise Up!
And keep rising! From Lambs into Lions!
Holmes takes a copy of the rebellious poster.
Examine blank papers from the pile on the ground.
Holmes deduces that the Merry Men are planning
some sabotage based on the gunpowder and poster.
Charles Foley: Foley
comes in and questions Holmes.
Talk to Charles Foley. Foley asks Holmes to open
the lock near the chains on the table.
Portrait of Charles Foley:
Check the key on the necklace. It is a complex
key in a protected place.
Check the bandaged bleeding wound on arm. It
is a recent trauma.
Check the gun tucked on the belt. Foley is a
cutthroat armed with the Bulldog revolver.
Check the ring on his hand. The ring has the
ram's head and part of the stolen Five Rams of Mytilene.
Check the tapes on the other hand. Taped hand
shows agility and is a practiced acrobat.
Charles Foley has a valuable antique ram
head ring upon his finger. It is the last piece of the missing Five Rams
of Mytilene jewel set.
Charles Foley is wearing a Bulldog revolver
beneath his belt.
Deduction:
Foley's revolver + antique ring = Man in jacket.
Charles Foley wears an antique ring - the last
missing piece of the Five Rams of Mytilene jewel set - and also a revolver
retained under his belt. It proves that Charles Foley is our mysterious
jacketed man who nimbly escaped the crime scene at Half Moon Street.
Open the lock lying in the circus
marquee:
Examine the lock: Go to table
by the barrels and examine the lock. Review the guide for lock puzzles at
top of page.
There are 4 holes at top layers and a 5th opening
on inside layer.
Check all openings and align the lines. Start with
the large openings and check for lines.
There is a skip button.

Talk to Charles Foley and gain his confidence:
Talk to Foley. Holmes' new alias is Nigel Shirley
from York.
Foley asks how Holmes hear about him. Press Q key. Select Jailed
thief.
Holmes tells Foley that he met his brother Vincent
- The Butcher in prison and he told Holmes all about his betrayal.
Foley said
that his brother died in jail seven days ago and the traitor paid blood
price for it. He, Billy and Jack will wait for Holmes
at midnight near the abandoned house. Holmes will share the loot.
Find and examine the secret lock at Notting Hill Manor:
Go to Notting Hill Manor.
Unlock the manor door: Review
the lock puzzle guide at top of walkthrough page.
There are 4 square openings on top layer and 3 at
inside layers. There are 4 layers with the top one split into 2 to be
inserted.
The top layer has to be correctly inserted
together. Check the lines (there are 2 possible insertion points).
There is a skip button.

Find the safe: Go right to the
living room.
Examine the messy bookcase right of the fireplace
and the fallen books on the floor. This cupboard can be moved.
Move the bookcase and see the safe behind it.
Unlock the safe: Review the lock
puzzle guide at top of walkthrough page.
There are 5 square openings on top layer and 2 at
inside layers. There are 3 layers with the top one split into 2. It does NOT
need to be inserted together.
There are extra lines on the edges of the last 2
layers which might throw you off.
See that there is another lock behind the opened
lock. This one needs a key. The key on Foley's necklace.

Set the traps for the thieves at Notting Hill
Manor:
Window upstairs: Go back to the
front door and climb the stairs.
Examine the window. See the possible escape route.
See a reenactment of possible escape through window. Press F key if you want
to see a replay. Toggle the F key to stop replay.
Examine and take the bead necklace on the
table behind Holmes.
Examine the top of the stair. Drop bead necklace
on top of stair.
Press F key to see a possible happening.
Window in hallway by stairs:
Go down to the entryway at left by front door.
Examine the window at end of hall. See a
reenactment of possible escape through window. Press F key if you want to
see a replay. Toggle the F key to stop replay.
Turn left and examine the cupboard that is covered
by cloth. It is a heavy cupboard.
Move the cupboard to block the window.
Replay by pressing F key again and see what might
happen.
See that after seeing the window blocked, the
thief enters the kitchen and out the door.
Hatch on kitchen floor: Look down on the
floor of the kitchen. Examine the hatch on the floor.
Open the hatch. There is no ladder down to the
cellar.
Press F key and see the thief jump over the hole
on the floor.
Go back to the living room via open door at left.
Examine and take the carpet right of the
moved bookcase and a chair.
Go back to the open hatch-hole on floor. Cover it
with the carpet.
Press F key to see the possible happening.
Block the kitchen: Go to the
kitchen and check the back door.
See possible escape route using the living
room, kitchen and out the back door.
Take the chair from the corner and under the window in the
kitchen.
Examine the kitchen door and then the door handle.
Block the door handle with chair.
Press F key to see possible event. See the thief
might destroy the connecting door with a sledgehammer to exit.
Block the living room: Examine
the stove in kitchen. Take the rope.
Go around through hallway and then to living room.
Press F key again and see that the thief uses the
sledgehammer to open the blocked door.
Examine the fallen chandelier. Attach the rope on
the chandelier.
Examine the sledgehammer beside the chandelier and
tie-press rope.
Hang the chandelier.
Press F key to see what might happen to the thief
that uses the living room to escape.
The traps are all prepared now.
Catch the thieves:
Watch the arrival and subsequent trapping of the
thieves. Holmes says that Watson caught all 3 thieves. LOL.
Meet Mycroft. Mycroft tried to use Sherlock to
catch the Merry Men.
Holmes explains about the theft of the Hellenistic
Treasures.
Open the safe using Foley's key. See the stolen
Hellenistic Treasures. Mycroft is not happy.
The famous collection of Hellenistic Treasures
that was considered to be lost, was found in the safe of the abandoned manor
at Notting Hill.
Achievement obtained: Haunted House. Catch the
thieves at Notting Hill Manor.
Deduction:
Press B key to start the deduction.
Foley's vengeance:
Precious safe + Long lost artifact = Hidden
art.
The antiques discovered inside the hidden safe
of the abandoned manor at Notting Hill represent the collection of Hellenistic Treasures that were stolen in 1885 and considered to be lost.
Burglary motive + Leighton's innocence + Crossfire
+ Simultaneous shot + Circus acrobat = Vanishing act.
Vanishing act (man in jacket) + Hidden Art =
Foley's Vengeance.
Conclusion: Foley's vengeance.
Charles Foley organised the theft of the
"Hellenistic Treasures", which was related to the double murder at Half Moon
Street. Leighton Chapman was a witness to the crime.
Moral Choices:
Note - Choose one of
the moral choices to see an ending for this conclusion.
Confirm moral choice.
After seeing what happened after this moral choice - click on "replay
ending" to see
another ending.
Do NOT accept this
decision.
Absolve Foley. No doubt
Charles Foley will be imprisoned - he organised the theft of ancient
treasures that rightfully belonged to the British Museum. In fact, his band
was hired by the Merry Men, who planned a revolution in London. But he did
not directly commit the murder at Half Moon Street. You have decided that
under such circumstances, his sentence can be shortened.
Holmes explains Foley's part in the double murder
at Half Moon Alley.
Condemn Foley. Charles Foley
organised and executed a wicked plan of revenge for his elder brother. It
took two human lives and almost resulted in life imprisonment for an
innocent man. In fact, his band was hired by the Merry Men, who planned a
revolution in London. In addition, he organised the theft of ancient and
valuable treasures that rightfully belonged to the British Museum. He
deserves the rope.
Continue investigation.
The Merry Men:
Holmes tells Watson that he has unfinished
business to do.
Circus tent: See the Merry Men arrive. They see Holmes perched
on a table smoking a cigarette.
Below Holmes is poured gunpowder that leads to the
barrels.
Simon Beckett expounds his cause, the tyranny of
the titled and problems of the working men. They plan to bomb the London
Stock Exchange; to destroy the property papers. They want chaos and inform the working people that they are
free.
Throw the cigarette to light the gunpowder trail.
Run! Now!
Mycroft: At Baker Street,
Mycroft discusses Crime and Punishment by Dostoyevsky, deep love and justice with Sherlock. Hmm...
We serve the truth, not justice.
Watson informs Sherlock that Mrs. Hudson tells him
that the new Lady neighbor wants to store her boxes in the empty spare room.
Summary:
See the summary of the case.
Clues found: 18
Conclusion and moral choice selected are shown.
Use the space bar to see if the clues are all
found.
Selection for replay ending
are seen.
Accept decision?
Note - After seeing the
ending of this moral choice - click on "replay ending" to see
another ending.
Do NOT accept this
decision until you are sure. This will exit the game. Use a saved game
if necessary.
After the credits:
Sherlock Holmes sits by the fire and contemplates.
Case: Open the casebook.
Chronicle: If you finished
the case, see the personality ranking. It depends on your moral choice. The
conclusion and moral choice done are seen.
Trophy: The Merry Men
poster.
Achievement obtained: Guilty Brotherhood.
Finish Half Moon case.
Achievement obtained: Their Crimes, Your
Punishments. Complete the game.
Achievement obtained: I Never Guess.
Reach 6 correct conclusions for all 6 cases
Achievement obtained: I Never Fail.
Finish 10 Dialogue without a failure.
Achievement obtained: A Complex Mind.
Reach all possible conclusions in the game.
Achievement obtained: An Omnivorous
Reader. Receive 3 messages from those whom you condemned or absolved.
Achievement obtained: Keen Observer.
Finish 15 Character Observations without skipping
Achievement obtained: A Methodical
Man. Gather 26 Character Portraits.
Achievement obtained: Child's Play!
Finish 25 mini games and puzzles without skipping.
Achievement obtained: Elementary!
Finish 35 mini games and puzzles without skipping.
Achievement obtained: My Grey
Matters. Finish 45 mini games and puzzles without skipping.
Achievement obtained: A Man of
Character. Receive maximum personality ranking.
Achievement obtained: Perfectionist.
Collect all possible in-game achievements.
This document may not be
distributed without express written permission of the author and the content may
not be altered in any way.
For Questions or Comments
on this Walkthrough,
Please write to:
MaGtRo
Copyright © 09/2014
MaGtRo
 GameBoomers
Walkthroughs and Solutions
GameBoomers
Walkthroughs and Solutions