Tomb Raider III - All Hallows - Walkthrough by Stella
BONUS LEVEL: ALL HALLOWS
NOTE: In order to access this level, you need to find all of the secrets in the game--or cheat. (The all-secrets cheat for the PlayStation version is at http://tombraiders.net/stella/cheats.html. PC players can download a savegame for All Hallows at http://tombraiders.net/stella/zip/allhallows.zip.)
Kills: 2 Items: 14, plus 1 Key and 3 save/power-up crystals Secrets: 0
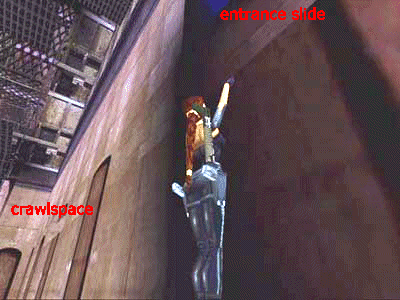
Walk-through: As you slide down the chute, jump and roll to face uphill, and grab the end of the slide. Let go and quickly press Action again to grab a seam in the wall below the chute. Traverse to the left along the seam until you can pull up into a crawlspace. (See the screenshot at http://tombraiders.net/stella/images/hallows.gif for clarification.) Inside is a spiked area with grates on the ceiling to traverse over it. On the opposite ledge you'll find a save/power-up crystal and flares. Traverse back to the crawlspace, go through and safety drop to the ground.
Now you need to make your way up to the top of the room via the suspended platforms, making a couple of pick-ups on the way. Climb onto the cement block to the left of the dome (from the entrance chute). Pull up onto the platform above. Take a running jump to the L-shaped platform ahead. Walk to the end and take another running jump to grab the next platform. Go to the right end and again run and jump to the next ledge. (The tall cement pillars are now on your right.)
Vault up onto the next low ledge. Turn right and take a standing jump to the sloped platform (the right side of this platform is flat and has a railing across it). Pull up onto the platform above, then the next ledge above that, where you'll find some Uzi clips. Safety drop twice to get back down to the ledge with one sloped side. Jump up to grab the grate above and traverse forward, past the railing. Drop to land on the small square platform. Take a standing jump to grab the opening and crawl in to get a small med-pack and a save/power-up crystal. Crawl back out and safety drop to the ground. (NOTE: This will lower your health by about 25%. Hang onto the med-pack and use it just before dropping through the cathedral ceiling.)
Climb/jump back up again to the ledge that's sloped on the left and flat on the right. This time, go to the right end and take a running jump to grab the ledge ahead. Pull up and get some flares. Turn around. See the two tall, angled pillars? Take a running jump to land on the one on the right. (Watch out for the support cable in between.)
Now, MAKE SURE LARA'S HEALTH IS AT 100%. You'll lose nearly all of it on this next maneuver. Walk to the high side of the pillar and jump up to grab the grating. Traverse to the middle of the last square of grating. Then drop onto the other angled pillar. Slide back, grab the edge, and let go to drop through the break-away tiles in the cathedral dome, to land on a catwalk below. There's a large med-pack nearby for a quick fix-up.
Take a running jump to the platform ahead to the left. Pick up the flares. Turn left (toward the wall with only one stained glass window). Angle Lara toward the pillar below, which is set forward from the ledge. Hop back then take a STANDING jump to land on it. Climb into the hole to get Uzi clips and another large med-pack. (NOTE: There's another similar hole at the other end of this walkway. It is blocked by a trapdoor, which you'll open later.)
Stand on the pillar where you landed when you jumped from above, and take a standing jump to land on the black-and-white tiled walkway (on the left when you're facing the wall with two stained glass windows). There's a hall with a switch above, but you don't need to go there yet. Safety drop down to the small tiled ledge. Turn around and take a running jump to grab the ledge on the right side of the central structure. Pull up and climb into the slightly angled alcove at the left.
Turn right and take a standing jump to grab the crevice ahead. Traverse to the left, pull up and take the large med-pack. Use the switch to open a door down at ground level. Now turn around and take a running jump to the suspended platform. (NOTE: Be careful to angle the jump so you take off from the left side of the alcove. That way Lara doesn't bang her head on the ceiling and miss the jump.) Take another running jump to the tiled ledge ahead where there's a small med-pack. Safety drop to the ground. (NOTE: If you don't want to lose any health, jump over to the suspended platform and drop form there.)
Now head for the door you just opened. Run across the break-away tiles with spikes below. Pull the switch to raise a panel with bars above the black-and-white tiled walkway. Use the ceiling grates to traverse back over the spikes. Then climb up to the tiled walkway: Climb into the alcove on the right, which is decorated to look like a pipe organ. Take a running jump to the suspended platform ahead. Then turn left and take another running jump to the small tiled ledge. Pull up onto the walkway.
Climb into the raised hallway and, if you didn't do it earlier, use the switch to open the door that will let you exit the level. Take a standing jump from the opening to grab the ceiling grates. Traverse all the way to the right. Let go and grab the ledge below. Pull up near the zip line. Before sliding, climb the ladder behind you and get the VAULT KEY. Climb back down and ride the zip line across the room. Be sure to let go BEFORE the end to land on the cement walkway. Otherwise, Lara will slide down a chute and fall to her death.
Turn around and take a standing jump over the spikes to grab the crawlspace on the left. Crawl through and drop into the opening behind. A concealed door in the bookshelf opens. Go through it and follow the passage to a ledge near spikes. Stand at either side and take a standing jump to grab the ceiling grates. (If you go down the center Lara will catch fire when the flames ignite). Traverse over the spikes, and let go when you hear a "clank" to drop into a pool between the spikes and the burner.
Swim through the tunnel, past the crusher. Climb out of the water and crawl through the low opening ahead. Push the button there to open a trapdoor above. There's also a small med-pack in the hole above the crawlspace where you came in. Crawl back out and climb the grating ladder.
Take a standing jump over the orange square in the floor. (This is a trapdoor that will drop you on the burner below. Then you'll have to swim past the crusher again to get to the ladder.) Continue forward, into the main room. The door will close behind you. Pull up onto the pillar on the right.
Drop through the trapdoor you just opened into the water below. Climb out in a room with a locked door and two grated alcoves. Shoot out the grating on the left alcove to get some flares. The right alcove has a switch that opens a door back into the main room (located in the dark corner of the room with the pool). It also turns on alarms and arms the nearby blade trap. (NOTE: If you pulled the switch in the raised hallway above the tiled walkway, you won't need to return there, so you can skip this alcove.)
Use the vault key to unlock the door. There's a large med-pack inside in the left corner. On the right is an opening above water. Swim down into an H-shaped underwater area. Head for the middle of the passage, turn left, continue straight to the T intersection, then make another left. At the far end, you'll find a save/power-up crystal. Swim back down the straight passage to the end, where you can surface. There's a guard here, along with his dog. Climb out and kill them. Or, if you have harpoons left, you can shoot from the water.
Climb the ladder, through the trapdoor you opened earlier, and approach the room full of goodies to end the level.
Remember to start a new game now if you want to have all weapons and unlimited ammo.
Copyright © 1998-99 - Stellalune. Special thanks are given to the
participants in the alt.games.tombraider newsgroup, without whom some parts of this
walk-through couldn't have been written. Feel free to copy, distribute and quote this
walk-through, but please include this credit line so people can send me their corrections,
comments and suggestions. Also, if you'd like to offer this on your own web site, kindly
ask permission first.
![]() GAME BOOMER'S hints, cheats, and walkthroughs
GAME BOOMER'S hints, cheats, and walkthroughs
![]() To GAME
BOOMER'S Bulletin Board
To GAME
BOOMER'S Bulletin Board