 Take
the DIARY from the small table. Look at it in the inventory and you'll
find a loose page. Take the page and look at it. You have found your TIME
CARD. Take
the DIARY from the small table. Look at it in the inventory and you'll
find a loose page. Take the page and look at it. You have found your TIME
CARD.
Click
"Alternative" at top right. Choose Diary. Read April's diary to get the
background. Make a habit of reading the diary often. You get April's view
of what has happened and it will give you a better understanding of the
game.
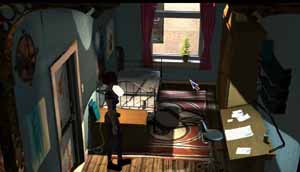
Open
(click it and choose hand, see General Rules above) the closet and look
at the TOY MONKEY. Take it.
In
the inventory look at the monkey and you'll get a close up. Look at the
monkey's EYE, take it and it will fall out. Then take it again to put it
into the inventory. Turn the screw on the close up. You'll learn that the
monkey can make sounds.
Leave
April's room and talk to Zack in the corridor. Then walk downstairs into
the Common Room.
Talk
to Fiona.
Look
at the Notice Board on the wall and take the PINK NOTE. Look at it in the
inventory and you'll see that you also have got a PUSH PIN. Read the note
and then give it to Fiona. She'll give you the GOLD RING.
Talk
to her, ask all the questions, she has a lot to tell you.
Pick
up the MATCHES from the table and go outside.
Outside,
to the left, there is a machine. It is the broken Water-Pump that Fiona
told you about. You must fix it.
Use
GOLD RING on the loose electrical wires (upper right). Save the game.
There
are two handles. Look at them, push them and learn what they do.
The
left handle transfers the read light one step to the right. The right handle
turns the small dials 45 degrees clockwise. The dial over the red light
is unaffected.
 Push
the handles until all the dial are horizontal. It is possible to do this
by trial and error. Push
the handles until all the dial are horizontal. It is possible to do this
by trial and error.
If
you have difficulties, reload the game and do it this way:
Push
left handle 2 times and move the red light two steps to the right,
push
the right handle 2 times.
Push
the left handle 1 time,
push
the right handle 3 times.
Push
the left handle 1 time,
push
the right handle 1 time.
Turn
the knob on the gas valve (left).
Turn
the wheel, then take the CLAMPS.
Don't
forget to take the GOLD RING back.
When
you pass Cortez on the bench he will stop you. Talk to him.
Go
to the Bridges. From here you can reach the Metro, the Park and the Café.
Push
x on the keyboard if you want to find the exits.
Go
through the Park to the Academy.
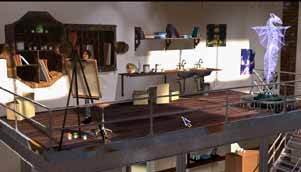 Enter
the Academy, and go upstairs. Take the PALETTE (from the table), then use
it on your painting. Enter
the Academy, and go upstairs. Take the PALETTE (from the table), then use
it on your painting.
Talk
to Emma.
After
the animation, go downstairs, pick up the RUBBER GLOVE from the wastebasket
and return to the Bridges.
From
there go to the Fringe Cafe.
Enter
the cafe and talk to Charley.
Take
some CANDY from the jar and go into the café.
Talk
to your boss Stanley. You have to talk to him until he gives you the money.
Threaten to quit the job.
Take
the TIME SHEET from your inventory, and give it to him.
He
transfers money onto your CASH CARD.
When
Stanley asks you to work, say yes or no. (Remember the choice, because
you have to do as you said, to end the chapter later on.)
Look
at the poster in the far right corner. Read it. Take a TICKET. Look at
it in the inventory to get the address to Roma Gallery.
Talk
to Emma. Take some BREAD from the table.
Go
to the Subway Station.
To
get through the subway gates you must buy a ticket. Look at the gene scanner
to get a close up.
Push
"Week" then show your CASH CARD to the gene scanners eye.
Go
through the gates and enter the Train
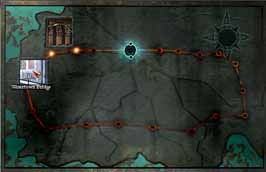 Inside
the train, overhead, there is a SUBWAY MAP. Look at it. It is a menu, that
gives you access to different locations. Every time when you get a new
address, a new location is added to the map. Inside
the train, overhead, there is a SUBWAY MAP. Look at it. It is a menu, that
gives you access to different locations. Every time when you get a new
address, a new location is added to the map.
Save
the game.
Select
destination Roma Gallery. When you leave the train you see the gallery,
go inside.
Talk
to Cortez until he leaves.
To
end the chapter you must do what you choose earlier.
Either
go back to the café and report for work, or go home and talk to
Fiona and Mickey at the apartment until Fiona asks you to watch the TV
with them.
There
are two different endings, depending on where you go. |
