

All images are property of
Warner Bros™
![]()
Written and illustrated by Dr. Hugh
Website conversion and layout by Bert Jamin

|
|
|
|
|
Click on one of these images to go to that Level
 |
 |
 |
 |
 |
 |
 |
 |
 |
 |
Or click on the image at the bottom of this page to go to the next Level
To go to one of the sublevels just click on one of these links:
© February
2003 Bert Jamin (www.gamesover.com)
This walkthrough may not be sold and may not be used for any commercial
purposes. Neither is it permitted to publish this walkthrough in any way without
the written permission of the author. Feel free to place this walkthrough on
your web site or on your home page, on condition that no part of this
walkthrough is changed and that the name of the author (Dr. Hugh), the URL of
the owner of this site (
www.gamesover.com ) and his E-mail address (
gamesover@planet.nl
) are mentioned unchanged. For the most up to date walkthroughs always visit
www.gamesover.com.
If you have any suggestions to improve this walkthrough, let me know by sending me an email: gamesover@planet.nl .
Wingardium Leviosa Lesson
Attend Professor Flitwick’s Charms Class on the fifth floor.
Find 2 Secret Wizard Cards. Find 7
Secret Areas.
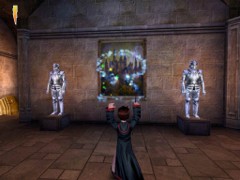
[1.7] Harry is now in a room with 2
armor statues and a bunch of fellow students.
Cast Flipendo 4 x on each tin soldier to get a small
collection of Bertie Bott’s Beans. Left of the armors you can cast Flipendo on a
cauldron and get some more Beans.
If you go to the students standing on the room on the red
rug one of them will say:
Have you met Hagrid? He’s so large I
can scarcely see the top of his head.
Then go meet Hermione who is standing in front of a door
with a sparkling padlock: You’re early for the lesson, Harry. But I’ll teach
you a new Spell I’ve learned on my own. The Spell I learned is Alohomora.
It will open magically locked things,
but don’t get into any mischief.
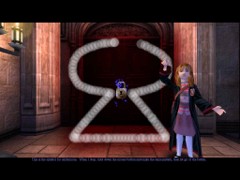
This is the symbol for Alohomora
When I stop, hold down the left mouse button and make the
same pattern, then let go off the button.
Just like last time with the Flipendo Charm of Prof.
Quirrell, you get four tests. Your first grade is 50%. If you make it past the
grade, Hermione will say:
Great Harry, I’m sure Prof. Flitwick
would give you 5 house points for that charm.
The second grade is 65%, third is 80% and fourth is 95%. The
next points you earn are 10, 15 and 20, resp. This procedure will be the case
with all other Spells you will learn in this game.
Now you try using Alohomora. We still have a few minutes
before the Charms lesson. That door in front of you is magically locked. Cast
Alohomora to open it.
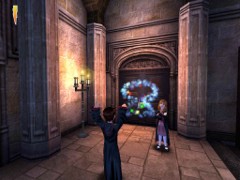
Harry tries out his first Alohomora Spell
Cast Alohomora onto the door. It will open and Harry and
Hermione run into the next room.
You’ve got it, says Hermione.
Now... can you find the two Secrets in this room?
Cast Flipendo on the tin armor (it
will throw a Bean for Harry) and a first Secret Door will open. Inside you’ll
find your Wizard Card #28:
Tilly Toke, 1903-1991, Awarded Order of Merlin First Class for saving lives
during the Ilfracombe Incident of 1932, when a Dragon swooped down a beach full
of sunbathers.
A Wizard Card in the Secret Room
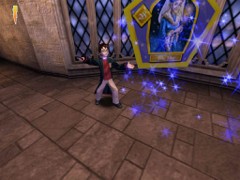
Cast Alohomora on the bookcase.

Alohomora on the bookcase
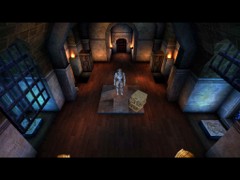
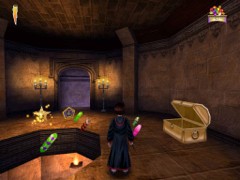
That will open an access to a next room with a large
mirror. Harry will admire himself in the mirror (he’s handsome, isn’t he?):
If you’re done admiring yourself,
Harry, take a look at that magical chest. Cast Alohomora to unlock it.
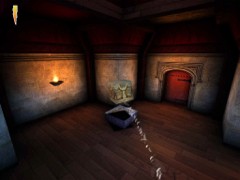
Cast Alohomora on the chest and it will open and spit out
some Bertie Bott’s Beans. Next, cast Alohomora on the mirror.
Cast Alohomora on the mirror
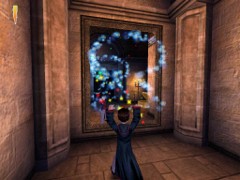
Inside you may catch a Chocolate Frog. Get out of here and
cast Alohomora on the door and enter the next room. Here inside cast Alohomora
on a painting.
Charm the painting
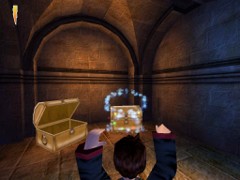
Enter the Secret Area and cast Alohomora on the chest to
extract some Beans.
Charms Class is through this door.
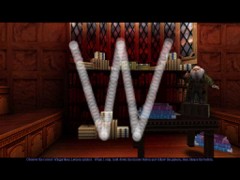
First cast Alohomora on the bookshelves.
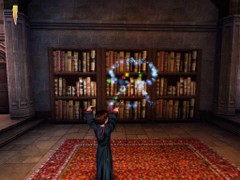
Cast Alohomora on the bookshelves
Climb the ledges into the Secret Room and open the chest with
Alohomora. Get more Beans out of that chest.
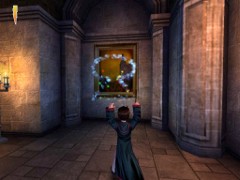
Leave the room and look at the painting between the two tin armor men. Cast Alohomora on the painting.
Alohomora on that painting
That will open and unveil a Secret Area with one BB Bean.
Inside, a wall will open up and give access to two chests. However, if you did
not cast Flipendo four times on each of the tin men at the beginning of this
save block, do it now or that wall would not open up.
Two chests in the Secret room
The two chests are opened with Alohomora and contain a number
of Beans.
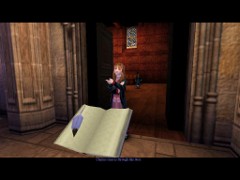
Now go out and save by the Book.
[1.8] Professor Flitwick welcomes the students:
Observe the correct Wingardium Leviosa symbol
By now, you know how to learn a spell. You can get up to 50
points for Gryffindor if you can follow the W-sign four times correctly passing
the marks.
You may now enter the Wingardium Leviosa Challenge to
practice the Spell. Follow me, Mr. Potter.
Follow the Professor to the next room.
Cast
Wingardium Leviosa on that statue, then move it onto that large plate.
Charm the statue with Wingardium Leviosa and place it onto
the square plate left or it. You may repeat the charm if the statue won’t move
far enough. In that case, go stand near the statue and apply the Spell again.
Moving the statue
That will open a door.
Well done, says the Professor.
Now go and collect the Challenge Stars. I’ll meet you at the end. Good luck,
Mr. Potter!
Go inside and cast Flipendo on a cauldron for some Beans.
Turn right in the corridor and a door will open allowing two
Gnomes to attack Harry. Stun them with Flipendo.
The door gives access to a room with a Flipendo switch. Cast
Flipendo on the switch.
The grille door in the previous corridor will open and you
can take your first Challenge Star.
Go down the stairs and save your game by the Save Game Book.

Time to save!
[1.9] Go down the stairs and knock
over two cauldrons with Flipendo.
Take out the Beans. There are two bookcases with a Bean on
top and a chest is standing in the middle. Cast Alohomora on the chest for Beans
and a Choc Frog and grab the Beans on top of the bookcases.
Enter the next room and take care of two more cauldrons.
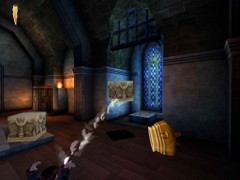
In the middle of the room there is a tin soldier. Cast
Flipendo twice on him to get more Beans. There are two Wingardium Leviosa blocks
in front of the tin soldier.
Further there are two tall blocks with Flipendo signs on
them. If you look well you’ll notice a Gnome hiding behind each of these blocks.
Cast Flipendo on each block and immediately stun the Gnome
that is thus released. When the blocks have moved aside you can cast Flipendo on
two switches on the wall. Those will open the grilled doors on each side in the
room.
The grilled door slides upward
Now you’ll have to move each W-block onto the platforms in
the newly opened rooms. Cast Wingardium Leviosa on these blocks.
Move the block with WL
These will open two parts of a sealed door towards a
Challenge Star.
Then you’ll be entering a wonderful balcony with a Save Book. First go left and grab your 3rd Challenge Star.
Now save your game.
[1.10] On the other side of the balcony you will have to move another statue with the Wingardium Leviosa Spell onto the square plate.
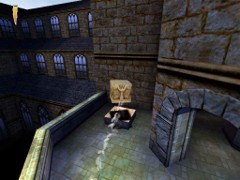
Move that statue
Once you’ve done that, a floating ledge will come near, so
you can take a ride to the opposite side and grab your 4th Challenge
Star.
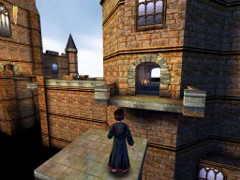
On your way to another Star
Here on this side there are two more statues that have to be
lifted with Wingardium Leviosa and placed upon switch plates. The first will
trigger a floating ledge and the second will open a door in the wall giving
access to a Secret Area.
Once inside, first cast Flipendo on the wall switch. That
will make a second floating ledge with a Challenge Star come near. Then, cast
Alohomora on the large mirror giving access to the actual Secret Area. Climb
some ledges until you’ll arrive in a room with three chests and Challenge Star
#5. The chests can be opened by charming them with the Alohomora Spell. One of
them contains a Wizard Card, the others BB Beans.
A Card and Beans is what these chests contain
Take your
Wizard Card #10: Burdock Muldoon,
1429-1490, Chief of Wizard’s Council 1448-1450.
Jump down the hole catching the 5th Challenge Star
and go to the balcony where you may jump to the floating ledge. Turn left and
jump to the ledge with your 6th and final Challenge Star.
Return to the previous ledge and from there jump to the
opposite side when the ledge is near. Prof. Flitwick will meet Harry there:
You’ve collected all the Challenge
Stars! 20 points for Gryffindor! Now off you go!
Cast Wingardium Leviosa on a statue and levitate it onto the
plate. A wall will open giving access to a Secret Room with a chest inside. Cast
Alohomora on the chest and retrieve a number of BB Beans.
Go out and approach the exit door. This will open and you’ll
enter a new sublevel.
Let's follow Harry into the
