|
Written
by Dr. Hugh and Danny Kriestanto With
Team: Anna,
Bert, Diane, Jean
|
|
Written
by Dr. Hugh and Danny Kriestanto With
Team: Anna,
Bert, Diane, Jean
|
Click on one of these images to go to that Level
 |
 |
 |
 |
 |
 |
 |
 |
 |
 |
 |
 |
 |
 |
Or click on the image at the bottom of this page to go to the next Level
© June 2004
Bert Jamin (www.gamesover.com)
This walkthrough may not be sold and may not be used for any commercial
purposes. Neither is it permitted to publish this walkthrough in any way without
the written permission of the author. Feel free to place this walkthrough on
your web site or on your home page, on condition that no part of this
walkthrough is changed and that the name of the author (Dr. Hugh), the URL of
the owner of this site (www.gamesover.com) and his E-mail address (gamesover@planet.nl) are mentioned unchanged. For the most up to date walkthroughs always visit
www.gamesover.com.
If you have any suggestions to improve this walkthrough, let me know by sending me an email: gamesover@planet.nl .
LEVEL
11
COMPLETING
REQUIREMENTS
Mission:
Complete your third year requirements and return to Professor Dumbledore outside
in the Courtyard.
Courtyard
[11.1]
Harry, Ron and Hermione walk outside the Castle to the Courtyard and meet the
Professors Dumbledore and McGonagall.
Ah,
glad to see you three survived your final exams. Hermione:
Oh, they were great fun! Ron:
Speak for yourself. I’ll be having nightmares for months. Well,
then. Let’s see whether you’ve completed all of your third year
requirements.
Now you’ll get a look at the Achievements list. The boxes that are checked indicate completed requirements. The unchecked boxes don’t and these required achievements need to be completed to beat the game.
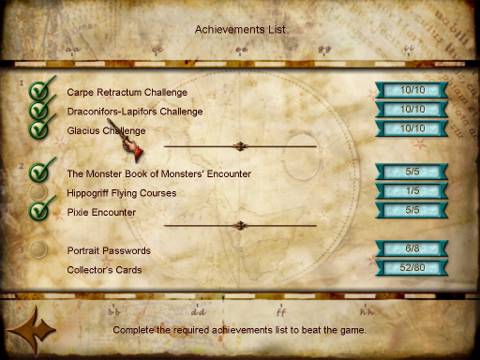
The Achievements
list: two boxes still unchecked
From
the list it seems like we’ll have to fly 4 more courses with the Hippogriff
and get 2 more Portrait Passwords from the twins’ shop. We’ll also have to
purchase some more Cards from the sellers.
Altogether that should complete our Collection of Cards from 52 to 80! Looks
like you’ve got a few things to finish up yet. Off you go.
Return
to the Courtyard and turn left onto the Grounds. Pass the bridge and before
entering the Hippogriff course area through the portal (with two red banners
bearing Hippogriff images), save by the Book left of it.
Mini-game:
Hippogriff flying
[11.2]
Enter the paddock.
The
game will load without a save point and you’ll get a Hippogriff Course
Selection screen. Select a course by clicking on a number and then click on Play.
Now
Bucky comes running in and Hagrid and Harry meet again: Hello,
Harry! Back fer some Hippogriff ridin’, are yeh? If
it isn’t too much trouble... No
trouble at all, Harry!
You
have to match the score in the upper right corner to get a Collector’s Card.
Should you get lower points Hagrid will say: Hard
luck, Harry. Try again! The
Cards you’ll earn are:
2nd
Course - Score 2800
Quidditch
Card # 2: Gwenog Jones (1968 – present) – Captain and Beater of only
all-female national Quidditch Team, the Holyhead Harpies.
3rd
Course – Score 4000
Quidditch
Card # 3: Cyprian Youdle (1312 – 1357) – Only Quidditch referee ever to be
killed during a match. The originator of the curse was never caught but believed
to have been a member of the crowd.
4th
Course – Score 4900
Quidditch
Card # 4: Roderick Plumpton (1889 – 1987) – Seeker for England Quidditch
Team. Holds British record for fastest capture of Snitch during game: three and
a half seconds.
5th
Course – Score 5600
Quidditch
Card # 5: Bowman Wright (1492 – 1560) – Famous for developing the Golden
Snitch.
Harry
may return any time to improve his scores. Back on the Grounds go up the stairs
to the bridge and traverse the
Courtyard into Hogwarts Entrance Hall. There
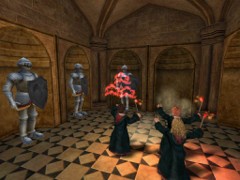
will be a long game load (but no save point). There is that darn Peeves again! Harry:
I thought we’d seen the last of you, Peeves! Peeves
is wearing armor now. Ron:
That armor looks red hot!
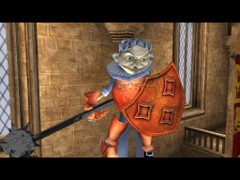
Oooh,
ickle kiddies... Want to play?
An
autosave is now made.
Portraits
[11.3]
Cast triple Rictusempra on Peeves and make sure to strafe when he throws a nasty
thing.
Peeves
will then be stunned for a while. Immediately cast Glacius and he will shed a
piece of his glowing armor. Oh,
looky, looky! Cracked-Potter has a new spell! That’s not nice! Keep
an eye on Peeves’ stamina meter in the upper right corner.
After
5 combined blasts Peeves will forever slink off crying (in this game!). Ha!
So much for him! Brilliant work, Harry! Thanks...
I quite enjoyed it. Hermione
has some typical doubts: You don’t think we overdid it... making him cry like that?
Ron has also his typical kind of answer: Don’t worry, he’ll be back to annoy us again in no time.
[ ** note: In the next game... Ha-Ha!]
Pick
up two Cauldron Cakes that Peeves has shed. Now
head right, to Hogwarts Side Chamber and save by the Book in there.
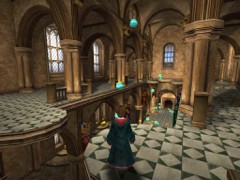
[11.4]
Take Portrait 7 straight up to the 7th floor.
Pass
the Portrait of the Living Lady and enter Fred and George’s shop. Now purchase
the two remaining Portrait Passwords:
CC
25 – Leopoldina Smethwyck Portrait Password
Harry
hasn’t got enough Cauldron Cakes to buy the last one (Bridget Wenlock Portrait
Password at CC 30). A Cauldron Cake costs BB 50. You’d better not spend most
of your Bertie Bott’s Beans on that Password, because you may still need some
spare Beans for buying Cards from the sellers! So better play it safe now and
perhaps we’ll find some more Cauldron Cakes in the Portrait side games!
7th
floor Portrait: Leoplodina Smethwyck
Leave
the Shop through the Portrait of the Living Lady and run to the room in front of
you. There is the Portrait of Leopoldina Smethwyck. Harry speaks the Magic
Password: Polyglottal, and the
Portrait opens up giving access to a room.
Enter and the game will be loaded (no save point though). Follow the track of Beans all along the stairs into a Library and take a Cauldron Cake! (What did we predict, huh?). Then you will be attacked by a Swarm of Pixies.
Damn
Pixies!
Strafe
and cast Rictusempra to blow them forever away and a Spongify tile will appear
on the floor in the middle of the room. The Tapestry on top of the grated alcove
will roll up and a load of Beans are thrown on the floor and a track of Beans
appear in the air. Spongify
the tile and jump up, grabbing all the Beans and land in the opening that was
hidden by the Tapestry.
Cast
Depulso on the wall sign and something happens... but what? Jump down to find a
track of Beans that leads to an entrance under the Hufflepuff banner. Follow the
track into a room with 3 Chocolate Frogs and first get all three of your stamina
levels full (just eat enough to get fully loaded and spare the other one(s).
Cast triple Alohomora on the triple locked chest in there and get an enormous
load of Cauldron Cakes, Beans and Pumpkin Pasties!
Back
in the main room you’ll be attacked by angry books! Cast Depulso to burn them up
and a track of Beans is formed to the now open alcove with a triple locked
chest. If you’re hurt eat the rest of the Frogs in the next room.
Cast
triple Alohomora and another full load of Bertie Beans, Cauldron Cakes and
Pumpkin Pasties will be spit out, together with your Beast
Card # 1: Imp – Found only in Britain and Ireland, the Imp has a slapstick
sense of humor and will amuse itself by pushing and tripping the unwary.
5th
floor Portrait: Derwent Shipling
[11.5]
Take the stairs on your right to the 6th floor.
Enter
the room and meet the Portrait of Bridget Wenlock. Hermione says: If
we want to see what’s behind this Portrait, we’ll have to buy the Password
from Fred and George’s shop.
Yes,
this was the one we didn’t purchase, right? Let’s
play it safe and keep this Portrait for the last. Go
to the 5th floor, enter and on your right there is the Portrait of
Derwent Shimpling. Harry speaks the Password: Tummy-button.
Enter,
and after a game load (no save point) follow a track of Beans into a Library
where you’ll be attacked by 8 Imps. Push their fire crackers down their
throats and in the middle of the room a Chocolate frog will appear.
You
can cast Depulso thrice on the right Suit of Armor and get some Beans out of
that can. Depulso on left can will get a first load of 13 Pumpkin Pasties! A
second Depulso will shake out 9 Pasties. There
are two Slytherin banners above the tins Suits. Cast Depulso twice on each to
get some Beans. The banners will then roll up.
Depulso
on these banners
Now
cast Alohomora on the Tapestry. It
will roll up and a Chocolate Frog will appear behind it. Enter your 1st
and only Secret Room. Cast Alohomora on the chest and obtain 7 Cauldron Cakes
and your Beast Card # 7:
Manticore – A rare, dangerous beast, the Manticore has been known to sting
softly as it eats its prey. Its sting will kill instantaneously.
When
returning to the main room cast Depulso on the cauldron for another load of
Beans. Get
out of here and after a game load (no save point) you’ll be back on the 5th
floor.
4th
floor Portrait: Bertie Bott
Go
down to the 4th floor, go in, ascend the stairs with the green carpet
and meet Bertie Bott’s Portrait on your left. Approach the Portrait and Harry
speaks the Magic Password: Bibble.
Enter
a room with Beans and two chests. Cast Alohomora on the table chest and get 14
Pumpkin Pasties and your Beast
Card # 6: Giant Squid – the bane of ancient mariners and students at Hogwarts
– should the latter decide to go for a dip in the lake.
Also
a Spongify tile has appeared on the carpet. But first cast Alohomora on the
chest on the floor: 13 Pumpkin Pasties and 8 Cauldron Cakes. Wow … this is
getting great here! Cast Spongify on the tile, jump up and catch two more
Pumpkin Pasties and a Cauldron Cake. Now
cast Alohomora on the painting above the table.
It
will slide up and a Skull will spit out some Beans. Now turn right and notice
two chairs. Cast Depulso on each and they will rotate through an angle of 90°.
Both chandeliers left and right will shed each 3 Beans. Coming out of this room
run straight into a Save Book in the next room.
3rd
floor Portrait: Hesper Starkey
[11.6]
Go down to the 3th floor.
Go
in and check everything but there is no Portrait here. So, descend to the 2nd
floor and say hello to your old Gargoyle buddy. Turn left, then right, and
opposite of the triple locked chest meet the Portrait of Hesper Starkey. Use the
Magic Password Lunartickle to enter
this area. Jump in, a game will be loaded (no save point) and enter a room with
two Suits of Armor. Look up to higher floors ending with a ledge and a
Collector’s Card. Cast Depulso on each tin soldier for the Beans and a
Spongify tile will appear in between them on the floor. Spongify and jump up to
the second floor. Cast Depulso on the wall sign. A door on either will open and
two Imps appear. Fry them and two more come out of the other room. Double fry
them and a Spongify tile appears on this floor. First get into that room (on
your right?) and cast Alohomora on the chest in there. Get Beans and 9 Pumpkin
Pasties.
Now
take care of the chest in the left room: more Beans but only 4 Pumpkin Pasties
(we’re getting spoiled). You’ve
already noticed the Fire Crabs on the next floor. Cast Spongify on the tile and
get up. Get both Crabs in the hole with Rictusempra and a Spongify tile appears
on the floor. On top of that lies a Cauldron Cake and you also get a Chocolate
Frog. Spongify, jump up, catch the Cake and land on the ledge seizing Beast
Card # 5: Gnome – A common garden pest, the gnome lurks in holes in the ground
and may run out and attempt to trip up the unwary traveler. Can be ejected from
the garden by swinging in circles and flinging it over the garden wall.
Get
out of here and after a game load (no save point) save by the book next to the
Gargoyle.
1st
floor Portrait: Tilly Toke
[11.7]
Go down to the 1st floor.
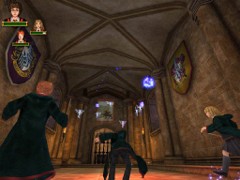
Enter and turn right heading for the Portrait of Tilly Toke. Speak the Magic Password: Dirigible and enter. The game will load (no save point) and you’ll all enter a room with a triple locked grated door. Cast triple Alohomora to get access to a Gargoyle. Cast Lumos on the Gargoyle and the left wall will be charmed. Go in there, from the stairs and meet 6 Suits of Armor each with a shield.
Six
suits or Armor each carrying a shield
Cast
triple Depulso on each and smash them into thrash. When all six are turned into
scrap metal the left wall will retreat revealing a staircase going up to your
left. Follow
the first part of the stairs and look left: there is that Gargoyle you just
charmed! Follow the next part of the stairs and the game will be loaded.
You’ll be out of that area again. Apparently there is NOTHING in there? No,
no, try again. This time when you’ve sent the tin cans to their recycling
plant turn left and find stairs leading down to a room full of Cauldron Cakes
you did not notice the first time!
There
are 12 Cauldron Cakes in there! Go ahead and collect them all. Cast Alohomora on
the chest and get a full load of Beans and your Beast
Card # 4: Billywig – Has a long thin stinger that causes giddiness followed by
levitation. Dried Billywig stingers are used in a variety of potions.
Get
out of there and on top of the stairs there is a new circle of Beans with 3
Pumpkin Pasties in the middle of them. Get the goodies and take the stairs on
your left again to get a game load and get back in the hallway. Save
your game by the Book there.
[11.8]
Go out of the Great Hall and descend the Monumental Staircase.
Enter
the Dungeons on your right, and walk straight to the door past the Gargoyle and
it will open allowing access to the Dungeons! Now there is a game load without a
save point. On
your left and right there are locked doors (perhaps the Debug mode later on?).
Walk up to the end and notice two Portraits in here.
Dungeon
Portrait: Glover Hipworth
Go
to the end and follow the passage on your right to the portrait of Glover
Hipworth. Spell (or say?) the Password Gezundheit
and enter in there. You’ll
have to pass a Save Book.
[11.9]
Cast Lumos on the Gargoyle in front of you and the wall on your left will be
charmed.
Proceed
until the gap and cast Rictusempra on the Fire Crab until it tumbles into the
trap hole at the far end. A track of Pumpkin Pasties will appear. But first
backtrack to the charmed wall and cast Alohomora on each chest. The chest on the
right (facing the charmed wall) sheds 4 Pumpkin Pasties and the chest on the
left a bunch of Beans. Cast again on this one for a new load of Beans.
Now
turn around and jump on the walkway following that track of Pasties and Beans.
Careful now. There is a dark part on that track. Stop here and push those Fire
Crabs on your left and right into their holes before going further. More Pasties
and Beans will now appear in a straight line after a door will be opened.
Further up there is another dark part on the track where you’ll have to push a
Fire Crab into a hole on each side. The track will build further on.
Follow
till the corner and turn left. There are two chests on your right. Cast
Alohomora twice on the first one for loads of Beans and on the second one for 4
Cauldron Cakes and your Beast
Card # 3: Bowtruckle – A tree-guardian adept at dodging most kinds of charms.
May attempt to gouge out your eyes if you approach its tree home in a
threatening matter.
Dungeon
Portrait: Mopsus
Turn
right and now enter the Portrait of Mopsus with the Magic Password Forsooth.
Also here you’ll pass a Save Book.
[11.10]
Go down the stairs and notice a Collectors Card behind a grated door.
Turn
right and Spongify the tile. That will allow you to cross a deadly gap and land
on a ledge with another tile and a chest. Cast Alohomora on the chest twice for
Beans. Spongify this tile and land on another similar ledge. Cast Alohomora
twice on the chest for each time you will get Beans and 2 Pumpkin Pasties.
Spongify and jump to a third such ledge. Alohomora twice on this chest provides
a double load of Beans and a Cauldron Cake.
Spongify
this tile and land on the ledge behind the grated door you saw at the beginning.
Catch your Beast Card # 2:
Doxie – Sometimes mistaken for a fairy. Nests in bushes and, if approached,
will attempt to bite with its double row of sharp, venomous teeth.
There
are two chests here. Facing the grated door cast Alohomora on the right hand
chest and receive a stack of Beans and a bonus of 3 Pixies! Apply your strongest
insect repellant. The left hand chest? … 4 of those white nasty fake
Dragonflies! After having crushed them pick up the Chocolate Frog. The grated
door has gone up but also look left: a track of Cauldron Cakes and Pumpkin
Pasties is leading downward. So why not try a jump into the deep following that
track first? Run and jump down. You’ll
land on the previous ledge again. Spongify the tile, jump up and grab the ones
you’ve just missed.
Now
go out and immediately notice a tile on your left and a track of Pasties in the
air. Spongify and follow the track down, grabbing all goodies. You’ll land on
one of the previous ledges. Spongify this tile and jump up along another track
of goodies. Look left and see another track full of treasures! Spongify, jump up
and catch them all! Spongify and bounce up to the ledge where you fought those
pesky Pixies. Now go straightforward and exit this area, and meet Ron and
Hermione again. Go
left, out of the Dungeons and speed straight up to Hogwarts side Room where you
save by the Book first.
[11.11] Take Portrait 7 up to the Fred and George’s shop and purchase your last Portrait Password.
CC
30 – Bridget Wenlock Password
Go
to the 6th floor and enter her Portrait with the Magic word Snafflejack.
Go
in here and again a game load without a save point will be made. Go to the right
and enter a tall room with paintings, bookcases and Tapestries. Cast
Alohomora on the bookcase on your right and it will retreat revealing a room.
Go
in there, turn right and cast Depulso on the wall sign. Turn
right and observe how a Spongify tile has been set free on the floor. Cast
Spongify and jump up into a higher room with a Tapestry and a Suit of Armor.
Cast Depulso on the tin man and get 11 Pumpkin Pasties.
Next
cast Alohomora on the Tapestry and it will roll up. Go inside the passage, turn
left and enter a room with a Suit of Armor and a Spongify tile. Cast
Depulso on Mr. Tin and get Beans and 5 Pumpkin Pasties. Spongify
the Carpet and land in a similar room on the opposite side. Cast Depulso on the
suit of Armor for 5 Cauldron Cakes. Spongify the tile and end up in a higher
room with a tile and a red Tapestry high up. Spongify
this tile and land in a room with a ledge containing a tile.
Spongify
this tile and end up down below in a Library. Cast Alohomora on the cabinet and
all hell breaks lose! You’ll get a Collector’s Card and a pack of angry
books. Defeat these books by strafing from left to right and always casting
Depulso. When all pages are gone up in flames an enormous pile of beans and
Pumpkin Pasties will become your property, as well as 3 Chocolate Frogs.
A
stack of goodies!
Pick
up all these goodies, eat a Frog if needed and collect your final Beast
Card # 8: Unicorn – The Unicorn is a shy creature and generally avoids human
contact. It is more likely to let a witch come near it than a wizard and casting
magic spells may frighten it off. Its blood has highly magical properties.
Final
collector’s Cards
Get
straight out of this area and up again to the 7th floor, and save by
the book in front of the Portrait of the Living Lady.
[11.12]
Hear that guy again who is forever calling Harry?
Well,
you’re loaded with stuff now, so talk to him again. He will offer the final
Collector’s Card to be earned in the game:
PP
70 – Wizard Card # 14: Thaddeus Thurkell (1632 – 1692) – Famous for
producing seven Squib sons and turning them all into hedgehogs in disgust.
BB
75 – Final Witch Card # 4: Wendelin the Weird (Medieval, dates unknown) –
Alleged to have enjoyed being burnt at the stake so much that she allowed
herself to be captured forty-seven times in various disguises.
PP
40 – Wizard Card # 9: Wilfred Elphick (1112 – 1199) – First Wizard to be
gored by an African Erumpent.
PP
20 – Wizard Card # 12: Dzou Yen (4th Century B.C.) – Chinese
Alchemist.
The
guy runs off now. And this is the entire set of Collector’s Card you could
obtain while playing the game so far – 74 Cards! Time has come for a final
visit next door to Fred and George’s shop!
Go
straight to the side Room and catch your Bonus
Collector’s Card # 75 – The final Wizard Card # 15: Harry Potter – The boy
who lived.
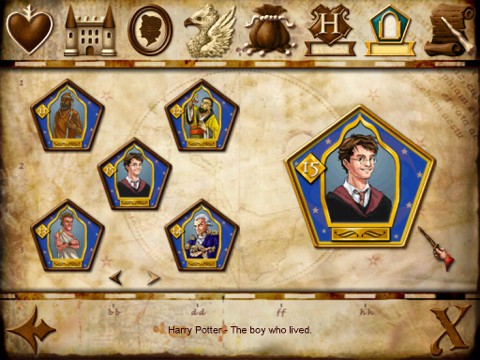
We
always find this so touching!
Beans
Bonus Room: fourth Round
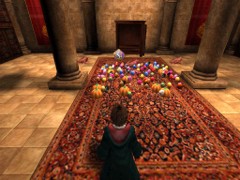
Now
you will get a visit to the Beans Bonus room without a time limit and may
collect anything you can in there!
The
Beans Bonus room is yours now!
Spongify
the first tile and jump up along a track of Beans and your Bonus
Card # 4: Salazar Slytherin (Medieval, dates unknown - - Co-founder of Hogwarts.
Gave his name to one of the four Hogwarts houses.
Have
a good look around here. On top you see two more Collector’s Cards. Bur first,
let’s empty the entire first floor. You
can’t open the chests here for now: just follow the tracks of Beans.
Meet
Bonus Card # 3: Helga
Hufflepuff (Medieval, dates unknown) – Co-founder of Hogwarts. Gave her name
to one of the four Hogwarts houses.
(you’ll find this Card twice!).
When
the whole first floor is “cleaned” of goodies, go up by the Spongify tiles.
Grab Bonus Card # 2: Rowena
Ravenclaw (Medieval, Dates unknown) – Co-founder of Hogwarts. Gave her name to
one of the four Hogwarts houses,
and
also Bonus Card # 1:
Godric Griffindor - (Medieval dates unknown)- Co-founder of Hogwarts. Gave his
name to one of the four Hogwarts houses.
And
up on the second floor cast one of the Spongify tiles, jump up along a huge
track of Beans catching your final Bonus
card # 5: Dumbledore – Headmaster of Hogwarts!
Now
you’ll notice a Depulso sign on the floor. Cast Depulso and all the chests
will open up spitting loads of goodies!! And
now you’ve got everything you could have taken here! Go out of the bonus Room
and the game will be loaded and you’ll end up in the Hogwarts Side Room.
There’s a book where you can save.
[11.13]
Go out of the Castle and meet the Professors Dumbledore and McGonagall left of
the Courtyard.
Well
done, all of you! You’ve completed your third year requirements. Splendid
work. Absolutely splendid. You
should all be very proud of yourselves. What you did for Sirius Black and
Buckbeak was truly courageous. Now,
do try and behave yourselves during the summer holidays.
The
game will be loading offering you congratulations!
You’ve
completed your third year at Hogwarts!
As the Hogwarts Express carried him and his friends back to King’s Cross Station, Harry recalled something Professor Dumbledore had said... You think the dead we have loved ever truly leave us? You think that we don’t recall them more clearly than ever in times of great trouble? Your father is alive in you, Harry, and shows himself most plainly when you have need of him. We now say goodbye to Harry in the train.

Hogwarts
Express is leaving for home!
And...
we’ll soon meet again with...
Harry
Potter and the Goblet of Fire!!
In
the name of Dr. Hugh’s international walkthrough team,
Anna,
Bert, Danny, Diane, and Jean:
Enjoy
the game!
Antwerp
Bogor
Doncaster
Phnom Penh
Yogyakarta
Zoetermeer
June
27, 2004