|
Written
by Dr. Hugh and Danny Kriestanto With
Team: Anna,
Bert, Diane, Jean
|
|
Written
by Dr. Hugh and Danny Kriestanto With
Team: Anna,
Bert, Diane, Jean
|
Click on one of these images to go to that Level
 |
 |
 |
 |
 |
 |
 |
 |
 |
 |
 |
 |
 |
 |
Or click on the image at the bottom of this page to go to the next Level
© June 2004
Bert Jamin (www.gamesover.com)
This walkthrough may not be sold and may not be used for any commercial
purposes. Neither is it permitted to publish this walkthrough in any way without
the written permission of the author. Feel free to place this walkthrough on
your web site or on your home page, on condition that no part of this
walkthrough is changed and that the name of the author (Dr. Hugh), the URL of
the owner of this site (www.gamesover.com) and his E-mail address (gamesover@planet.nl) are mentioned unchanged. For the most up to date walkthroughs always visit
www.gamesover.com.
If you have any suggestions to improve this walkthrough, let me know by sending me an email: gamesover@planet.nl .
LEVEL
5
DRACONIFORS
- LAPIFORS
Hogwarts
Castle
Secrets:
4 (2 left to be found)
Mission:
Go to Transfiguration Class on the first floor.
[5.1]
First explore the 8 paintings and approach each.
They
will slide upward giving a fast passageway to a certain floor. Harry will name
the paintings:
0:
Mortal Dread
1: Haddock
2: Cheese Charmer
3: Malevolence
4: Piggywiggy
5: Manticore
6: Sea Serpent
7: Starshine
First
go to the other room (the access room to the Challenges) and cast Depulso 5
times on each Suit of Armor on the right end. That will augment your number of
Beans.
[5.2]
Peeves is chucking stink pellets, so keep using your strafe keys to go from left
to right while casting triple Rictusempra and then immediately after that Carpe
Retractum.
Peeves
will then throw Pumpkin Pasties. He will drop off after a few hits and the
grated doors will slide upward again.
[5.3]
Go to the second floor and cast Alohomora on the bookcase on your right.
The
bookcase will slide to the right unveiling a small room with a chest. Cast
Alohomora on the chest and some angry book pages will escape. Cast Depulso on
them and when they’re gone the other bookcase will slide to the left. Go
inside there, your 3rd
Secret. To the left is a chest with lots of
Beans and 3 Pumpkin Pasties.
Take
two central escalators all the way up to the 7th floor and enter the
Gryffindor Common Room again through the portrait of the Living Lady. You can
cast a triple Depulso on the Suit of Armor with the shield, but it won’t
supply you guys with Beans. Now turn right and face a painting in front of the
entrance to Fred and George’s shop. Cast triple Alohomora on the painting and
it will slide upward.
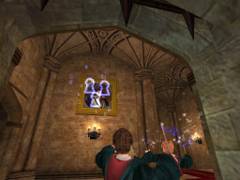
Triple Alohomora on this painting
Also
a Spongify tile will appear on the carpet. Bounce inside your 4th and
last Secret Room in the Castle. Cast Alohomora on the chest in there to get a
load of Beans.
You
can pay a visit to the shop now if you like and purchase some things, like
Portrait Passwords. The first Portrait Password to buy is Bertie Bott’s at 10
Cauldron Cakes. The second one (Derwent Shimpling) costs CC 12, so you don’t
have enough CC to buy that now. Go past the portrait of the Living Lady and save
by the Book there.
Second
Challenge: Draconifors-Lapifors
Secrets:
8
Challenge
Shields: 10
Mission:
Complete the Draconifors-Lapifors Challenge. Collect all ten Challenge Shields
to enter the Beans Bonus Room.
[5.4]
Now hurry down to the classroom on the second floor to join your lesson in
Transfiguration.
Take
three middle escalators down to the first floor. Prof. Mc.Gonagall is teaching
here: Animagi can transform themselves
into animals, and then back into people. They turn into animals at will, but a
Werewolf cannot control its transformation. Now for todays’s lesson, the
Draconifors and Lapifors Spells.
The
names of the Spells have been derived from the Latin words Draco
(= Dragon) and Lapis (= Rabbit).
You'll get in control of transfigured Dragons and Rabbits to help you out
throughout the Challenge. Miss
Granger. Perhaps you’d grace the class by having a go at the exercise I’ve
prepared.
So,
this is Hermione’s Challenge! She’ll walk through the door and the Challenge
will start now, one of the funniest Challenges you’ve ever seen in the Harry
Potter games! An autosave is made.
[5.5]
Lapifors controls the transformation of a small object into a rabbit.
Cast
Lapifors on the rabbit statue. You will then be able to control the transfigured
rabbit. Use the arrow keys to move the rabbit in the desired direction.
The right mouse button (or jump key) will make the rabbit hop.
Push the forward arrow key and hold down the right mouse button
for the longest jumps.
Press
the Enter key any time you wish to stop the spell... or simply complete
the task at hand with the rabbit, and the Spell will stop on its own. Now
Hermione can fool around with that rabbit. You
will find rabbit holes throughout the Challenge. If a hole is blocked by grass,
click the left mouse button (or wand key) to make the rabbit chew through the
vegetation.
There’s
a hole on your right blocked by vegetation, so let the rabbit chew all the
delicacies and go in now. There is a track of Beans you can follow ending with a
Pumpkin Pastie. Well done. Now, take note
of the mound of earth. Position the rabbit on top of the dirt and press the left
mouse button (or wand key) to begin digging.
The
rabbit will dig and unveil a tile that will open the door on your left giving
access to your 1st Challenge
Shield. A following door will open now,
but first give a good shake with Depulso on those two tin Soldiers. The left one
will shed a Collector’s Card, the Dragon Card # 1: Common Welsh Dragon –
This breed is among the least troublesome of Dragons and actively avoids humans
unless provoked. Fire is issued in thin jets. The one to the right will merely
shed some Beans.
The
next door will be closed when passing through. Cast Alohomora on the rabbit
tapestry in front of you. That will roll up and a door behind will open up
unveiling a room with a rabbit statue. First go behind the statue and pick up a
Cauldron Cake. Now cast Lapifors on the statue and you’re in control of a
rabbit again. Let the rabbit chew the vegetation in front of the hole on the
right side and then go in there. Follow three tracks of Beans first. The third
one ends with a Pumpkin Pastie in front of another hole.
Return
to the corner with the mound of earth and start digging to get out a couple of
Beans. Chew free the entrance to a second hole and enter. There is your 2nd
Challenge Shield floating above brown earth. Dig the ground and the door to the
Shield will be opened.
[5.6]
Now you’re entering a corridor with a rabbit statue on your right.
Cast
Lapifors and have the rabbit chew all vegetation in front of the hole on the
opposite side. Enter a garden full of Beans, and Pumpkin Pasties. Left of the
well there is another grass covered hole to munch on. Get in there, follow the
track of Beans and reach the higher level. Take all the Beans and then start
digging the earth. Now the well will open up.
Jump
down and into the well. Follow the track of Beans and the Pumpkin Pastie and
take the Beans that are on top of the other hedge, ending with a Pumpkin Pastie
before another digging mound. Dig here and a door near Hermione will open while
a 3rd Challenge Shield comes down. Let Hermione seize that Shield.
Approach
the door and it will open up giving access to some kind of a greenhouse. Now
let’s move on to the Draconifors Spell. Cast on the dragon statue, Miss
Granger, to transform it into a living creature.
You
will notice a Challenge Shield behind the dragon statue. Now
listen closely... To proceed, you will need to use the dragon to get the
Fireball pickup... Then
fly up and land on a platform... Finally,
you must light the torch to complete this part of the Challenge.
Off
you go, Miss Granger. Click the Spacebar to make the dragon fly. Use the arrow
keys to make it turn. Click the left mouse button to make the dragon breathe
fire once it’s grabbed a Fireball pickup. The dragon will produce one blast of
flames for each pickup.
Practice
flying the dragon and collect the Beans in the air. Each press on the Spacebar
will flap the dragon’s wings. Then pick up the Black Fireball and spit it into
the bowl hanging from the dragon statue. Back as Hermione, jump down from the
platform. Cast Depulso on a pumpkin on each side of the garden and get two
Pumpkin Pasties out of each.
Notice
two suspicious Gargoyle heads below the central platform. Cast Depulso on them
and they will start pouring water. 4 Imps will come out that you have send to
hell with their fire crackers. A Secret Room is now accessible under the floor
of the Challenge Shield. Enter your 1st Secret Room and cast
Alohomora on the chest to get two Cauldron Cakes.
Jump up on the opposite side and grab the 4th Challenge Shield. The door will open and you’ll see the next Challenge Shield in front of a Save Book. There is a walkway going to the left. Look down and you’ll notice a Spongify tile.

Jump down first
Jump
down and get your 2nd
Secret. There are 4 pumpkins in the garden and
one big pumpkin in the central fountain. Three of the garden pumpkins will shed
a Pumpkin Pastie by Depulso and one will shed two. Cast Depulso on the central
pumpkin and obtain your Dragon Card # 2: Hebridean Black Dragon – Britain’s
other native Dragon is more aggressive than its Welsh counterpart and feeds
mostly on deer, though it has been known to carry off large dogs.
Cast
Spongify on the tile and bounce up to the walkway again. Now go left to the room
with the dragon statue and cast Draconifors on it. Fly up to the Beans and
Pumpkin Pasties, and also take the black Fireball. Underneath the walkway there
is a Cauldron Cake. Land on the platform in front of the bowl and catch the
Pumpkin Pastie. Spit fire into the bowl and the walkway will rotate through 90°.
Now Hermione can walk to the 5th Challenge Shield and save by the
Book.
[5.7]
Go inside and cast Depulso on both Suits of Armor.
Shake
the Beans out of them. Cast Depulso on the wall plaque and a Spongify tile will
be opened on the floor. Spongify and bounce upward. The door will be opened when
you proceed and you’ll enter a room with a rabbit statue in a niche. Turn left
and cast Depulso on two pumpkins to get two Pumpkin Pasties out of each.
Cast
Lapifors on the rabbit statue and chew the vegetation in front of the hole on
your left. Go inside and follow a track of Beans to a new hole. Take more Beans
and a Pumpkin Pastie in the alley on your right. Turn around and jump over the
hedge where there are two digging mounds. Dig and Beans will pop out.
On
the left side under this gallery there is another hole. Chew and enter. This is
your 3rd Secret
Room. On first view there’s nothing to find in
here, but start munching the vegetation by the walls. You’ll get Beans, two
Pumpkin Pasties and a Cauldron Cake.
Now
head to the other hole and get in there. Dig the ground and you’ll find a
tile. Now we’re back with Hermione. The rabbit statue in the niche will turn
around and a dragon statue will appear. Cast Draconifors and let the dragon fly
up following the track of Beans in the air to the balcony where you can take a
Pumpkin Pastie. Go inside and enter a huge room. Follow the track of Beans all
the way around and gather all. Fly up, catch all Beans in the air and take a
Black Fireball. Land on the platform in front of the lowest of three bowls to
catch a Pumpkin Pastie and spit fire into the bowl. This will lower a giant
hammer and knock a block to the other side of the wall where Hermione is
waiting. Pick up another Black Fireball and repeat this for the two other bowls.
You’re
back with Hermione and the dragon statue in the niche has now rotated again into
a Suit of Armor. Cast Depulso on the tin plates and they will shed some Beans. A
third rotation will now provide you a hole in the niche floor. Look down into
the lower room. Jump down and walk up 4 steps into the 4th Secret
Room. You’ll be attacked by 4 Imps. Give them all a taste of their own fire
crackers and pick up a Cauldron Cake in the corners on each side of the chest.
Open the chest with Alohomora and get a full load of Beans. Now look up.
Recognize this room? Yes, you’re standing on the floor of that huge room where
the dragon just lit the bowls.
Leave
by the other door and you’ll be lifted up to the previous room. Climb up the
three knocked in blocks to the next floor and conquer your 6th
Challenge Shield. The game will now be loaded and an autosave made.
[5.8]
In this room you will find three blocks in a vertical row in front of you and
three sealed alcoves containing two chests and a Shield.
This
puzzle is like a jackpot machine: cast Depulso on the blocks to rotate them
through 90° until you get three matching signs. Three Shields will open the
alcove with the Challenge Shield. Three purple Beans open up the alcove with the
chest on the left, and three Card signs open the middle grated door. Open the
left chest with Alohomora for a stack of Beans. The middle chest will give you a
Collector’s Card, Dragon Card # 3: Hungarian Horntail Dragon – Supposedly
the most dangerous of all dragon breeds, the Hungarian Horntail can breathe fire
up to fifty feet. Then take the
7th Challenge Shield
from the last
alcove.
Cast
Alohomora on the padlock on the left door and enter a greenhouse with a
fountain. Go inside and a cut scene will show a horrible green toad-like
creature: This, Miss Granger, is a
Bundimun. A Bundimun will expel a foul trail of slime that you will need to
avoid. You can cast Rictusempra to stun a Bundinum. Then, if you are quick
enough, you can jump on top of it to see if it will produce a reward.
Stun
the Bundimun with Rictusempra and quickly jump upon its back before is vanishes
in the ground. You’ll get two Pumpkin Pasties. In the corner to the left of
the Save Book there is a Cauldron Cake. Now save by the Book.
[5.9]
Proceed to the next greenhouse. You’ll be immediately attacked by one of those
clumsy Bundimuns.
Stun
it and jump onto its back for a Pumpkin Pastie. Run around the central fountain
and get rid of two more of these ugly buggers. Should you get hurt there’s a
Chokkie waiting by the fountain. You can’t follow the track of Beans and
Pumpkin Pasties between the walls and the flowerbeds (guess Hermione is getting
too fat?).
Cast
Depulso on each of the four plant animals at the corners of the fountain and
have them shed all of their Beans. Cast Lapifors on the rabbit statue and let
Bugs Bunny conquer all Beans and Pumpkin Pasties behind the flowerbeds first.
Now
open the hole and get in there, your Secret #
5. Take a Pumpkin Pastie from the
floor and jump up to the roof above the entrance for a Cauldron Cake. Dig the
ground. That will stop the central flow of water in the fountain and the
Challenge Shield will drop down, together with a bunch of Beans. As Hermione
pick up the 8th
Challenge Shield and the Beans.
Now
enter the next greenhouse with a fountain on your left and right side. 6 Imps
will attack you there. When they’re all blown up the two fountains will shed a
number of Beans, a Chocolate Frog will appear and the next door will open up.
Before entering the following room, look in the corners on each side of the
doorway and pick up two Pumpkin Pasties.
In
the next room cast Depulso on each giant cauldron for more Beans. There is a
Save Book on your left. Before saving, cast Depulso on the wall tablet above the
Book. A Spongify tile will appear on the floor. Spongify and bounce up to the
second floor ledge. Enter the 6th Secret Room and face a strange
puzzle in there.
There
are three rotating rings with signs. It’s another sort of jackpot game.
A hit of Depulso on the Gargoyle heads makes a ring turn 90° in
anti-clockwise sense. The head on the left controls the outer ring, the middle
head the middle ring, and the head on the right the inner ring. When three
identical signs are aligned with a matching wall sign you’ll get a bonus and
the corresponding Gargoyle head will start pouring water.
You’ll
get 4 Pumpkin Pasties, your
9th Challenge Shield
and your
Dragon Card
# 4: Romanian Longhorn Dragon – The horns of this breed of Dragon are highly
valued as potion ingredients and as a result, its numbers have fallen in recent
years.
[5.10]
Enter the next large greenhouse featuring a labyrinth.
Turn
left and right and flip a cauldron on the left for a stack of Beans. Proceed
until a Bundimun appears. Take its Pumpkin Pastie. Past the third rabbit hole
and a second Bundimun will appear. Open the chest with Alohomora and obtain two
Cauldron Cakes. Save by the book.
[5.11]
Another Bundimun will emerge.
Stun
it with Rictusempra and extract a Pumpkin Pastie before it digs itself into the
ground. Turn left and notice an Alohomora sign on the hedge. Cast Alohomora and
the hedge part will slide down unveiling a rabbit statue. Leave that for the
time being and proceed to the Chocolate frog. Another Bundimun will appear
behind you. Cast Rictusempra and get two Pumpkin Pasties. Cast Depulso on the
wall tablet. The grated door on the right will slide upward giving access to a
small room with a dragon statue. There is a Cauldron Cake lying behind the
statue which you can’t take because you are obviously getting too fat.
Return
to the rabbit statue and cast Lapifors on it. Send Bunny to the hole near the
statue and have him chew the vegetation. This hole gives access to another part
of the labyrinth. On the opposite wall there is another hole. Chew the
vegetation and enter some kind of a Mausoleum with a chest sealed off by two
grated doors. Dig the ground.
The
grated doors will lift up and the Mausoleum can now be entered by Hermione. Go
around the corner and enter the Mausoleum, your 7th
Secret. The chest
contains a stack of Beans and your final Dragon Card # 5: Norwegian Ridgeback
Dragon – The Ridgeback is nowadays one of the rarer dragon breeds and has been
known to attack most kinds of large land mammals.
Exit
from the right side and notice another rabbit hole immediately on your left.
Send Bugs Bunny to that hole by casting Lapifors on the statue again and have
him chew the vegetation. Enter the hole, your 8th and final
Secret.
Dig the brown earth for a number of extra Beans. Munch all the plants in here
for more Beans, two Pumpkin Pasties and a Cauldron Cake. Notice there is an
Alohomora sign on the hedge. Seems completely useless. Turn back into Hermione
by pressing Enter.
Now
return to the dragon statue and cast Draconifors on it. Let the dragon first
pick up the Cauldron Cake behind the pedestal and then fly out. Take all the
goodies lying on top of the hedges first. Catch all the Beans in the air and the
Black Fireball and land on the platform in front of the bowl. Take the Pumpkin
Pastie and light the bowl. An entrance to a Spongify tile will be opened. Back
as Hermione, Spongify the tile and bounce up to your 10th and final
Challenge Shield.
Beans
Bonus Room: Second Round
Spongify
as many tiles as you see and each time bounce up along a huge track of Beans and
Cauldron Cakes. Everywhere there are Suits of Armor that spit out Pumpkin
Pasties, just wait a few seconds until they throw up all goodies on their own.
Try to gather as many as you can. Jump
over gaps with tracks of Beans and Cauldron Cakes because they are most desired!
This is another timed sequence!

Get the Cauldron Cakes by Spongifying tiles!
Quidditch!
You’ll
end up in the Challenge Access Room and meet Harry and Ron there. You can cast
another five Depulso hits on both Suits of Armor in there and shake out more
Beans (we think they stuff ‘em up every time). When you leave this side room
the game will load, but – alas - a save point won’t be made.
Even
though the following morning was stormy and foul, Harry was excited to be
playing in the first Quidditch match of the season. This is just a cut scene
though. Suddenly Harry notices a pack of Dementors from the air and drops down. Harry
came away from the fall without injury... but he resolved to confront his fear
of the Dementors. Professor Lupin offered to help him with Anti-Dementor
lessons. Then the game will be loaded again and this time providing an autosave.
So...
let's