|
Written
by Dr. Hugh and Danny Kriestanto With
Team: Anna,
Bert, Diane, Jean
|
|
Written
by Dr. Hugh and Danny Kriestanto With
Team: Anna,
Bert, Diane, Jean
|
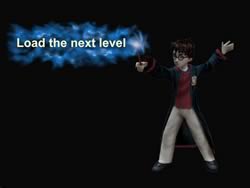
Click on one of these images to go to that Level
 |
 |
 |
 |
 |
 |
 |
 |
 |
 |
 |
 |
 |
 |
Or click on the image at the bottom of this page to go to the next Level
© June 2004
Bert Jamin (www.gamesover.com)
This walkthrough may not be sold and may not be used for any commercial
purposes. Neither is it permitted to publish this walkthrough in any way without
the written permission of the author. Feel free to place this walkthrough on
your web site or on your home page, on condition that no part of this
walkthrough is changed and that the name of the author (Dr. Hugh), the URL of
the owner of this site (www.gamesover.com) and his E-mail address (gamesover@planet.nl) are mentioned unchanged. For the most up to date walkthroughs always visit
www.gamesover.com.
If you have any suggestions to improve this walkthrough, let me know by sending me an email: gamesover@planet.nl .
LEVEL
8
RESCUE
MISSIONS
Tunnel
to the Shrieking Shack
Secrets:
5
Mission:
Rescue Ron
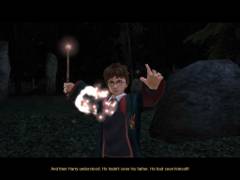
[8.1]
Where does this tunnel come out? – wonders
Hermione.
Harry:
I don’t know... but we’ve got to help
Ron. The door behind their back shuts down and they are on top of a
staircase, leading down into a foggy room.
Move
Harry down the stairs: Do you hear
something? Strange sounds are
coming from that passage. There is a Skull lying on the floor on the left. Cast
Depulso and catch some Beans. Suddenly a bunch of bones turns into a Charmed
Skeleton. How creepy! We better both cast
at once!
Avoid
the bones he’s throwing by strafing from left to right while meantime
casting a double Rictusempra. As soon as both signs appear on the Skeleton use the wand button at once and this creep will burst and
scatter bones all over the place.
Flip
the cauldron on your left with double Depulso and get more Beans. Turn around
and go to the right where you will be standing before the window. Turn left and
look high up to see a Skull. Cast Depulso and a Cauldron cake will drop down.
Moreover,
this is also your 1st
Secret. Turn right and descent the stairs to
the next passage. On your right you’ll see a Skull on the floor and a pile of
Beans. Cast Depulso on the Skull and have it blow its final breath... err
Beans. Pass the stack of bones but they won’t react. Further on suddenly two
Skeletons will come to life. Quickly cast double Rictusempra on each of them
and keep strafing from left to right. Cast double Depulso on the cauldron on
your right for two Pumpkin Pasties.
Cast
Depulso on the Skull on the left and the wall will spin around revealing another
passage. Go in there and see your 2nd Secret
Room. Take a well timed running
jump across the gap and cast Alohomora on both chests. One spits Beans and the
other a Cauldron cake. Run and jump back.
Proceed
left and find a double locked door through which you see two Choc Frogs and your
first Save Book. Cast a double Alohomora on the locks and the grilles will slide
upward. Eat the Chocolate delicacies and save by the Book.
[8.2]
Go down the stairs and proceed along a passage to the left.
Cast
double Alohomora on the double locked chest on the left and collect the Beans.
Walk around the block with two Depulso signs and notice a groove. Double Depulso
on the block will push the block forward along the groove but two Skeletons will
arise on each side. Scatter their bones and climb the double block to the next
ledge. A small track of Beans leads to a chest: cast Alohomora for two Chocolate
Frogs and a Pumpkin Pastie. Go up the stairs and cast double Alohomora on both
locks of the door.
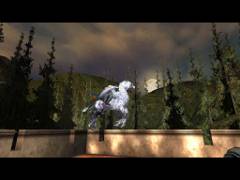
You’ll
enter a room with a fire Salamander. Freeze it into pieces along with the fire
and the next room will open up with two more of these leftover Dinos. Speed will
do the trick here too and when they’re frozen to death 3 Skeletons arise from
different sides. This is getting tougher. Remember to use the wand button until
two Rictusempra signs appear while always strafing from left to right and avoid
the bones they constantly throw, while releasing the button as soon as both
signs appear on one. When all are sent to their Jurassic Cemetery a small room
has opened containing two chests.
Enter
this
3rd Secret Room
and open them with Alohomora. One contains a
Cauldron Cake and the other a large set of Beans.
[8.3]
Open the door with two locks with a double Alohomora.
Find
a Chocolate frog and a Pumpkin Pastie. As soon as Harry runs near both goodies,
a double trap door flips down and Harry and the Chocolate Frog drop all the way
down below.
Harry,
are you all right? Harry
crawls up: Oof...
Yeah... fine. But I don’t see a way back up. Keep
looking. I’ll see if I can find a way down to you. With
this words from Hermione the trap-door and the door behind her close again. You
are in control of Hermione now.
Proceed
grabbing the Pumpkin Pastie and enter a room with a platform. There are deep
gaps all around this. Turn right and cast Draconifors on the dragon. Fly out as
a dragon, pick up a Black Fireball and first land on the platform in front of
the bowl hanging on the dragon statue on the left wall. Light the bowl.
Below
this platform is a ledge. Fly down there and enter your 4th Secret
Room. This is a tower around a high central tower. There are three full
horizontal circles of Beans hanging around the central tower at different
heights. Collect them all and finally land on top of this tower for a Cauldron
Cake.
Return
to the ledge and enter the room as Hermione again. Pick up a Black Fireball and
light the second bowl. An exit on the opposite side will lower down. The third
one will raise two floating platforms over the gap. Brilliant!
That’s a good dragon!
Run
and jump over the two platforms to the opposite side and Hermione will run to a
double locked door with a cut scene. Oh no...
blocked! She turns back but the door will rise while she desperately keeps
calling Harry!... Harry! Hermione is locked up in there!
Now
we’re watching a cut scene of Harry who is walking down on the lower floor. Oh
great … I hope Ron’s all right. He walks up to a Save Book but a door
closes behind him as well. Start playing as Harry and take the Choc Frog in
front of the passage leading to the Save Book. Harry will probably need it to
get back his full Stamina.
Turn
left in the foggy room with the fountain. Cast Alohomora on a chest on your left
and get some beans out of that. A new door shuts cutting off the way back. Pass
the Book and save.
[8.4]
In the right corner in front of the channel lies a Skull.
Depulso
will have it spit out two Pumpkin Pasties. Cast Glacius on the well and start
your slide down picking up the Beans along the way. This is just a short ride
and Harry will land on a ledge giving access to an octagonal room containing a
chest. You’ll get 3 Pumpkin Pasties and a central Spongify tile on the floor.
Look
up and notice this is a very high tower. Cast Spongify and jump high up to a
ledge with a new Spongify tile. First walk around the narrow ledge and get the
goodies: Beans and a Pumpkin Pastie. Spongify the tile
and jump to a higher ledge with a Spongify tile. Walk around the narrow ledge
and cast Depulso on each of two Skulls in a niche.
When
each are hit an opening will appear between the Skulls. Enter your 5th
Secret Room and cast Alohomora on the chest for 3 Cauldron Cakes. Go out and
Spongify the tile and fly high up to your top ledge with a Save Book. Turn
around and notice another track of Beans and a Pumpkin Pastie around the narrow
ledge. Walk around and take them in. Now save by this Book.
[8.5]
Cast Depulso on the Skull in the corner and make it vomit every last Bean.
Walk
up the stairs and open the chest with Alohomora for still more Beans. Turn left
and cast Depulso on the wall sign. The door will open and release Hermione. Well
that was fun, says Harry.
Then
suddenly they hear a frightful scream from Ron. C’m
on, we’ve got to help Ron. Now you can open the door with double Alohomora.
Go in and three of these Skeletons will attack. Try to survive this attack and
leave their scattered bones for the doggies. Two more will appear around the
corner, smash them into pieces with your double Rictusempra. Cast double Depulso
on the cauldron in the corner for 2 Pumpkin Cakes and Depulso on a Skull lying
there waiting to get emptied.
Head
down the stairs for the Save Book but first notice a double locked chest on your
right. Cast double Alohomora and retrieve two Chocolate Frogs and 3 Pumpkin
Pasties. Save by the book.
[8.6]
Harry and Hermione pass through a door.
What
do you suppose this is?
Hmm...
let me think about this. And with these words
you’re Hermione now. This room is the size of a Church! Go to your right and
open a double locked chest in the corner with Alohomora for the 5 Pumpkin
Pasties. On each side a Skeleton will appear. Blow them to pieces. Now run all
the way around and observe three blocks of different heights for a staircase
that are moveable along a groove. There are piles of bones everywhere!
Obviously
the tall one has to be pushed forward first: cast a double Depulso and it will
slide toward the wall. Now move the second one (on the right side) to the middle
groove and then push it against the first block.
Finally
push the left block to the middle groove. Now all hell will break lose! You’ll
be attacked by a whole bunch of Skeletons. They approach very slowly, so start
running around the whole area as much as you can and surprise each Skeleton
separately. Don’t let them approach you in a bunch or you’re gone in no
time. When they’re all gone, a track of Beans has formed on the staircase
leading up to a Collector’s Card, and the entrance door at the top has opened.
Before
climbing the stairs first go left and open a double locked chest with double
Alohomora for more Beans. Now go up the stairs, collect all Beans and your Witch
Card # 9: Sacharissa Tugwood (1874 – 1966) – Pioneer of Beautifying Potions.
Discovered the pimple-curing properties of Bubotuber Pus.
When going further up, Harry and Hermione will arrive at the Shrieking Shack
and watch Ron sitting there with Scabbers in his hand. Where is the dog? Ron: It’s
not a dog. The Dog appears growling behind Ron and Hermione. Suddenly it
transfigures into Sirius Black: Expelliarimus!
Prof.
Lupin joins Sirius: There is no need to be
afraid. Sirius Black is not what you think he is. And Scabbers – he’s not a
rat. He’s a Wizard by the name of Peter Pettigrew. Watch. Prof.
Lupin casts a Spell at Scabbers who transfigures into a frightened old man: I
can explain! - Ron doesn’t
know what he is seeing!
Pettigrew’s
an Animagus. It wasn’t Sirius Black who betrayed your parents, Harry. It was
Pettigrew. The game is loaded now without making a save point
Forbidden
Forest
Our
company walks now through the Forbidden Forest. Peter Pettigrew had not only
betrayed James and Lily Potter to Voldemort, he had also framed Sirius Black as
Voldemort’s spy. It was agreed that Pettigrew would be taken back to Hogwarts
and turned over to Professor Dumbledore. Sirius
... Pettigrew’s gone! He’s transformed into a rat!
But
there was one more secret to be revealed that night. Prof. Lupin starts to
transform too. Lupin transforms into a Werewolf under the influence of the full
moon that came out.
Sirius
shouts: Leave it to me! - and
transforms again into the dog chasing Prof. Lupin. He attacks the giant
rat but the rat turns back into Pettigrew and escapes knocking Ron down
and leaving
him behind for dead. He transforms into a rat again and knocks the dog
unconscious too. Then he takes off. But the dog wakes up and chases the
giant
rat.
Harry
and Hermione take care of Ron: Is he all right? He
is breathing at least. Professor Lupin is a... Werewolf? That
sounded like a dog... it must be Sirius! Go
and help him! I’ll take care of Ron. Harry runs after Sirius and Hermione
stays with Ron. The game is now loaded with a save point.
[8.7]
Harry comes running to Sirius who is lying down having fainted.
A
whole circle of Dementors is now surrounding Sirius. Leave
him alone, he’s innocent! Harry
kneels by the victim. A number of Dementors in a foggy haze are approaching from
all sides.
You
can only turn around on the spot. Keep turning and casting Expecto Patronum on
the nearest ones and make sure you wait to cast the Spell when the ring starting
from Harry’s shoulder reaches the wand. After a first victory a new pack
attacks. When you blow them all away suddenly a Dementor will grab Harry and
pull him towards his soul sucking hole.
For
a brief moment, Harry thought he saw some rescue. Was it … his father? But no,
it couldn’t be. Harry faints and the screen gets all white. Hermione
appears: Harry,
are you all right? Harry
is lying in a bed and wakes up: What’s happened, is Sirius OK? Where is Ron? Madam
Pomfrey says Ron will be all right... He just needs some rest. Dumbledore
enters the sick bay: Unfortunately,
Sirius Black is not faring so well. He’s locked in the high Tower. Hell’ be
handed over to the Dementors soon. There is nothing I can do to stop it.
Hermione:
But
he is innocent! I
believe that’s true. What we need... is more time. But...
Oh... the time-Turner! More
than one Innocent life could be saved tonight. Dumbledore
leaves. I meant
to tell you... eventually. Professor McGonagall let me borrow this Time-Turner.
I’ve been using it all the time to go back in time so I could attend extra
lessons. So now we know why Hermione always
disappeared in due time!
That
explains a lot. We could use it and save Buckbeak. And then fly up to the tower
and rescue Sirius. But we must take care not to be seen by earlier selves. A
game load and save takes place.
Hogwarts
Grounds – back in time
Mission:
Rescue Buckbeak
[8.8]
Harry
and Hermione show up in the past at the grounds by night.
They
arrive at a building that we haven’t seen before yet and its gates are open
wide. They’ve got Buckbeak somewhere in
there. Harry:
It’s
awfully quiet. You’re sure you set the Time-Turner back the right amount?
They
enter the courtyard and Hermione looks up: Look,
there is Buckbeak! The Hippogriff is locked up in a prison cell on the top
floor above the entrance door. Brilliant,
let’s find a way to get him. Hermione
runs to a platform:
There must be a way to get this platform go up.
The
gates have closed now. Look up and you’ll notice a Black Fireball hanging in
the air, right in front of Buckbeak’s cell window, and a Depulso sign left of
the entrance door. Cast Depulso on the wall sign and a Spongify tile will appear
underneath. Before casting Spongify better save first by the Save book behind
the wagon.
[8.9]
Spongify the tile and bounce up to the ledge above.
The
ledge will lower down caused by Harry's weight and Hermione’s platform will
rise (apparently Harry is heavier than Hermione...). Hermione enters a room with
a dragon statue and a Save Book whereas the lower part of the door closes
leaving an upper window open. There is also a door with a double look. Well,
there’s got to be a way out. First flip that
cauldron in the corner with Depulso for a load of Beans and cast Draconifors on
the dragon.
Let
the dragon fly out of the window and pick up the Beans on the 3 higher ledges,
the Black Fireball and the Beans in a circle around it, and the 4 Pumpkin
Pasties below it. While flying around notice a Spongify tile on top of both
entrance towers.
There is a Spongify tile on top of each tower
Land
on the platform above the entrance door and lit the bowl. That will open a
window on the opposite side on the second floor. Nice
one, Hermione, you opened the door. But... it’s too high for me to reach!
Pick
up a second Black Fireball and fly inside the window but first take the 3
Cauldron cakes on the top roof beam. Land on a second dragon platform and lit
the bowl. A door on the first floor opens up and now Harry will go see what’s
in there.
Inside,
look up: this is the lower floor of the room that the dragon just came into.
Turn around and about 8 Imps will suddenly appear and the doors closed. Feed
them all with their fire crackers and when they’re all busted the doors will
open up again and a Spongify tile will appear on the floor.
Before
jumping up, cast Depulso on the Cauldron and knock some Beans, 2 Cauldron Cakes
and 4 Pumpkin Pasties out of that. Spongify
the tile and jump up to the second floor. Eat a Chocolate Frog and open the
chest with Alohomora for Beans and 4 Pumpkin Pasties. There is a Save Book in
front of a Depulso sign on the wall. Save first.
[8.10]
Cast Depulso on the wall sign.
The
doors on your right will open and a Spongify tile will slide outward. Spongify
the tile and jump up to the Spongify tile on the first tower that we just saw.
Spongify and hop to the second tower. In front of you a square part of the roof
has slid aside. Spongify this tile and Harry will land through the hole in the
roof into the room where Hermione is trapped. A
lot of good that did. Now we’re both stuck in here! Cast
double Alohomora on the door with two padlocks. Before entering this next room,
turn around and save by the Book first.
[8.11]
Enter the next room and you’ll be attacked by a swarm of Pixies escaping from
a crate with three Depulso signs.
When
they’re all sprayed with Rictusempra, a door in the wall will open up
unveiling a rabbit statue. You are
Hermione now. Pick up a Cauldron Cake and 3 Pumpkin Pasties from the floor. Cast
Depulso on the cauldron behind you and obtain your Wizard
Card # 10: Professor Armando Dippet – Former Headmaster of Hogwarts c. 1940.
Cast
Lapifors and direct the rabbit into the adjacent hole. Take a couple of Beans
and jump down. More Beans on this ledge. Jump down to the floor, catch 2 Pumpkin
Pasties and follow a short track of Beans to a next rabbit hole. In there catch
all the Beans in a circle around a digging mound. Start digging and doors in our
friend’s room will open up. Go inside, eat a Chocolate Frog and cast Alohomora
on the chest in the left corner. Get 3 Pumpkin Pasties.
Double
cast Depulso on the couple of signs in the wall and a panel in the floor will
slide open unveiling a Spongify tile. Cast Spongify on the tile and both Harry
and Hermione will be catapulted on top of the flat roof above Buckbeack’s
prison.
First
cast Depulso on each cauldron in two corners and get Beans and 5 Pumpkin
Pasties. Double cast Alohomora on the double locked grate on the roof. The
grates will slide aside and a cut scene will show our both friends jumping
inside and flying out on Buckbeak’s back into freedom!
Buckbeak has been rescued!
A
game load provides a save point here.
Rescuing
Sirius
[8.12]
Buckbeak makes a landing in the Forbidden Forest by the lake where Harry was
rescued from the Dementor that had caught him.
Wait
here Hermione. I’ll go see this time to rescue Sirius. Be
careful, Harry! Still using the power of the Time-Turner, Harry hurried
towards the lake. He had to learn who had cast the Patronus Spell that had saved
him from the Dementors. Had his father come to help him? Had James Potter cast
the Spell that saved Harry’s life? And then Harry understood. He hadn’t seen
his father.
Harry had seen himself!
Harry
(from the past) casts EXPECTO PATRONUM on the Dementor that is strangling Harry
(from the present) and sets him free. Running back to Buckbeak a new circle of
Dementors forms around Harry. Cast your Expecto Patronus Charms very quickly.
After
a first round more appear around Harry. You’ve got to be faster now, keep
going in a circle and make sure you don’t miss any of them. Then a third round
will bring even more Dementors that still approach faster. After having exploded
them all a true inferno breaks lose, but a bright white flying mysterious stag
flies in to the rescue and lifts Harry out of this burning hell.
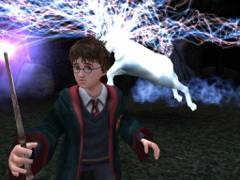
The white stag releases Harry
The
stag lands to the spot where Hermione is waiting. When Harry wants to touch the
stag it vanishes and Hermione runs into the scene: Harry,
I can’t believe it... You conjured up
a Patronus that drove away all those Dementors! That’s very, very advanced
Magic. I
knew I could do it this time, because I’d already done it... does that make
sense?
Harry,
we’ve got rescue Sirius from the tower and get back to the hospital wing
before anybody realizes we’re missing. Right...
let’s go! Our
friends run off and on Buckbeak’s back they land by the Tower in front of
Sirius’ cell. They cast double double Alohomora on the double locked door and...
set Sirius Black free!
Sirius,
you’d better go. They’ll be here any moment. How
can I ever thank you? GO!!
Sirius
mounts the Hippogriff’s back: We’ll
see each other again... You are... truly your father’s son, Harry. And off
he flies away disappearing under the light of a full moon that night. A load
game without a save point is now made.
Hogwarts
main Entrance
Mission:
Go to the Defense of the Darks Arts classroom to start Ron’s final exam.
News
of Sirius Black’s escape spread throughout the School like fire. No one seemed
to know how he’d managed it. Harry, Ron and Hermione kept what they knew to
themselves. Besides, it was the day of their final exams – and not all of the
friends were prepared.
Our
three friends gather together at the Hogwarts Entrance Hall. Hermione:
I
don’t know how you possibly going to pass your exams, Ron. You’ve hardly
studied a thing. Me?
What about you? You spent all that time on researching Buckbeak’s defense. Please,
Ron, give me some credit. I used the Time-Turner to study of course. I’m
aiming for perfect marks!
She’s
always got an answer, doesn’t she? Harry:
Bad news, Ron. Your Carpe Retractum is first. We’d better head to Professor
Lupin’s classroom. Shall
we take the portrait shortcut to get to the 3rd floor... or the
stairway?
So...
let's